Welcome to RennTech.org Community, Guest
There are many great features available to you once you register at RennTech.org
You are free to view posts here, but you must log in to reply to existing posts, or to start your own new topic. Like most online communities, there are costs involved to maintain a site like this - so we encourage our members to donate. All donations go to the costs operating and maintaining this site. We prefer that guests take part in our community and we offer a lot in return to those willing to join our corner of the Porsche world. This site is 99 percent member supported (less than 1 percent comes from advertising) - so please consider an annual donation to keep this site running.
Here are some of the features available - once you register at RennTech.org
- View Classified Ads
- DIY Tutorials
- Porsche TSB Listings (limited)
- VIN Decoder
- Special Offers
-
OBD II P-Codes - Paint Codes
- Registry
- Videos System
- View Reviews
- and get rid of this welcome message
It takes just a few minutes to register, and it's FREE
Contributing Members also get these additional benefits:
(you become a Contributing Member by donating money to the operation of this site)
- No ads - advertisements are removed
- Access the Contributors Only Forum
- Contributing Members Only Downloads
- Send attachments with PMs
- All image/file storage limits are substantially increased for all Contributing Members
- Option Codes Lookup
- VIN Option Lookups (limited)


swynn97
-
Posts
126 -
Joined
-
Last visited
Content Type
Profiles
Events
Forums
External Paint Colors
Downloads
Tutorials
Links Directory
Collections
Classifieds
Store
Everything posted by swynn97
-
5mm OEM Spacer Set Screw Size
swynn97 replied to swynn97's topic in 996 Series (Carrera, Carrera 4, Carrera 4S, Targa)
Mine fell out - is it an issue to drive around like this (after replacing wheel), even for a short time? i.e. are they for convenience, or actually required to orient the spacer? Simon -
5mm OEM Spacer Set Screw Size
swynn97 replied to swynn97's topic in 996 Series (Carrera, Carrera 4, Carrera 4S, Targa)
Thanks - I assume any M6x16 will work. Simon -
Quick question - does anyone know the size of the counter-sunk set screws for 996 5mm OEM spacers? I believe it's M6 x something. Thanks in advance! Simon
-
Thanks!
-
Hi, A rather basic question, but I need the trim and nozzle piece for the passenger side headlight on a US 996 C2 2004. I have the parts manual, but don't know what side L R refer to, so is the correct part: 996 628 143 00 or 996 628 144 00 ? So, is 'L' facing the car, or sitting in the car?? Thanks in advance. Simon
-
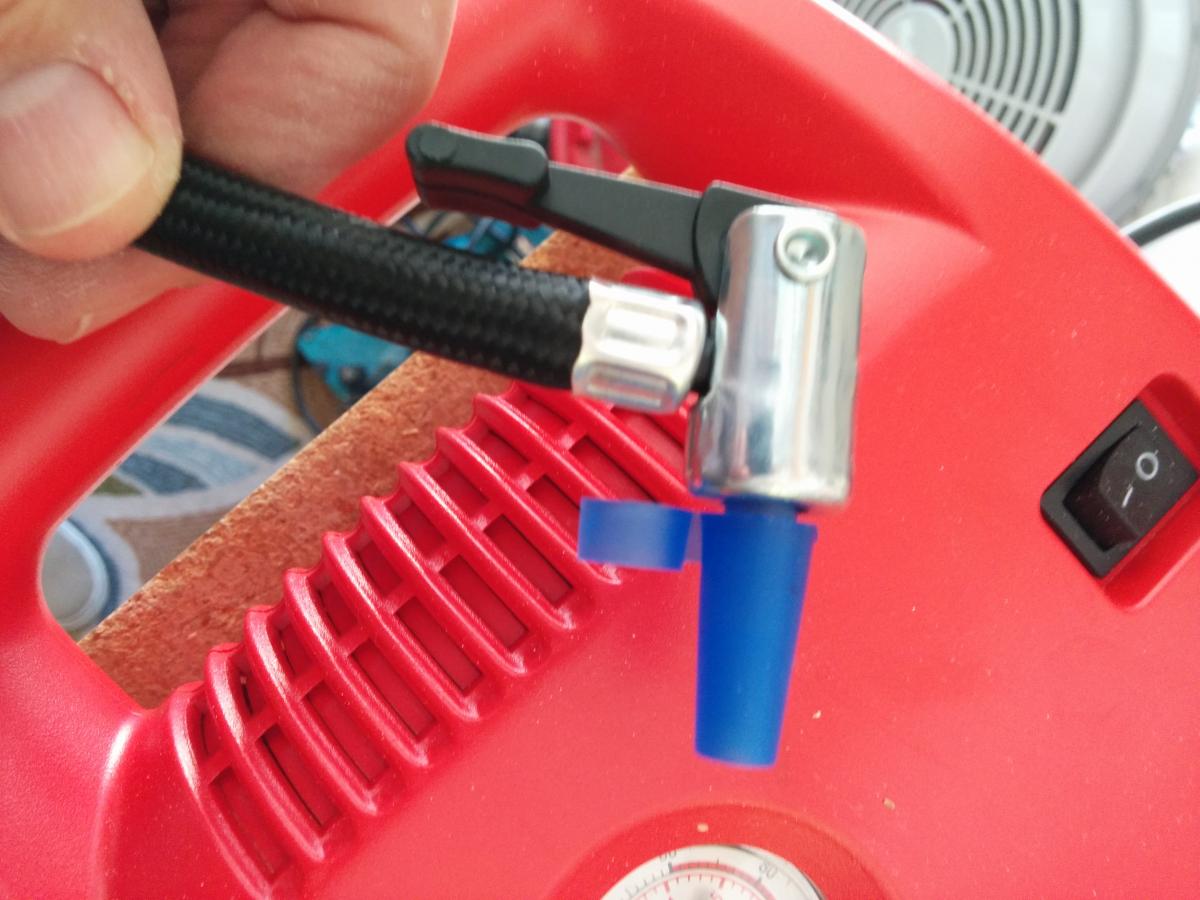
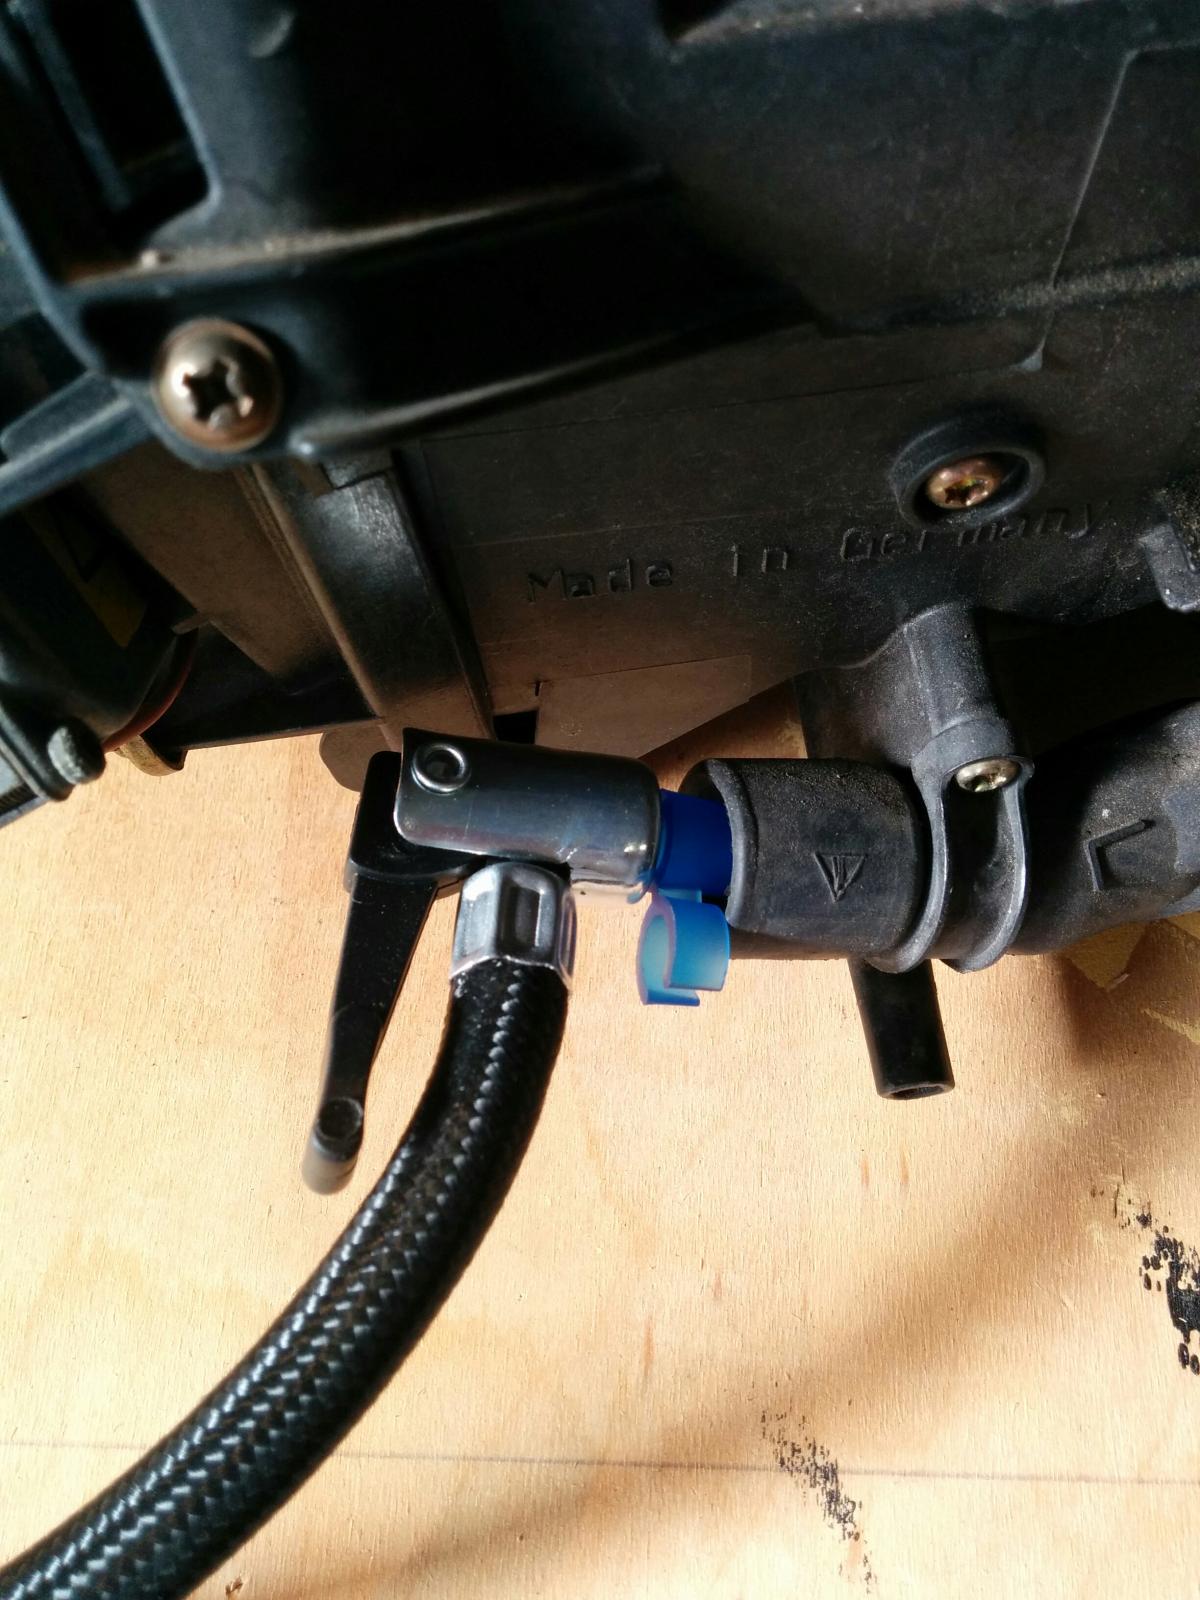
Great advice kgoertz - I used a small AC compressor using one of the inflatable toy adapters (See photos) - hit the compressor for about 1 second and the washer pops up. Leaving the compressor connected, but not on, keeps enough back pressure to keep the washer popped up as I removed it. The best way is to lightly compress the tabs on the main shaft, then the chrome cap just pops off. btw I completed one light - for me I needed one 3M kit per headlight, so the passenger side is next weekends project.... Simon

-
Growling Power Seat Adjusters
swynn97 replied to 356to966's topic in 996 Series (Carrera, Carrera 4, Carrera 4S, Targa)
This is a great fix. I had noisy seats in my 2004 C2 Cab ever since I bought the car in 2007. It was 'on my list' to remove the seats - ugghh. I gave this fix a go using the Teflon spray (from Amazon.com), and it worked perfectly. 5 minute fix. I've attached a couple of photos showing the bushing cover, both on and off. It's more like hard plastic than rubber, and to remove it I found pushing with your thumb on the side facing you as you grab it from behind the seat the seems to work. Simon
-
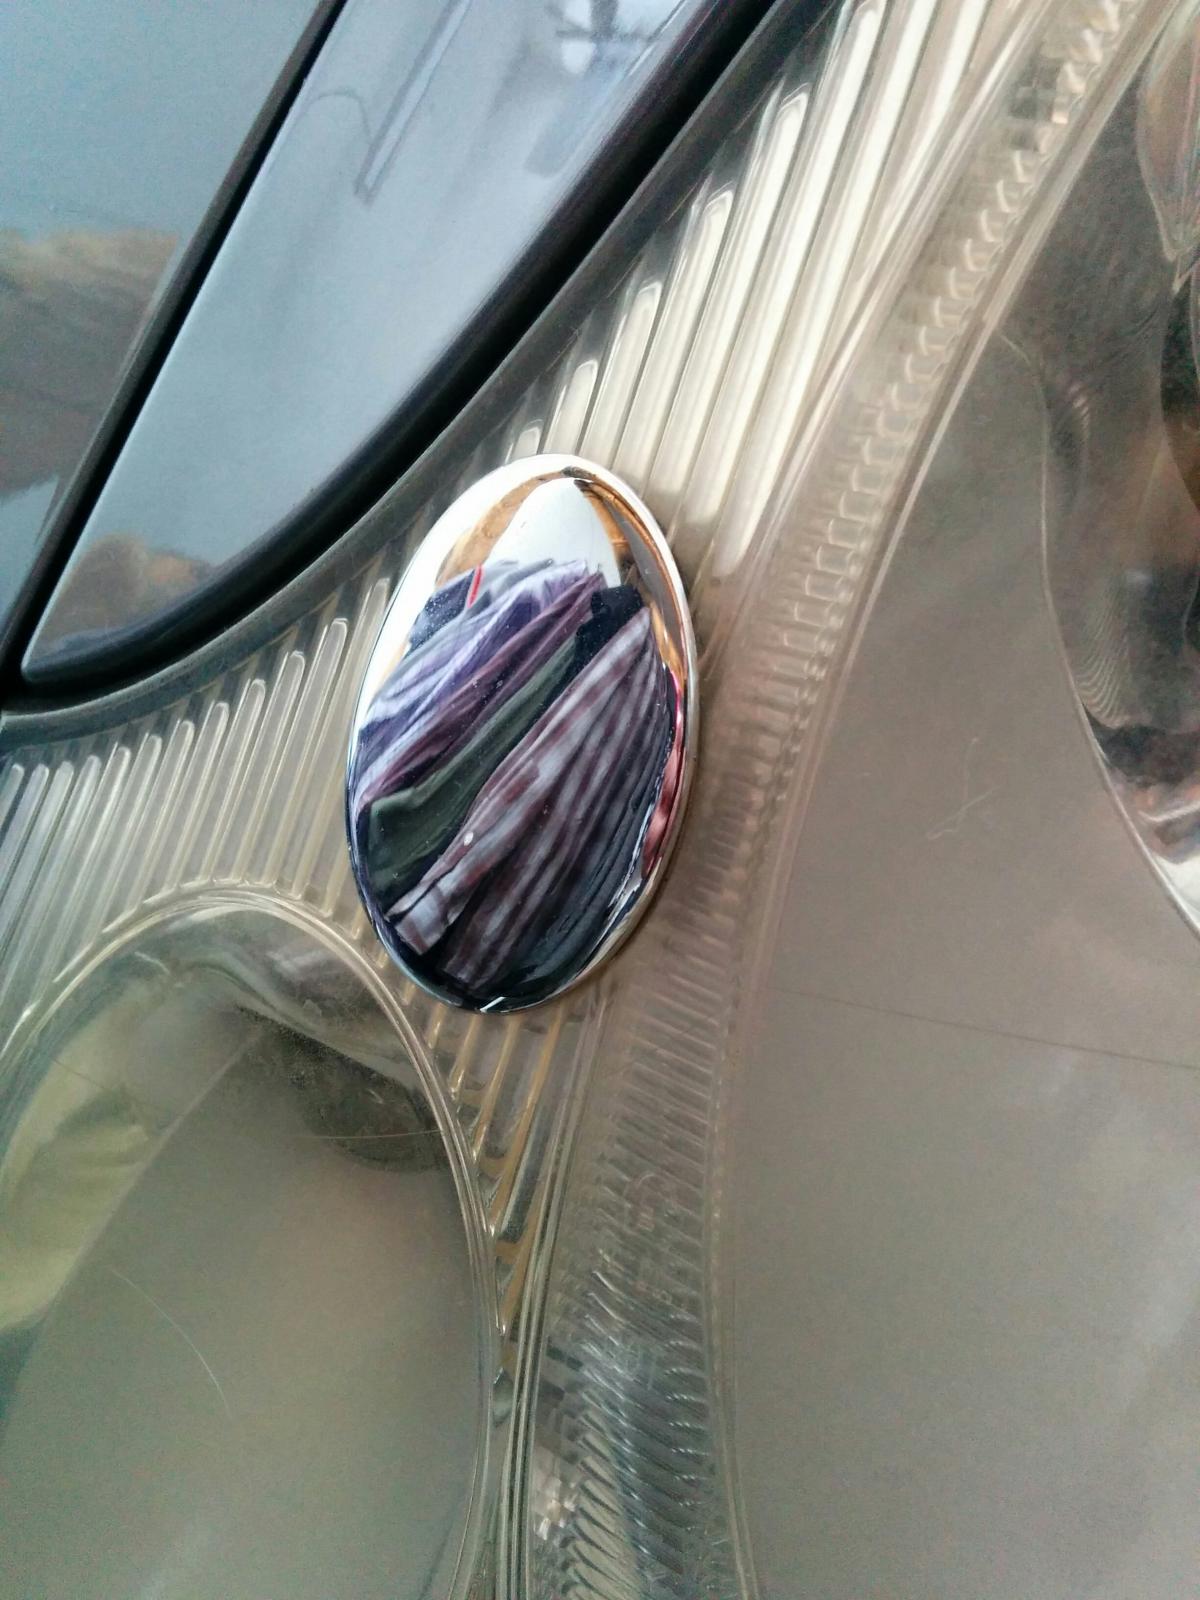
I have some pretty dingy headlights on my 2004 996, and I plan to use a 3M kit to restore them. My plan is to remove the headlights and place them in a jig to hold them while I preform the restoration. One question though - has anyone done this on headlights that have washer with the chrome caps, see photo? Should I try to remove these first, and if so, how? I've looked in the forum regarding the chrome caps and there are generally instruction on how to install replacements, but not on removal. I don't want to break anything, since that would mean I need new headlights. Thanks in advance. Simon