Welcome to RennTech.org Community, Guest
There are many great features available to you once you register at RennTech.org
You are free to view posts here, but you must log in to reply to existing posts, or to start your own new topic. Like most online communities, there are costs involved to maintain a site like this - so we encourage our members to subscribe or donate. All subscriptions and donations go to the costs operating and maintaining this site. We prefer that guests take part in our community and we offer a lot in return to those willing to join our corner of the Porsche world. This site is 99 percent member supported (less than 1 percent comes from advertising) - so please consider an annual subscription or donation to keep this site running.
Here are some of the features available - once you subscribe RennTech.org
- View Classified Ads
- DIY Tutorials
- Porsche TSB Listings (limited)
- VIN Decoder
- Special Offers
- Paint Codes
- Registry
- Videos System
- View Reviews
- and get rid of this welcome message
It takes just a few minutes to register, and it's quality Porsche information at a low cost.
Contributing Members also get these additional benefits:
(you become a Contributing Member by subscribing or donating money to the operation of this site)
- No ads - advertisements are removed
- Access the Contributors Only Forum
- Contributing Members Only Downloads
- Send attachments with PMs
- All image/file storage limits are substantially increased for all Contributing Members
- Option Codes Lookup
- VIN Option Lookups (limited)


carrera mike
-
Posts
31 -
Joined
-
Last visited


carrera mike's Achievements
Member (1/1)
3
Reputation
-
I installed grille to protect the radiators from bents and chips (plus all the junk that the air intakes collect). So here's a Bumper Cover Removal DIY + the Grille Install. http://gallery.rennlist.com/gallery/albuq24
-
...
-
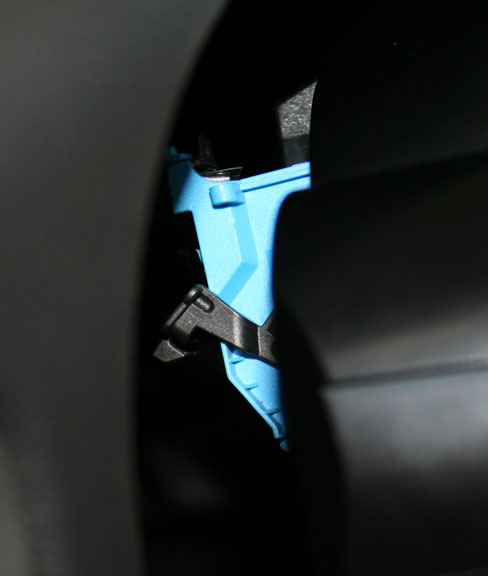
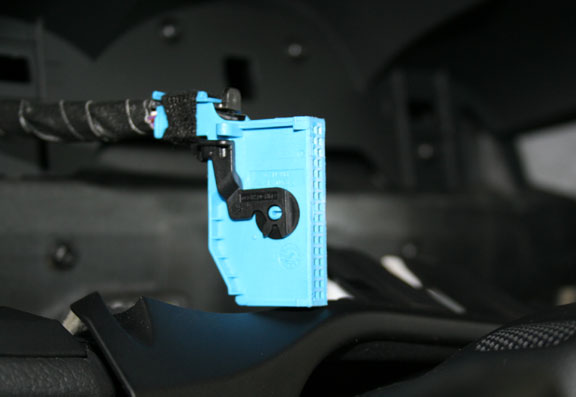
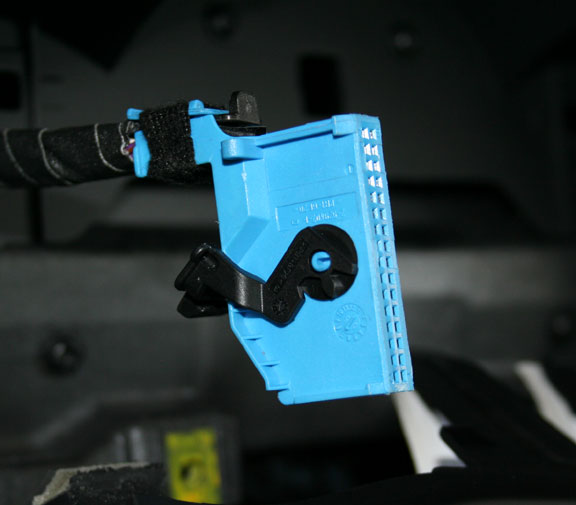
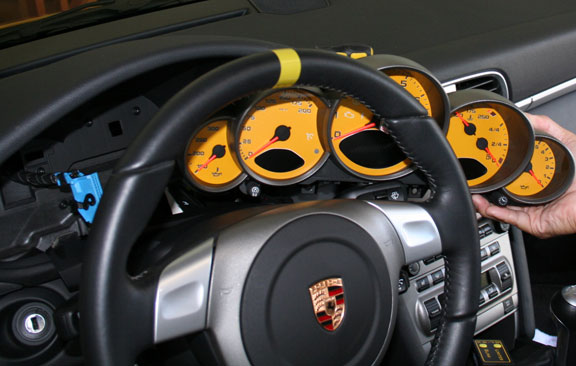
a. The harness is held by the black harness lock tab. Swing the black tab down and the harness will push itself off the cluster.

-
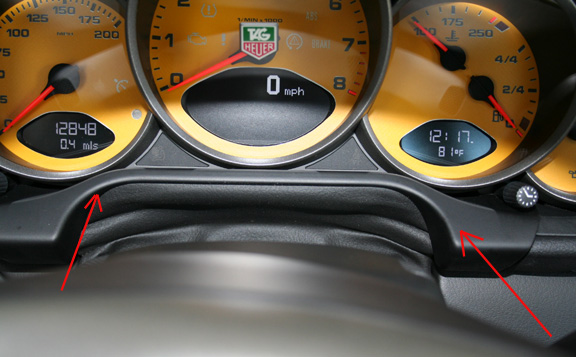
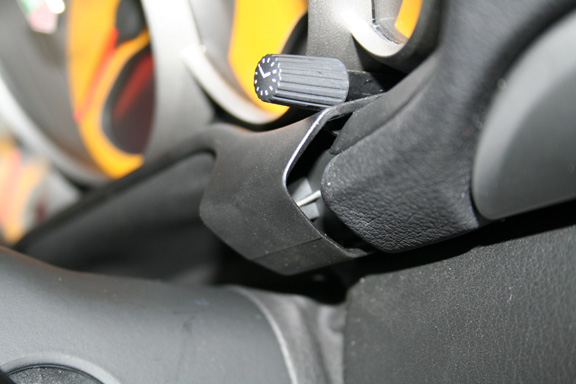
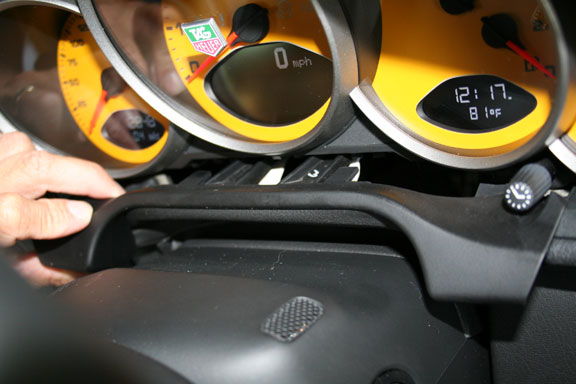
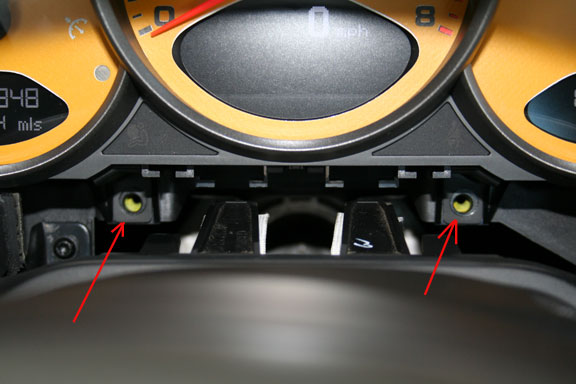
I just did this. here are some pictures. hope they help: 1. Lower the steering wheels and pull it all the way aft. No need to take the steering wheels off. 2. Pull the plastic former right under the cluster towards you or stright aft. This will reveal the two torx screws that holds the cluster locked. 3. Remove two torx srews. I used an extra tool(magnet) so not to drop the screws themsleves. 4. Now you can pull the clusster straight back. It is still held by two clips in the back, so ti will need a strong tug towards you. I found the best way is to insert your fingers under then behind the cluster and pull it towards you.
-
Does anyone known where to tap RPM / Tach signal from the 997? I have a shift light that was installed on my old 996 which I want to move on the 997. When I had it on the 996 I directly tapped from one of the wires of the OBD II terminal. On the 997, its not there anymore ALTHOUGH if I connect my Durametric, I could still get the RPM reading. Thanks!
-
DIY GT3 Seats Install
carrera mike replied to carrera mike's topic in DIY Articles - Carrera (996) - Accessories
My pleassure Gents! ~Mike -
Leaking from ?
carrera mike replied to carrera mike's topic in 996 Series (Carrera, Carrera 4, Carrera 4S, Targa)
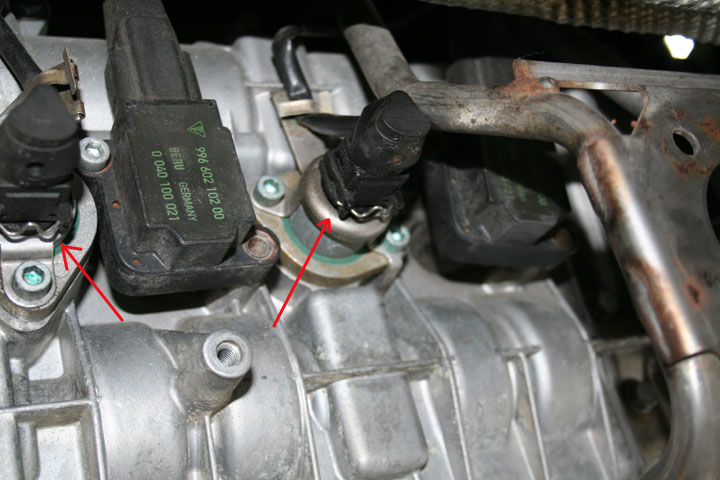
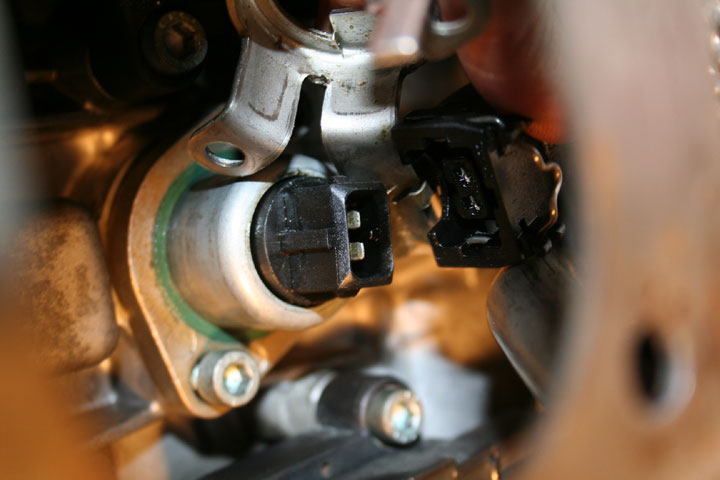
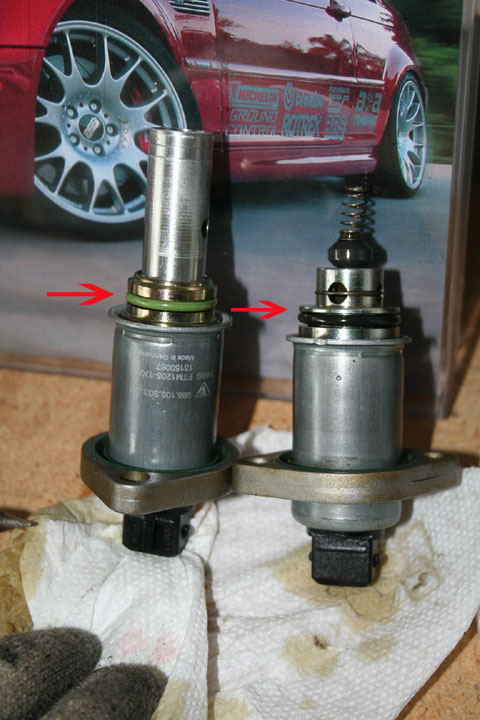
A great enthusiast just directed me to the right PET illustration figure 103-11. (I was looking at wrong illustration 103-00 earlier) They are # 40 and # 41, which are Variocam Actuators. The O-Rings I need are as follows: -For #40 996.105.903.03 -#41 996.105.903.05 -
Ive had this very minor leak and narrowed it down to be coming from these units. Could anyone tell me please what they are? Are they Cam Position sensors?? They are located forward and aft of the # 4 spark plug on the left side of the engine and forward and aft of # 3 spark plug on the left side of the engine. Nearest to the variocam chain. Theres tota four of these bad boys. Only the two on the left side of my engine are leaking though. These ones I have on the left side are both leaking oil through their O-rings. Somehow I can not find the part nos of these o-rings with my PET. Thanks in advance.
-
DIY removal of stock seats and installation of Euro GT3 Seats. http://gallery.rennlist.com/gallery/albuq24 I know Rockitman made a great DIY already. In fact I read his several times when I installed my seats. Thanks to him! I made this one with more detailed procedures of some of the steps.
-
DIY GT3 Seats Install DIY removal of stock seats and installation of Euro GT3 Seats. http://gallery.rennlist.com/gallery/albuq24 I know Rockitman made a great DIY already. In fact I read his several times when I installed my seats. Thanks to him! I made this one with more detailed procedures of some of the steps. Author carrera mike Category Carrera (996) - Accessories Submitted 07/03/2007 07:38 AM
-
DIY removal of stock seats and installation of Euro GT3 Seats. http://gallery.rennlist.com/gallery/albuq24 I know Rockitman made a great DIY already. In fact I read his several times when I installed my seats. Thanks to him! I made this one with more detailed procedures of some of the steps.
-
Buddy and I replaced his stock brake calipers(997) with big reds. On the 997, big reds need their own front wheel carriers and reservoir, so we had to open a lot of connections and introduce air in the system. After bleeding the whole system with probably 2 gals of fluid, it was still a little bit spongy. I knew that there were still bubbles trapped in the ABS sys even though we were getting solid flow from the calipers. So what we did was do it the old fashion way, press the pedal 4 times, and while holding the pedal down, release the fluid pressure the normal way thru the caliper bleeder valve. Boy, you wouldn't believe how much bubbles came out. As soon as the pedal bottoms out to the floor, close the caliper valve and pump the pedal again and hold. Repeat until there's no more bubbles coming out.
-
MY 2002 Carrera Coupe Owners. (Mine is a 02 C2, this might work with other models BUT please verify it with your owner's manual) Here's a wallet size bulb chart I made that could be useful when going to the part store. Hope it helps. BULB_CHART.doc