Welcome to RennTech.org Community, Guest
There are many great features available to you once you register at RennTech.org
You are free to view posts here, but you must log in to reply to existing posts, or to start your own new topic. Like most online communities, there are costs involved to maintain a site like this - so we encourage our members to donate. All donations go to the costs operating and maintaining this site. We prefer that guests take part in our community and we offer a lot in return to those willing to join our corner of the Porsche world. This site is 99 percent member supported (less than 1 percent comes from advertising) - so please consider an annual donation to keep this site running.
Here are some of the features available - once you register at RennTech.org
- View Classified Ads
- DIY Tutorials
- Porsche TSB Listings (limited)
- VIN Decoder
- Special Offers
-
OBD II P-Codes - Paint Codes
- Registry
- Videos System
- View Reviews
- and get rid of this welcome message
It takes just a few minutes to register, and it's FREE
Contributing Members also get these additional benefits:
(you become a Contributing Member by donating money to the operation of this site)
- No ads - advertisements are removed
- Access the Contributors Only Forum
- Contributing Members Only Downloads
- Send attachments with PMs
- All image/file storage limits are substantially increased for all Contributing Members
- Option Codes Lookup
- VIN Option Lookups (limited)


usaf-lt-g
-
Posts
361 -
Joined
-
Last visited
Content Type
Profiles
Events
Forums
External Paint Colors
Downloads
Tutorials
Links Directory
Collections
Store
Posts posted by usaf-lt-g
-
-
That article is offensively misleading. There has been a poll going on on Boxa.net about engine failure & there have only been 2 cases in a sample of 100, which is a bit more representative than a sample of 11. What a cretinous half-wit that made that assumption, do you not think if failure was 20% Porsche would have a reputation like Alfa Romeo. What an absolute idiot.
:clapping:
:cheers:
-
I painted the door lids silver alum. New ones at suncoast cost more than a dealership oil change...
Wasn't that hard
1.) Unhinged it - took it out
2.) Sanded it to get the coating off. Sandpaper at any autoshop
3.) Washed it dried it
4.) Painted with metalic silver spray paint , I simply chose a color that look nice to me *three coats* Spray in one direction and look to see if any bubbles formed
5.) finished up with clear gloss top coating spray paint *three coats*
6.) wait like a full day before reinstalling the lid, cause it was easier to take lid off then put on...you gotta jamm it in there against the door. If you attempt to put it back on too soon the "young" paint will get dammaged easily in the process.
Any pictures? Does it match well to the other metalic parts? I'm trying to get as close to the "tequipment" feel as possible.
-
Questions:
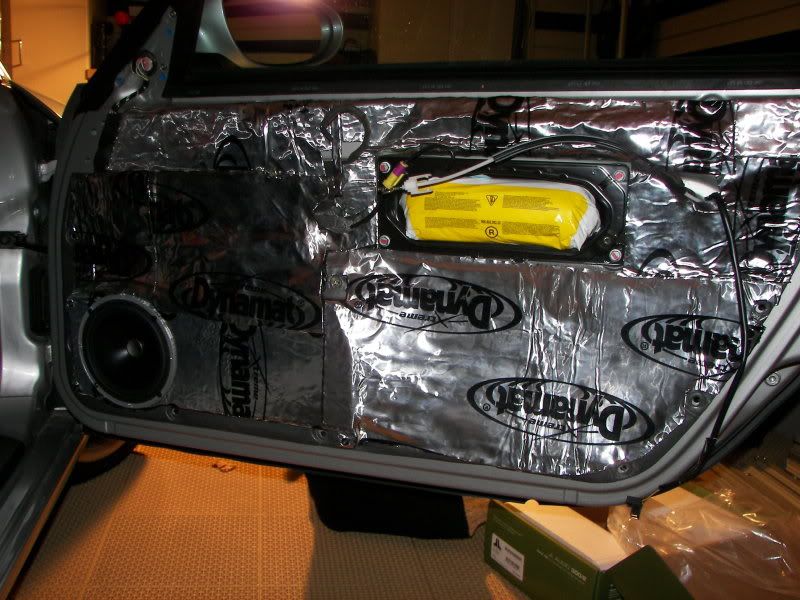
How is the Dynamat performing? Can you notice a difference in road noise?
Are you using the stock wiring for your door speakers, or did you figure out a clean way to run high end cabling?
I am also curious to know if you will have any electrical issues with running both of those amps? For instance, a possibility of too much draw on the alternator and battery. Let us know! I have a couple of big amps in storage that I would love to put in my car, but I've wondered if she could handle it.
Dynamat is performing well, although from past experience, I've never really noticed a difference in road noise unless you outfit the entire car in dynamat, and I only did the doors, so not much difference. However, in terms of crisper, cleaner base response, the dynamat deffinately helps keep the loudness of the woofers inside the vehicle, and provides a much darker and rich tone.
For all the speakers, I used the stock wiring and spliced in my own cable. doesn't seem to be an issue, and honestly, speaker wire is speaker wire is speaker wire. I've never once been able to tell the difference between a car that used a stock speaker harness vs. 16 AWG or 14 AWG. You could have one strand of 18 AWG barely touching the speaker and still get full sound. IMHO - The only thing good about using thicker cable, is that it's easier to connect to the speaker and give it a better fit. Doesn't do anything for your sound though.
Absolutely no electrical issues whatsoever. No I did not install or ever intend to install a CAP. And it's not necesssary. There's no drain on the car, no dimming of lights etc. I can't say for certain on how "other" amps would perform. But JL Audio is a high-end quality amp, and i've never experienced any sort of drainage on the car when using them. My other car is a Nissan Maxima, and it has 3 JL Audio amps hooked up to it. No issues at all.
-
From ALL the research, reading, more research, more reading, and talking to several Porsche people, early models of the MY02 engines seemed to have this problem at lower mileage (i.e. 25k - 45k) and that it occurred on a batch of Porsche's engines which was never properly diagnosed or given a good fix for people out of warranty. On a side note, several other people have noted that engines past these mileage marks "usually" didn't have anything to worry about.
And some more encouragement for owner's like myself, is that the "S" edition engines seem to have longer longevity overall and handle beefier performance modifications better (such as a turbo or supercharger... neither of which I have installed or can attest to). At least that's what I've heard from some other gearheads around my area that specialize in Porsche cars.
-
Hey guys,
Has anyone taken on trying to paint any of the interior parts themselves? I've seen numerous kits out there that just seem OUTRAGEOUS in price for pieces getting painted as simple as the vents etc. I'd like to add to some of the other "accented" silver / aluminum pieces that come stock on my vehicle, such as the door handles for example. Anyone know the paint you could use for this that would match it pretty good? Do you have to prep the pieces with primer before hand? I'd like to try and get as close to the "Tequipment" feel, without purchasing the costly tequipment replacement pieces. A nice DIY project for me.
In addition, I already have the 3-spoke Boxster S wheel on my car, it's all black though. I figured someone out there has to make those 3 aluminum trim pieces that can just stick on to those portions of the wheel, rather than buy a whole nother steering wheel for $750! Just curious if there's a more cost effective method.
Curious on the thoughts! Thanks!
-
Fixed her...
Spliced new wire at the headlight for parking light and turn signal. Turn signal I ran new wire to the hazard light switch (green / black), Parking light I ran to the back of the headlight switch (grey / red). Tested, and everything seems to be running smooth now.
A huge sigh of relif on your part no doubt!!! Glad it turned out OK in the end
Use a new version of the old carpenters mantra next time - Check twice drill once!!!!
RB
LOL! For sure!!! Typically I'm the guy that does "ALL" of my research before diving into anything. Actually if you've seen any of my other posts, I literally try to design everything out and get all the facts before I do anything. Just so happened I thought my left was my right, and drilled the wrong spot. Yes HUGEEEE Sigh of relief now that everything is working exceptionally well ;)
BTW! I just want to say THANK YOU so much to all of you at Renntech. This site has become my Porsche Bible, and it's SO great to hear many of you are interested in making your Boxsters top notch and doing things the "right" way. Thanks again for everyone's support and help over all the posts!
Loren, you're the man! :cheers:
:renntech:
-
Nothing terribly flammable on the engine back there, that’s right about at the crank pully. If I remember correctly the fuel lines are to the rt. of the passenger side. It would take an accelerant to make a missed rim shot off the ashtray to burst into flames and do that sort of damage (maybe a spilled methanol martini)
Plastics like Nylon melt and have a slippery feel. Nothing weird there.
Regards, PK
Hmm... it almost looks like melted tarring found on the back of dynomat which is used as the adhesive. When in doubt... rip it out lol. No to be honest, my guess is you'd have to purchase new carpeting for that area. Have you tried pulling back the carpet to inspect underneath?
-
Fixed her...
Spliced new wire at the headlight for parking light and turn signal. Turn signal I ran new wire to the hazard light switch (green / black), Parking light I ran to the back of the headlight switch (grey / red). Tested, and everything seems to be running smooth now.
-
If you go wire by wire this should work. Where there is room to work temporatly splice a long piece of wire in line, then go to the other side of the firewall, pull the slack thru, repair the damage, pull the slack back thru the firewall and take out the temporary splice. Might take a long time but should work. Ed
After analyzing the Electrical diagrams from my Bentley book, I see that black green wire has a weld point at location 34 (which is in the harness). However, by tracing it's fellow "brother" wires... It apears the blinker wire, can be re-splicded in at the "hazard light's switch" black/green wire. I took apart the cluster, hazard button assembly and confirmed the black green wire's presence at the button. Should be easy enough to get to once I run another wire.
As for the side marker (Gray/Red wire on right side). Can I simply splice over to the Left Headlight's side marker wire which is gray/black? Or are these run in parallel and not in series? I'm woried if I splice it in to the left, it will end up dimming both lights. Otherwise I'll have to find another connection point to splice it in at.
thanks
-
:oops:
Hey guys,
So I'm officially calling myself an idiot right now, and kicking myself in the arse. As most of you know, I was finishing my amp installation yesterday (which runs good by the way). HOWEVER, I mad a HUGE idiotic mistake yesterday. When I was running cables from the battery compartment to the interior of the car, I mistakanly drilled on the wrong "grommet" for a few seconds, and I believe I chopped a couple of wires. I ended up drilling to the "Left" of the battery first, through the top portion (of what I thought was just rubber) of the factory Headlights and speaker harness.
After going for a spin last night (and running later tests) I found that the headlight marker lamp (first click to the right on headlight knob), Side Marker lamp, and turning signal on the RIGHT SIDE only of the car no longer worked (surprisingly enough, the actual HID light, High Beam, fog light, and motor still work). I double checked the fuses, and the bulbs, which all tested positive. I also inspected the inside of the headlight compartment to make sure the plug was 100% plugged in.... NOPE. I'm sure of it... I cut the Gray/Red and Green/Black wires at the wiring harness plug by mistake.
So I was trying to figure out what the quickest way to solve the mess was, and I thought, if I remove the battery, and the battery tray, that will allow me access to pull the harness from the hole. UNFORTUNATELY, there doesn't seem to be enough slack from the inside of the vehicle to let me pull it out very far, which means I can't get to the wires from inside the hole, to splice in two new wires before my mistake.
I have a feeling, this is the first time anyone's done something this idiotic, so I'm looking for help here on how to fix the problem. :( It's one of those, "Argghhh! Why Did I do that!" type of mistakes. Here's the pictures below so you can see what I'm talking about.
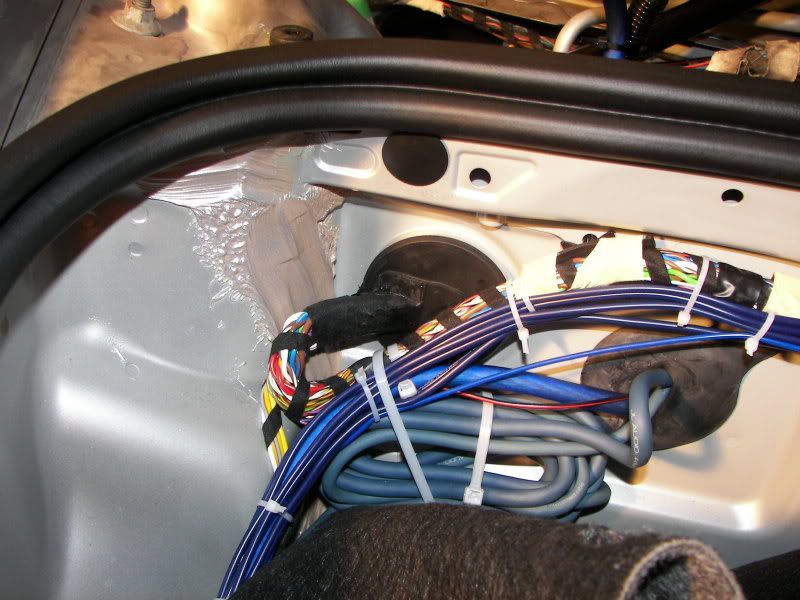
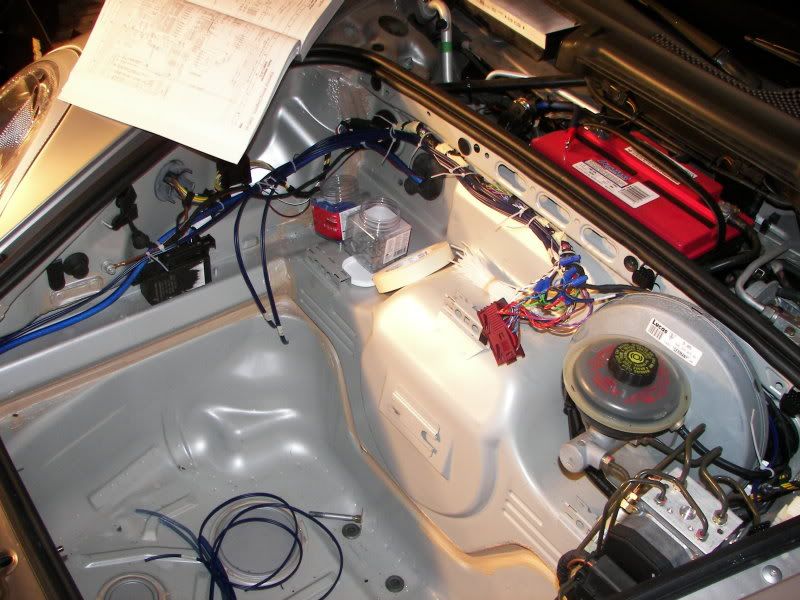
here's the wiring harness as it enters into the battery compartment from the passenger side of the front hood. It contains both the speaker/amp harneisss and the headlight harness from the passenger side.

here's the opposite side of the harness from the battery compartment side.
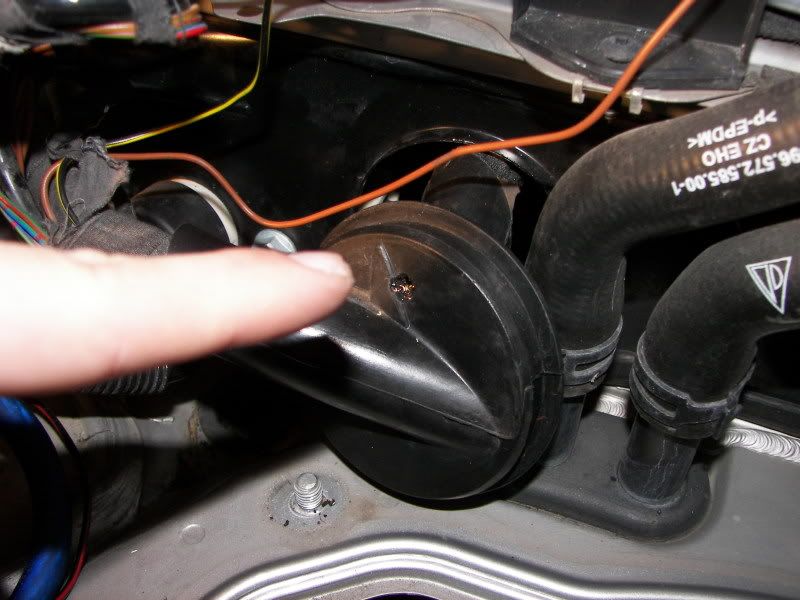
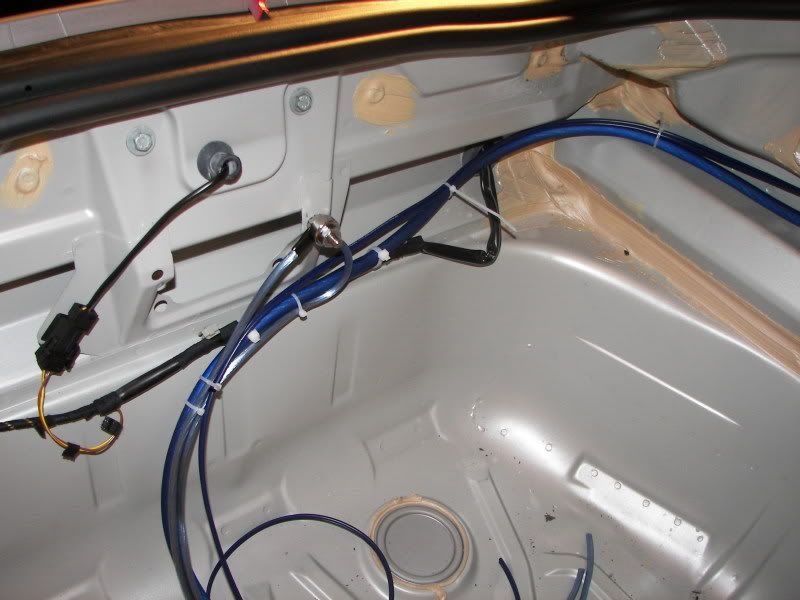
And here's the mistake. I started drilling a small hole towards the top of the harness as it passes from battery compartment to the inside of the vehicle. You can see the small hole with some frayed pieces in it. It's located just to the left of where the battery sits, at the bottom.
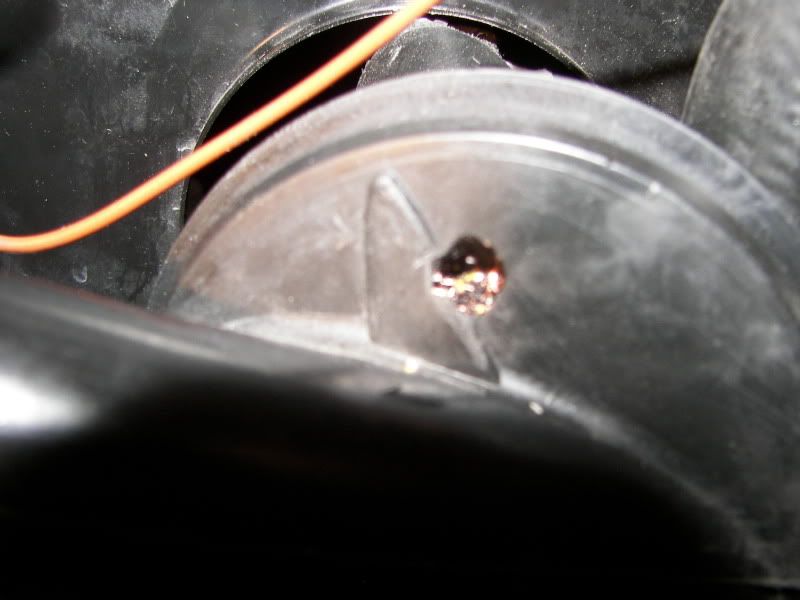
A closer image of the hole...
ANY Help on what I can do to fix this is greatly appreciated! Thanks! :( :help:
-
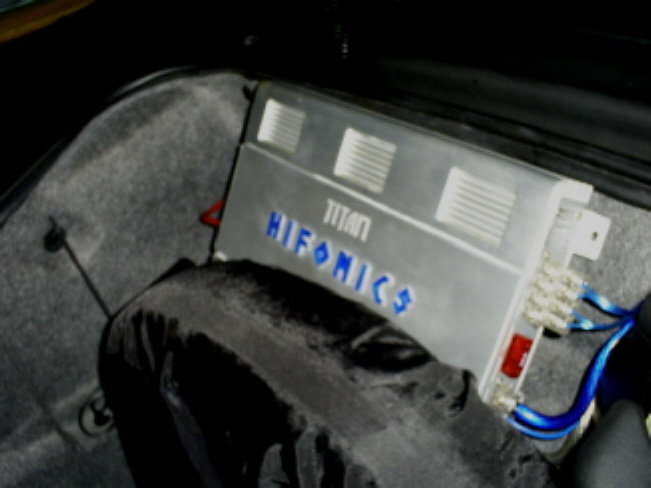
Alright, got her finished up...
Can I just add... WOW what a difference in sound quality after I changed out the factory amp? I mean, granted I did some tuning with high and low pass filters, frequency changes etc. But wow! You'd think I'd INSTALLED the subwoofer already! And that's yet to come! ;)
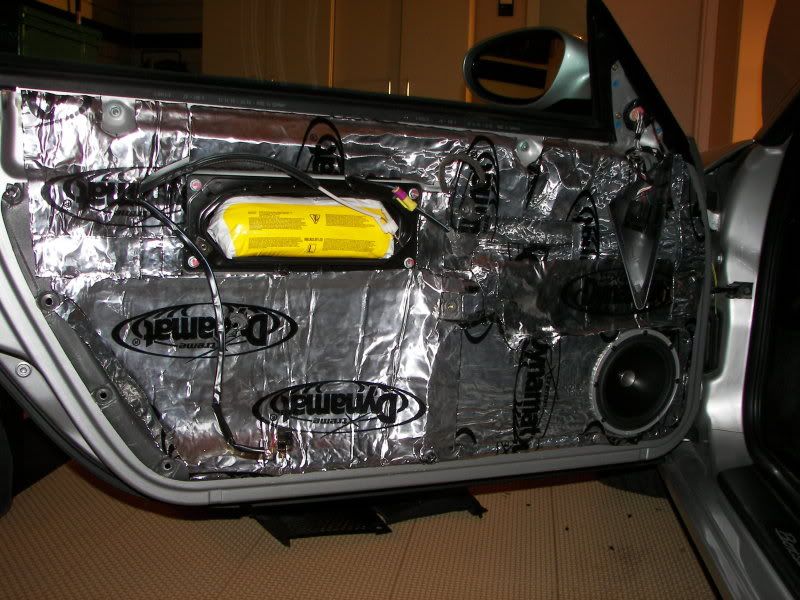
Here's The Driver's side door after I finished dynomatting it in it's entirity (only the speaker brackets were done before).
The Passenger Side Door finished.
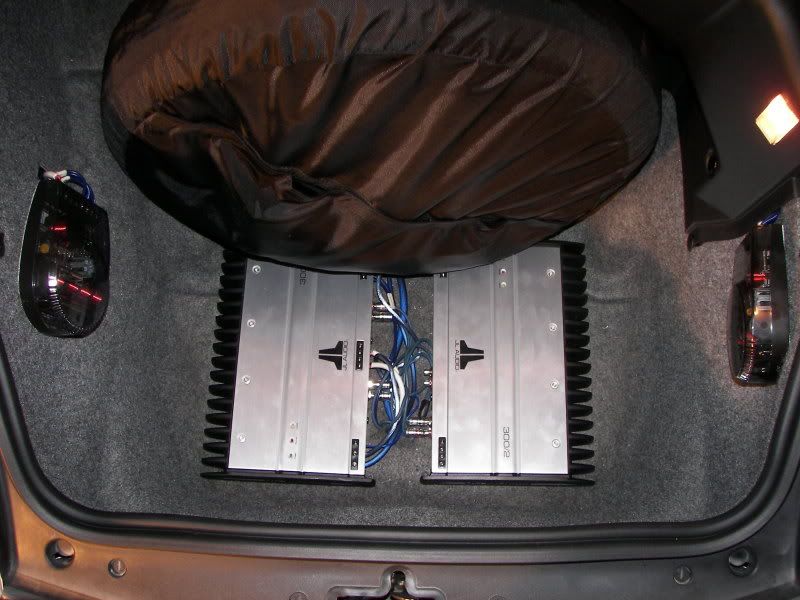
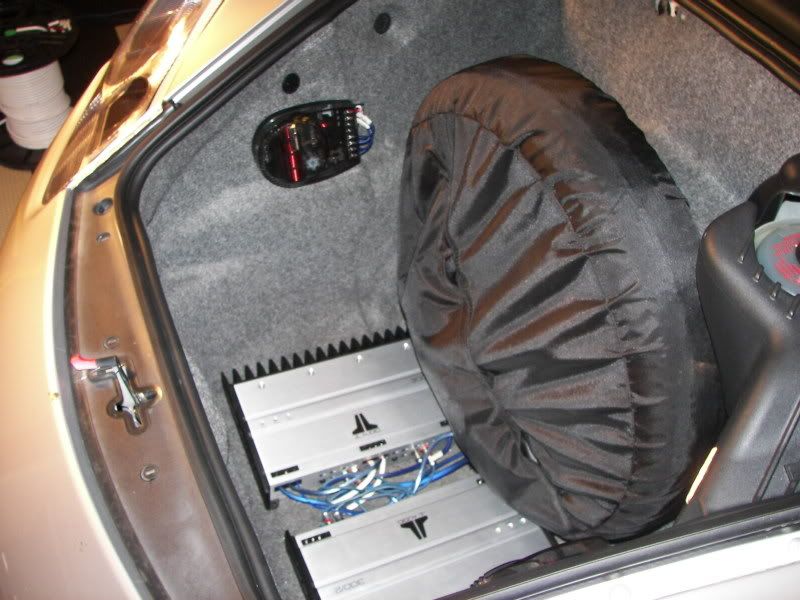
The Two JL Amps as mounted on the floor of the Front Trunk with 2 JL Crossover's for Rear Tuning. *Note* I opted to hook up the 2nd amp on the right anyways, even though I haven't officially hooked up the sub I am putting in yet. This way it's easier for me for the future.*
:renntech:
Time for a beer and a smoke! :beer:
-
Hey USAF are u copying my blue cabling job? LOL
great choice by going with JL 4AWG.
what a garage floor! very nice
Lol Thanks! You should see the custom cabinetry, workbench, and Slatwall I had installed as well. Makes it MUCH more convenient to work on the cars :) K back to work now... lol. more pictures to come later... I'm working on finishing off the driver's side door dynomat right now.
-
Where do you plan on locating the sub-woofer listed in your diagram?
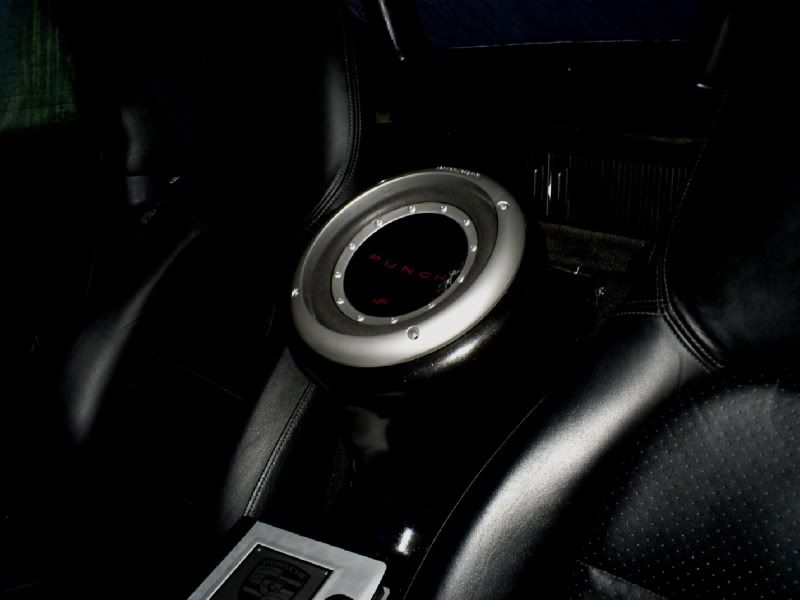
I'm going with Juniinc's design. Placing the sub between the 2 seats, although I'm going to modify the lower portion a bit to allow me to still use the center console cup holders.
-
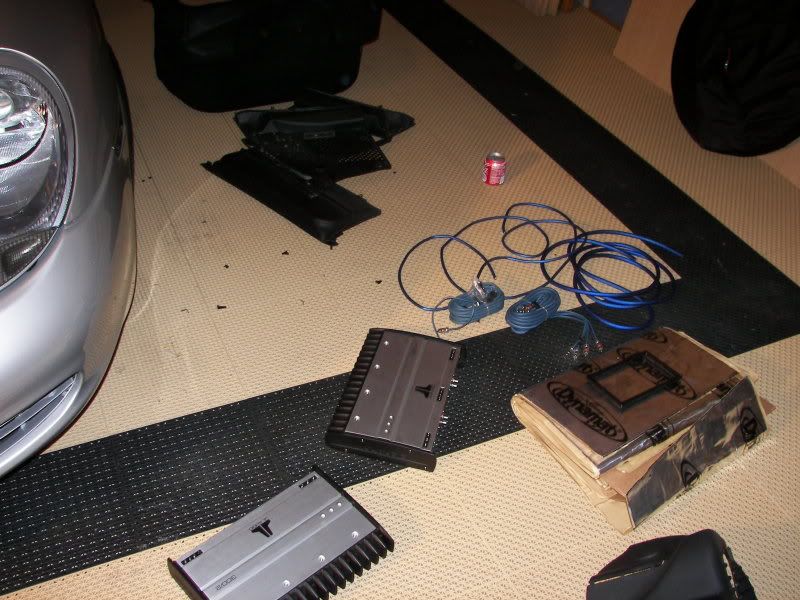
Well today began Part 2 of this project! Installing the 2 JL Amps.... after trying to figure out where to mount them given their size, I decided the floor of the front trunk was the best spot. I can still get to the spare tire and access what I need to. So here's day 1 of the project which was mostly wire runs.
On a side note, today was my lucky day. A store called "Tweeter" which is by me, and carries high end car audio equipment like JL Audio, is going out of business. I picked up all of the following for less than $100!
JL Audio XC-PCS4-2B - 4 AWG 12-Volt Power Connection System for Two Amplifiers
JL Audio XC-BCSC16-25 - 25 ft. / 7.6 m Blue/Clear 16 AWG, Parallel Conductor Speaker Cable
XB-BLUAIC4-18 - 4 Channel Twisted-Pair Audio Interconnect RCA Cable with Machined Connectors 18 ft.
XB-BLUAIC2-18 - 2 Channel Twisted-Pair Audio Interconnect RCA Cable with Machined Connectors 18 ft.
Keep in mind these are all JL Audio's "High End Cables" which typically run a lot more.
Above, you can see the 2 JL Audio Amps (300/4 and 300/2) that will be installed. Along with some of the JL Audio Cable, and front trunk carpeting taken out of of the car. There's also some dynomat extreme that I plan to use to finish off the doors.
Above is the wiring which I started today. I spliced into the factory harness, making sure to cap off each wire for a good connection. I also used the black/red remote wire. Anyone know if the "Brown" wire is a ground or not? I'm guessing it is... which if that's the case I'll need to splice that into the master ground lug as well to ensure a consistant ground is used throughout. From this picture you can see I have wires hanging down the left side. I also have wires hanging down the right side. This is because I chose to re-locate my Crossovers (which will be used to combine the Door and Rear Speakers as my "Rear Channels") to the front for display, and split out the highs and lows properly.
Here's the new master lug nut. Although this picture show's I'm using the top right Hole... I quickly decided to use the bottom right hole after realizing the factory carpet molding has a plug that goes in that hole ;) The wires you see here are power, ground, speaker, and remote (some of the others I haven't finished routing yet).
More to come tomorrow... stay tuned.
-
shouldn't be any problem,,,
something like this? or below the tire
Rubber plugs?? Anyway you can take a few photos of your mounting location, and these plugs you're talking about?
-
Well for those of you debating tackling on the challenge of A) Replacing your Head Unit B) Replacing Your Factory amp with aftermarket amp(s) C) Changing out all the factory speakers with High-Grade Speakers and D) adding in Sub-Woofer........ perhaps this will help.
In an effort to "visualize" how I was going to obtain optimal sound from all the upgrading I've been doing lately, it helped me to draw out an electrical conceptual diagram of my layout so that I could:
1) Visualize which inputs / outputs went to which connection on the amp / receiver / cross-over etc.
2) Understand what all my impedence levels would be
3) Determine Watt Distribution per Channel / Cross-over / and Speaker so that I could visualize where the bulk of sound would be coming from
4) Determine all the frequency ranges so that I can properly tune the input gain sensitivity levels on the amps correctly
5) Give me the big picture :)
So here's the diagram I drew up of my particular planned install (only items that haven't been installed on this diagram yet, are the 2 amps, and the subwoofer thus far).
-
bump
Hmmm... ok, so I was giving my installation a little more thought today, and I'm a bit confused on how to run the speakers / rca's to my amp(s) and Head Unit.The IVA-W203 has 3 sets of RCA inputs which are labeled:
Front
Rear
and Subwoofer.
What I was originally hoping to do was to split out the front dash speakers, door speakers, and rear speakers on their own channels... 6 channels. And then add in the sub as an extra channel on a separate amp. But with having only inputs on the Alpine Head Unit for Front and Rear speakers, this makes things a bit more complicated in my head.
The crossovers, which are hooked currently to the front dash speakers (Tweeter / 4" woofer) and door speakers (6.5" Woofers) both support High / Low inputs. In otherwords, you can hook up and separate highs and lows for each.
Given the circumstance would it make more sense to run the front dashe speakers in their current configuration and then run the rear speakers to the same cross over as the door speakers? Or is there a better way for me to do this? Just curious what everyone's thoughts are....
-
ok, thanks Loren
I cleaned the throttle body today, seems to be oil in the intake pipes, quite a bit too, is this normal?
Sounds like oil change overfill or failed AOS.
Ditto the AOS. I replaced mine about 3 months ago. Oil in the intake pipes is almost a for sure sign. You may have codes on an OBD II, but chances are, if then ENG light hasn't turned on, there might not be anything there. I'd deffinately make an effort to replace your AOS though. There's a complete guide on here on how to do it. If you have an E-Gas version, you don't need to order the extra J-Pipe.
-
LOL, I'm sorry.... but everytime i see this post on the list.... it pops up next to the "Getting High" post, and I just have to chuckle... perfect timing ;)
:cheers:
-
Hmmm... ok, so I was giving my installation a little more thought today, and I'm a bit confused on how to run the speakers / rca's to my amp(s) and Head Unit.
The IVA-W203 has 3 sets of RCA inputs which are labeled:
Front
Rear
and Subwoofer.
What I was originally hoping to do was to split out the front dash speakers, door speakers, and rear speakers on their own channels... 6 channels. And then add in the sub as an extra channel on a separate amp. But with having only inputs on the Alpine Head Unit for Front and Rear speakers, this makes things a bit more complicated in my head.
The crossovers, which are hooked currently to the front dash speakers (Tweeter / 4" woofer) and door speakers (6.5" Woofers) both support High / Low inputs. In otherwords, you can hook up and separate highs and lows for each.
Given the circumstance would it make more sense to run the front dashe speakers in their current configuration and then run the rear speakers to the same cross over as the door speakers? Or is there a better way for me to do this? Just curious what everyone's thoughts are....
-
986 and 986S tips are interchangeable if the exhaust is stock, available in stainless steel and chrome.
Yeesh... for the $300 - $400 for just a tip... why not just get a complete exhaust?
-
Have a 03 Bosxter base and would like to change my oval exhaust tip for the S type. Anybody can confirm if the replacement is only a matter of unscrewing the stock one and screw the S one at the same place without any more work to do?
Thanks!
Thierry
The Boxster S is actually a dual exhaust muffler vs. the boxster's single exhaust. The S series has physically 2 exhaust ports coming out the center. It's not a tip, unless you purchase a performance tip that fits that configuration.
-
Try cleaning the throttle body! It's easy to do and if it doesn't work you aren't out anything.
Lol... well... It's "semi-Easy" to do. The bolts on the underside of the throttle body to the intake are a bit of a pain to get off. and reattaching the intake pipe to the throttle body is also a bit of a "work" :) I soaped mine up, and then struggled for a good 20 minutes in different positions making weird faces trying to get mine back on. Just a pre-warning. Other than that it's a piece of cake.


New Porsche, How Do I Upgrade my Stereo?
in 986 Series (Boxster, Boxster S)
Posted
Kid_A,
Search around the forums, there's TONS of information on upgrading your Head Unit, Amplifiers, Speakers in this forum. In fact I just got done writing up an article on everything I replaced. Even though I did not have the MOST Bus system installed in my car, there shouldn't be any reason you could not do a re-wire to make this work. If I were you, I would first work on replacing the "speakers and head unit" first. Then if you want to add a subwoofer, or fine tune your car audio, purchase amps and re-wire like I did.
Alpine IVA-W203 with P1 Navigation
Wiring Diagram I drew up to visualize my installation
Door speakers Upgraded
Amps and crossovers installed
Cheers. :cheers: