Welcome to RennTech.org Community, Guest
There are many great features available to you once you register at RennTech.org
You are free to view posts here, but you must log in to reply to existing posts, or to start your own new topic. Like most online communities, there are costs involved to maintain a site like this - so we encourage our members to donate. All donations go to the costs operating and maintaining this site. We prefer that guests take part in our community and we offer a lot in return to those willing to join our corner of the Porsche world. This site is 99 percent member supported (less than 1 percent comes from advertising) - so please consider an annual donation to keep this site running.
Here are some of the features available - once you register at RennTech.org
- View Classified Ads
- DIY Tutorials
- Porsche TSB Listings (limited)
- VIN Decoder
- Special Offers
-
OBD II P-Codes - Paint Codes
- Registry
- Videos System
- View Reviews
- and get rid of this welcome message
It takes just a few minutes to register, and it's FREE
Contributing Members also get these additional benefits:
(you become a Contributing Member by donating money to the operation of this site)
- No ads - advertisements are removed
- Access the Contributors Only Forum
- Contributing Members Only Downloads
- Send attachments with PMs
- All image/file storage limits are substantially increased for all Contributing Members
- Option Codes Lookup
- VIN Option Lookups (limited)


Upnorth
-
Posts
46 -
Joined
-
Last visited
About Upnorth

Upnorth's Achievements
Member (1/1)
1
Reputation
-
Thanks.
-
Request for part number for drivers door lock. This is for a UK spec 996 GT3 RHD 2003 VIN number is WP0ZZZ99Z4S690311
-
😃😃😃
-
Loren, Think I've found out why. I think there must be an individual max file size. The orig photo size was 3.7M when I reduced it to 2.2M it uploaded OK. There is a note about total up load size but not individual file size. Can you tell me what the limit is for future reference? Mike
-
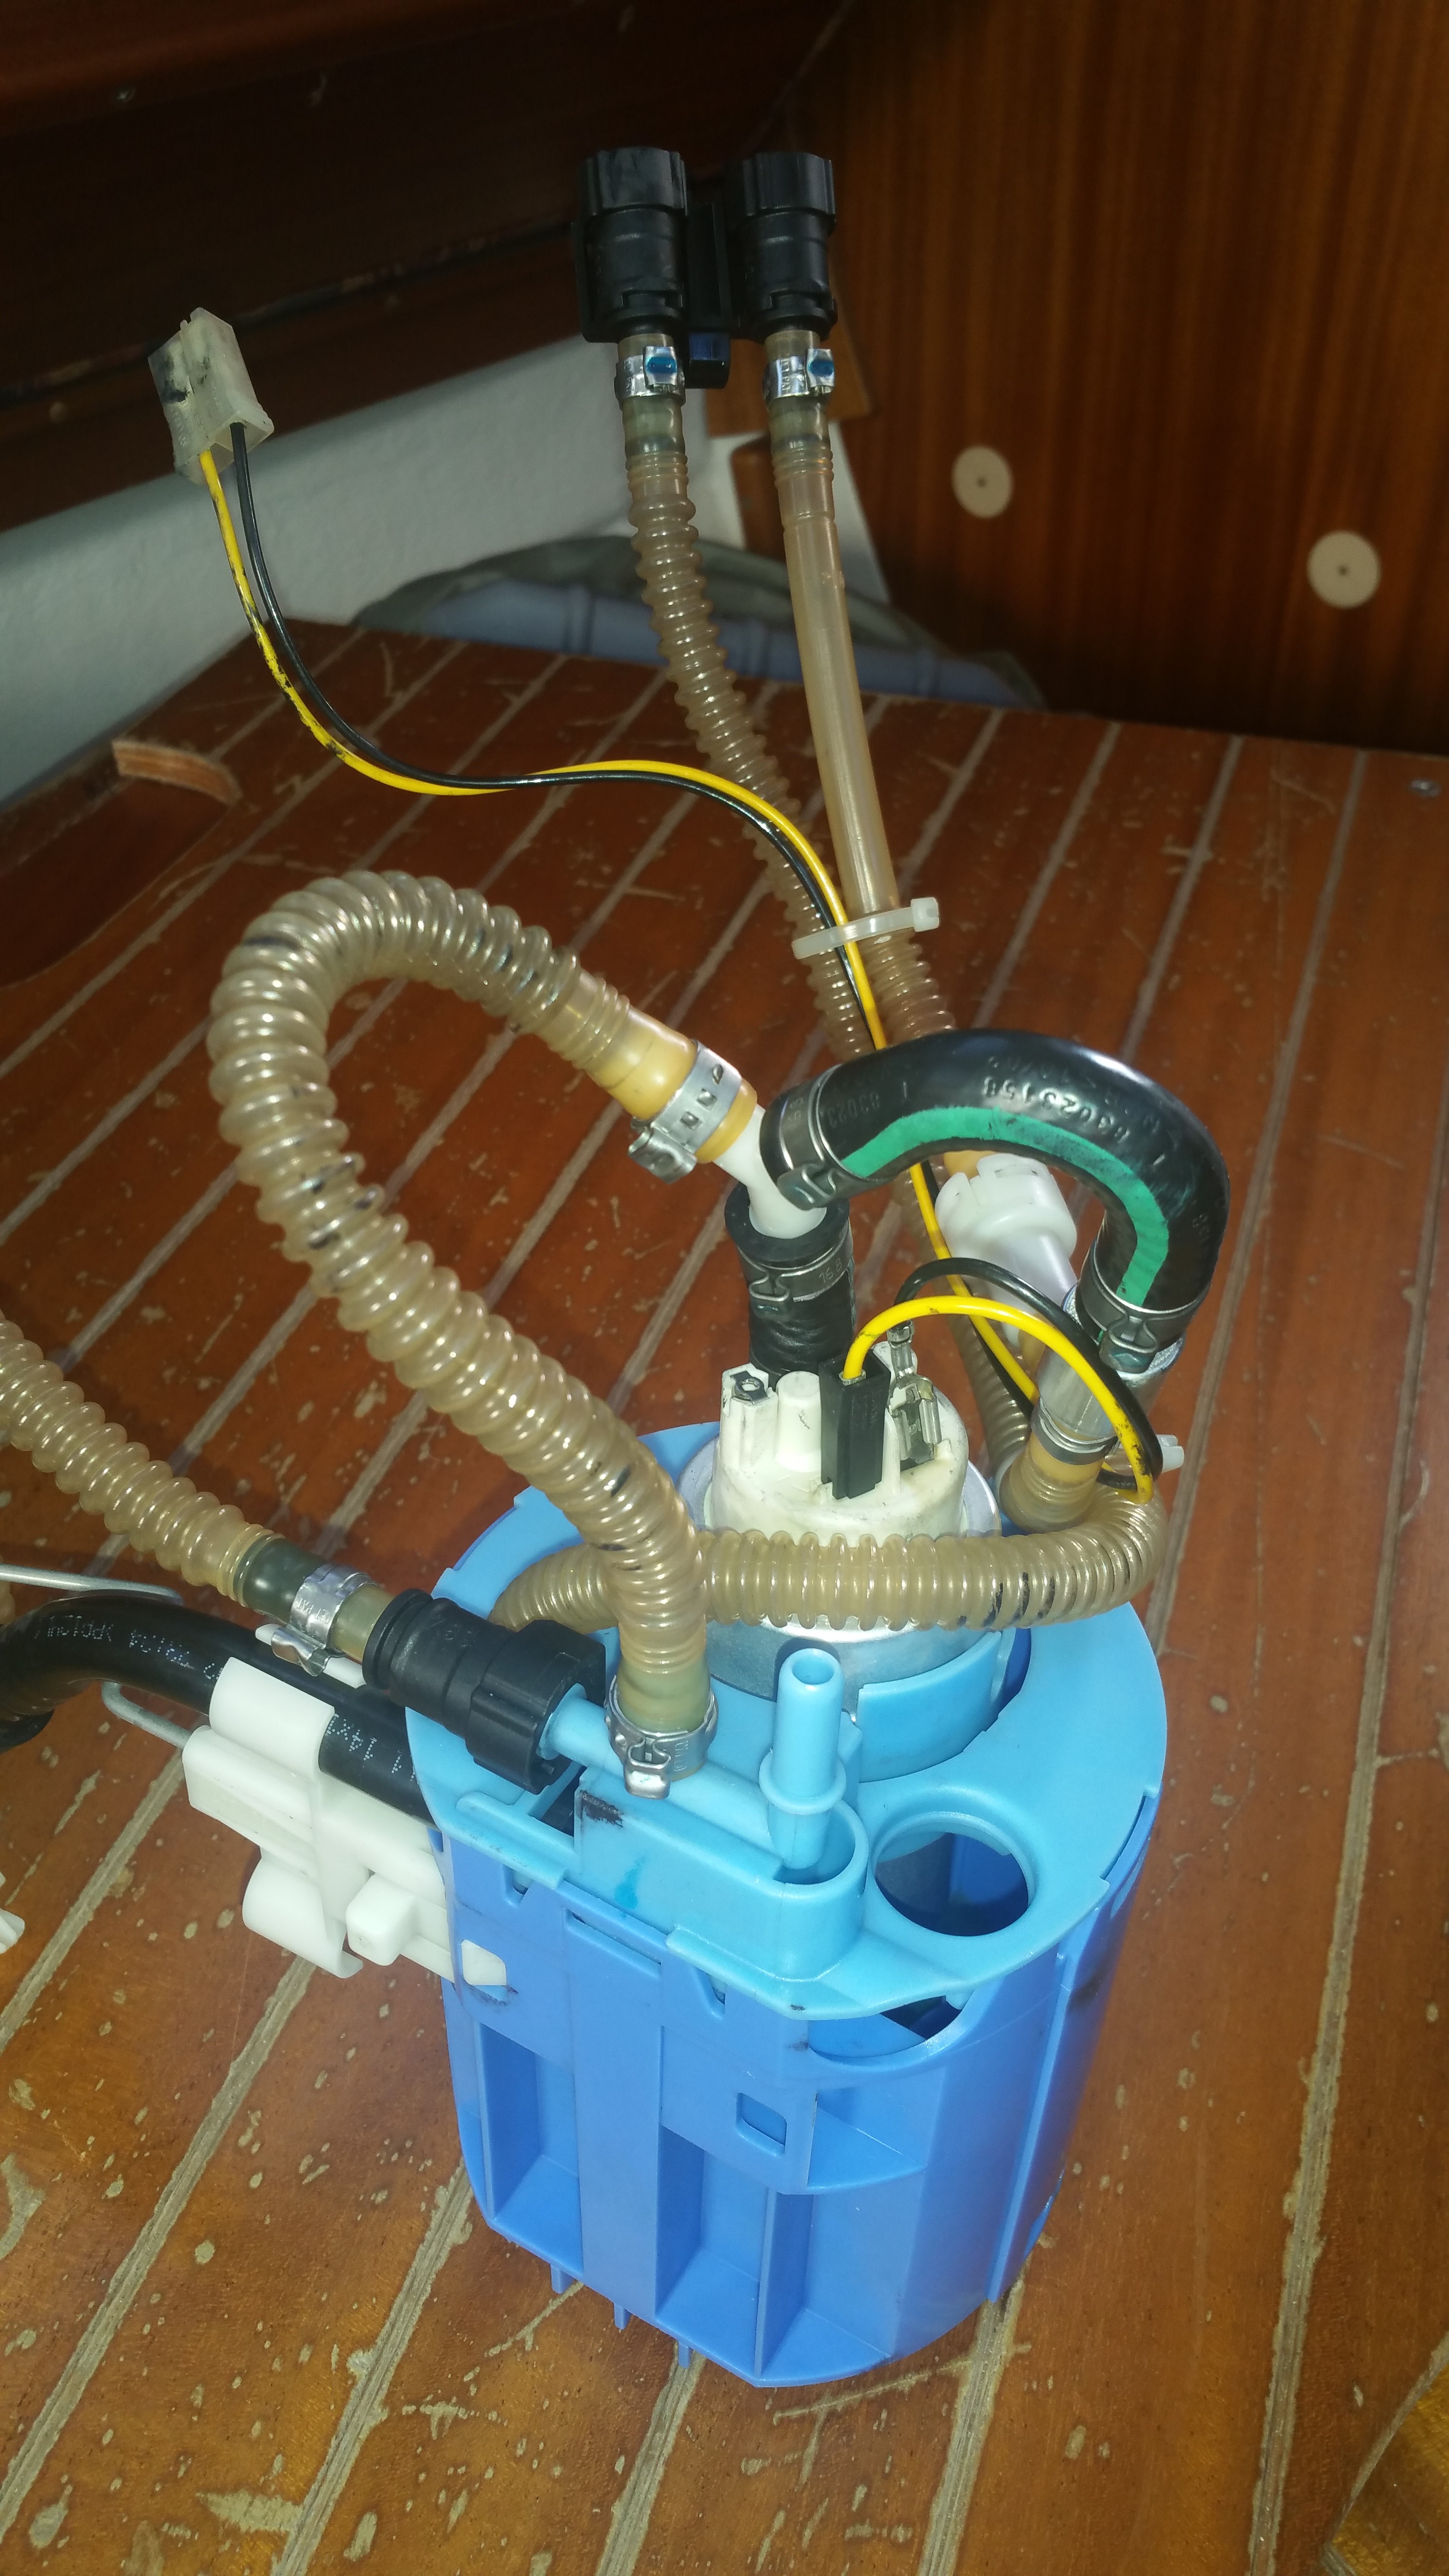
Just about to start re-asembling my new fuel pump. I wonder if anyone knows how to check that the jet pump (venturi) pickup is working correctly. I tried blowing down the corrugated tube and it seems blocked, but I suppose if there is a venturi the aperture would be very small and so would appear to be restricted. I don't want to reassemble the whole thing and then discover it is not working correctly. I searched online and there does not appear to be any diagrams to show what is inside the bottom plastic piece. Any help/advice would be appreciated.

-
photo in jpg format
-
When trying to upload an attachment to a post I am getting an error code 200. It says upload has failed. Any ideas what I am doing wrong? Mike
-
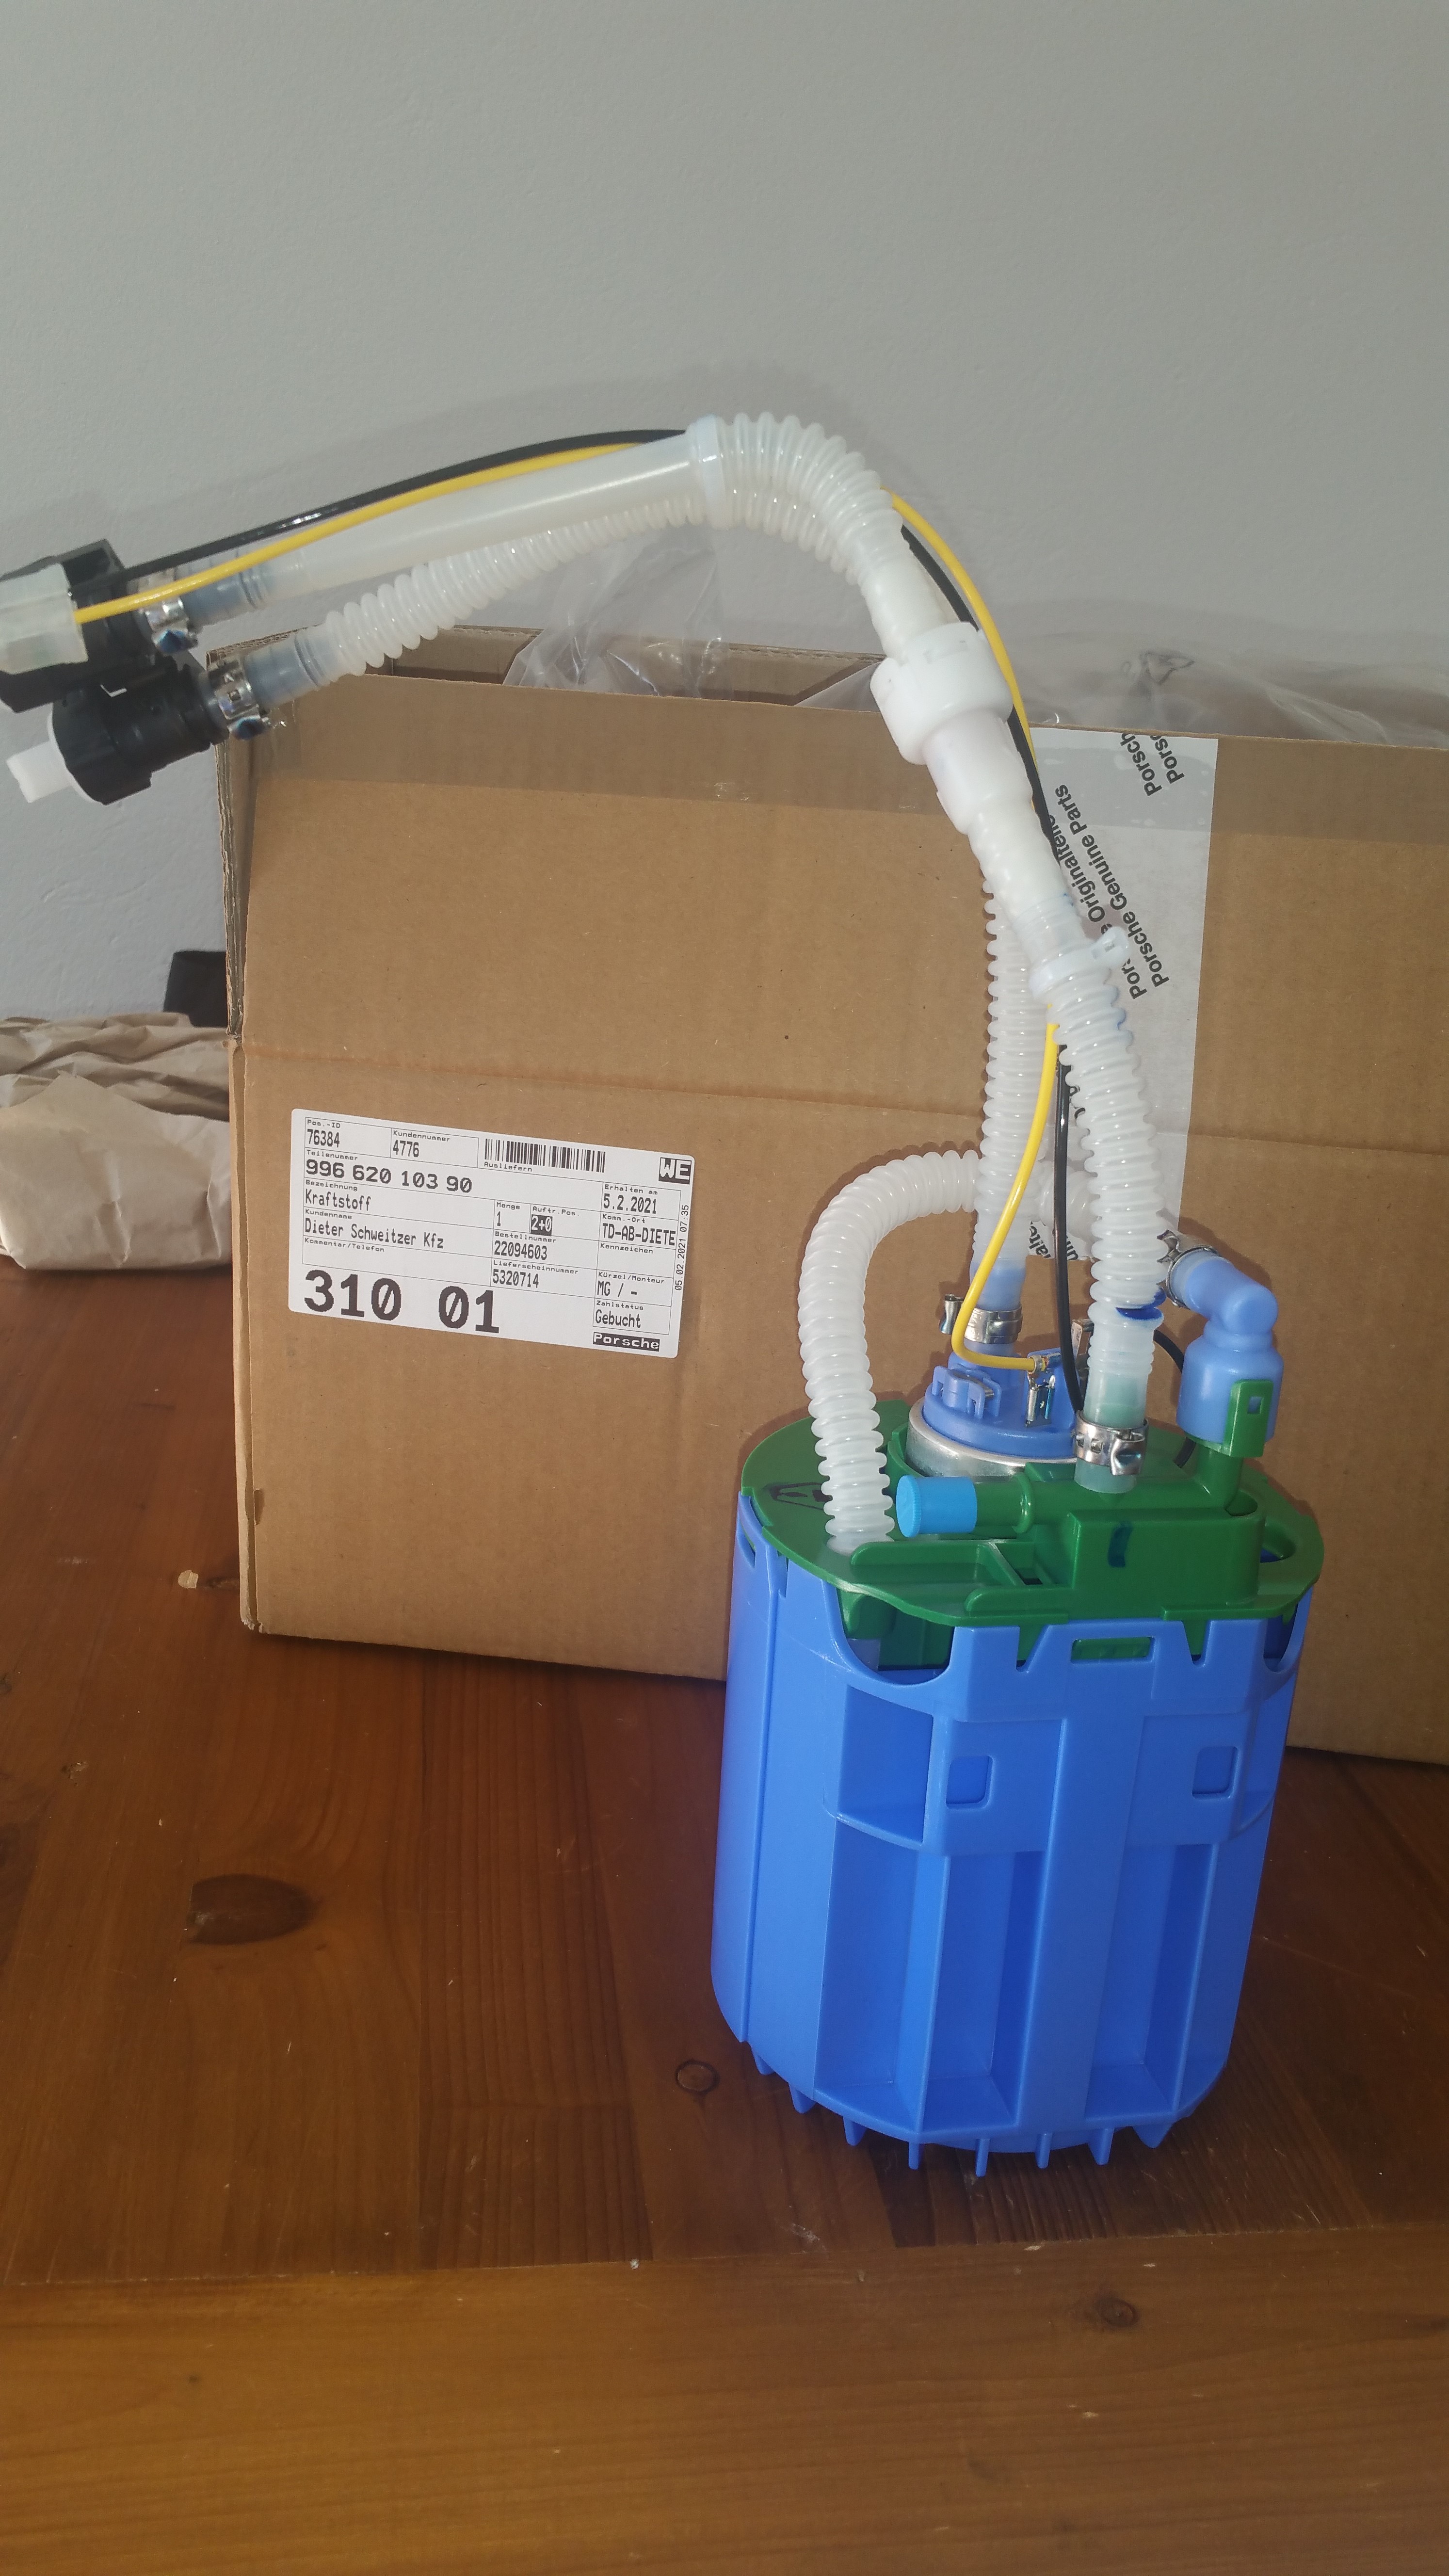
Update Loren. Firstly I must appologise for incorrect info in my first request. I had assumed that my car was 04 model year, however on checking my authenticity certificate is clearly states 2003, sorry. I have just received the pump and there have some significant changes to the pipe layout. it looks as if the venturi/jet pump is now powered by the return fuel flow. In fact the pipework is considerably simpler. Also the non-return valve on the fuel flow pipe to the engine has been removed.
-
Thanks very much Loren. Just as a matter of interest, what are the other parts for, and how would you know which to choose?
-
Hoping there is someone here who can help with me identifying the fuel pump part number for my 996 GT3 Model year 2004 (was delivered June 2003). The item in the parts list diagram is 4. The four parts listed are 4 996.620.103.90 (4) 996.620.057.90 (4) 996.620.057.91 (4) 996.620.057.92 In the remark column the last three are described as '04-'. I made some initial enquires as I assumed that the parts are listed as they are 'upgraded', so I should order the part with 92 at the end. However I was told this is not the part for my car and that I should order the first part in the list. I am now confused as the first part in the listing does not say 04- in the remarks column, and my car is an 04 car. Sorry for the verbal diarrhoea. Any help appreciated, Mike VIN Number WP0ZZZ99Z4S690311 I have attached what I think is the correct page from parts cat. GT3PartsCat2010FuelPumpPage.pdf
-
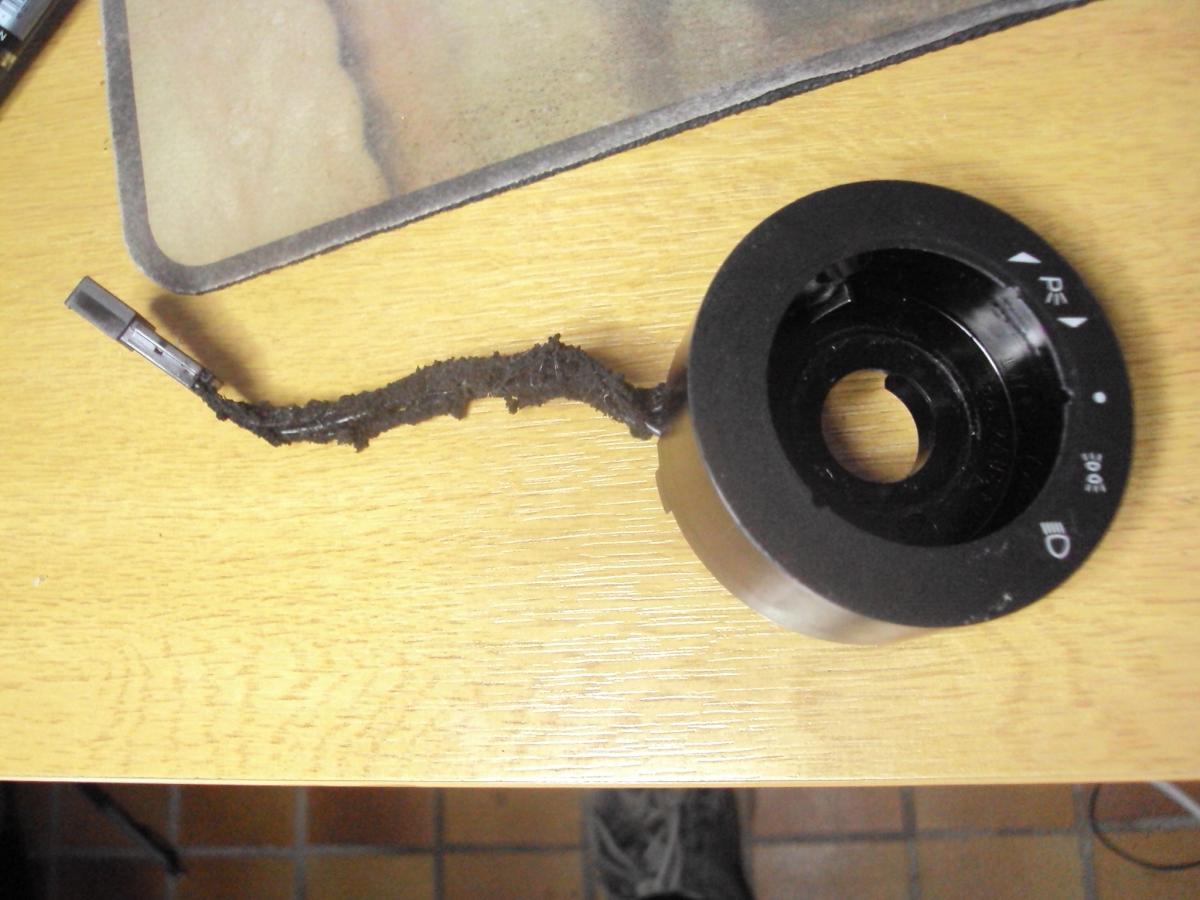
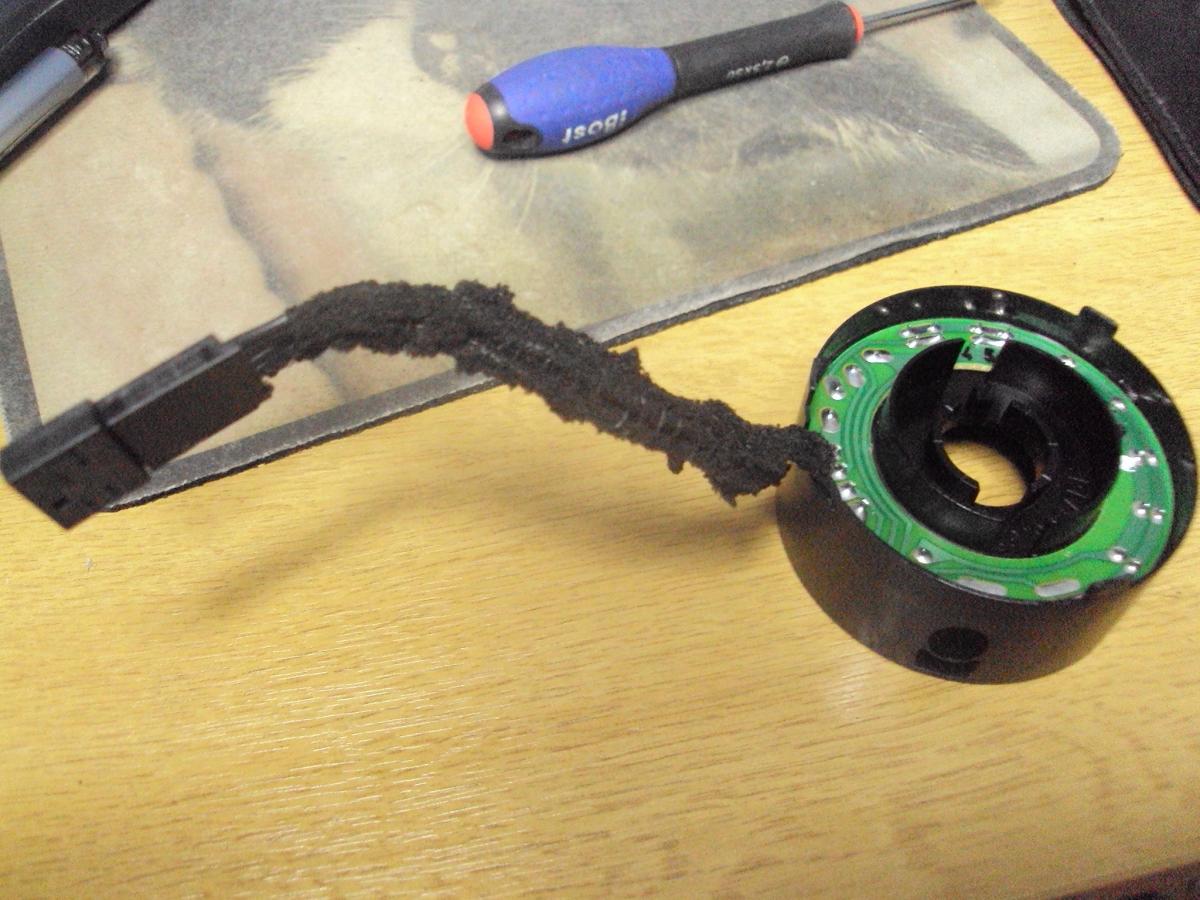
Just had the headlight switch out to gain access to the ignition switch. Couple of observations/comments which might help. What isn't mentioned in the DIY is the fact that there are two wiring connections to the switch. The main harness to the rear and a seperate one to item 27 in the drawing, the front bezel. Further back from this part is a plug and socket junction covered in a 'foam' antirattle cover. See below. Also the tape which covered these wires, as you can see in the picture had gone back to nature and was very sticky. Secondly when replacing the side vent, make sure the knob that opens and shuts the vent is set to 'open'. It makes reassembly at lot easier.
-
Battery disconnection and alarm
Upnorth replied to Upnorth's topic in 996 Series (Carrera, Carrera 4, Carrera 4S, Targa)
Loren - FYI you can remove the key once the battery has been disconnected. I did it and everything was quiet. Thanks again to your wonderful site. How would we survive without it. Creekman - thanks for tip on dropping window. Would never have done that. There is some logic in the seperate alarm battery, as a bad person would be expecting the alarm to go off, and would then be ready to disconnect battery to stop it. When it doesn't maybe he would giveup and retreat, leaving the pride and joy to live another day. -
I know the procedure for preventing the seperate battery powered alarm going off if the battery is disconnected. That is insert ignition key and turn to position 1 before disconnecting the battery. I have a question however. If having disconnected the battery using the above procedure - is it necessary to leave the key in position 1, or can the key be withdrawn? The reason I ask is that I intend to do some work on the electrics and this will take me some time, so I don't want to leave the key in the car during this period.
-
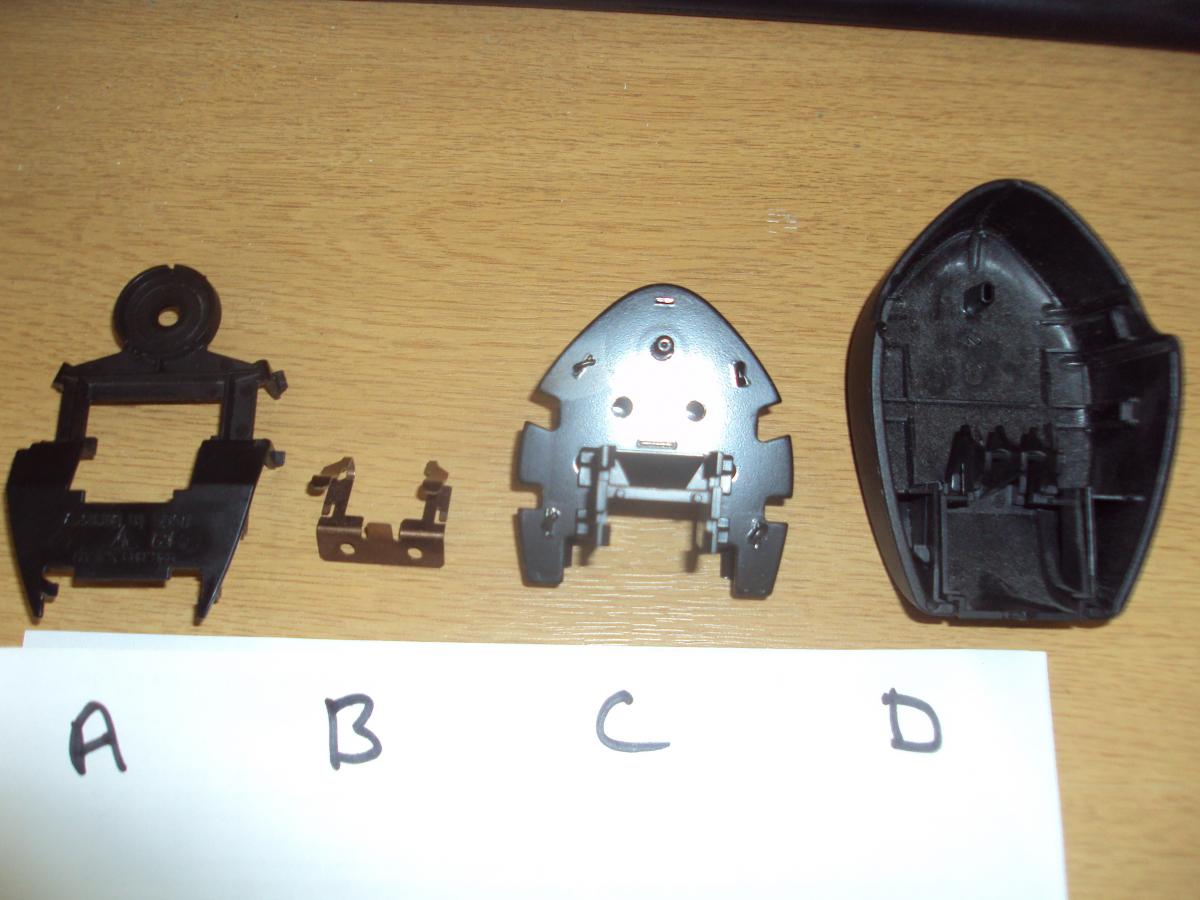
This is to help all those who have removed the seat belt adjuster the wrong way (I did it too, that’s how I know) and couldn’t get the cover back on. Firstly remove the piece that is still attached to the seat belt adjusting mechanism. You do this by levering it off. It is clipped in place with a centering pin into the seat belt fixing bolt. It makes a strange noise but it will come off. I used a proprietry trim removing tool, but a large screwdriver should work. Refer to attached photo You then have a metal piece C, a plastic piece A. You will also have the cover D, that you took off before, with the metal clip B in it . Remove B from D Insert C into D Refit B into D (this will hold item B in place) Lastly clip in item A You now have the whole item in one piece, which can be refitted to the car. Hope that’s some help.
-
Terminal XE
Upnorth replied to Upnorth's topic in 996 Series (Carrera, Carrera 4, Carrera 4S, Targa)
Yes this is an option. A7 was empty, whereas E8 is already fitted with a fuse. Also being a bit of a geek!, I am interested when I see new things - so was as much as anything I was interested in finding out what terminal XE was for.