Jump to content

Welcome to RennTech.org Community, Guest

There are many great features available to you once you register at RennTech.org
You are free to view posts here, but you must log in to reply to existing posts, or to start your own new topic. Like most online communities, there are costs involved to maintain a site like this - so we encourage our members to donate. All donations go to the costs operating and maintaining this site. We prefer that guests take part in our community and we offer a lot in return to those willing to join our corner of the Porsche world. This site is 99 percent member supported (less than 1 percent comes from advertising) - so please consider an annual donation to keep this site running.

Here are some of the features available - once you register at RennTech.org

  • View Classified Ads
  • DIY Tutorials
  • Porsche TSB Listings (limited)
  • VIN Decoder
  • Special Offers
  • OBD II P-Codes
  • Paint Codes
  • Registry
  • Videos System
  • View Reviews
  • and get rid of this welcome message

It takes just a few minutes to register, and it's FREE

Contributing Members also get these additional benefits:
(you become a Contributing Member by donating money to the operation of this site)

  • No ads - advertisements are removed
  • Access the Contributors Only Forum
  • Contributing Members Only Downloads
  • Send attachments with PMs
  • All image/file storage limits are substantially increased for all Contributing Members
  • Option Codes Lookup
  • VIN Option Lookups (limited)

jpcolin

Contributing Members
  • Posts

    157
  • Joined

  • Last visited

Everything posted by jpcolin

  1. Thx but meant some additional disassembly instructions. because I don't see how to do it. thank you
  2. Loren or someone else could you sent me the instruction to fix the sunvisor please, mine has also gone!
  3. hey thanks for the description, but you forgot to mention, how I connect the wire to the spoiler dash switch. which one goes where??
  4. Hi, I finaly got my switch, does someone has the procedure to follow to install it? can't be difficult but don't know what pin to connect to/and on the existinf spoiler switch thanks
  5. ok thanks everybody, I have been able to install it. was not that difficult once you know how to do it!
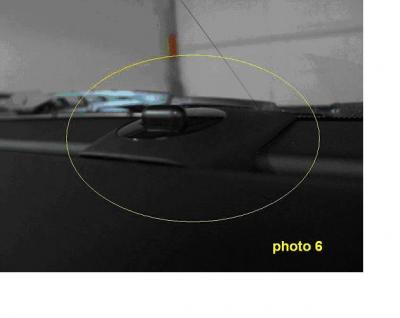
  6. Thanks TP, my sensor is a "trimble" or so, it ftis within the standat location, but I'm not sure how to remove the mounting plate for the sensor I it really safe to pop up the left side defroster trim a bit? Will Nothing break? For the access, I have removed the entire center console so I have a big hole in the dash ;-)
  7. ok I've been able to remove it, but now I wouldhave to remove the older of the gps antenna, I removed the 2 torx screws but it doesn't come of, it looks like it too large, should I remove one of the trim pieces one the left of the right to remove it? I have to route the GPS antenna cable that's why I have to remove it. thank you
  8. Hi, I tried to pull but it wont come out, is there something I miss? I would like to put my GPS sensor over there like it's on factory, but I don't know if my sensor is small enough, maybe someone has de dimensions of the factory sensor, so I would eventualy need to remove the cover if mine is bigger! thank you
  9. After my work, nice sunny afternoon, I tought mmm weather to be topless, but my top refused to open altough windows went down. I noticed that the handbrake light in the instrument panel was not working anymore, so I'm assuming this is the problem, but how do I have acces to this switch? Is there a step by step guide? Or could it be something else? thx
  10. ok, I'm adding a trim above witch follows the curve of the console. center console wil be painted glossy black. should be painted next week. I already installed half of the new speakers, dash: focal 100kp and doors : focal utopia 5Ws/ the door was pretty easy, 2-3 hours of work. but dash is much more tricky. speakers are connected on a 900W RMS ground zero amp. if you guys want i can post pictures.
  11. Hi, I know it's possible to have the interior trims painted in any color as an option. i would like to paint my trims in black (since all the switches a glossy black, it should look great) but don't know the code of this color, I mean non metalic just black. thank you
  12. Hi, I'm doing the same upgrade, I was wondering if there was any reason why you left the gap under the 2din unit instead of above? I'm planning to have the gap above the unit and fill with a custom made trim to match the contour of the center console. The center console will be painted glossy black.still wainting for same parts to complete the job. I'll post some pics when i'm done ;-) should take another 2 weeks since i only work 1 our/day on it ;-)
  13. Thx TP, someone gave me another number: 996.552.339.00 01C what's the difference between the 2?
  14. Hi, I need the PN of the AC trim for cars with PCM, where the AC is located inthe lower center console. Any idea of the price? thank you
  15. Try liquid leather (for your leather of course) it works great, restores the original leather smell en has a matt finish! great product!
  16. yes I wasn't sure about this, but seems I have no choice! thanks TP
  17. Hi, I know there are different models, that's why i'm asking here. It should be a glossy black for the pre 2002 dash (non horizontal swtiches). thank you
  18. thank you looks pretty wel explained!
  19. Hi, I'm looking for pict of center console, alu look, artic silver, ... other colors of the 97-02 model. any color is good as long as it is OEM. could you halp me to find these? thank you.
  20. I'm planning to do it myself, I'm plannig to change oil and oil filter, and maybe air filter. anything special to look at? btw it's a 98 2.5L
  21. so do you think the trim is included in the control partnumber? should I buy the entire control? do you have the price and partnubmer? But how can I be sure the control fits my cables and wires? I can't believe it's so difficult to find this tiny trim!
×
×
  • Create New...

Important Information

We have placed cookies on your device to help make this website better. You can adjust your cookie settings, otherwise we'll assume you're okay to continue.