Welcome to RennTech.org Community, Guest
There are many great features available to you once you register at RennTech.org
You are free to view posts here, but you must log in to reply to existing posts, or to start your own new topic. Like most online communities, there are costs involved to maintain a site like this - so we encourage our members to subscribe or donate. All subscriptions and donations go to the costs operating and maintaining this site. We prefer that guests take part in our community and we offer a lot in return to those willing to join our corner of the Porsche world. This site is 99 percent member supported (less than 1 percent comes from advertising) - so please consider an annual subscription or donation to keep this site running.
Here are some of the features available - once you subscribe RennTech.org
- View Classified Ads
- DIY Tutorials
- Porsche TSB Listings (limited)
- VIN Decoder
- Special Offers
- Paint Codes
- Registry
- Videos System
- View Reviews
- and get rid of this welcome message
It takes just a few minutes to register, and it's quality Porsche information at a low cost.
Contributing Members also get these additional benefits:
(you become a Contributing Member by subscribing or donating money to the operation of this site)
- No ads - advertisements are removed
- Access the Contributors Only Forum
- Contributing Members Only Downloads
- Send attachments with PMs
- All image/file storage limits are substantially increased for all Contributing Members
- Option Codes Lookup
- VIN Option Lookups (limited)


saved4it
-
Posts
19 -
Joined
-
Last visited
Recent Profile Visitors

saved4it's Achievements
Member (1/1)
1
Reputation
-
This weekend I had the chance to use my Durametric to test the variocam solenoids. At idle, engaging either side caused a brief engine shudder and a slight dip in RPMs before returning to idle. I think this means those systems are okay (or intermittently bad, if at all). A real-time data log of misfire counts did not reveal any problems at idle. (0 total) Can anyone recommend a battery of values to data log on a test drive so I can narrow any problems down some? I do not know what many of those values are, but perhaps some would be useful.
-
Yes, there was intermittent flashing. 99% of the time the CEL was on (or off), but 1% of the time it would flash very briefly.
-
Those were the extent of the codes on the motronic section of the Durametric. Can I try to make it happen with the tool somehow? It is NOT the O2 sensor. All those fault codes point to misfires on bank 1. Either there are bad coil packs or the cam position actuator bracket is broken or the cam position sensor actuator is bad. Any cam position faults?
-
Short version: Driving when I got a CEL. Car didn't seem to have a problem that affected driveability. Looked at the dash and the oil pressure gauge was bouncing around. Oil levels fine. Felt a few misfires next day. Limped home. Oil pressure was all over the place, from 3 bar going uphill (2-3k rpm) to normal 4.8 bar (2-3k rpm) downhill. Overall I'd say the oil pressure looks like it's running lower than normal. Once in a while the CEL flashes. Durametric reports: P0300: fault code 507 - Misfire detection (total) P0301: fault code 508 - Misfire cylinder 1 P0302: fault code 509 - Misfire cylinder 2 P0303: fault code 510 - Misfire cylinder 3 So one bank affected. Anything I can try to help diagnose? JPflip suggested the TP solenoid brackets on the affected bank. And I gather I can try the variocam adjustments test on the durametric (although I'd need reference to a thread that tells me what to do and what to look for). Thanks for any help. Otherwise it's into the shop for me! $$
-
Oil Change Instructions
saved4it replied to Loren's topic in DIY Articles - TT/GT2 (996) - Maintenance
Changed my oil today and while draining the turbo cases I found one of the washers to be missing. Put the car back together without the one washer and filled the engine with oil. Later found the washer in the oil pan. Doh! I ordered enough of these washers 900-123-140-30-M17 to last me a few years. My question is can I just empty the turbo cases and install the two new washers without going through the whole oil change? Or should I just wait 5k miles and refresh them at that time? -
Headlight Assembly Bottom Cracked - New or Epoxy?
saved4it replied to saved4it's topic in 996 TT, 996 TT S, 996 GT2
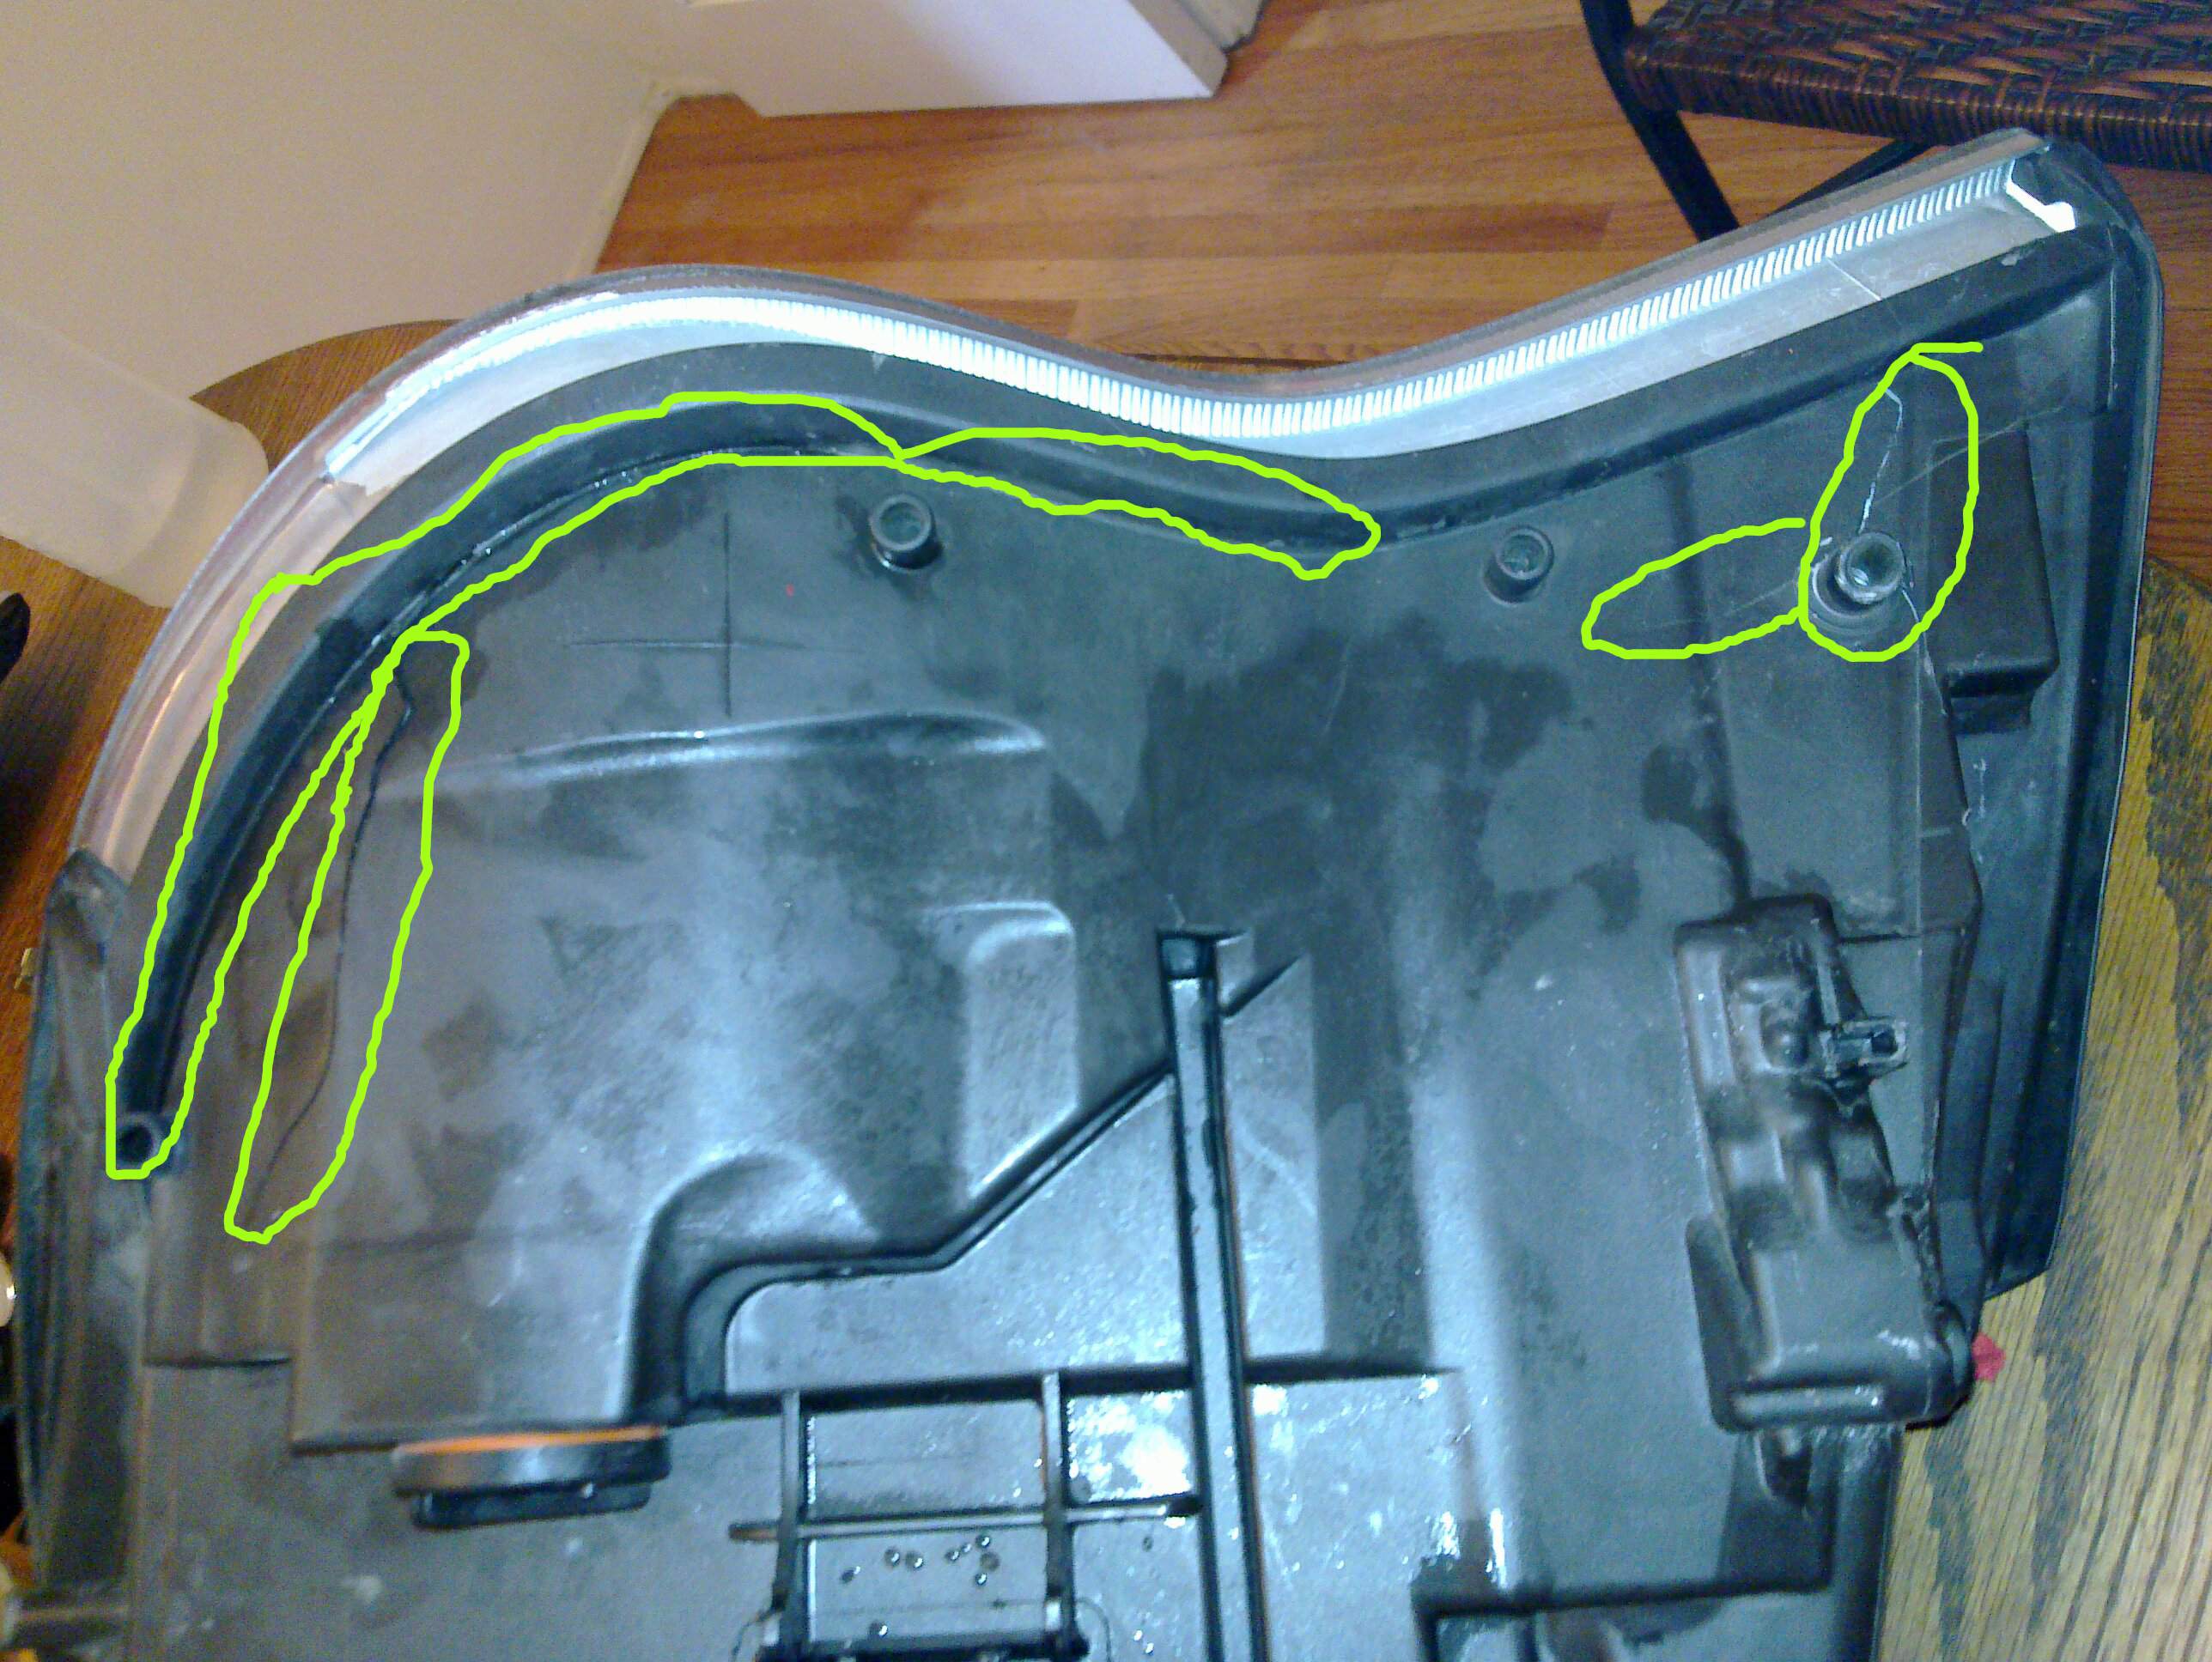
Aha! More information comes in. The gentleman above mentioned an air tube that feeds the light apparatus coming from the front bumper. I noticed that on this same broken headlight that the mounting bracket with this tube was broken. I guess that at some point my bumper also hit the curb or something and broke off this little piece, and perhaps also hit hard enough to crack the plastic on bottom. -
Headlight Assembly Bottom Cracked - New or Epoxy?
saved4it replied to saved4it's topic in 996 TT, 996 TT S, 996 GT2
Thanks for the tip! -
Headlight Assembly Bottom Cracked - New or Epoxy?
saved4it replied to saved4it's topic in 996 TT, 996 TT S, 996 GT2
Thanks for the heads up. I think I'll give the epoxy, polish, and two new chrome pieces a go. $300 vs. $1200 is worth the risk, and I don't think there will be any problem with sealing it up well enough. Anyone have any recommendation on epoxy to try? Or maybe a piece of tape first, then epoxy over it? -
Headlight Assembly Bottom Cracked - New or Epoxy?
saved4it replied to saved4it's topic in 996 TT, 996 TT S, 996 GT2
I think someone didn't use the guide rails when reinstalling the headlamp and forced it down, causing a crack. I guess I have nothing to lose by using some heavy duty epoxy. I'll see if the body shop can do it while it's there getting polished. Thanks =) -
I took out my headlights to get them wetsanded, polished, and clear coated at my local body shop so they look new again. Cleaned them up with a rag first, and realized I had to put them back into the car in order to take off the chrome headlight washer. In the process, I noticed that the bottom of the passenger side lamp assembly was cracked pretty good. Isn't this supposed to be sealed against the air? I mean, a little moisture gets in there and it could get pretty ugly, right? Do you think I could just get these polished and then use a little epoxy to seal the bottom up tight? The inside of the lamp seems clear (although it's hard to know with the outside being a little dull and yellow). The lamps and washers function fine when I put them back into the car. I certainly hope I have an alternative, as a new assembly is $2300!!! If I could just buy the black bottom piece, I'd gladly do that. See the picture where I've circled in yellow the cracks. Thoughts?

-
Just a quick note to say that the seat heater is fixed. It sure is easier to take the seats out and dismantle stuff once you've done it a few times.
-
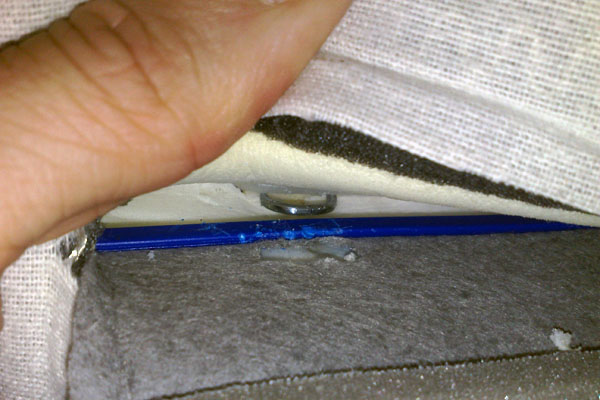
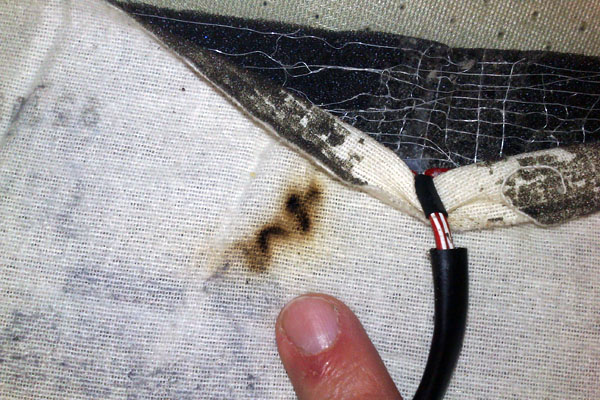
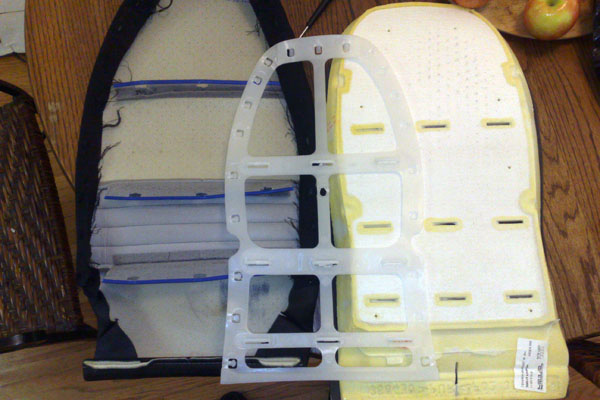
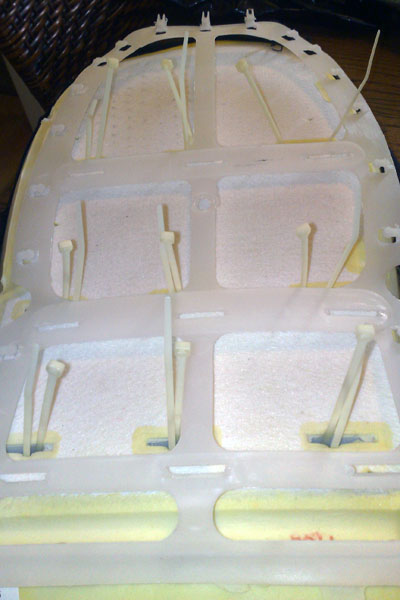
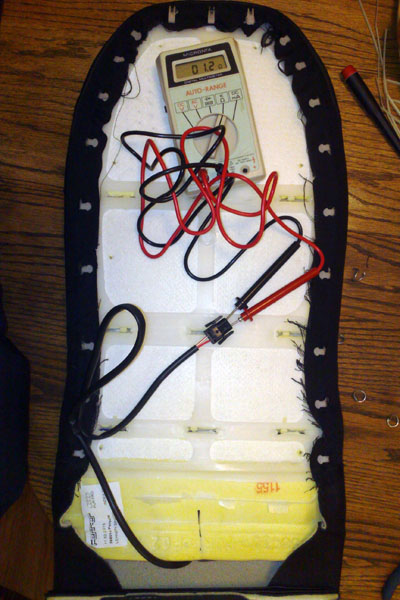
So, here's an update. I managed to swap out the bad seat heater element (see picture with perfect resistance) and rebuild the seat-back upholstery. This took about 90 minutes with lots of care and testing. The seat heater element itself is sandwiched between the leather upholstery and a white plastic backing on which there are hooks to attach the leather upholstery. You have to undo the cloth from these hooks, then undo 9 metal clasps in the middle of the seat-back that also attach the upholstery to the white plastic. These metal clasps were a pain in the butt to remove (see picture). I wound up using a thin screwdriver to separate them and then pliers to wrench them off and squeeze the blue upholstery felt thingy (technical term) off the white plastic mold. Once everything was apart, I noticed a burned section on the heater element (see picture). Bingo! The thing that surprised me with this is how close the heater element is to the upholstery and the driver's body. Wow! I can imagine sweat building up there, possibly contributing to a short. On the other hand, my wife loves how fast my seat warmers work. Trade offs! Swapped in the new heater element (see picture), which tested some resistance. The trick was to get that upholstery back on, without undue wrenching to the heater element (didn't want to screw up the new one by bending wires). I decided to upgrade to the high-tech plastic zip-ties (see picture). Positive benefit: a 1 gram weight savings. I think I'll feel that! Everything is back together and the seat-back still tests 1 ohm or so. Daylight gone, so sometime this week I'll take the seat out and install it. Wish me luck, although I feel I have this conquered.
-
Sweet, Beverly Hills Porsche had the part and, because it was a special order that no-one ever picked up, they let me buy it for $95 (better than Pelican!). I will post some pictures later on how the upholstery comes off the old element and goes into the new one. It does not seem too hard, but there are little wire clasps that might need to be pried off with a pair of pliers. More later!
-
Don't understand what you mean. I already tested wires 1&2 on the heater elements and the backrest one didn't give a reading, therefore it is bad.
-
Yeah, going to call McKenna tomorrow to see if they have it in stock. Otherwise probably an order in to Pelican. I will have to take out the seats again anyway to reinsert the cables back into the retaining clips along the side of the seats (forgot, but no biggy since I am not driving anywhere). Yeah your wiring diagram confirms pins 5 and 9 to test for voltage and then 5 and 3 to test for resistance overall. Is that little bridge between the heating elements the thermostat? Is that what gives the resistance of 1 Ohm?