Welcome to RennTech.org Community, Guest
There are many great features available to you once you register at RennTech.org
You are free to view posts here, but you must log in to reply to existing posts, or to start your own new topic. Like most online communities, there are costs involved to maintain a site like this - so we encourage our members to subscribe or donate. All subscriptions and donations go to the costs operating and maintaining this site. We prefer that guests take part in our community and we offer a lot in return to those willing to join our corner of the Porsche world. This site is 99 percent member supported (less than 1 percent comes from advertising) - so please consider an annual subscription or donation to keep this site running.
Here are some of the features available - once you subscribe RennTech.org
- View Classified Ads
- DIY Tutorials
- Porsche TSB Listings (limited)
- VIN Decoder
- Special Offers
- Paint Codes
- Registry
- Videos System
- View Reviews
- and get rid of this welcome message
It takes just a few minutes to register, and it's quality Porsche information at a low cost.
Contributing Members also get these additional benefits:
(you become a Contributing Member by subscribing or donating money to the operation of this site)
- No ads - advertisements are removed
- Access the Contributors Only Forum
- Contributing Members Only Downloads
- Send attachments with PMs
- All image/file storage limits are substantially increased for all Contributing Members
- Option Codes Lookup
- VIN Option Lookups (limited)


IanB
-
Posts
5 -
Joined
-
Last visited
About IanB

IanB's Achievements
Member (1/1)
0
Reputation
-

Convertible Top Won't Lock
IanB replied to number9's topic in 996 Series (Carrera, Carrera 4, Carrera 4S, Targa)
You say the latch doesn't seem to be cracked or damaged in anyway. The latch itself is metal so hopefully is OK, however the latch should have a plastic cover that fits neatly over it. If this plastic cover is damaged or missing then the roof will not lock as it won't activate the microswitch. Check to see if the plastic cover is OK. If the problem is the plastic cover then it is a cheap and easy fix. The plastic cover part number is 996 561 787 00 as found in Porsche UD 248 Katalog 2010 (illustration 811-05 part #12). I have had the same problem and a new plastic cover sorted it out. Good luck. -
How To Lower Top On 996
IanB replied to pseasea's topic in 996 Series (Carrera, Carrera 4, Carrera 4S, Targa)
The little piece of plastic covering the hook does matter. I had the same problem with mine when it became cracked and worked loose. A little spot of super glue sorted it out or if you need a new one the part number is 996-561-787-00. -
Stupidly Overfilled Coolant Tank.
IanB replied to JamesD's topic in 996 Series (Carrera, Carrera 4, Carrera 4S, Targa)
Quick fixes when the engine has cooled down: Open the coolant reservoir cap and remove some of the coolant with a clean syringe or baster like ones used for battery top up or cooking meat. Use a clean lint free cloth to soak up the coolant and squeeze out the cloth and repeat until the level is OK. Check the relief valve to the left and forward of the coolant filler cap (looks like a black filler cap with a spring clip and plunger arrangement on the top). If the system is under pressure the plunger may be raised (check by pressing down, it will feel springy). Move the metal clip from the horizontal to vertical position above the plunger so the bottom of the clip is resting on top of the cap and the plunger is raised. This physically holds the relief valve open. After driving for a couple of hours and keeping an eye on the temperature gauge the level will probably have dropped and the system will have had a chance to purge any trapped air. Don't forget to reset the relief valve clip to the normal horizontal operating position when you are done. -
-
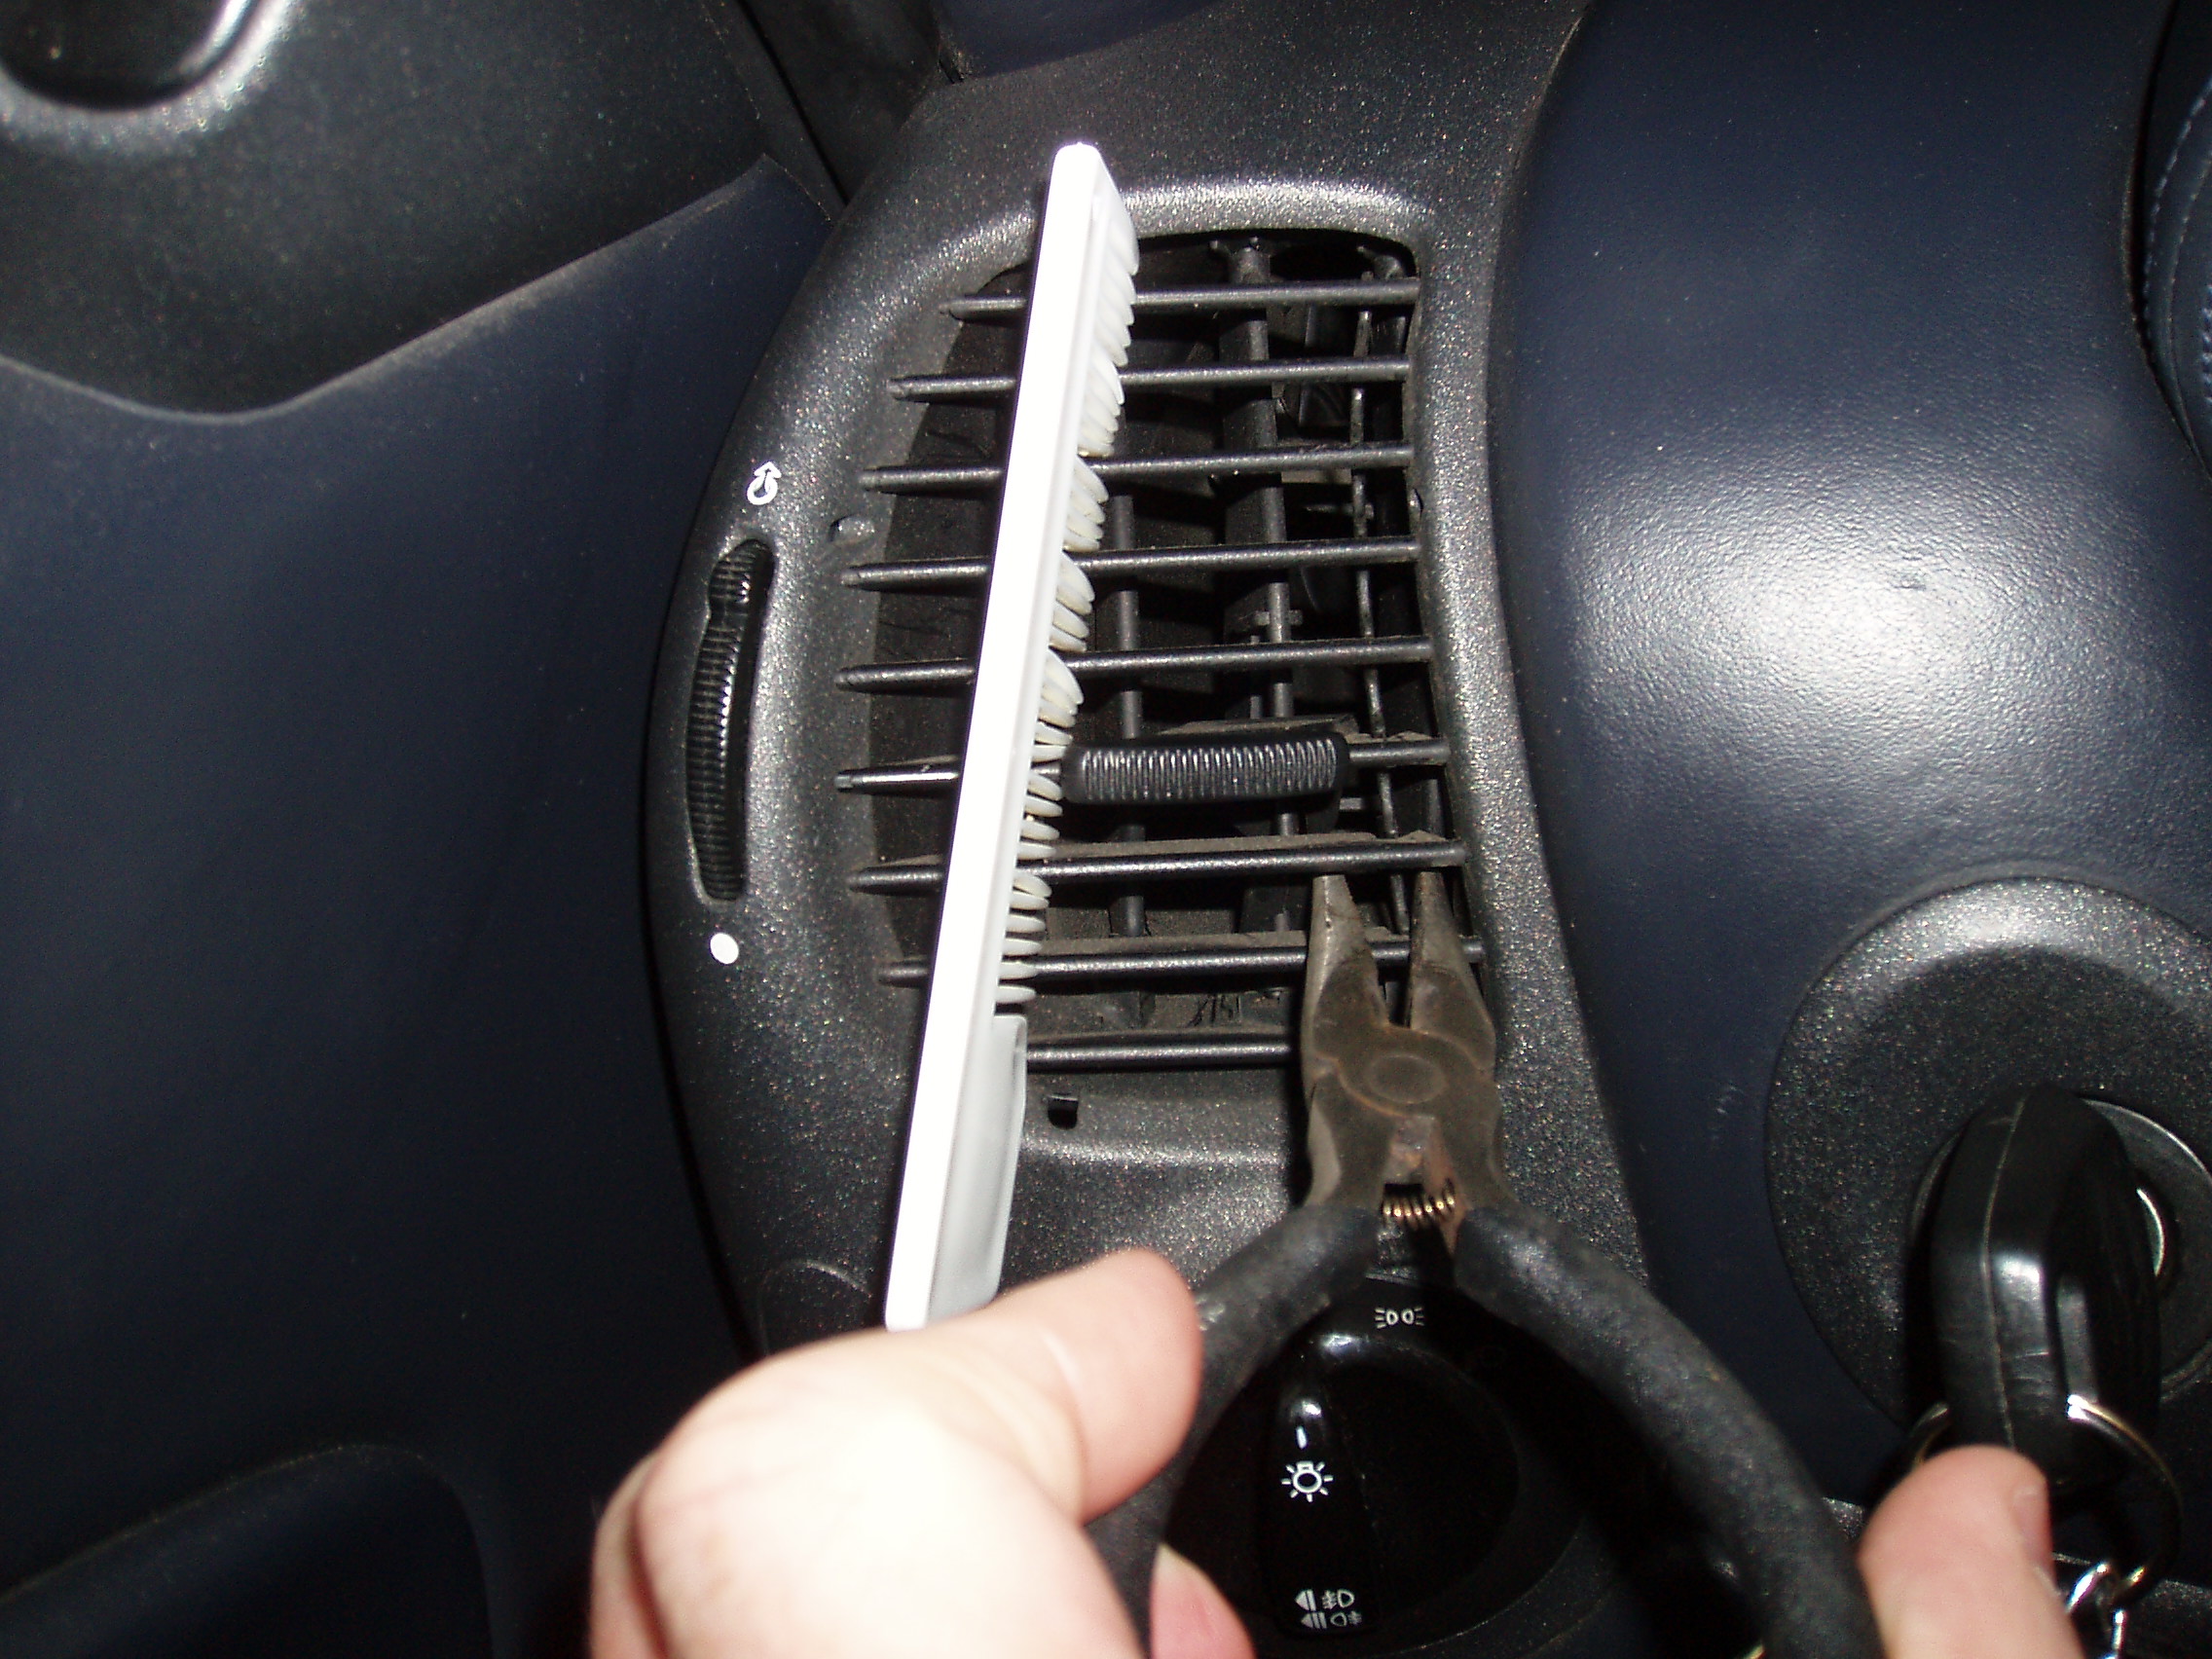
After trying to attach a GPS holder into the side air vent the horizontal slats became detached from the air vent control bar. After no success trying to clip the slats back onto the control bar due to the slats moving freely and being at different angles and spacings I came up with the following process to quickly line up the slats and attach them back to the control bar: Move horizontal slat control to downward position. Push a small flexible hair comb into the horizontal slats checking that they are evenly spaced. Move the comb to align all of the slats with all of the the clips on the control bar. Grasp the control bar with a pair of thin long nose pliers and pull the control bar to clip into the horizontal slats. This is easiest done starting with the bottom slat and working your way to the top slat ensuring that each one clicks into place. Remove the comb and check vent operation.