Welcome to RennTech.org Community, Guest
There are many great features available to you once you register at RennTech.org
You are free to view posts here, but you must log in to reply to existing posts, or to start your own new topic. Like most online communities, there are costs involved to maintain a site like this - so we encourage our members to donate. All donations go to the costs operating and maintaining this site. We prefer that guests take part in our community and we offer a lot in return to those willing to join our corner of the Porsche world. This site is 99 percent member supported (less than 1 percent comes from advertising) - so please consider an annual donation to keep this site running.
Here are some of the features available - once you register at RennTech.org
- View Classified Ads
- DIY Tutorials
- Porsche TSB Listings (limited)
- VIN Decoder
- Special Offers
-
OBD II P-Codes - Paint Codes
- Registry
- Videos System
- View Reviews
- and get rid of this welcome message
It takes just a few minutes to register, and it's FREE
Contributing Members also get these additional benefits:
(you become a Contributing Member by donating money to the operation of this site)
- No ads - advertisements are removed
- Access the Contributors Only Forum
- Contributing Members Only Downloads
- Send attachments with PMs
- All image/file storage limits are substantially increased for all Contributing Members
- Option Codes Lookup
- VIN Option Lookups (limited)


frisbee91
-
Posts
47 -
Joined
-
Last visited
Content Type
Profiles
Events
Forums
External Paint Colors
Downloads
Tutorials
Links Directory
Collections
Store
Posts posted by frisbee91
-
-
Wow, that's some serious subwoofer action for a Cabriolet. What head unit did you put in the dash? Do you have any pictures of it installed?
Thanks for sharing.
-
Donation Sent. I've used renntech DIY's for multiple projects, including Spark plugs, Cab top modification, and more. Now to read those TSB's ...
-
I need to get my rear window stitched on my 99 cab. Looking for a referral in Tampa to do the job...
Not sure about Florida, but my local shop in Delaware wanted $800 to stitch in a new window in my convertible top, and $1500 to put on a new top from GAHH. I decided to fix it myself. My writeup (with pics) can be found in the 996 DIY section.
-
This is the support topic for the DIY Tutorial Updating your standard wheel hub emblems. Please post here if you have any questions or feedback.
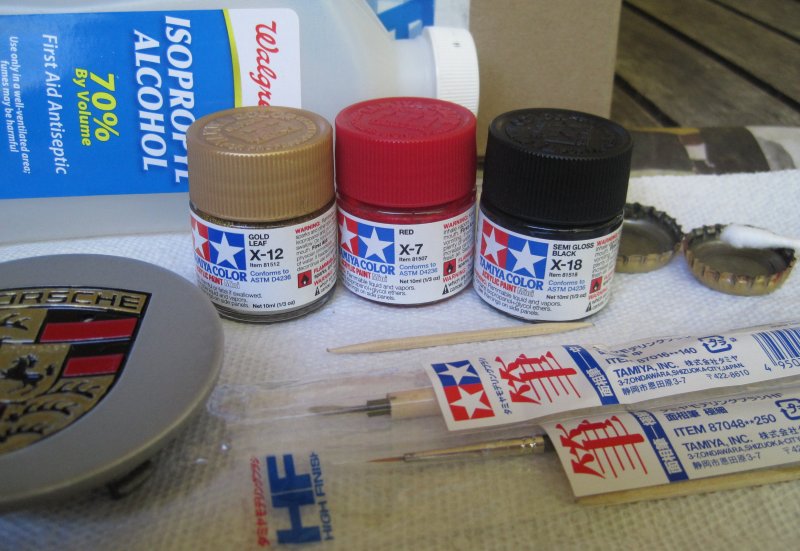
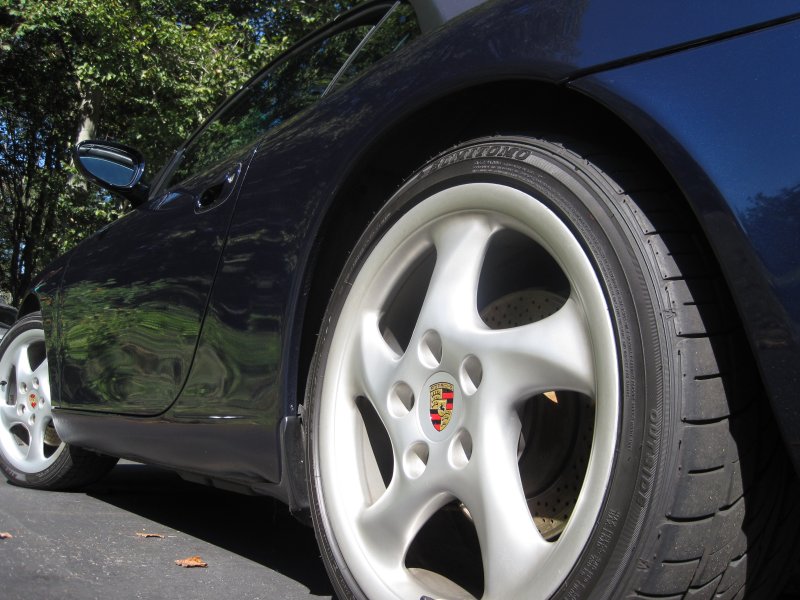
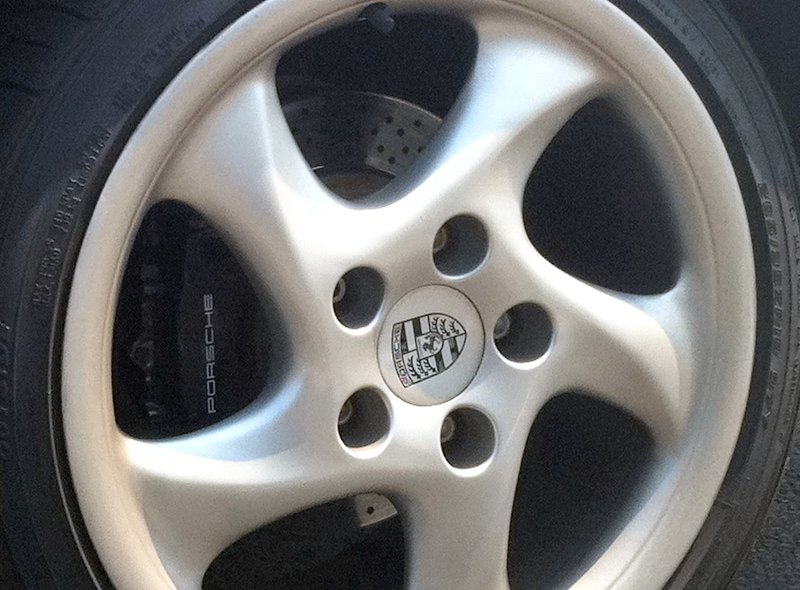
Nice DIY! Glad I found it. My black and silver concave plastic wheel center caps were peeling in places, so I decided to paint them. (I have a '99 996) I ordered the paints and brushes directly from TamiyaUSA (http://www.tamiyausa.com/product/category.php?sub-id=60100)
My order:
Acrylic Mini X-18Semi Gl Black - 10ml Bottle Item# 81518 $2.30
Acrylic Mini X-7 Red - 10ml Bottle Item# 81507 $2.30
Acrylic Mini X-12 Gold Leaf - 10ml Bottle Item# 81512 $2.30
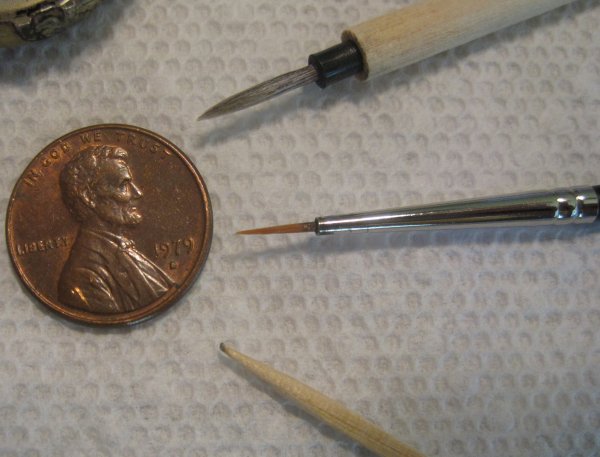
Pointed Brush Med - DC716 Item# 87016 $2.50
High Finish Pointed Brush - (Ultra Fine) Item# 87048 $5.25
Shipping: $6.00
I used the pointed medium brush for the flat areas, and the ultra fine brush AND a toothpick for the letters and detail areas, like the horse legs. If you are careful with the gold and red, you can use the black just for touch-up. I only painted black where it was necessary, and left the factory black in the other areas. A magnifying glass helped, too. I put a small amount of paint in a beer bottle cap for dipping, and some isopropyl alcohol in a second cap to clean brushes. I thinned the black paint with a few drops of isopropyl alcohol also, but not the gold or red. You can also clean the brushes with water.
If you mess up, you can clean up mistakes using a clean toothpick or a q-tip. It's best to do the gold and red, then let it dry overnight before doing the black touch-up work. I also did one cap start to finish before doing the other three. The second set came out better, since I had practice.
I let the black dry overnight, then did 3 coats of clearcoat spray at 20 minute intervals.
Finished painted wheel center cap:

Paints used:
Tamiya Med Pointed Brush 86016, Ultra-Fine Brush 87048, and a toothpick:
Finished wheel center crests:
Before painting:
-
I fixed mine myself...
-
Here's what I did to fix my cab window that was coming unglued...
-
This is a great simple modification. Now I can put up my convertible top as a roll through a parking lot, or down my driveway, or retract it as I drive (slowly) away.
I like the fact that I need to pull up the e-brake one click to make this work. An extra safety against inadvertant top opening at high speed.
Great stuff! :)
-
DIY Convertible Top Window Repair
This write-up describes a multi-step sewing and gluing process to repair a plastic window separating from the convertible top. See attached 9- page PDF file. Window_Repair_DIY.pdf
-
Author
-
Category
-
Submitted09/01/2010 01:30 PM
-
Updated03/17/2017 05:06 AM
-
-
Did the "Remote Range TSB" fix last night ('99 996 C2 Cab). Everything was exactly as described in the DIY. Shortened the white wire to 130mm, and my range went from about 8' to about 20', but this was with the car inside my garage. I'll try the range again once it's outside. Perhaps I need a new battery in the remote, too. Thanks for the tutorial!
-
Thanks for posting this! :thankyou: The weird size lighter socket on my '99 996 has been bugging me. Got the parts and did the install. Even with the excellent instructions, getting the old lighter out is still tricky.
One additional tip: When installing the new lighter, insert the clear ring into the dash trim ALL THE WAY before installing the metal cylinder assembly. If you click the clear ring and the metal cylinder together first, it makes the installation harder.
Also, I added a cigarette lighter flashlight, which is handy, and I think looks good. Got mine on Amazon, but they are available several places. Now it fits properly, as does my cell phone charger.
-
Good thing about order new visors, is that now you can get rid of the yellow warnings fixed on the visors. Get two new ones without the ugly warning notices, makes the interior look much cleaner.
When I did a repair on my visors, I was able to remove the scratched-up yellow airbag warning lables with a bit of steel wool (brillo soap pad), some isopropyl alcohol, and a bit of warm water. They look much better now. Of course, new visor mirrors would have been simpler. :)
-
Does anyone know where I can find the child seat anchor in the parcel shelf?
I've read on herre it exists and you need to cut the carpet, I'd just hate to butcher it trying to find it.
A picture or diagram would be great.
Here is a LONG threadon the subject of Child seats in the 996. Look at post #127 for the cutout.
-
Great, that's exactly what I need! BTW, did you have to transfer your old mirror to the new assembly? If so, what is difficult?
I'm not sure, since I didn't order these. I did a "repair" on my broken mirror flap. I epoxy-glued the broken plastic pieces and spring clips that hold the flap closed. The repair lasted about 6 months, then they broke again, so I wouldn't recommend it. Now, I have gone with velcro dots. I'll probably pick up these replacement parts at some point.
If I recall, removing the mirror was simple once you got the plastic housing removed from the vinyl visor. Removing the housing was a bit tricky. You need to know where to place your screwdriver or spatula to depress the removal tabs correctly.
Search is your friend. Here are some links:
Visor Removal (hint: you just pull it off)
Good luck!
-
Thanks for the reply. Did you order just the visor mirrors or the complete visors? What are the part #'s?
Here's one source. They also have a cheaper one with no illumination.
http://www.suncoastparts.com/product/euromirro.html?Category_Code=POTE996IN
(note: I have no affilitation with these guys. I'm just a customer)
I'm sure other places carry this as well.
-
Is the clutch height adjustable on my 1999 996 cabriolet or do I have to replace the clutch. If so how much would you say a clutch costs on this baby.
I'm in the same boat. My clutch engages near the top of the clutch pedal stroke. I've done some searching on this board and others, and it doesn't seem like it is adjustable. I'm considering a clutch replacement, but it's running fine right now, with no symptoms other than the pedal height at engagement. I've got a '99 996 with 50k miles.
If I recall, I saw some posts estimating replacement costs at indy shops at around $2000. (do a search for more accurate numbers.) But, there's the additional thought of "while you're in there", you might also replace the RMS (rear main seal) and the IMS bearing, which adds some additional cost.
Of course, you could also do it yourself... Do a search for some info on that.
Anyone else have thoughts on the clutch height?
-
 1
1
-
-
... I tried the Daren Fister mod and loved the sound but didn’t like the small loss in low end power ...
Could you elaborate on the small loss in low end power with the Fister exhaust? How did it manifest itself? I don't have Variocam issues, but am considering the Fister exhaust for my '99 996.
-
did you keep the CD storage unit? I may be interested in it to replace the .... wait for it... "cassette storage" in my recently purchased 1998 Row 996 Carrera
Hermann.
I replaced by cassette storage unit with an open tray from bumperplugs.com. More details with pics at
http://forums.rennlist.com/rennforums/996-forum/562630-99-cabriolet-first-post.html#post7493684
-
read on some post about fix for knobs instead of buying new- get some black plastic dip from hardware store used to dip tools, etc. take off knobs and clean them well, make holder out of popsicle or other type stick and suspend knob just to end in plastic for a few seconds- let it dry- worked like a champ on my knobs.
Another quick fix I have done for sticky rubber radio knobs is to pull off the knobs, clean them with gentle soap and water, and let them dry completely. Then, I tossed them in a bag with a little talc (a.k.a. talcum powder or baby powder) and shook the bag to coat evenly. I then brushed off the excess with a soft brush and reinstalled. The talc sticks to the knobs and gives them a matte black finish, but not sticky. The matte black look is very different, but it works fine. Seems to hold up well.
-
Try 6704
or
6702
Thanks for the help. 6705 ended up being the correct code.
-
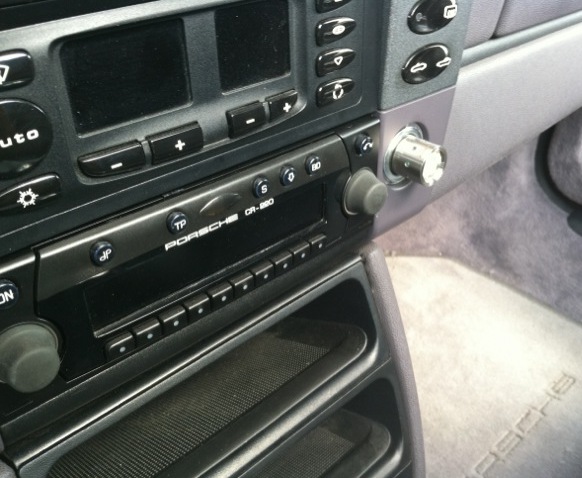
The CR-220 in my '99 996 C2 Cabriolet has peeling buttons. A friend gave me his old one in mint condition, but alas, no code. Here's the info from the sticker on the side of the unit:
Type: CR-220
Model Number: BE 4362
Serial No: 15050296
EC: 116
Thanks much for any help you can provide!

Interest in a simple non-MOST iPod connector?
in 996 Series (Carrera, Carrera 4, Carrera 4S, Targa)
Posted · Edited by frisbee91
I voted "maybe". The solutions that exist seem to require me to disable my 6-disc trunk-mounted CD changer. I still use that, so I wouldn't want to get rid of it. I'd pay probably pay $40 or $50 for an adapter that didn't disable my CD changer.