Welcome to RennTech.org Community, Guest
There are many great features available to you once you register at RennTech.org
You are free to view posts here, but you must log in to reply to existing posts, or to start your own new topic. Like most online communities, there are costs involved to maintain a site like this - so we encourage our members to donate. All donations go to the costs operating and maintaining this site. We prefer that guests take part in our community and we offer a lot in return to those willing to join our corner of the Porsche world. This site is 99 percent member supported (less than 1 percent comes from advertising) - so please consider an annual donation to keep this site running.
Here are some of the features available - once you register at RennTech.org
- View Classified Ads
- DIY Tutorials
- Porsche TSB Listings (limited)
- VIN Decoder
- Special Offers
-
OBD II P-Codes - Paint Codes
- Registry
- Videos System
- View Reviews
- and get rid of this welcome message
It takes just a few minutes to register, and it's FREE
Contributing Members also get these additional benefits:
(you become a Contributing Member by donating money to the operation of this site)
- No ads - advertisements are removed
- Access the Contributors Only Forum
- Contributing Members Only Downloads
- Send attachments with PMs
- All image/file storage limits are substantially increased for all Contributing Members
- Option Codes Lookup
- VIN Option Lookups (limited)

-0001-0001.png.112c13ee97acfad0cb1e70d195cc9a0e.png)
Loren
-
Posts
37,335 -
Joined
-
Days Won
535
Content Type
Profiles
Events
Forums
External Paint Colors
Downloads
Tutorials
Links Directory
Collections
Store
Posts posted by Loren
-
-
That is correct.
Where the rollbar support goes behind the seats is different. The coupe has a greater distance to the rear mount points (as I recall).
-
You will need to remove the original additional brake light. Then insert:
996 504 981 01 G2X Cover trim for installation opening of additional brake light (prime coated). There is a note in the C4S Aerokit instructions on this that says:
6 Install additional brake light cover trim.6.1 Only for vehicles as of model year '04.
6.1.1 Clip in cover trim for installation opening of additional brake light.
6.2 Only for vehicles up to model year '04
6.2.1 Cut off all lugs (A) of the cover trim.
6.2.2 Apply adhesive compound (6) in the border area of the installation opening for additional brake light and insert cover trim.
Note: Select the size of the adhesive bead so that after pressing on the cover trim, any remaining adhesive is not visible from the outside.
6.2.3 Fasten cover trim with adhesive tape.
-
Normal. The oil drains down to the sump when the engine is stopped so it takes a few seconds to get it back to the valve lifters. Yeah, it likely does cause a little wear - but you will also likely get 150,000 miles on a high performance engine. Only Porsche can do that!
-
Yes, and my price list is a year old :(That is a steep price for a piece of plastic pipe! Must be all those custom bends
Are you talking about item 5 (996 504 129 01)? Also, don't forget to look for missing plastic rivets (item 6) and plastic nuts (item 2).Do you know the partnumber for the rear - most plastic belly pan?
-
Sounds like item 10 (996 423 113 05) in the image below. If it is further forward then it is item 9 (996 423 109 10). Each line is about $75 - $85 each (retail).Yes, as many of you suspected there is a clutch fluid line leak. I did not take a picture yet but the leak is just in front of the drivers side rear jack point. It is right where the line makes a turn to go to the tranny. The hole is not visable by my naked eye but when under pressure a nice spray is visable. After raising the car it was pretty obvious where the leak was, there was a crack in the under belly plastic panel right under the clutch line and the clutch line was somewhat crushed above this. I noticed the crack previously but did not think much of it.My next question (and I will ask the parts guy as well), is what do I do? Is there a line repair kit or do I just replace the line?
Thanks again, Chris
-
White gas is gasoline without the additives in it. VERY dangerous to use.
I use citrus based cleaners like P21S Total Auto Wash or Wurth Citrus Degreaser. No matter how you look at it - a messy job.
-
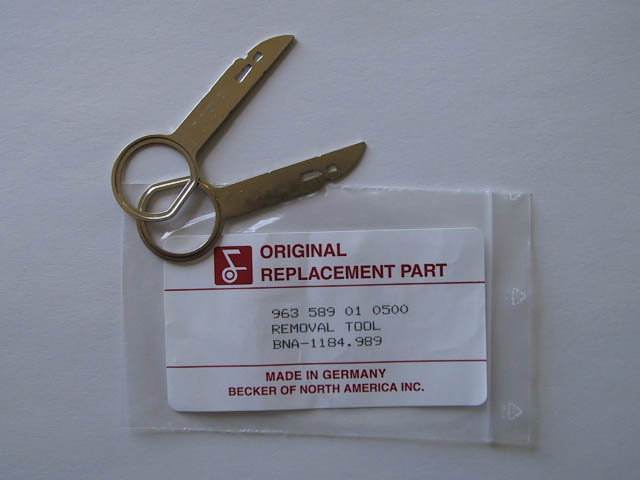
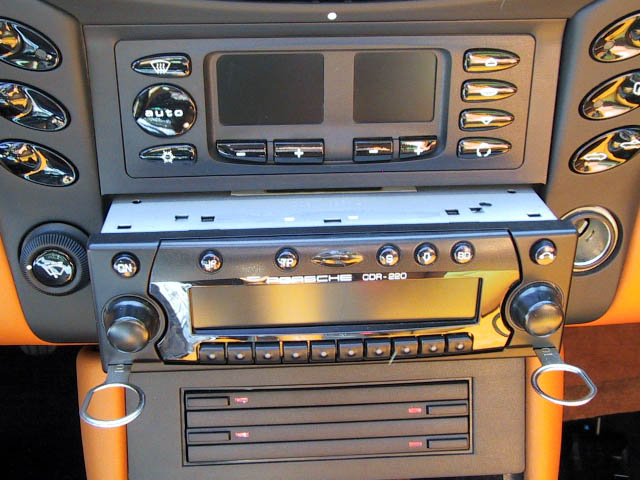
I'm pretty sure the CD22 is the same as the other Becker radios. You will need the becker radio removal keys (also work on most most Mercedes). About 2 USD here.
Slide them in until they lock and then pull the radio out.
You will need to press the tabs on the sides of the radio to remove the keys.
(photos courtesy of Tom Morris)
-
Correct.So the muffler is only used in the 27-42 mph window? -
Sounds like your clutch has air in the line or the slave cylinder is leaking. Check the brake fluid level as the clutch and brakes share the same reservoir. There is a clutch/brake bleeding procedure here in the DIY section.
-
RS rear calipers
993 352 425 80 Left Rear Caliper
993 352 426 80 Right Rear Caliper
993 559 241 02 70C 'RS' Script (in Rally Black)
-
Should be pretty straightforward (and messy).
The oil to to crankcase bolts only get 7.5 ft/lbs (10 Nm) so do not overtighten them.Also Porsche says use only Drei Bond Silikon - type 1209 -- within 5 minutes of applying.
-
Well, my friends X50 TT exhaust has 996 111 987 76 written on it (thanks Joe). So the GT2 uses 996 111 987 72 and a standard TT uses 996 111 027 75. I still don't know the difference between them or why the 76 is not in the parts list. Unless the 72 has been upgraded to the 76?
Perhaps the next parts list will show the change?
-
If it smells sweet and tastes extremely bitter - then it is coolant.It has the consistency of water.......but doesn't taste like water. -
The manual doesn't say but I think the bolts have to be removed and the solenoid will slide through the valve cover when you take it off (after disconnections the wiring cable).Does the manual state the variocam solenoid must be removed? I believe it resides in the spot to the right of bolt number 19.
Sounds like your are talking about the oil extraction pump. I'm not sure - I don't think so. If you do take it off note the orientation as is has markings for correct rotation (markings should face the crankcase).Also, when looking at the vavle cover from the front side between bolts 18 and 19 there is a circular plate, with four bolts in it, and then four smaller hex key bolts within a smaller radius circle. Do any of these bolts need to be removed in order for the valve cover to be removed? -
According to the ODB II Manual the potential causes for a P1123 are:
- Fuel pressure too high.
- Fuel injector leaking.
- EVAP canister purge valve open.
Other possible causes (per past experiences) are:
Water in the air cleaner housing.
Crack in the oil filler hose.
-
Well, if you can't fish it out then you will have to remove the valve cover, clean the sealing surface, apply new sealant (Drei Bond silicone - Type 1209 and loctite 5900). Porsche also recommends that you replace the microencapsulated self-sealing bolt at location 3 (in the image below) (Part number 900.378.163.09 (M6 x 16)). Sealant goes around the edge of the cover AND also a small amount on each bearing saddle. Be very careful torquing these bolts down - only 10 ft/lbs.Loren,Engine was warmed up. Have a problem now. One part of plastic broke and fell behind the valve cover.
I was planning only to replace the o-rings but I believe now I must remove the valve cover and re-seal to retrieve the pice from the tube.
Can you help me with the correct procedure for removing the valve cover?
The bolts look straight forward to me, but I am not certain about the chain and cam area where the variocam is written.
I called the mechanic from the dealership where I ordered the parts, but he is 3.5 hours from me, and has never had to remove a valve cover. I don't think there are so many Boxsters running around where they are. He said whenver something goes wrong he simply replaces the engine. He offered to let me look through his manual, but I was hoping to find help on-line before having to make a 3.5 hour drive.
John
BTW... Porsche also has a special tool for removing the tubes that is like an tailpipe expander. (see image below).
-
 1
1
-
-
So, would that be a P1124? or are you getting other codes too?
-
Well, 996 111 987 76 is not a valid part number in my Sept 2004 parts list. As I said the muffler listed for the GT2 only says GT2 next to it - no mention of X50. I've got a friend with an 2004 X50 I'll see if I can get him to crawl under the car and read the part number.
-
There is nothing in the parts list that signifies the GT2 muffler is used for X50. The GT2 muffler is a different part number but I do not know the differences.
Oh... and my 1 year old price list shows it at $2869.42 not the $7000 he mentions. If it came off a GT2 then the part number should be 996 111 987 72.
-
In the service manual they actually suggest warming the engine first.I think I know why the black plastic finger tubes are replaced along with the rubber o-rings. When I removed the ones from my car, they cracked :angry: so re-using them might not be an option unless you are more skilled than I am when removing them from the engine.Note -For disassembly "Removing oil protection tube", the cylinder head cover in the vicinity of the oilprotection tube must be heated up. Two different methods can be used for this:
First method: Heat cylinder head cover in the area of the oil protection tube using an industrial hot-air gun.
Second method: Warm engine up to operating temperature.
The second method is preferable if no further assembly work has to be performed, e.g. sealing cylinder head cover, replacing tensioning element (VarioCam)or replacing the flat-base tappets, etc.
-
Most common are the center armrest console and the front trunk.
-
Should be fixed now.The link to the owners manual dosent work!!!! -
IMHO no. I think you want a suspension expert to really look through the car for any other (hidden) damage. If that cross memember is damaged then you could have other damage including several cracked or nearly sheared bolts on other suspension components. I think at least a partial disassembly would be needed to ascertain the damage.Loren, the second page of the rear suspension view shows the cross member brace (#6) and that is what is bent. Is that something that could bend without other things bending? -
Replacing is the front fender (wing) is not too difficult. The rear panel from behind the door all the way back to the bumper is one piece welded under the rear side window. If you damaged the rocker panel (side skirt) then that could be replaced also - but any rear quarter damage means body work.
Do you have a pic or two?
Another PSE rattle
in 996 Series (Carrera, Carrera 4, Carrera 4S, Targa)
Posted
If there is a rattle then it is likely a broken weld inside the muffler (in my experience). You might be able to find a used 3.4 (original) PSE muffler at wrecking yard or on eBay. If you can't then you will need to replace both mufflers with the newer type.