Welcome to RennTech.org Community, Guest
There are many great features available to you once you register at RennTech.org
You are free to view posts here, but you must log in to reply to existing posts, or to start your own new topic. Like most online communities, there are costs involved to maintain a site like this - so we encourage our members to donate. All donations go to the costs operating and maintaining this site. We prefer that guests take part in our community and we offer a lot in return to those willing to join our corner of the Porsche world. This site is 99 percent member supported (less than 1 percent comes from advertising) - so please consider an annual donation to keep this site running.
Here are some of the features available - once you register at RennTech.org
- View Classified Ads
- DIY Tutorials
- Porsche TSB Listings (limited)
- VIN Decoder
- Special Offers
-
OBD II P-Codes - Paint Codes
- Registry
- Videos System
- View Reviews
- and get rid of this welcome message
It takes just a few minutes to register, and it's FREE
Contributing Members also get these additional benefits:
(you become a Contributing Member by donating money to the operation of this site)
- No ads - advertisements are removed
- Access the Contributors Only Forum
- Contributing Members Only Downloads
- Send attachments with PMs
- All image/file storage limits are substantially increased for all Contributing Members
- Option Codes Lookup
- VIN Option Lookups (limited)


Charlestonboxster
-
Posts
87 -
Joined
-
Last visited
Content Type
Profiles
Events
Forums
External Paint Colors
Downloads
Tutorials
Links Directory
Collections
Classifieds
Store
Everything posted by Charlestonboxster
-
Hello, Had coolant level problem, searched appropriate threads, took apart trunk liner and wood, sure enough... coolant leak due to cracked tank. Tool pants pictures helped a lot. During my search, noticed a towing connection jury rigged to wiring, and the following piece that appears to be a towing hitch mount?: Webasto 986-504-109-00 I removed licence plate and sure enough, there is a hole there with a female threaded insert for what I guess is a tow hitch. Searched various sites, could not locate above part, can anyone confirm it is indeed a towing mount? Was this a factory option or add on? Where i can buy ball attachement? Thanks a bunch, Tony
-
DIY Subwoofer thread
Charlestonboxster replied to ninpo4me's topic in 986 Series (Boxster, Boxster S)
Keep us posted! - Standard Black carpeting easy to order at partsexpress (as well as tons of speaker items). This is not factory style carpeting. - OEM style carpeting: Indeed, as indicated above. A local car and boat upholstery shop had a catalog of German factory replacement carpet, and they had the exact match for my 98 Boxster Red, $88 for 3'x6' piece. -I am considering doing a footwell sub too, rather than buying one from Jamey at Rawlings Audio in LA ($600-$800, 8", custom molded, ready to bolt in, with factory carpet.) Only because I enjoy it as a hobby, otherwise I would buy ready made, as if I go fiberglass custom mold, it will take me 15-20 hours of work, and stil cost about $300 (parts, driver and carpet). The sub aspect of Boxsters is an important topic, hopefully this thread will help everyone with knowing what the various options and costs are. Tony -
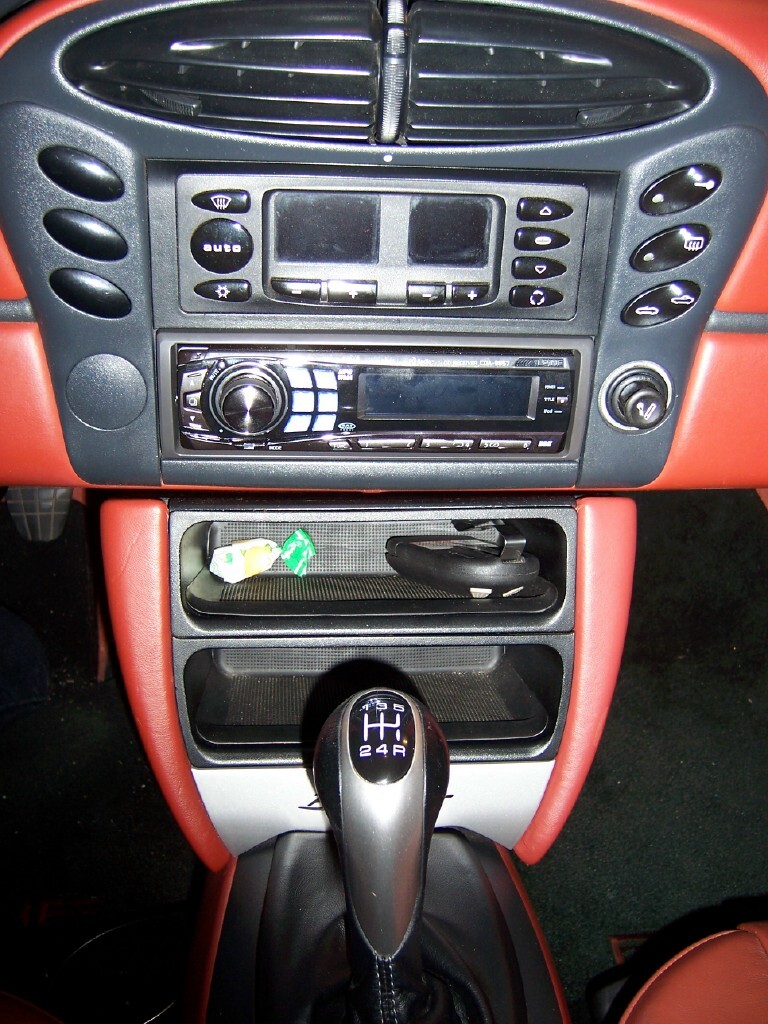
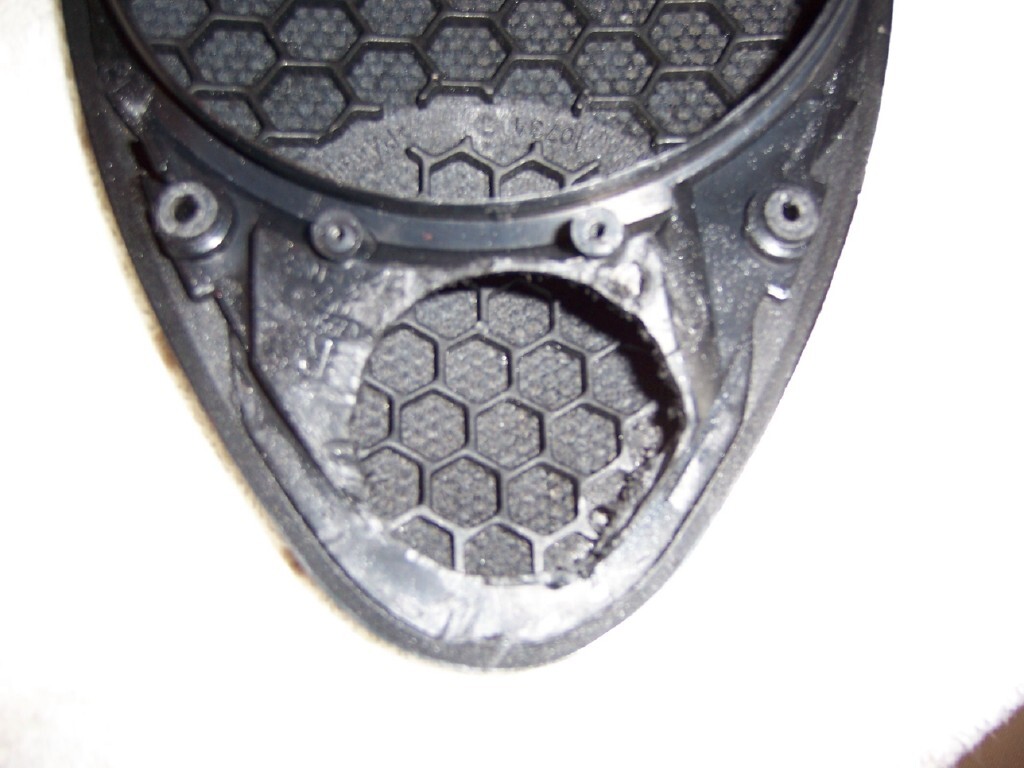
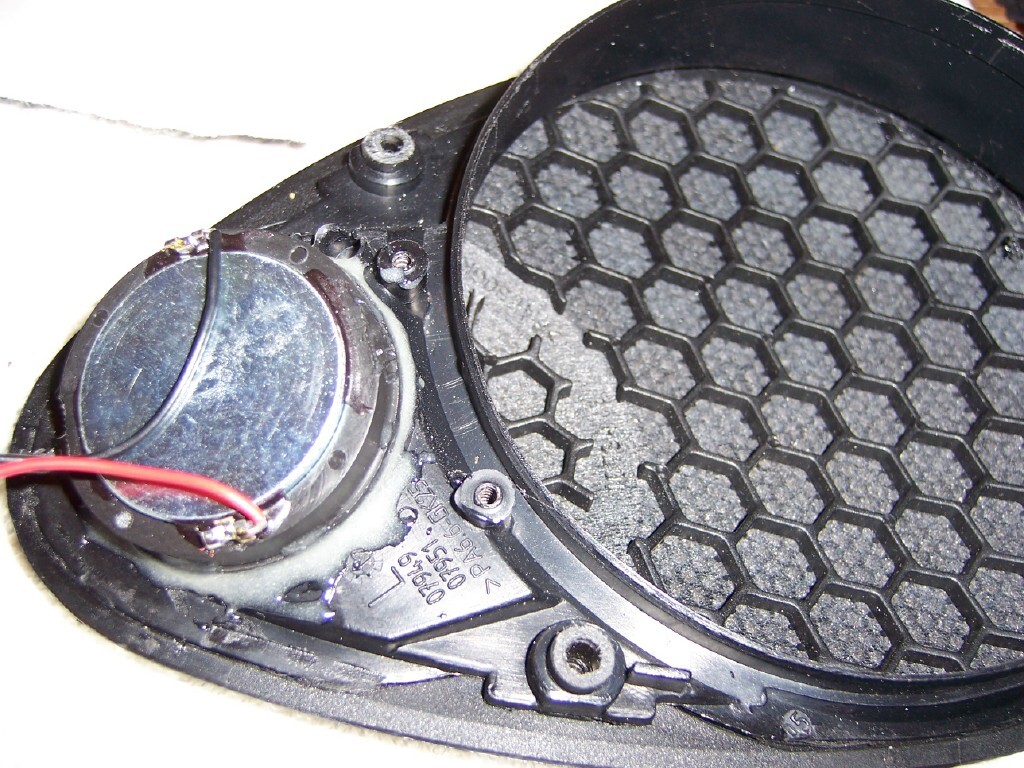
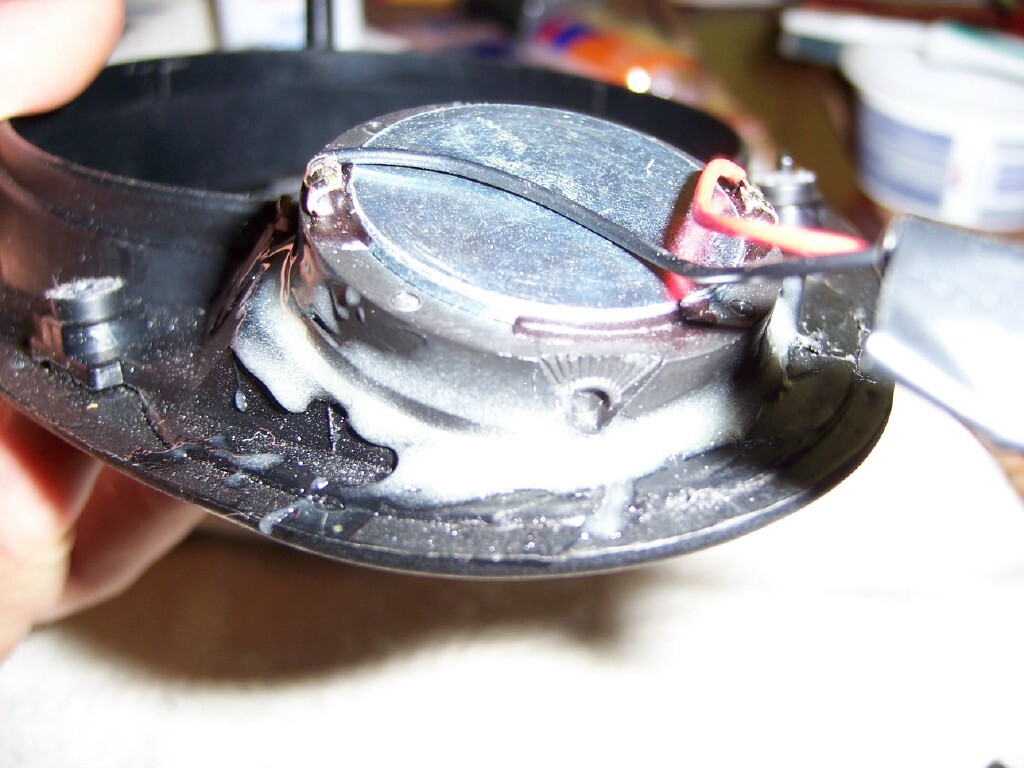
1- Here is Alpine Installed. The blu glo lights stand out at night. Wife liked them, not me. I did a little bit of electronic mod, opened up the cover of the retractable head part (very small phillip screws), and put a piece of tape over the blu glo light LED's to subdue them. Quite easy actually, Unit is now much more discreet at night. If it helps anyone, here are various pictures of modification of Dash Grills. First step was the OEM Basket mod elsewhere on this board, I added Boston 4" coaxes fitted into borken/mod basket. As upgrade, I removed Bostons (seen here next to new mids) and went seperate mid and tweeter as part of JL audio XR 3 way. Mid driver mounted in basket seen in second pic Here is a good pic of the grill with the original sized tweeter hole, which I am about to dremel to make bigger for the 1 inch component tweeter. TIP Place a thick piece of cardboard inside the grill, under where you are dremleing, or you might hit right thru the grill... Here is the grill with new tweeter hole done. Tweeter barely slides into here with a few edges catching enough to hold while being epoxied... Here is Tweeter epoxied into hole. Used 2 part GEL epoxy (Lowes) thickened with talcum (baby powder) so it sticks well and does not "drip" anywhere. Worked very well, just used a toothpick. Second pic is a close up. After that, simply mounted mid basket back into grill with original screws and location. Now had 2 drivers and only one OEM wire though, so had to run second wire down and out of dash holes and to the crossovers, which are in the trunk. I hope this, ad the other thread on the OEM dash grill mod, helps anyone ready to tackle the DIY Dash speaker Mod! Reminder: I have the door baffle template in a PDF doc, and a word document with a bunch hof notes, I can email them to anyone. Tony

-
I just finished the whole Dash/Door upgrade, somewhat similar to what Andy did. See my signature for Audio upgrade. I did it with a lot of phone consulting from Jamey in LA, formerly from Paris Audio, he has 10 years experience as a full time high end car audio installer in LA, owns his own business, and knows Porsche installs like the back of his hand. a) He can cut and ship you wood baffles and the screws for about $60-$70. B) I drew a true size template of the baffles he supplied me, it's on a 11"x17" sheet, and I can email a PDF document of them to anyone, in case you want to cut them yourself with a Jigsaw. Hope this helps. When I have a bit more time, I'll post what I did and what I learned! I also have a CDR210, OEM 4 channel, OEM 6 channel amp, one mounting bracket, for sale, cheap, if they can help anyone's basic system. Tony
-
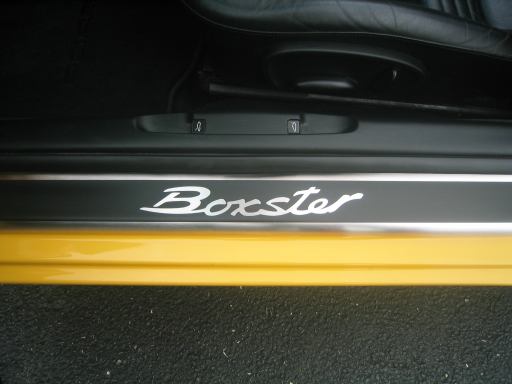
Boxster door scuff plates
Charlestonboxster replied to jpcolin's topic in 986 Series (Boxster, Boxster S)
The Boxster sign is a sticker, in the case of the Black sill, like the one below, the Black part is a sticker, and the Boxster part is simply the SS background/sill showing through. Very nicely done, top quality. I would have to add a third strong vote of reccomendation for Harvey's sills, very nice and well priced. You can email him asking what color scheme he suggests too, or that most people buy for your color. I believe he has a black boxster like mine, I chose black with SS logo, looks really, really good (no pictures of mine). I could not find them on eBay anymore, so just email him. One small note: They install with double sided tape. One of the 2 ways to install in the instructions seemed to be wet with cleaner like Windex and stick. At least that's what I understood. This did not work for me. What worked best was method #1, simply wipe sill clean as possible with good cleaner, solvent, degreaser, whatever, and dry stick the sill on. Just make sure you line it up centrally, the way you want. This is like mine. They also come in other schemes. Another view. Hope this helps! Tony 29"
-
Can't help you with the problem, but in case you need a replacement amp, I do have a spare m490 6 Channel and a spare m490 4 channel amp for sale very reasonably, not sure if the m490 can replace the m680 though, tbd. Anyone else interested in the amps, please let me know, they do not come with the harnesses, but one can come with the OEM mounting bracket. Tony
-
-
Hello All, I have come upon a few rather peculiar problems that I have not been able to find solutions for in the archives, and wonder if anyone has any guidance, am most grateful. 1- I removed sunvisors for badge removal. When reinstalling, both of the two female torq screw nuts (that are encased in the A-pillar/frame, and used to secure the exterior visor bracket) have cracked inside their holes, so the male torq screws do not catch. Guess I tightened too hard...Now I can't screw in the bracket. Spoke to Sunset, they were not sure if there is a replacement female nut, said if they are inside the frame, a body shop may need to open up that part to access them or, drill them out and install something like a "Nutsert". Hmm....My thoughts are perhaps I can drill them out and re-thread the hole for a new, slightly thicker male torq screw. Weird problem, and a bit of a bummer. Anyone experience this, or suggestions? PS Mod: I am seriously considering removing the visors entirely, and modifying the brackets (metal and small plastic one) by removing the pins, drilling, inserting black plugs, and installing the holding brackets only, to have a clean, sun visorless A-frame. Looks really clean without the visors. Thoughts? 2- Steering wheel exerts a mild squeek when I turn at middle speeds. May just be lube, thought it was nothing serious..until.. 3- My blinker stalk no longer return to neutral once I have cornered and straightened out. Thanks for any advice or guidance. Tony
-
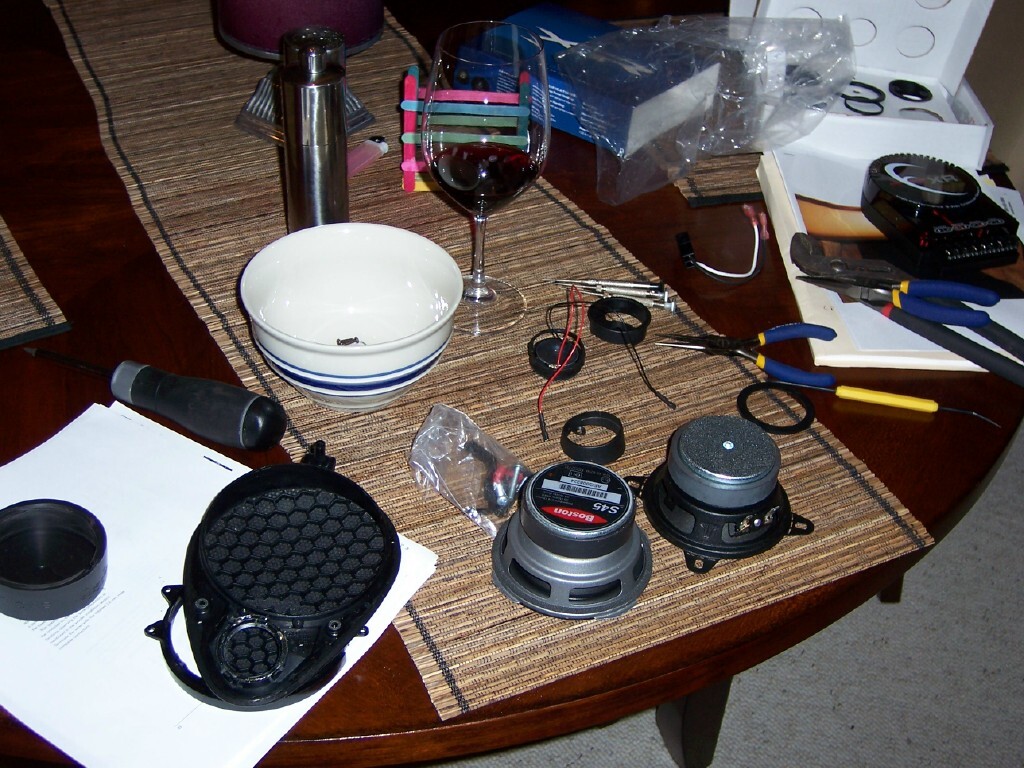
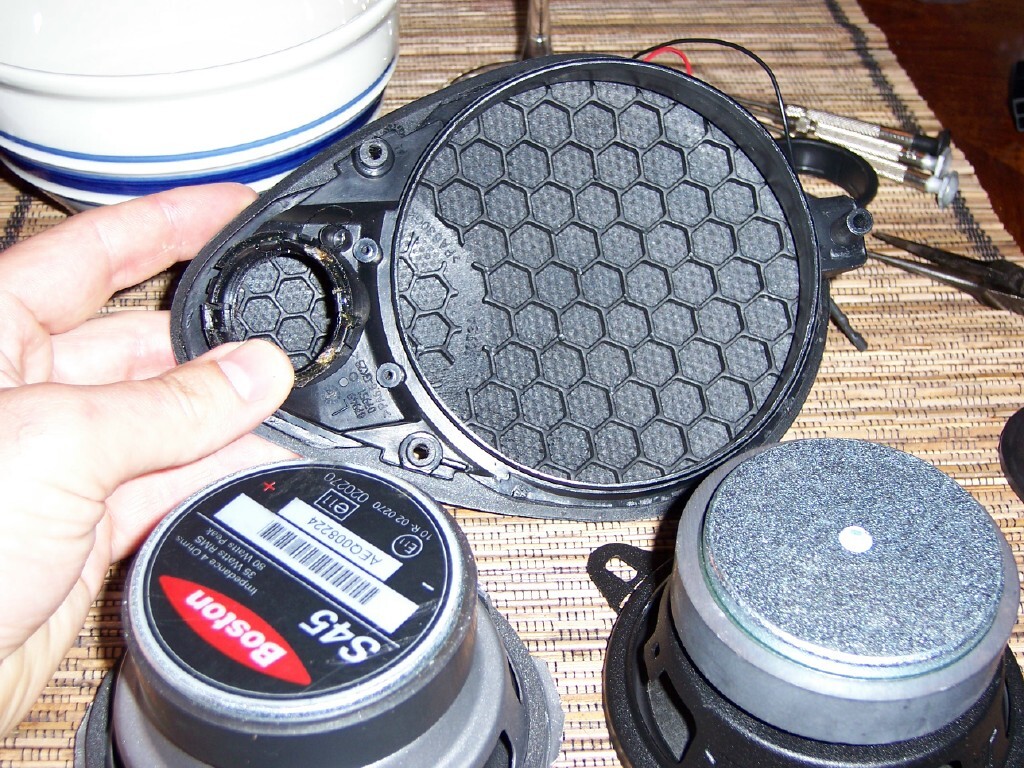
>I planned on making a scale CAD drawing of the door mounts and attaching it to the write up in a couple of formats for anyone to use. This way you could print out a template to start from.< 1- ALAN, This would be really fantastic for many guys now and in the future! Jig sawing baffle board or plywood is well within the skills of most amateur diy'ers, but what intimidates me is the trial and error cutting out the right size price firsthand. I'm up for mailing a beer fund in cash immediately if you can get a drawing up, as I'm ready to do the door upgrade. 2- 95% finished installing the huge magnet Boston s45's (4" coax) in Dash a'la Jinster. Mounting depth was over 2.2", and sure enough...left side dropped in fine...but the right side nudges against the bolt head... <_< . Drops in all the way if I twist it a tad, but grill does not lie perfectly flush. So..I will Dremel off 1/8" of an inch off the bolt and/or speaker magnet, and should drop in just perfectly. What I did: - I Broke apart the plastic Nokia speaker bracket to use it as a mount, like Jinster. 10 minute job, used metal cutter scissors. - To drop the s45 fit into the Nokia bracket, I had to clip (same metal cutters) the 4 mounting tabs almost completely off, and left just a bit so they fit snugly. Too snugly as it turns out, had to Dremel the inside perimiter of the Nokia braket a tad. And, I cut a bit too much off some of the tabs, so Epoxy was needed to secure the criver in the Nokia bracket. - I dropped some thick epoxy on each tab, and screwed the whole thing back in with the standard 3 screws. - I reused the existing connectors, soldered female part to speaker s45 wires/clips. As others have indicated, replacement sounds GREAT. What I learned: - 2.2" is pushing it if you don't want to grind the bolt or magnet. 2" depth replacement drivers eliminates this problem. - Be careful clipping the tabs, to leave enough so they fit snug. - I wanted to do this beause I enjoy DIY'ing, and challenged myself to fit the Bostons. If someone wants less hassle, VFBox's adapters are probably a simple way to go than clipping, dremeling, etc... - Thick GEL epoxy (2 part) works well and does not spill where we don't want it to. Test: - With the stock tweeters still in place, hmm...I wonder if they would still be useable and of sufficient quality (suspectful) to compliment the s45. So I connected one of them, just soldered the wires to the s45 input in series. I would think 2 different tweeters (stock and the coax of the s45) may sound weird or not in phase, OR they may compliment each other and expand the highs, with the stock tweeter poiting in a different way. Could not tell a differerence yet, will test further this evening in quiet. This has been a great thread, building on things done in the past. Next steps: 6x40 amp Harvey Peck Rear kit Kenwood sub Door replacement PS: Does anyone know if the 6x40 amp does NOT have the high pass crossover or filter that I assume the 4x40 has? (Which would be why only low's go to the doors) Reason is, I hope all 6 channels drive all frequencies, so I can get full range from the doors. Thanks!
-
-
Andy, Thank you for keeping us closely posted on door reconaissance, and dash redo with MB's. Door: I am ready to order door speakers, want to install without mod or as little as possible, was considering Boston Acoustic S series S65rc ($119), shallow mount 6.5's. Dash: I have Boston Acoustic s45's ($79) and am ready to modify bracket as you did, but will test depth first....results tbd...! I like the Boston Acoustic sound over others, a tad warmer. For the interest of the board, rest of mods I am in the process of doing: 1. Add Rear Storage bin (bought used LA porchedismantlers $250, my 98 has Vinyl enclosure) 2. Add Harvey Peck PNP mounting kit and wiring (He gives great service and advice!) and add my own choice of 3.5's, probably Bostons. 3. Install 6x40 (bought on ebay for $100) 4. Add Kenwood Sub (bought online for $160), drops nicely behind passenger seat, will turn down when I have a passenger, to reduce the vibrating seat factor. Seriously considering: Alpine HU with XM and iPOD completely integrated ($350 + XM + iPod). Tough to gove up the stock look as a purist, but integrated Xm and ipod are tough to pass up. Tony
-
Removing the Amber on the Headlights
Charlestonboxster replied to Parker's topic in 986 Series (Boxster, Boxster S)
Just poured over all past posts, found Tool Pants post about Amber Plastic. Got it. -
Removing the Amber on the Headlights
Charlestonboxster replied to Parker's topic in 986 Series (Boxster, Boxster S)
Hello, Perhaps I missed it, but is there a to remove the Amber from the older, pre 2003 lights? Thanks,