Welcome to RennTech.org Community, Guest
There are many great features available to you once you register at RennTech.org
You are free to view posts here, but you must log in to reply to existing posts, or to start your own new topic. Like most online communities, there are costs involved to maintain a site like this - so we encourage our members to subscribe or donate. All subscriptions and donations go to the costs operating and maintaining this site. We prefer that guests take part in our community and we offer a lot in return to those willing to join our corner of the Porsche world. This site is 99 percent member supported (less than 1 percent comes from advertising) - so please consider an annual subscription or donation to keep this site running.
Here are some of the features available - once you subscribe RennTech.org
- View Classified Ads
- DIY Tutorials
- Porsche TSB Listings (limited)
- VIN Decoder
- Special Offers
- Paint Codes
- Registry
- Videos System
- View Reviews
- and get rid of this welcome message
It takes just a few minutes to register, and it's quality Porsche information at a low cost.
Contributing Members also get these additional benefits:
(you become a Contributing Member by subscribing or donating money to the operation of this site)
- No ads - advertisements are removed
- Access the Contributors Only Forum
- Contributing Members Only Downloads
- Send attachments with PMs
- All image/file storage limits are substantially increased for all Contributing Members
- Option Codes Lookup
- VIN Option Lookups (limited)


Scouser
-
Posts
539 -
Joined
-
Last visited
-
Days Won
2
Content Type
Profiles
Events
Forums
Exterior Paint Colors
Downloads
Tutorials
Links Directory
Collections
Classifieds
Store
Everything posted by Scouser
-
Jeff I just read this post of yours from back in Jan. Hahaha. Well, it is leaking again...well not exactly dripping just sweating this time. But the car still runs great at approaching 55,000 miles. Just did a 660 mile trip to Scrotland yesterday no problems. It's due to have the 8th seal and "apparently" the one that will fix it forever on Monday. Only time will tell ;)
-

Broken Windows
Scouser replied to Philip1972's topic in 996 Series (Carrera, Carrera 4, Carrera 4S, Targa)
That's worrying as both my front windows squeak quite badly. Anyone know of any routin maintenance that should be done to prevent what's happened to Philip. -
Interior color
Scouser replied to mtimmy's topic in 996 Series (Carrera, Carrera 4, Carrera 4S, Targa)
That looks the same gray as mine. Graphite Gray.
-
I believe the ROW cars have motion and vibration components to their alarm systems that are not included in the US version. Whether that explains the difference or not .... experience shows there is no motion sensor for the interior of my 2000 Cab when the top is down. Additionally, from page 22 of the MY2000 Owners' Manual (bold print is Porsche's): "The infrared passenger compartment monitoring system is always switched off when the convertible top is open". Hmmm..... I just looked in my 2000 cab handbook and its not on page 22 but on page 18. But it says the same as you. However, coincidentally I leaned into my car to get the book out and the alarm went off :lol: Forgot it was locked. So, I dunno. Maybe this can be set by the OPC and they have it on by default in my car with the top open. Weird.
-
This is one of the reasons why the remotetop offers "one-touch" operation :) Who would want to feel like a plant pot holding down the button and aiming at the car for 20 sec? Especially in densely populated areas no chance to complete the cycle without a dropout. The interior motion sensors are definitely *NOT* armed in the original condition with the top down (open). They only arm with the top up. Cheers Stefan Wilhelmy Oh for suer I am not saying the "one touch" operation from a dash swich is an issue. I think it's a great idea. One day when it's more affordable here in the Uk I will purchase it. But £175 = cica $280 is too expensive IMHO for something that I can already do but in a less lazy way. For key fob remote operation I think it is an unimportant feature though. But one thing is for sure, I just tested it on my cab, with the top open, if I put my hand in the car the alarm goes off immediatly. So motion detection is definitely on.
-
Here in the uk, you get this feature by default with your 996 cab. I have a button on my key for remote top operation. But in all honesty I have only used it once and I felt like a right plantpot standing there pointing my key at my 911 while the top did its thing. I don't see its purpose in practical terms. Putting the back windows up while the top is down is easy. Just stick your pinky in the whole on your windshield and then press the window buttons. Locking the doors automatically when you start up the car can be programmed into any 996 by your OPC. The interrior motion detector is on by default when you lock the car with the top down so long as you dont hear a beep. Allowing the use of the wndows for 15 minutes.....well not sure what that does for you.
-
Intermediate shaft, bolt failure?
Scouser replied to hooper4s's topic in 996 Series (Carrera, Carrera 4, Carrera 4S, Targa)
Is this true. PCNA not PNA. Does your Porsche Motor Club membership cover you for your engine? Or is this just a typo. -
Spoiler light always on
Scouser replied to Loren's topic in 996 Series (Carrera, Carrera 4, Carrera 4S, Targa)
Thanks for that explanation Loren. However, why would "only" the spoiler light bit lit and not the other break lights. Seems a strange concept. -
Spoiler light always on
Scouser replied to Loren's topic in 996 Series (Carrera, Carrera 4, Carrera 4S, Targa)
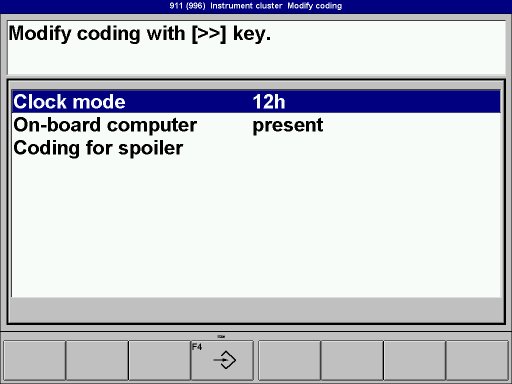
Loren, I read about the harness required for installing a fixed tail but do you know anything about the instrument cluster spoiler coding. What is this option for and does it effect the warning lamp? Does one still need the harness or will setting this option be sufficient? Confused.
-
Just FYI in case you guys missed my threads on this n the 996 section: My 7th RMS has now stopped leaking all of its own! The 7th RMS went in Feb last year and shortly after (about 2 weeks) it began to leak again. (Note this is the 3rd generation seal) With the leaking RMS and after a Major service I drove it 3000 miles to Spain and back to Liverpool UK. Had no problems but the seal continued to leak. Then aftre I had covered about 6000 miles it suddenly ceased leaking and has not leaked now in a further 5000 miles. I have done 2 oil changes in thet period using Mobil 0/40 and still no leaks. I still don't trust it though ;)
-
Scouser, Here's what I posted here last February. At the same time I also posted some details on the tools and tricks necessary to gain access to the rear quarter drain area, and to remove the front and rear seats .... so as to remove carpet for drying. Kim 2000 Cab Here is the lesson learned for you Cab owners: a small plastic drain tray runs along the side wall behind the inner upholstery panel beside each back seat. A right angle fitting leads from the low point, sideways through the inner body panel and into the void ahead of the rear tire. If you remove the rear wheel, then the forward side wheel well liner, all you see is the metal body panel right behind it. Almost at the bottom of the body panel is the outlet for the drain tube. The outlet itself is a simple plastic check valve with a rubber flapper valve about the size of a nickel. Therein lies the problem. The rubber was stiff with age, and gummed up about 90% with the same kind of crud you clean out of your gutters ... fine, wet, black gunk. When my car was out in the pouring rain at the airport for 2 days, the 10% drain capacity left was clearly not enough to handle the water flow, and a gallon or so ended up in my back seat floor. I pulled the flapper off, blew out the drain with air, then soaked the flapper in Lexol conditioner to soften it before reinstalling. Considered leaving the rubber flapper off, but was afraid that road debris might come in the other way to block it. Going to pull the driver's side wheel and liner tomorrow. My car has been kept in a garage ... no reason to suspect more than average debris in the drain. You Cab owners might wish to add this to your "check every now and then" list. Many thanks for that Kim. My intention is to go thru this at the weekend (tommorow if the weather holds up). I will take pics and post here of the process. A question: I haven't looked yet but is removing the "forward side wheel well liner" difficult to do? Where are the screws/nuts for this? Anyone have any pics to share? Cheers
-
Dead Battery
Scouser replied to stsanford's topic in 996 Series (Carrera, Carrera 4, Carrera 4S, Targa)
amps (current) must be measured in series with the circuit not in parallel with it. You cant measure the current by placing a meter across the battery. You must disconnect the battery and place the battery connection "thru" the meter and then onto where the battery terminal connects. car electrical circuit_____| -ve bat +ve|_____-ve meter +ve____car electrical circiut -
This was posted by a PCGB member (Howie). I thought it may be useful info to post here. I would like to hear from anyone who has had similar problems with their 996 cab (I will be checking mine this weekend wheather permitting). And a fowllow on post after asking him to provide more detailed DIY explanation:
-
Anyone seen this local 996
Scouser replied to Tool Pants's topic in 996 Series (Carrera, Carrera 4, Carrera 4S, Targa)
No it isn't. As far as I understand it it is only used in the US. If I called someone a ricer in the UK he would look at me very strange. I still don't understand it fully, but from what I have read the interpretation infers a young rapp loving yob with baseball cap and hood sitting in a very low position in a very cheap car modified to such an extent that it no longer looks like a car. Oh, and it has a gazillion watt stero system and 23 LCD TV screens, a toaster and 802.11 wifi LAN to boot. Personally, I think we are all posers in our flash porkers. IMO that car looks very tastefull and if I had the dosh I would pose it up just the same. One day I hope to have enough guts and cash to SC my 996 and that is purely for posing purposes ;) -
Under performing seal
Scouser replied to Loren's topic in 996 Series (Carrera, Carrera 4, Carrera 4S, Targa)
No problems. You can let it leak forever without damage. Even in the most extreme rare case (and I don;t know if this has ever happened) that the seal fell out, it won;t blow your engine up. The seal is not like a plug. It doesn't hold the oil in per se, it just stops it weeping out the end of the block thru the main bearing. If it gell out its possible to get a lot of oil on your clutch and it would probably drip on your exhaust and cause a lot of smoke. But no catastrophic engine failure. I drove around for thousands of miles between RMS fixes. In fact I had my 1st RMS done at 27k and my car has now done 52k and only just stopped leaking......I have been driving around leaking for years. So hang in there until the clutch is done. -
Help me identify seal
Scouser replied to toddel68's topic in 996 Series (Carrera, Carrera 4, Carrera 4S, Targa)
Nothing to do with RMS. I can't think of anything that size other than maybe the end of the axle boot. Maybe it sheard off. I would go back to where you got the tyre done and ask the guy where "exactly" he yanked it from. -
Fabspeed Mufflers
Scouser replied to Izzy's topic in 996 Series (Carrera, Carrera 4, Carrera 4S, Targa)
I posted this ages ago. Here is a little combo vid of my trip to Spain last year. The vid is a bit shaky but you can sure here the fabspeed ;) I don;t get any resonence problems and the sound is hair raising. My wife and I did this 3500 trip and never once got a head ache. My setup is vanilla maxflow only. No headers or air filter or anything. Click here -
row m030 with 19" wheels
Scouser replied to navif1's topic in 996 Series (Carrera, Carrera 4, Carrera 4S, Targa)
Yeah you right. Sorry about that. My front tyres are 235-35-19 so I had to rll my fenders. -
Alternator Failure
Scouser replied to jslindst's topic in 996 Series (Carrera, Carrera 4, Carrera 4S, Targa)
My understanding is that bleeding the coolant system is a real art. SO suggest you don't! -
row m030 with 19" wheels
Scouser replied to navif1's topic in 996 Series (Carrera, Carrera 4, Carrera 4S, Targa)
Have a look in the Garage there are pics of my car which is a UK 996 cab with M030 and 19" Khan wheels. The only thing you will have to do is roll the front fenders as the tyres will touch the arches on full lock. -
I am fairly certain it is the manufature year. An example to prove this is my own 996. It is registered in the UK in March 2000 and this is first registration from new. On the UK registration documents it says the year of manufacture was 2000. But the VIN decoder says it is 1999. I tend to believe the VIN since it is highly likely the car was manufactured in 1999 and not the 1st qtr of 2000. SO in reality my car is a 1999 model (akbeit it has all the traits of a 2000 + 996). In fact I think I am right in saying that the 996 cab first came out in 2000 so it means my cab is seen to everyone as a 2000 model. But the VIN tells the true story ;)
-
Under performing seal
Scouser replied to Loren's topic in 996 Series (Carrera, Carrera 4, Carrera 4S, Targa)
Sheesh! Believe it or not I only just got to know about this. I just heard about it on rennlist. Show you just how long I have been out of the loop. -
In-dash Spoiler (Tail) Switch Mod Note: Part numbers sometimes change without notice. Always double check with your supplier that you have the latest part numbers. The switch is part number 996.613.155.00 A02 for a switch installed on the left side of the dash and 996.613.156.10.A05 for a switch installed on the right side of the dash. Like other dash switches it has a raised portion on one side. When you order the switch, ensure you specify which side you want the raised portion according to which side of the dash you are ins Author Scouser Category Carrera (996) - Mods Submitted 11/16/2005 09:59 AM
-
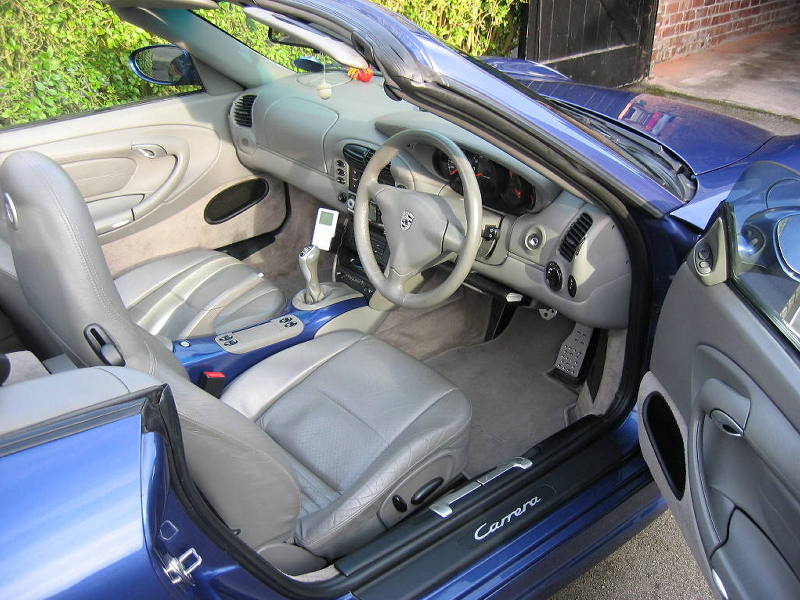
Note: Part numbers sometimes change without notice. Always double check with your supplier that you have the latest part numbers. The switch is part number 996.613.155.00 A02 for a switch installed on the left side of the dash and 996.613.156.10.A05 for a switch installed on the right side of the dash. Like other dash switches it has a raised portion on one side. When you order the switch, ensure you specify which side you want the raised portion according to which side of the dash you are installing it into. These install procedures assume you will be placing the switch in the unused dash socket below the PSM switch on a RHD car. For LHD cars, the PSM switch is on the left side of the dash and the raised portion of the tail switch should also be on the left (as shown in the picture). For RHD cars, the PSM switch is on the right of the dash and the raised portion of the tail switch should also be on the right. Take care that you order the correct tail switch for your car. Parts you will need: 1 ea 996.613.155.00 A02 (or 996.613.156.10.A05) Spoiler Switch 5 ea Female connectors 5 feet (1 length) Connector cable 2 (3 inch length each) 14 gauge wire few Cable ties Tools you will need: Phillips head screw driver Blunt flat blade to prise the switch tab (I used a butter knife) Wire cutters Crimping tool Soldering iron Remove the cover from the fuse box. Then carefully remove the four screws pointed out in the picture. Ensure the screws do not fall into the fuses else you may start a fire! (The fusebox is located in the drivers side footwell.) Once the screws are removed, pull away the carpet trim around the fuse box. You will be cutting into the wiring loom connected to the existing spoiler (tail) switch. The switch is the black square item located in the bottom left corner of the fuse box. Note: The installation of the new in-dash tail switch does not effect operation of the existing spoiler (tail) switch. It is simply wired in parallel to it. I have used a mirror here to show you the back of the fuse box. Pull the connector from the switch. It has no clips but it may be quite hard to pull off. Be careful not to pull the wires out of the connector. DO NOT use a metal implement to pry it off. If you rock it from side to side while pulling, it will eventually come off the switch. Here you can see the connector pulled away from the switch. The connector has three wires: Green/black, Brown/Green and Brown. Carefully cut the 3 wires going to the connector. Ensure you do not short the wires as you cut them. Leave a long tail on the wires at the connector as you will need to splice them back later Use a blunt blade to carefully pry out the switch tab holding the PSM switch in the dash. I used alarm wire in a single cable. You need 3 cores in the cable and it needs to be about 5 feet long. Feed it through the opening for the PSM switch tab. You can see in the picture where you can feed it through the back. Push the wire through so that you can grab it from underneath the dash and feed it along within the dash to bring it out behind the fuse box. Carefully cut the 3 wires going to the connector. Ensure you do not short the wires as you cut them. Leave a long tail on the wires at the connector as you will need to splice them back later Fit the new tail switch into an unused slot. Usually the one below the PSM. Place the connectors as shown on the switch. Make a note of the colour coding you use and which switch terminals you put them on. I used red, brown and black wires in this configuration. Next you will wire up the tail switch light. Use two 14 gauge wires cut to about 3 inches. I used blue and brown wires. Strip both ends of the two wires. Crimp a female tag onto one end of each wire. Connect the tags on these wires to the two outer (remaining) tail switch tags. Pull off the connector from the back of the PSM switch. Insert the blue wire onto the left most PSM switch tag (blue/pink/brown connection wire). Insert the brown wire onto the top PSM switch tag (red/blue connection wire). Ensure the inserted wires are not shorting any other tags. Push the PSM connector back into place with the inserted wires. One way to do this is to cut the bare ended wires short and feed them through the tag holes before pushing the connector back on to the PSM switch. At the switch box end, feed a 1 inch piece of heat shrink sleeve onto each of the 3 exposed loom wires. Push the sleeves along to expose the bare wires. Pre-solder each end on all exposed 9 wire ends. Then solder the loom wires back together while at the same time splicing the new wires into the loom. The 9 wires comprise 3 from the original Spoiler (tail) switch connector, 3 in the loom that you cut from the tail connector and 3 that you have just wired in from your new tail switch. The wires are soldered as follows: red -> red/green black -> green/black brown -> brown Check the solder joints. Push the sleeving over the joints and use the soldering iron to heat the sleeving so that it shrinks around the solder joints. Ensure no strands of wires or solder is protruding from the sleeving. Refit the connector back to the original fuse box spoiler (tail) switch. It is important to tidy up your cabling. I used cable ties to ensure the cables don't rub on anything sharp. Before refitting the switch tab, test that your newly installed in-dash tail switch works. Also test that the switch light works when you turn your side lamps on (with ignition on of course). Finally, replace the switch tab in the dash, push the fuse box surround carpet back into place and replace the 4 screws. Job done.
-
Convertible Top
Scouser replied to Izzy's topic in 996 Series (Carrera, Carrera 4, Carrera 4S, Targa)
There's a TSB that explains several microswitches that need to be changed.....specificall the switch in the side flaps.