Welcome to RennTech.org Community, Guest
There are many great features available to you once you register at RennTech.org
You are free to view posts here, but you must log in to reply to existing posts, or to start your own new topic. Like most online communities, there are costs involved to maintain a site like this - so we encourage our members to subscribe or donate. All subscriptions and donations go to the costs operating and maintaining this site. We prefer that guests take part in our community and we offer a lot in return to those willing to join our corner of the Porsche world. This site is 99 percent member supported (less than 1 percent comes from advertising) - so please consider an annual subscription or donation to keep this site running.
Here are some of the features available - once you subscribe RennTech.org
- View Classified Ads
- DIY Tutorials
- Porsche TSB Listings (limited)
- VIN Decoder
- Special Offers
- Paint Codes
- Registry
- Videos System
- View Reviews
- and get rid of this welcome message
It takes just a few minutes to register, and it's quality Porsche information at a low cost.
Contributing Members also get these additional benefits:
(you become a Contributing Member by subscribing or donating money to the operation of this site)
- No ads - advertisements are removed
- Access the Contributors Only Forum
- Contributing Members Only Downloads
- Send attachments with PMs
- All image/file storage limits are substantially increased for all Contributing Members
- Option Codes Lookup
- VIN Option Lookups (limited)


rockymount1
-
Posts
31 -
Joined
-
Last visited
Content Type
Profiles
Events
Forums
Exterior Paint Colors
Downloads
Tutorials
Links Directory
Collections
Classifieds
Store
Everything posted by rockymount1
-
Doesn't start when engine warm
rockymount1 replied to MG88's topic in 986 Series (Boxster, Boxster S)
The Codes would indicate P1818 Pressure regulator 2 P1823 Pressure regulator 3 which are the fuel injector pressure regulators. I don't know whether the fault is that they aren't working or that they sense an under or over pressure condition. Someone else should be able to help. -
Plastic ball joint
rockymount1 replied to matthewjamesdunn's topic in 986 Boxster Convertible Top Issues and Solutions
This guy doesn't seem to be selling them on eBay anymore. Does anyone have his email address where I can contact him? Thanks, azzar0. azzar0: Just sent you a PM. Regards, Maurice. The guy is back on e-bay here: Mr Brink In Netherlands He now has White or Black. I just ordered a set. Later from Rockymount -
I'm very interested in anyone's reply to rick3000. I have looked for a description of the hack but can't find it. Tool Pants link works but the link within that message thread no longer works and therefore the instructions don't exist. If any one has a copy of the original link, it would be great if you could post it here and then RennTech can keep it safe. Thanks
-
Try 0823
-
Try this site: http://www.proclipusa.com/deviceholders/deviceholders.aspx Use the Shopping Wizard in the upper left to look for ipod holder then select the car model / year. If you already have the holder for the ipod then the bracket for the Boxster is all you'll need. I don't use an ipod, but the bracket is great for my XM radio, connected thru the Aux port onto my CDR220. I thank you for all the help. I have done some research, and I did not find the answer to my question, (although I did find many differnt ways to hook up my Ipod) I have been looking into the ICE link. I called them 3x and have yet to talk with anybody. Other then there site, is there a safe place to buy one? I already bought the cable to hook up the Ipod to the back of the CDR220, so I think I just need to find a good car mount. Any ideas there~
-
Headlight Problem (No DRL or Low Beams)
rockymount1 replied to rockymount1's topic in 986 Series (Boxster, Boxster S)
I’m very embarrassed; :huh: as you can tell from my first post I checked everything but the bulbs. I pulled both lights and guess what both burnt out within the same day (probably the same hour, since they must have burnt out on my way to work which takes an hour). Anyway, please forgive me. Replaced the bulbs in about 10 minutes and presto. I guess they really burn even, must be a good sign about the voltage to each bulb. Toolpants; Yes I have a double relay and that is the part I pulled. Not sure I won't pull it since DRL have little purpose on my normal commute thru the mountains and the bulbs would last longer. I did call the local dealer to see if they carried the relay and they would have to order it. At $54.00, that is one expensive relay. -
I have a 1999 Canadian Boxster. My front DRLs are out and I have no low beam headlights. I do have tail lights and the high beams work (in fact both bulbs on both sides come on with the high beams on). I have pulled the double relay thinking that I would just disable the DRLs and the low beam head lights would work, but this didn't work. I also checked fuses 9 and 10 on Row A and both are good. Any suggestions of what it might be?
-
Removing Carbon Canister In Front Fender
rockymount1 replied to rockymount1's topic in 986 Series (Boxster, Boxster S)
I'm also waiting. If you look at my other post - RFM from Belgium thinks that the canister is held in by rubber grommits and the single bolt on the side. But we will see - :) -
Thanks - I think this sounds like this could be the same for US cars. I will give it a try this weekend. Again, many thanks.
-
It wouldn't surprise me if the US version is similar. Once the bolt that is easy to get to is removed, the canister seems to be mounted on something that is very flexible. The rubber bushing would make sense. I just don't want to force it with out knowing. On the European canister, is that a single bolt that attaches to the canister on the right side (from looking into the wheel well)?
-
Toolpants, Thanks for the links, but in both cases it talks about getting to the latch. One even says it is easy to remove the evaporator canister (carbon canister), but neither article tells you how. I have removed the wheel and liner (that part was easy). But the canister is a mystery. There is one bolt visible, but the canister won't budge and I'm afraid to force it. Is there any shop manual available that covers this? When I do a Google search, I can find a link to a "Activated Carbon Canister" in Bentley's Service Manual for Boxsters (pg 24-5). If you own the manual can you tell me if this is the correct canister. I don't mind ordering the Service Manual, I just don't know whether the manual is talking about the fuel canister or the activated carbon filter that is sometimes used in the air intake for the cabin air.
-
I've just done a complete search on Renntech looking for a method to fix the latch on the fuel filler door on US Boxsters (I think this is similar to other Porsche models also). I found at least 10 other posts on this subject. In all cases, the same statement appears. Remove the right front tire and wheel liner. But I have not seen anyone say how to remove the evaporator (which must be removed to get to the latch). I see that a couple of people state that the dealer fixed this for them. Did anyone see the dealer remove the evaporator? Is there a service manual I can buy that includes removing the evaporator? Do you really need to remove the entire fender to get at this? My latch actuates perfectly, it is just loose in its bracket and I need to tighten the bolt that holds it in place so the plunger comes thru the hole in the fuel door. I know this isn't necessary for the car to perform correctly, but I get bothered when I know something is off on my Porsche. :cursing: Thanks in advance.
-
Fuel filler cover emergency release
rockymount1 replied to clickman's topic in 986 Series (Boxster, Boxster S)
But HOW!! I'll be tracking this topic for the solution. I didn't get any takers when I asked a few weeks ago. :rolleyes: -
Here is a link that will give you the information you are looking for: http://www.whiteson.org/boxster/mods/links.shtml
-
Removing Carbon Canister In Front Fender
rockymount1 replied to rockymount1's topic in 986 Series (Boxster, Boxster S)
Any idea where I can find instructions. I've searched the web. I've also looked at the Boxster Technical Manual and found the only reference in Volume 5 for "Removing and Installing the Wing" which is the front passenger fender. Those instructions don't really show the canister is just states that the wheel liner and the carbon canister must be removed before the fender can be removed. I'm stuck!!! -
iPOD with CDR24 and HK Drive&Play
rockymount1 replied to WolfgangK's topic in 987-1 Series (Boxster, Boxster S)
It seems that this is the same thing as the Scosche unit: Metra AntennaWorks Wired FM Stereo Modulator 44-FMMOD02 http://www.myradiostore.com/fmmodulators/m...44-fmmod02.html I think you will need an antenna adapter, but MyRadioStore has 7 different antenna adapter for VW/Audi/European cars. So you might have to call to get the correct adapter. And it looks like it is in stock. I haven't used it, since I have a CDR-220, but I've bought all my XM stuff from this website and have had good luck with them. -
Becker Code Needed..
rockymount1 replied to Pickey's topic in 996 Series (Carrera, Carrera 4, Carrera 4S, Targa)
5497 should work for the 4462 (CDR-220). For the BE6620 (CDR-22) if it is 5-digits it should be 38596. -
The locking gas lid is not working on my Boxster (I think the plunger just came out of the bracket. So I'm trying to fix this. I got almost there to be stoped by the Carbon Canister. I wanted to know how to remove it. There is one nut attaching one side but I can tell there is either another nut to be removed or a tab. Has anyone ever removed the Carbon Canister? Please let me know how. Thanks in advance.
-
Here is a good "how to" for both the air box up front and the engine air filter. It also shows the 996. Air_Filter_Replacement.pdf Pictures help!!
-
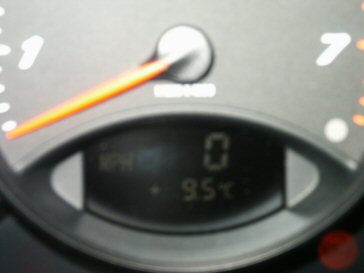
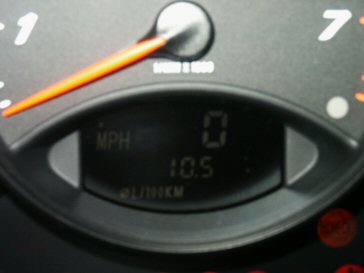
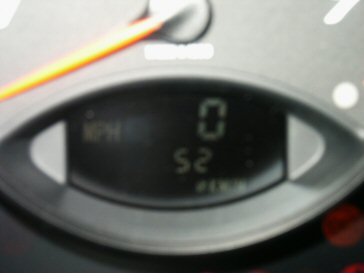
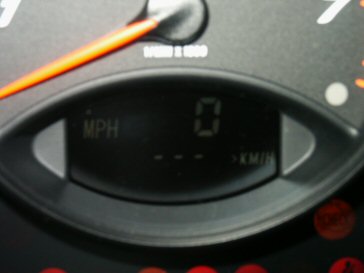
I found this in a forum a while back (don't think it was here) and was wondering if the list was ever completed. No real issue, just interested. It is interesting to look at 20c and find out the margin the speedometer carries. Hope I didn't post this twice, I hit the "Post New Topic" button, but I don't think anything happened. First, press and hold the Recirculating Button, then press both Temperature Buttons (+ -). To enter the Diagnostics, you hold down the Recirculating and Air Up buttons simultaneously for 5 sec. The + - will then scroll up/down through a list of 'C' codes. Pressing the Center Vent Button will alternate between the 'C' code with it's actual value. To exit and return to normal operation, press the Auto Button. Here is a list of the available codes: 0c - ERL 1c - Oil Temp 2c - Inside Temp - From the Sensor mounted in the Aspirator Assembly at the side of the Dash 3c - Outside Temp - From the Sensor inside the Air Inlet of the A/C Unit 4c - Outside Temp - From the Sensor in Front Grill of the Radiator. Data is fed to the Climatronic from the Instrument Cluster. When not moving, the Instrument Cluster OBC Temp Display retains it's last setting until moving. This is to prevent heat emanating from the Radiator affecting the Temp Sensor. The Climatronic uses the lower of the two values in determining Fresh-Air Temp. 5c - Outside Temp - matches OBC outside temp display 6c - Coolant Temp 7c - Footwell Discharge Temp 8c - Sun Sensor (dash top) 9c - Sun Sensor 10c- Passenger Compartment Fan Speed 11c- Passenger Compartment Fan Voltage 12c- Temperature Mix Flap Command (1=COLD, 100= HOT) 13c- Temperature Mix Flap Position 14c - Central Flap Command 15c - Central Flap Position 16c - Footwell/Defrost Flap Command 17c - Footwell/Defrost Flap Position 18c - Recirculation Valve Command (1=OFF, 100=RECIRC) 19c - Recirculation Valve Position (feedback) 20c - Vehicle Speed in kph, updates once per second. This is True Speed, not the Speed+Safety Margin displayed by the Speedometer. 21c - Engine RPM in hundreds, also updates once per second 22c - ? 23c - ? 24c - Sun Sensor, Exterior Lights Switch, and Panel Lights control (term. 58 & 58d voltage) - used for A/C Panel Display Illumination 25c - ? 26c - ? 27c - ? 28c - Fan Speed 29c - ? 30c - Engine Run Time in seconds (255max.) (=0Xff) 31c - Timing Counter 32c - Displays Test 33c - Software Version (usually 3.4) 34c - ? 35c - Outside Temp from Inlet Sensor (filtered) 36c - Temp
-
I did a Google search on FTW, Inc and final came up with this website: http://www.nhtsa.dot.gov/cars/rules/import..._list010807.htm It shows a list of importers into the US and FTW is listed as: FTW SERVICES B2-7056 PORTAL WAY, BLAINE, WA 98248 604-290-6698 604-526-8333 Which make total sense since I knew the car originated in Vancover. One last question before this thread is closed. If I buy a US cluster, will I have to get the OBC turned on again (I think I've read in one other thread that the OBC option is controlled by the cluster)? Thanks for all your help.
-
Here is what I find on my car. One is under the front hood and the other on drivers door. Am I looking in the wrong place?

-
WINDOW WONT GO DOWN TO OPEN DOOR
rockymount1 replied to outofcontrol's topic in 986 Series (Boxster, Boxster S)
Do a search for "Windows Are Not Going Up All The Way" and you will find instructions. I've also seen on other sites that you need to reset the windows by pressing the up postition and holding it for 5 seconds in the full up position. After completing the OBC hack, following re-connecting the battery, I had to reset the windows by lowing and raising the windows one time using the auto down and up (momentary select) for each window. You might try this, but make sure you have your radio code. -
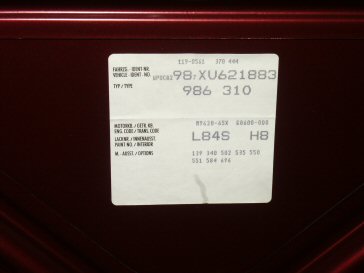
Option sticker (I assume you mean the one under the front hood) 139, 340, 502, 535, 550, 551, 584, 696. I know that 535 is the Alarm, 550 is the Hardtop (which wasn't sold with the car), 551 is the Windstop, 696 is the Radio with CD. All the others, I have no idea. I don't know what you mean by the black sticker on the door. There is a black and white sticker that states the car was imported by FMC, inc. Also, the sticker states the car meets all US Federal standard at time of build. I do know the car was first purchased in Vancover per Carfax. Finally, I do have daytime driving lights but I haven't looked at the fuse box to see if the relays are present or someone just did the hack. Although I won't get to it until next weekend, you've now got me interested enough that the cluster is coming back off this weekend. It only takes about 5-minutes to get the cluster off.
-
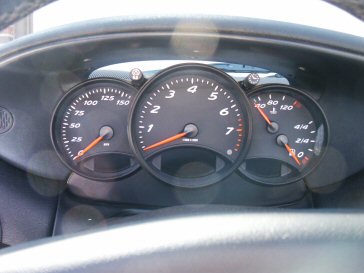
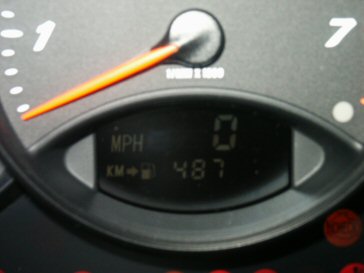
Here are my pics. Some are a little defocused (I guess I was too close). I have the same units that you describe for the UK guys. They are also a little faint (since the top is DOWN!!! - Finally a warm day in Colorado)