Welcome to RennTech.org Community, Guest
There are many great features available to you once you register at RennTech.org
You are free to view posts here, but you must log in to reply to existing posts, or to start your own new topic. Like most online communities, there are costs involved to maintain a site like this - so we encourage our members to subscribe or donate. All subscriptions and donations go to the costs operating and maintaining this site. We prefer that guests take part in our community and we offer a lot in return to those willing to join our corner of the Porsche world. This site is 99 percent member supported (less than 1 percent comes from advertising) - so please consider an annual subscription or donation to keep this site running.
Here are some of the features available - once you subscribe RennTech.org
- View Classified Ads
- DIY Tutorials
- Porsche TSB Listings (limited)
- VIN Decoder
- Special Offers
- Paint Codes
- Registry
- Videos System
- View Reviews
- and get rid of this welcome message
It takes just a few minutes to register, and it's quality Porsche information at a low cost.
Contributing Members also get these additional benefits:
(you become a Contributing Member by subscribing or donating money to the operation of this site)
- No ads - advertisements are removed
- Access the Contributors Only Forum
- Contributing Members Only Downloads
- Send attachments with PMs
- All image/file storage limits are substantially increased for all Contributing Members
- Option Codes Lookup
- VIN Option Lookups (limited)


azzar0
-
Posts
196 -
Joined
-
Last visited
Content Type
Profiles
Events
Forums
External Paint Colors
Downloads
Tutorials
Links Directory
Collections
Classifieds
Store
Everything posted by azzar0
-
Thanks Bristol! azzar0
-
You can disconnect the front sensors one by one, until you find the culprit. Unless the rear pads just reached their limit, you probably have a faulty sensor. Even if the rear pads are starting to wear out the light would not be on continuously on the dash. It usually comes and goes in the beginning. When it is on all the time it's time to change the pads, but it can take up to 5,000 from the time the light first comes up. azzar0.
-
City Light bulbs? which ones?
azzar0 replied to lucky_topher's topic in 986 Series (Boxster, Boxster S)
What bulb / size did you use for the license plate and where did you get it from? I've been trying to find one to match but I don't want to spend too much experimenting Thanks, azzar0. -
City Light bulbs? which ones?
azzar0 replied to lucky_topher's topic in 986 Series (Boxster, Boxster S)
These are very close to the ones I got, but mine are a little more blueish, which matches my HIDs. Since you have a lower temp HID then these would probably work just fine. Take pictures and let us all know how it comes out :) azzar0 -
City Light bulbs? which ones?
azzar0 replied to lucky_topher's topic in 986 Series (Boxster, Boxster S)
I'll take pictures some time soon and post them. My daughter has the digital camera and the phone camera doesn't do justice.. -
City Light bulbs? which ones?
azzar0 replied to lucky_topher's topic in 986 Series (Boxster, Boxster S)
Here you go: http://www.hoen-usa.com/city2.htm I ordered 2 pairs of those and I replaced the city lights and the side lights (I have clear side markers). They all match the HIDs now. Good luck, azzar0. -
City Light bulbs? which ones?
azzar0 replied to lucky_topher's topic in 986 Series (Boxster, Boxster S)
NP - they're the same thing :) I call them position lights, but I've seen people refer to them as 'city lights'. Must be a British term :P azzar0. -
City Light bulbs? which ones?
azzar0 replied to lucky_topher's topic in 986 Series (Boxster, Boxster S)
City lights are the small lights inside the headlamp. They turn on when you turn the position lights on and/or stay on if you forget your lights on after you take your key out of ignition. I know what you're talking about - I got matching city lights and side lights. They are leds, I'll tell you where I got mine from when I get home, I can't remember the website. In any event, they match exactly the hue of my HIDs. The only problem is that the led head is slightly wider than the factory bulb head. I ended up sanding down the hole to be able to fit the leds through (headlights only, side markers were just wide enough to fit). -
Do these come with the leds or do you have to get them separately? Thanks, azzar0.
-
Definitely worth cleaning the throttle body! My car runs excellent now, the RPM is rock solid and there is no more hesitation in low gears / low RPM. azzar0.
-
There is a small screw on the bottom of the bumper cover that holds the bumper cover to the wheel well liner - did you screw it back in? You may have to lift that part of the car and look under to see if the hole in the bumper is aligned with the liner. If it isn't, then you'll have to see if the bottom part of the liner is inserted properly. You may have to unscrew the liner again and play with it until it fits right. You may also have to push on the bumper (laterally, from the outside to the inside). I don't think there is any risk of damage, you can safely wait until Sunday. I had a similar problem with my car, except I noticed that the bumper cover hole where the bumper meets the liner was missing a side, so the screw wasn't actually holding the bumper, which produced a lateral gap between the liner and the bumper. I could push the bumper and get it close to the liner, but because the screw wasn't holding it, it would go back. Finally I screwed a piece of 2"x2" plastic to the bottom of the bumper cover and then drilled a small hole in that plastic piece to fit the screw and the bumper is where it's supposed to be. Good Luck! azzar0.
-
I just finished cleaning the throttle body. It wasn't easy, but I thought it would be a lot harder based on the reading I've done in the forums. I pretty much followed instructions in this post - warm engine, completely removed the o-ring from the hose, and with a little effort it came right out. I had a harder time getting the throttle body out, especially the lower left (passenger side) screw. Once I removed the 4 screws I was able to lift the TB up high enough to spray and clean it. Putting it back together was actually a lot easier. The tube snapped right in, with a little aligning and wiggling. Again, screwing the lower left screw back in was the hardest part, but with some patience it can be done. I decided to clean it because the car had a little bit of hesitation when switching gears (lower gears) at low RPM. I took it for a spin and it seems to behave better, but I'll have to drive it for a few days before I can make an educated conclusion. The idle is also more stable, although it still fluctuates a little when the engine is cold. I have new spark plugs, I cleaned the MAF a few months ago (although it looks like it was recently changed by the previous owner). The coils on the spark plugs look good (a couple do have very small cracks, but I never got any misfire or error codes). Air filter is new. What else could contribute to the hesitation in changing low gears at low RPM? Loren, you mentioned you add Techron every 3000 miles. I bought a 12 oz bottle and I want to add it to the fuel. I am less than half tank full. Should I add it now and immediately fill up or should I add it, drive a bit, and then fill up when the tank is almost empty? Thanks! :renntech: azzar0.
-
I was wondering if the 17" OEM rims from a 2006 Porsche Boxster would fit on a 1998? The fronts are 17x6.5 Offset 55 with 205/55-17 tires. The rears are 17x8 Offset 40 with 235/50-17 tires. Would I need any spacers or they would fit without any modifications? Thanks! azzar0.
-
Is the top frame adjustable?
azzar0 replied to azzar0's topic in 986 Boxster Convertible Top Issues and Solutions
Much better now! I unscrewed the bolts, added a few washers behind the bracket, adjusted the frame, screwed the bolts back in, and the gap is gone. Thanks Ashley! azzar0. -
Is the top frame adjustable?
azzar0 replied to azzar0's topic in 986 Boxster Convertible Top Issues and Solutions
Hi Ashley, I did see the 3 bolts you mentioned. I'll play with them when I get home tonight. The latch seems to be centered, it's just the back of the driver's side that is off by a little bit. Hopefully when I adjust the bolts it will allow me to push the back outward without messing up the front. I'll keep you posted. Thanks, azzar0. -
I noticed that my driver's window has a small gap towards the back of the car when the top is up. The front of the window seems OK. The gap starts about where the window curves and it gets wider towards the bottom of the window. Is there a way to adjust the top frame to 'push' it more towards the left side (as you look from the back of the car) on the driver's side? The rubber seal seems to be OK, so I don't think the problem is from the seal... Thanks, azzar0.
-
Make sure the parking brake is on, the top is in open position (windows will go down a couple of inches), and press the button. It should work. Good Luck! azzar0.
-
You're right. The car runs fine. I guess there is no need to replace the wires since the coils are separate entities. Wow, those coils in the picture are really bad! Mine just have a small crack, very little. I'll see how much they cost and take it from there. Thanks ToolPants! azzar0
-
I was thinking about leaving the wires plugged in, but I wanted to clean the coils while I had them out. It is good to do one side at a time, I agree it would be less of a pain to troubleshoot any problems that way... I would still like to know if the wires can / should be changed and how? I may have to replace the coils as 2 of them have small cracks on them... My local dealer charges $88 a piece though! I will check with Sunset and see how much they charge. Can I just change the cracked ones or do I have to change them all? I think I would change them all just to be consistent... Thanks, azzar0.
-
Well - it's all done :) It took me a couple of afternoons / evenings (I started yesterday around 3 PM, stopped around 10 PM last night, started again around 3 PM today and I was done by 9 PM), but I got everything done. It took me a good hour to figure out the best way to put the car up on four jacks. I used the "alternate" jacking points method and I was able to lift the car up without any problems. Taking the bumper cover out was not hard - just tidious (I hate those plastic rivets, pain in the butt - good thing I bought replecemnts prior to starting this project). The radiators looked good, I vacuumed a little, changed the side lights (to match the xenons), and put everything back together. Next I did the brakes. My brake lights have been on and off for the past few months, but the pads still had some life so I put it off until the light came on almost constantly. I noticed that the right pads were worn more than the left ones - is this normal or should I check something? The right front pads were almost gone while the left ones still had about 30% left (the sensor wire was still intact). The rear pads still had about 65% left, but I decided to change them anyway. I reused the sensor wires (although I had new ones). I could have left the old pads in, but since I have to go through the 'bedding' of the pads period I figured I might as well do it for all wheels at once. No surprises here, easy job... Next I tackled the spark plugs. I really didn't have any problems - a bit ackward to get to #1 and #4 (the ones towards the front of the car), but really not that bad. The only problem I had was after I put everything back - cylinder #2 was throwing a missfire error because the wire wasn't snapped all the way in. I went back and, after a few attempts, I was able to snap it in. I cleared the fault code and haven't had any problems since. Once I had new spark plugs, it was time for an oil change. Other than being messy, it wasn't hard at all. I used a tool from AutoZone for the oil filter (the "B" type, part # 25401, as suggested by gandrade1 and chaser), and everything went very smoothly. I attempted the fuel filter last night but I wasn't able to figure out how to get to it. Thanks to ToolPants and goldnogard, I was able to revisit the fuel filter today and finally snapped it out and put the new one in. This was the hardest part of the project. It was also the only part where I had to be under the car a lot, which I didn't really enjoy that much... After the fuel filter was replaced I started the car to make sure that everything still works - and it did. I put the protective shield back under the car, placed the wheels, brought the car down and torqued the wheel bolts. At this point all I had to do was replace the polyrib belt. It took me less than 10 minutes to have the old one out and the new one in! I took the car out for a spin and it ran beautifully. I didn't notice any significant improvements (my car never did have rough idles or anything like that to begin with), but knowing that I did all of the 60K maintenance service by myself gave me an immense feeling of achievement. I have yet to change the air filter and the cabin filter. They were out of them when I checked. That's a 2 minute job and I am not worried about it though. All in all it was a great experience! AND it saved me a LOT of money, even though I purchased all Porsche-approved parts. I would like to thank all of you for creating, participating, and helping others in this great forum! I wouldn't have been able to do any of this without this outstanding library of human knowledge. azzar0.
-
Fuel Filter Replacement - Help needed!
azzar0 replied to azzar0's topic in 986 Series (Boxster, Boxster S)
DONE!!! After I removed the brakets and snapped the pipes out of their holders I was able to wiggle the lines out. Out of everything I've done, this was, by far the toughest one. I guess it seemed this tough because my expectations were completely different. I was expecting the fuel filter replacement to be an easy job... In any event - it's all done now. Thank You all for guiding me through it! azzar0. -
OK, I finally found an AutoZone that had the "B" cap wrench. Of course it matched and worked like a charm. I have new oil in the car now :) Thanks all for your help, azzar0.
-
Fuel Filter Replacement - Help needed!
azzar0 replied to azzar0's topic in 986 Series (Boxster, Boxster S)
Thanks Ali and ToolPants. I'll go under the car again and remove the 2 brakets holding the pipes as you suggest and see if I have better luck. Thanks again, azzar0. -
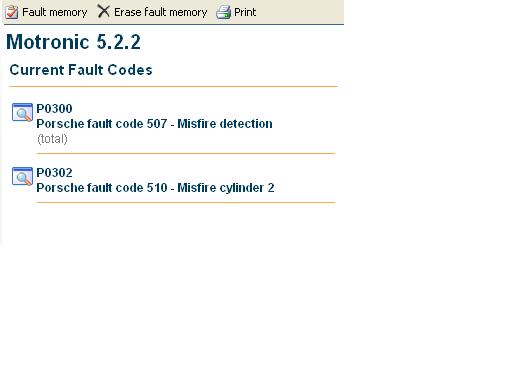
I just replaced the spark plugs and now I am getting a missfire on cylinder 2: First of all, is cyl 2 the middle one on the passenger side? The middle cyl on the driver's side is OK, but I did notice that the wire for the one on the passenger side does not 'click' when I reconnect it to the coil. The wire cover (the boot) is a little lose and I can't seem to be able to get rid of this missfire error. Any ideas? Also, if I wanted to replace the wires that connect to the coils - how do I do that? I followed the path but they all go into a tubing that goes in the back of the car and I can't find the other end. Can the wires be purchased from dealer / AutoZone? What is the part number? Thanks, azzar0. EDIT: I was able to snap the connection back in and the missfire error didn't come back (so far). I let the car running for about 10 minutes. I would still like to know how to change the wires though, if anyone knows :)

-
Hi Gus, I went to 2 Autozones and they didn't have the "B" wrench. I'll call around tomorrow and see if other stores carry it. Thanks for the tip! azzar0.