Welcome to RennTech.org Community, Guest
There are many great features available to you once you register at RennTech.org
You are free to view posts here, but you must log in to reply to existing posts, or to start your own new topic. Like most online communities, there are costs involved to maintain a site like this - so we encourage our members to subscribe or donate. All subscriptions and donations go to the costs operating and maintaining this site. We prefer that guests take part in our community and we offer a lot in return to those willing to join our corner of the Porsche world. This site is 99 percent member supported (less than 1 percent comes from advertising) - so please consider an annual subscription or donation to keep this site running.
Here are some of the features available - once you subscribe RennTech.org
- View Classified Ads
- DIY Tutorials
- Porsche TSB Listings (limited)
- VIN Decoder
- Special Offers
- Paint Codes
- Registry
- Videos System
- View Reviews
- and get rid of this welcome message
It takes just a few minutes to register, and it's quality Porsche information at a low cost.
Contributing Members also get these additional benefits:
(you become a Contributing Member by subscribing or donating money to the operation of this site)
- No ads - advertisements are removed
- Access the Contributors Only Forum
- Contributing Members Only Downloads
- Send attachments with PMs
- All image/file storage limits are substantially increased for all Contributing Members
- Option Codes Lookup
- VIN Option Lookups (limited)


fpb111
-
Posts
436 -
Joined
-
Last visited
Content Type
Profiles
Events
Forums
External Paint Colors
Downloads
Tutorials
Links Directory
Collections
Classifieds
Store
Everything posted by fpb111
-
Lets build a limited data base, get your pyrometers out and check temps after a 1/2 hour - 45 minute highway run, and maybe one after a run on your favorite twistys. If it stops raining here I will do one tomorrow. Log ambient, cold pressure and hot temp.
-
Possible cracked cylinder liner
fpb111 replied to flipflap's topic in 996 Series (Carrera, Carrera 4, Carrera 4S, Targa)
It is hard to tell but the "crack" (I think I see) is so straight that it looks more like light scoring -
I will do that. Thanks.out of curiocity. My understanding has been that oil pressure depends on oil level as well. If not so, does oil pressure stay the same regardless of oil pressure before it drops below a level where oil pump cannot inhale the level?The basic answer to your question oil pressure stays the same until there is no oil at the pickup.The pressure will fluctuate with RPM and temperature, that is normal.
-
It is tough to find recommended tire temps for street tires.http://www.tune2win.com/index.php/performance_tests/tire_tech_tuning_for_your_tires/TemperaturesAll tires have a temperature range within which they will generate maximum grip. Below this point the tire will begin to slide and break away prematurely. Above this point and the tire will once again begin to slide prematurely, but can also begin to blister and suffer permanent damage. So how do you know what is too cold or too hot? Most tire manufacturers will provide a range of temperatures to target, which is a great starting point. For example, BFGoodrich recommends an operating range of 160-220F for their g-Force R1 competition tire (more on these later).Measuring tire temperatures requires the use of a pyrometer. There are two different styles available, the probe type and the infrared type. Infrared pyrometers measure the surface temperature of the tire, whereas probe type pyrometers measure the core temperature. Infrared pyrometers are great for realtime tire temperature monitoring where it is impossible to use a probe type. Because surface temperatures change very quickly, unless you are monitoring and recording the values in realtime, by the time the vehicle rolls down pit lane the surface temperatures will not be of any use. This is where the probe type pyrometer is the tool of choice, as the tire temperature is far more stable below the surface.--------------------------------------------------------------------------------http://www.bridgestonetrucktires.com/us_eng/answers/doctor_performance.aspDear Tire Doctor,What are normal surface/tread temperature ranges for truck tires after they've been running for a while?Regards, Guy^ back to top Dear Guy,Thank you for this opportunity to be of assistance.While there are many factors, such as ambient temperature, load, speed, air pressure wheel position and tire pattern that will determine the tread temperature of a truck tire in normal operating conditions, we normally experience surface tread temperatures in the range of 150 to 180 degrees Fahrenheit.Regards, Tire Doctor--------------------------------------------------------------------------------http://www.arden.org/misc/pressure.html
-
Makes sense. They are in the "waste" heat stream from the radiators. Touch the top of the front fenders about 2" behind the headlights after a "normal" drive especially after one with the air on. Bet they are ~170.
-
2004 3.6 X51 oil change
fpb111 replied to JaxJim's topic in 996 Series (Carrera, Carrera 4, Carrera 4S, Targa)
one segment is 0.2 liter. One below the "full" mark or one left unlit above "full" line? rock breaks scissor paper covers rock scissor cuts paper stick trumps gauge. -
Check E6 "On a Boxster fuse E6 is for a flap in the fuel filler and the cell phone connector under the radio. If that fuse blows then you can't get fuel in. I suspect that when working on your radio the cell phone connector was shorted and blew the fuse. It is 7.5 amps. Guess the turbo is the same." http://forums.rennlist.com/rennforums/996-forum/343727-filling-the-tank.html
-
Or this iis also an AGM H7 size Battery: Duralast Platinum/Battery #H7 AGM Price: $179.99 +Core: A "Core" is an item that has the ability to be rebuilt by the manufacturer using new replacement parts. Rebuilding these items helps to reduce product cost as well as aid in recycling efforts which helps the environment. When the old part is returned to AutoZone, we refund the core charge to you. $15.00
-
Not sure if Boxster is the same. The part number I gave is for the 996 4 lever indicator assy.
-
The turn signal unit has a broken plastic tab in the spring of the mechanism. If your car has the four stalk switch setup get a 996 613 219 10 EWC. The top has a thin wire cable that guides the edge into the channel. Most likely one end has come loose. How to replace the indicator and wiper switch assembly on a Porsche Boxster 986 or 996 model 911. 996 613 219 10 EWC (equipped with computer IE 4 stalks) Tools Required: 8mm spanner 10mm spanner T-30 Torx screwdriver bit with long thin extension T-10 Torx bit Philips Screwdriver 24mm Socket & Ratchet Tipex, or paint and a permanent marker Duct tape 1. Turn on ignition (to prevent alarm from going off) and disconnect negative terminal from battery. Cover the terminal to make sure it cannot contact the wire. 2. IMPORTANT! Wait for at least 10 minutes to allow the airbag system to discharge. 3. Fully extend the steering column. 4. Undo the 2 T-30 torx head screws behind the wheel. Turn the wheel to help access them. 5. Remove the airbag and carefully pry the connector off with a flat bladed screwdriver. Set the airbag aside. If removing for an extended period of time, Porsche recommend keeping in a locked container! 6. There was already paint on the shaft and nut from the factory, but if not, use paint and a permanent marker to mark the position of everything, so the wheel goes back on straight. 7. Undo the 24mm nut holding on the wheel. 8. Keeping the nut on a couple of threads (so you don't smack yourself in the face with the wheel) pull and wobble the wheel free. If stuck, a couple of taps with a rubber mallet should help. 9. Remove the nut and spring washer. Make another mark where the splines on the wheel meet the shaft. Then after disconnecting the electrical connectors remove the wheel. 10. Stick a bit of tape on the clock spring to stop everything moving around. 11. Remove 4 philips screws on the column faceplate, and 2 on the clock spring. There are a further 2 T-10 screws on the side on the column. 12. Carefully unclip the plastic parts, noting the routing of the wires inside. Move the clock spring to one side whilst connected. Remove the rubber stalk surrounds noting which is which. 13. The switch assembly is clamped around the shaft. Mark it's position on the shaft to make sure it goes back at the same depth, then loosen the 8mm bolt on the clamp. 14. Disconnect the 2 wiring plugs by pulling to the front of the car and remove the unit. 15. The new unit was supplied minus the wash/wipe insert (for cars with/without headlamp washers) so I swapped the old one over. Reassembly is the reverse of dismantling. The steering wheel nut torque setting is 34 ftlbs. It's just more than hand tight if you haven't got a torque wrench. The mark on the nut lets you know where it should be. Porsche recommend fitting new airbag screws each time the seal is broken. Or just use a dab of blue loctite as they do to prevent them vibrating loose. Once everything is back together reconnect the battery and enjoy working indicators again!
-
Call a bearing/seal supplier near you. Bring the old seals. They should be able to cross ref the number on the seal.
-
Try it without the gas cap on to rule Evap Valve caused tank vacuum..I would suspect the ignition sensor, or maybe valve timing.
-
Make sure that the foam seal around the heater core access cover, under the battery, is not leaking. That will let in rain/car wash/etc water that will sit in the heater well and fog the windshield.
-
996 replacement engine
fpb111 replied to boxster-s-dk's topic in 996 Series (Carrera, Carrera 4, Carrera 4S, Targa)
all that with only 18k miles? I would definitely get a 2nd opinion. If you are considering option #2 talk to Jake Raby at Flat 6 about one of his "better then new" rebuilds. http://www.flat6innovations.com/engines/the-flat-6-difference -
New suspension components
fpb111 replied to jimmy3530's topic in 996 Series (Carrera, Carrera 4, Carrera 4S, Targa)
May want to investigate an IMSB update while you are in there. -
To get the rear windows to move you need to press the micro switch that the top latch (hook) hits when it pulls the top closed against the windshield header. You can press it with your finger. Shouldn't be any problem just using the hardtop. You might get some rattling from the unsupported clamshell.
-
THAT WOULD BE THE RIGHT SIDE. Not the left in a your UK car.
-
996 electrical problem/computer
fpb111 replied to daley996's topic in 996 Series (Carrera, Carrera 4, Carrera 4S, Targa)
Time for a new battery OOPS! see that you got a new one. Have you driven it much after you replaced it? What is the voltage indication after it has been running for 1/2 hour? ~14v? You may have a problem with the alternator. -
996 replacement engine
fpb111 replied to boxster-s-dk's topic in 996 Series (Carrera, Carrera 4, Carrera 4S, Targa)
Really?? How many removed bearings have you seen with the original grease still in them? I have only seen/touched 4 (with 24k to 53 k miles on the engines) none of which had any sign of the original grease. All were full of engine oil. -
Cabrio top problems
fpb111 replied to mstamm61's topic in 996 Series (Carrera, Carrera 4, Carrera 4S, Targa)
Did you check the res again? Sounds like you may have a blown piston seal. -
There are kits, 3M plus many others, for polishing your headlights. Just be sure to seal them with a UV protector after you are done. Many kits include sealant also. http://www.autogeek.net/headlight-lens.html http://www.renntech.org/forums/tutorials/article/38-polishing-acrylic-headlights/
-
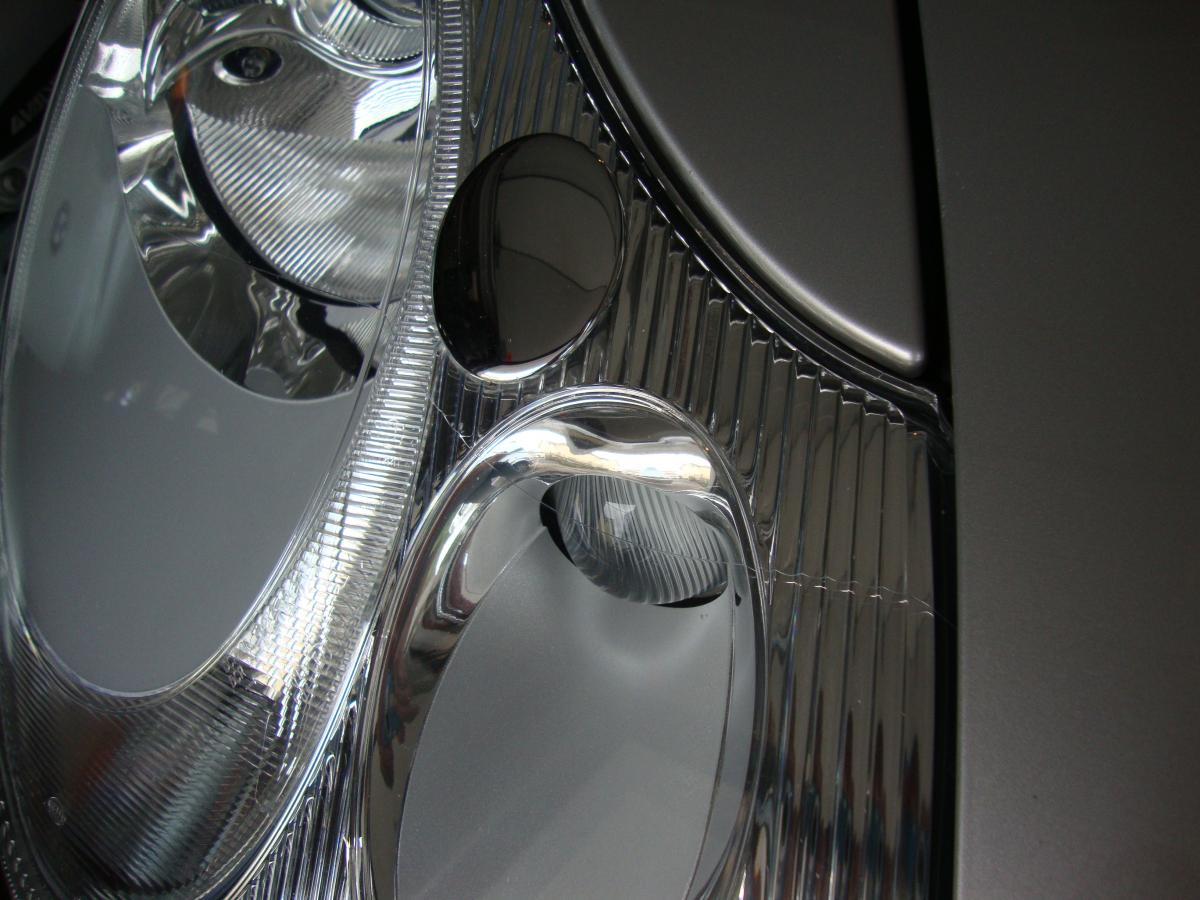
Pretty sure new ones will be "cracked" also. Look closely to be sure you aren't seeing a mold mark or seam. If what I see on yours is a crack both of mine are too.

-
Pic?
-
If you are going to replace the battery anyway, why not do that first to see if the 6 year old battery is the cause of your problem?
-
New 996 Owner with no owners manual?
fpb111 replied to RichTJ99's topic in 996 Series (Carrera, Carrera 4, Carrera 4S, Targa)
Spend the $20 its worth it.