Welcome to RennTech.org Community, Guest
There are many great features available to you once you register at RennTech.org
You are free to view posts here, but you must log in to reply to existing posts, or to start your own new topic. Like most online communities, there are costs involved to maintain a site like this - so we encourage our members to donate. All donations go to the costs operating and maintaining this site. We prefer that guests take part in our community and we offer a lot in return to those willing to join our corner of the Porsche world. This site is 99 percent member supported (less than 1 percent comes from advertising) - so please consider an annual donation to keep this site running.
Here are some of the features available - once you register at RennTech.org
- View Classified Ads
- DIY Tutorials
- Porsche TSB Listings (limited)
- VIN Decoder
- Special Offers
-
OBD II P-Codes - Paint Codes
- Registry
- Videos System
- View Reviews
- and get rid of this welcome message
It takes just a few minutes to register, and it's FREE
Contributing Members also get these additional benefits:
(you become a Contributing Member by donating money to the operation of this site)
- No ads - advertisements are removed
- Access the Contributors Only Forum
- Contributing Members Only Downloads
- Send attachments with PMs
- All image/file storage limits are substantially increased for all Contributing Members
- Option Codes Lookup
- VIN Option Lookups (limited)


C4 Pazzo
-
Posts
37 -
Joined
-
Last visited
Content Type
Profiles
Events
Forums
External Paint Colors
Downloads
Tutorials
Links Directory
Collections
Classifieds
Store
Everything posted by C4 Pazzo
-
Carrera C2
C4 Pazzo replied to jdearth's topic in 996 Series (Carrera, Carrera 4, Carrera 4S, Targa)
You don't need the becker removal keys for the PCM1. Just pop off the side covers using a butter knife at the bottom of each side piece. It feels like you'll break something, but keep twisting the knife and it will pop off. If you have leather, be careful not to damage it. Then remove the torx screws (I think they are T20, but I'm not positive). Grab the unit at the sides and slide it out. It's heavy and a bit awkward, so don't let it tip forward and smash into the shifter. Oh, yeah, it's already broken. I'd put a towel over the shifter before installing the new one, just in case. You'll need to disconnect several connectors and the aentenna at the back. Note also that there is a clip underneeth the PCM unit that is connected to the alarm. When you install the new unit, you'll need to attach the alarm connection so that it touches only the insulated part of the unit, otherwise you'll get an alarm error. If the plastic is not on the new unit, you can just put a piece of tape in its place to keep it from completing the circuit. You might also have to pop out the switches on the sides of the PCM and pop 'em in the new one. Just when you think you'll break 'em, they'll pop out. I think you might need the dealer to program the PCM to match your car, but I'm not sure. I don't know if that would keep your car from starting, but if it did, I suppose you could put the old one back in. -
Thanks, Loren!
-
Loren, I just received my RoW M030 from Sunset. All the part numbers check out with those listed above, except for the rear springs. I have a 2000 C4 Cab 6-Speed, the rear springs are p/n 996 333 531 12 marked Red/Green. From the posts above, it appears red/green is for a C2 cab, while brown/red is for a C4 cab. Did I get the wrong rear springs? What are the differences between springs marked red/green vs. brown/red? Also, the front shocks (996 343 043 13) were marked lilac and the rear shocks (996 333 051 13) were marked green. What is the significance of those markings? Thanks.
-
PSE Kit contents?
C4 Pazzo replied to Orient Express's topic in 996 Series (Carrera, Carrera 4, Carrera 4S, Targa)
Orient Express, Try Sunset Imports (Board Sponsor). They might be able to do a little better than that price. -
Post Brake Bleed Problem?
C4 Pazzo replied to C4 Pazzo's topic in 996 Series (Carrera, Carrera 4, Carrera 4S, Targa)
Update Started the car this afternoon without incident. I did notice that my seat was slightly further back than normal. I suppose its possible that I did not have the clutch pedal fully depressed, but I could not recreate the problem. I hope that's a good thing. -
I bled my brakes and clutch last night with the Motiv bleeder and ATE Super Blue. All seemed fine when I drove it last night. This morning on start up, I get a short whirring/grinding sound from the rear immediately after engine starts. Then car seems to run fine. Clutch is smooth and firm. Brakes seem fine, perhaps a tad softer than before. Note that the old fluid was clear; must have been changed just prior to my purchasing it 3,000 miles ago. Could this be related to the brake bleed, or just a coincidence? Any ideas? Next steps? TIA. Car is a 2000 C4 Cab.
-
Homelink hardwire help
C4 Pazzo replied to acao's topic in 996 Series (Carrera, Carrera 4, Carrera 4S, Targa)
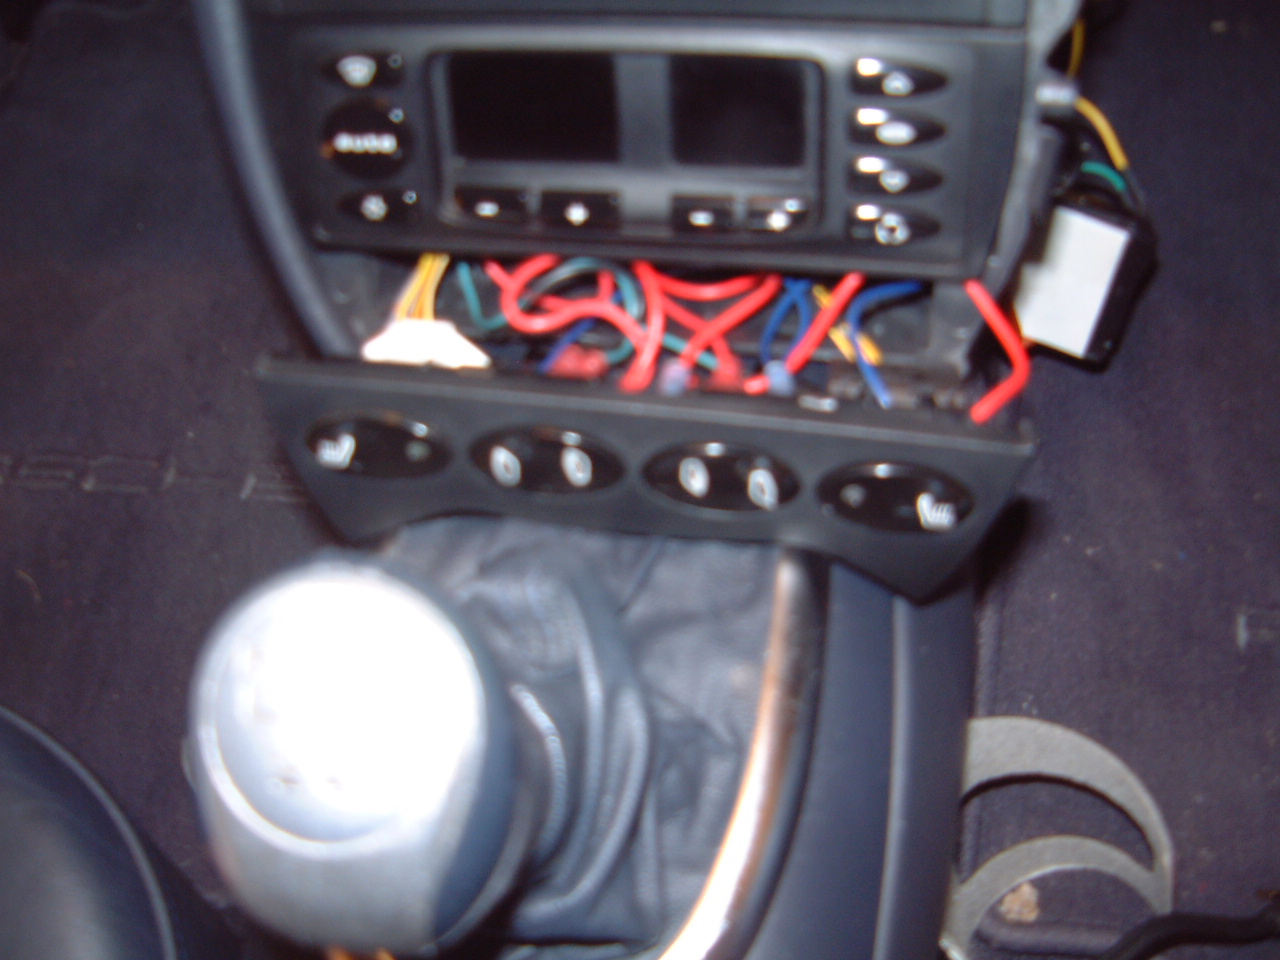
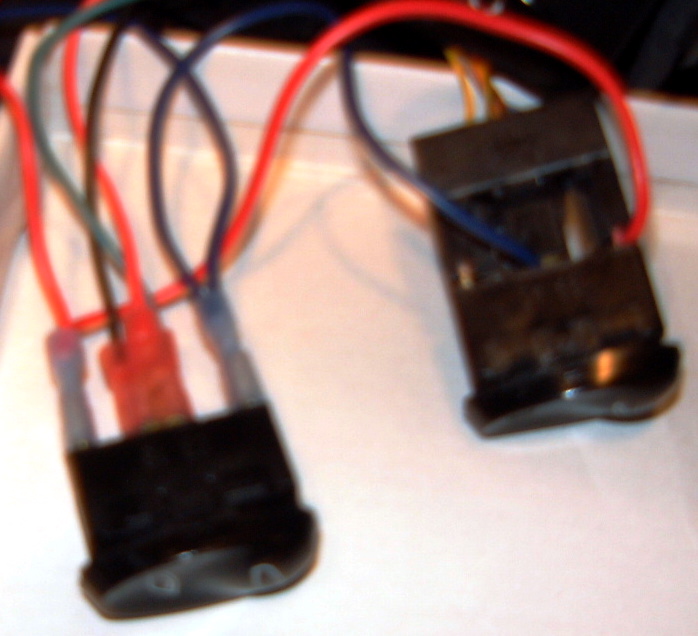
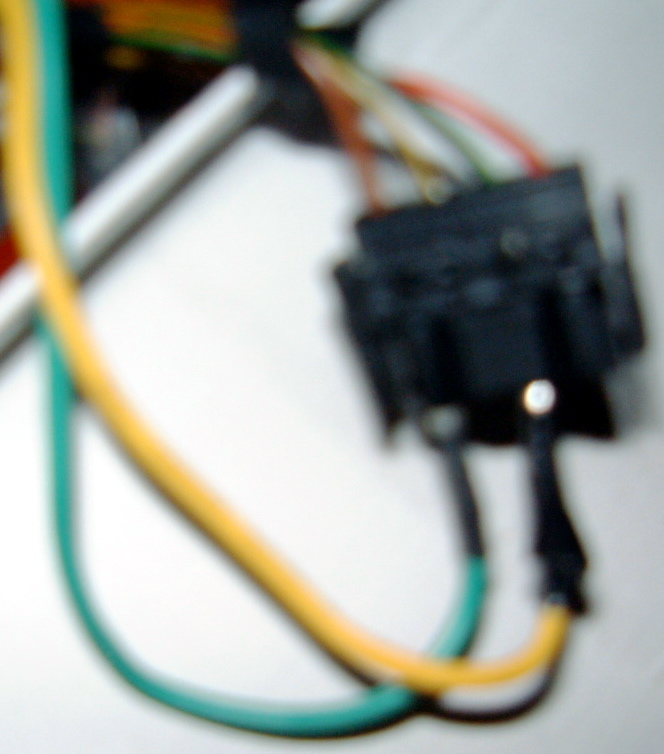
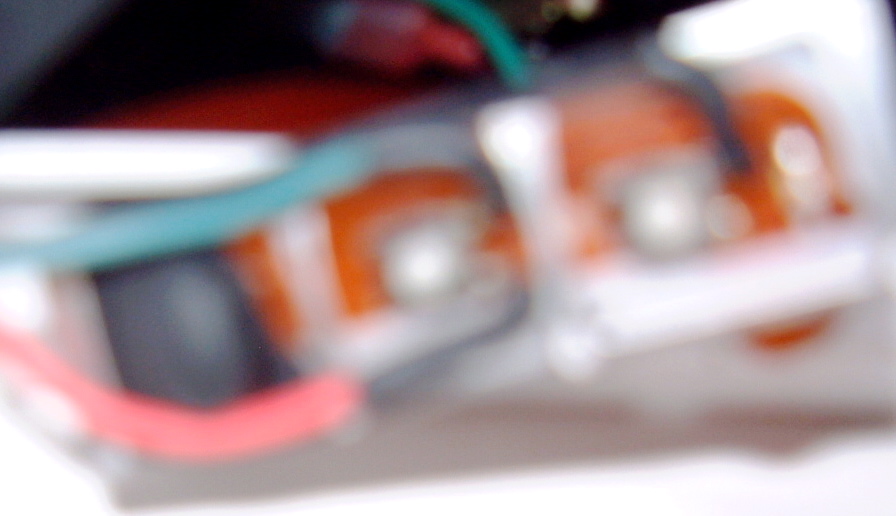
Here are some pics. I apologize for the poor quality, but hopefully they'll help. Overview Pic -- Two window switches in Targa Batwing 4 position switch plate (to control 4 doors). Dimming light tapped off of heated seat. Homelink under consol in background. Power tapped off of cell adapter. One of window switches on left, heated seat switch on right. Blue wire connects Brown center postion wire from heated seat to Outside Raised side of window switch. Red wire connects Grey/Blue/Red dot wire from outside heated switch to Outside depressed portion of window switch. Power tap. Green ground wire connected to Brown ground wire of cell adapter. Yellow wire to Green/Black switched power of cell adapter. Note that Green/Red on end opposite the Brown ground wire of cell adapter is always on power, if you prefer that. Worst pic of all. Buttons for Homelink. Black button at left still has rubber covering; this one is not used. At far right, very blurry, is the indicator LED. Center button, red wire at bottom is connected to the single center position of the window switch. Red wire is soldered to lower right corner connection point of center Homelink button. Green wire veering to the left is connected to one of the two parallel center positions of the window switch (don't be mislead by Green wire heading to the top center background of pic; that is the grounding wire for the Homelink power supply that connects to the cell adapter). The other Green wire is soldered to the upper right connection point of center Homelink button. Black wire connects to the other parallel center position of window switch. It is soldered to upper right connection point of the right-most Homelink button.
-
Homelink hardwire help
C4 Pazzo replied to acao's topic in 996 Series (Carrera, Carrera 4, Carrera 4S, Targa)
acao, I recently did this install with what looks to be the same type of Homelink you are using. Regarding your questions: 1. I tapped into the handsfree cell phone adaptor under the front consol. The brown wire is ground. The wire second from the opposite end is switched power. You can use that if you don't want the homelink to work without the key in the ignition switched on. Otherwise, use the always on power at the opposite end (I used the switched one). 2 and 3. I don't remember off the top of my head which conductors are which, but I actually did the opposite of what you suggest. That is, I connected the positive conductor to the center switch position (I used a window switch; I don't know if the targa switch is wired the same). I then connected a negative from each of two of the homelink switch positions to the corresponding left and right position of the window switch. I'll try to take some pictures to show this. 4. I put the window switches (I actually used two postions from each of two homelinks) in the "batwing" next to the heated seat switches and tapped off of them for the lighting. Again, I'll try to take some pictures to show this. 5. For the soldering, I took off the rubber Homelink button covers and soldered on the opposite side from that shown in your pictures. It was a PITA, but I am not a soldering expert. -
drpeter, I used an unmodified footwell lite switch, along with a four pole, double throw latching relay to switch between my cd changer and an iPod. For the nite illumination, as shown on Sandy's diagram, I connected position 3 of the footwell switch to the grey/blue/brown wire connect to the PSM switch. For the positive switching voltage, I connected position 4 of the footwell switch to the red/black of the rear defogger switch. By connecting position 5 of the footwell switch to the common spot on the fourth pole of the latching relay, and connecting the corresponding spot of the fourth pole for the iPod to ground, the annunciator lite goes on when that position is selected. It is important to make sure the positive power source is either a switched source or one (like the defogger) that shuts off after a period of time so as not to drain the battery if the car sits for a long period of time with the annunciator lit. I needed to use a four pole latching relay, since I used three poles for the left, right and ground channels for the audio switching.
-
Sandy, I just wanted to say "thank you" for posting the diagram of the latching relay and footwell light switch (way back in June). I was banging my head against the wall trying to use a four pole double throw latching relay with the footwell light switch to switch between the cd changer and an iPod. After searching Renntech and finding your diagram, I was able to get it working in minutes, including both the nite illumination LED and amber annunciator LED. Fantastic! Thanks. C4 Pazzo
-
Clutch Pedal Squeak
C4 Pazzo replied to C4 Pazzo's topic in 996 Series (Carrera, Carrera 4, Carrera 4S, Targa)
I had my car in the shop to get a replacement key programmed, so I asked them to take a look at the clutch pedal. They "threw some grease on it" and, so far, that seems to have fixed it. They said if it comes back, they'll need to grind down the pedal a bit. -
I've reviewed the TSBs regarding clutch noise. I think my 2000 996 C4 Cab (built late '99) "should" have the updated parts mentioned in TSB 3005, but I still hear a squeak when I depress the clutch pedal. I applied silicon spray to the clutch master cylindar -- still squeaking. Should I swap out the clutch pedal power assist spring (pn 996 423 081 12)? Is this a doable DIY? Any other parts needed? Special tools? Any other suggestions?