Welcome to RennTech.org Community, Guest
There are many great features available to you once you register at RennTech.org
You are free to view posts here, but you must log in to reply to existing posts, or to start your own new topic. Like most online communities, there are costs involved to maintain a site like this - so we encourage our members to subscribe or donate. All subscriptions and donations go to the costs operating and maintaining this site. We prefer that guests take part in our community and we offer a lot in return to those willing to join our corner of the Porsche world. This site is 99 percent member supported (less than 1 percent comes from advertising) - so please consider an annual subscription or donation to keep this site running.
Here are some of the features available - once you subscribe RennTech.org
- View Classified Ads
- DIY Tutorials
- Porsche TSB Listings (limited)
- VIN Decoder
- Special Offers
- Paint Codes
- Registry
- Videos System
- View Reviews
- and get rid of this welcome message
It takes just a few minutes to register, and it's quality Porsche information at a low cost.
Contributing Members also get these additional benefits:
(you become a Contributing Member by subscribing or donating money to the operation of this site)
- No ads - advertisements are removed
- Access the Contributors Only Forum
- Contributing Members Only Downloads
- Send attachments with PMs
- All image/file storage limits are substantially increased for all Contributing Members
- Option Codes Lookup
- VIN Option Lookups (limited)


RJG1
-
Posts
10 -
Joined
-
Last visited
About RJG1

- Birthday 11/01/1953
RJG1's Achievements
Member (1/1)
0
Reputation
-
Door Latch Issue even after replacing it....
RJG1 replied to RJG1's topic in 986 Series (Boxster, Boxster S)
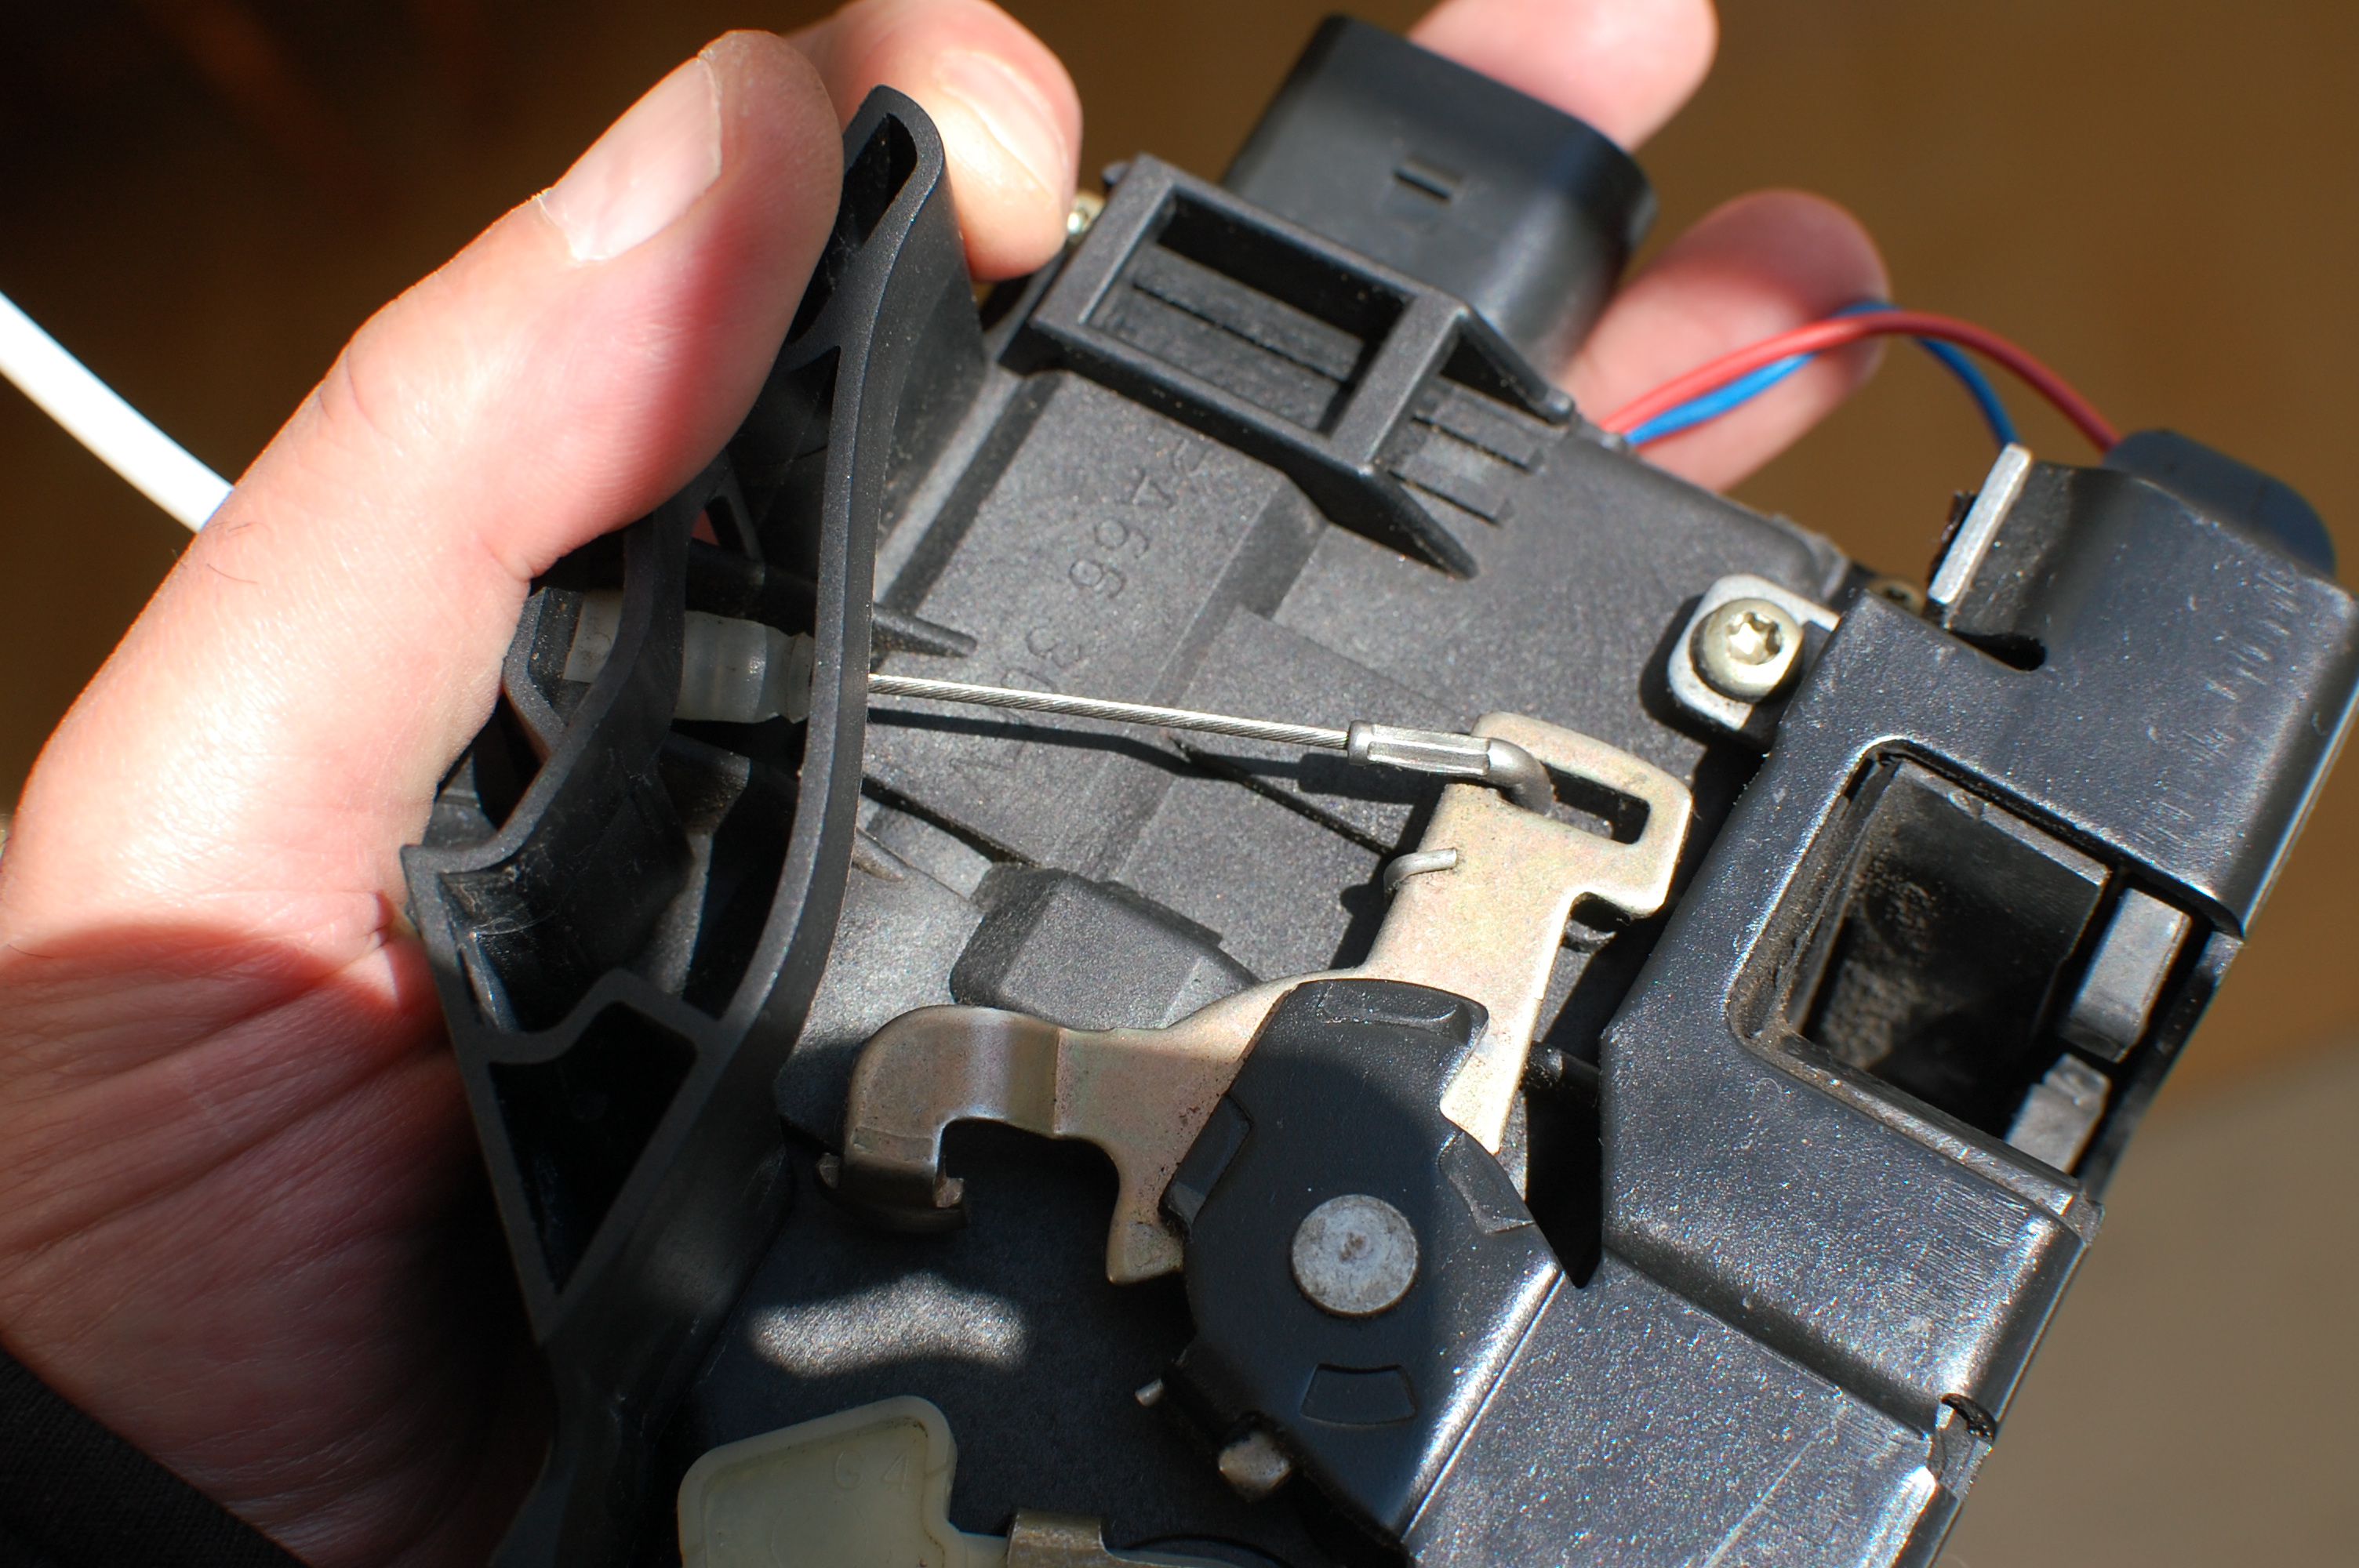
Glyn- Please let me explain, if I hold the door pull in the up position and close the door whilst holding the pull up the entire time, the door will shut, but not completely but it will close enough that if you give it a HIP check it will seal. My point was that in the almost shut postion as explained above the window stays lowered (as I am forcing it by holding the pull up) until the striker (door latch) is moved to the completed shut postion, DL mircoswitch is engaged and the and the window seals into the top. But this is just an aside as the real issue is the outside pull will drop the window and once I let go of it to shut the door the window raised and hits the top. The inside pull works correctly, open from the inside and the window drops and closed again once the door striker (door latch) is fully deployed. I have not disturbed the railing (I hope) and I did retrain the windows as you describe. "The microswitch above the lock that the door handle engages with when you pull the handle is not disturbed when you remove the lock so i cant understand how one lock works one way and the old one works correctly - check the two plastic pins that hold the microswith are firmly engaged - they can and do become detached." I'm as confused about this as you they are totally unrelated as you said. "Also dont understand why the inside door handle does nothing with the new lock fitted - again a microswitch to lower the window is attached to the inner door handle - not the lock, when you say it does nothing i take it the catch does not release the door?" The door catch works correctly as it too is a hard wired to the inside pull and runs to the door latch. What happen is with either of the New latches 1/2 once install and everyone is wired correctly the inner and outer handle do no provoke any changes in the window height. If I reinstall the OLD latch they are least work (inside correctly outside just the drop while you continue to hold the door pull up) Any ideas? I thinking about removing the right side door pull and trying it on the left side to eliminated it (mircoswitch) from the equation. If you have any other thought please let me know. Thanks for the reply. Best R Bob -
Door Latch Issue even after replacing it....
RJG1 replied to RJG1's topic in 986 Series (Boxster, Boxster S)
Well new Door Latch arrived Friday Morning (as an aside the US Postal system is amazing , 2 days from West Cost to the east cost for $9.00, try that with the other carriers) lets call it #2 I installed it today and exactly the same results as #1 see post 1. Outside handle has no effect inside handle does nothing as well. Same as it ever was. Reinstall old latch and inside handle works outside pull drops window 13mm until you let go and the windows goes back up before closing. Also, Glyn I actually tested the striker as you mention in your reply with a screwdriver and the window does return up once you engage the lock into believing the door in closed. So now what? Its not the door latch. The door pull must be working or the window would not drop down and inside pull and Micro switch are well behaved. Dumb question does the new latch #1,#2 need to be introduced to the system via PSTN tool? Maurice I checked the wiring harness best I could and it appear to be bone dry. double checked the connector on the latch and door pull seem good. Inside MS is cool. Only thing I can think of which I didn't mention is this may or may not of started one morning when the battery was dead and I had to jump start the hood open via the positive pole in the fuse box. Once I applied the red jumper cable to the red jump pole the windows dropped down and the instrument cluster reset tach and speedo went for 0 to their max. position and returned. I had witness this before as my battery had gone dead several time during the past 7 years of ownership. Looking to connect the dots not sure this is pertinent. Didn't notice the windows hitting the top for a while as I had my top down for several weeks during early Fall. I do not drive her when it rains my Audi serves that role. So my point is I don't know if I expletive the system when I jump started the hood/bonnet. -
Door Latch Issue even after replacing it....
RJG1 replied to RJG1's topic in 986 Series (Boxster, Boxster S)
Thanks for the reply Maurice- Passenger side works perfectly however I don't believe you can interchange the left with the right as the right side houses the alarm functions if I understand it correctly. I will check the wires which lead from the door jamb into the door panels. Sunset is sending the 2nd unit out today with arrival here in Ct on Sat. And yes I can take the door apart in 10 mins tops....Bob at Sunset was thinking it may be the door handle micro switch but why wouldn't work with the old latch and not the new one... Its got to be the latch. One other observation with the old latch if I hold the outer handle up so the window stays down enough to close the door without banging the window frame , it very hard to shut the door where it seals hence it open slightly. If I push on the door to completed the closure the window will drop down and seal ok. So I'm thinking the door striker triggers an operation to keep the window lowered until close and the unit is not interpreting the door handle sequence correctly (lower only, until instructed by the door latch/striker sequence). Anyway I'll know for sure on Sat. hopefully... Thanks Bob -
Ok.. I know this has been discussed before but here is the a issue common to others. My drivers door window goes down 13mm once the outside handle is pulled but returns to the full position before the door is closed. I removed the door panel and inspected the inner door micro switch, cleaned with CRC , it works fine if you pull on the inside handle the windows goes down. So what to do? Many who has had this issue before stated they found it to be the door latch which has a internal micro switch. BTW all connections (Latch/Inner switch and Door Handle) were double checked for tightness.. I ordered a DS door latch from Sunset (BTW they are awesome to deal with Bob and Jeff) great prices to boot. They sent it out I replaced the latch today but no joy. Now the inside pull doesn't work at all and the outside pull does nothing. The only indication I have the latch is working at all is that once you connect power to it the window will drop down to the proper height but no amount of inner or outer door pulling will change the window position. Also, one other thing when you apply power to the new latch the red/white door panels light come on and do no gracefully power down. With the old latch the lights only lite up once you pull on the handles. That was my first clue something was amiss. So where do I go.. I put the old one back now the inner works and the outer does the same as it did before drop down and return before closing. I called Sunset suggesting the latch was defective. They suggested that I purchase a 2nd unit install it and return the 1st unit under warranty to see if Porsche will credit the part in 45 days. Does any one have any suggestion as to what they believe could be the issue. Also, if you ever take you door panel off order additional door panel fasteners #999-507-582-40 its a 8-pack to replace the worn , bent and broken ones you may or may not break .. TIA Bob 01 Boxster S

-
Is their any truth to the stated fact that Porsche changed the mounting flange on the 3.2 engine to remedy the RMS/IMS problem beginning 'in the model year 2006? Ive seen this on both this web site and others forums but fail to find any documentation from Porsche to support this claim. Any feedback would be appreciated. Thx Bob
-
Difficult shifting after tranny oil change
RJG1 replied to geoff's topic in 986 Series (Boxster, Boxster S)
Geoff- If they used 80W then your observation makes sense as its thicker oil and would require slightly more heat to thin out, 75vs 80 weight. Bob -
Painting Porsche wheels and calipers
RJG1 replied to RJG1's topic in 986 Series (Boxster, Boxster S)
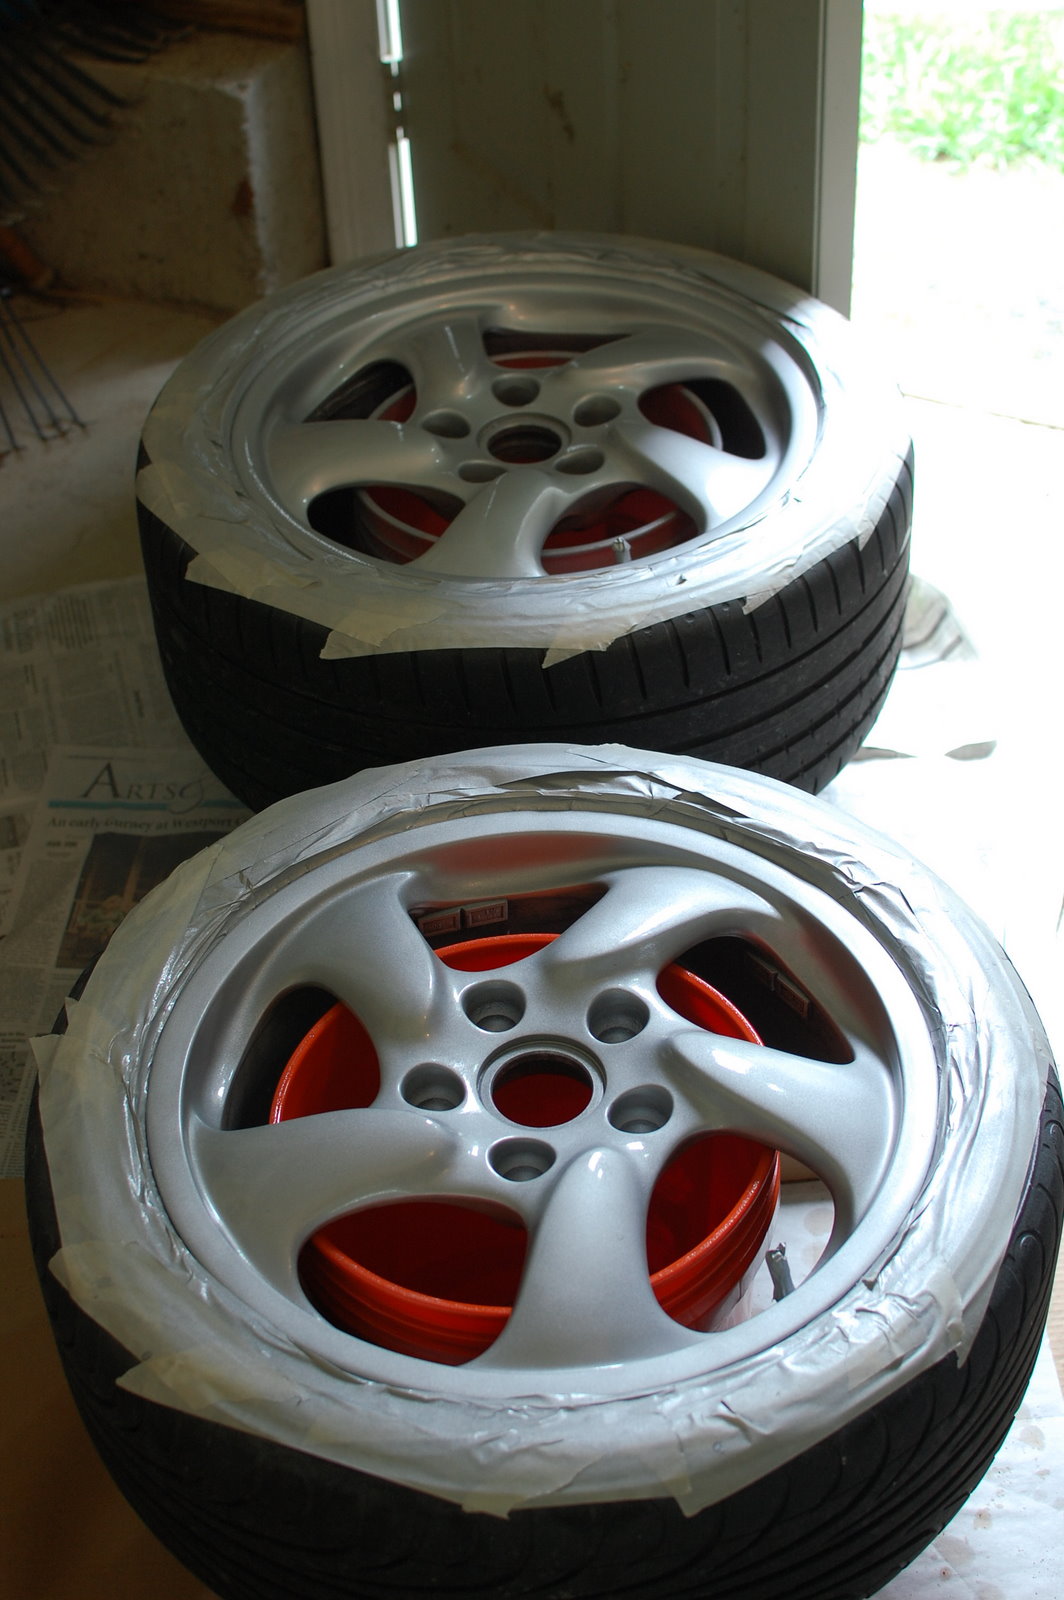
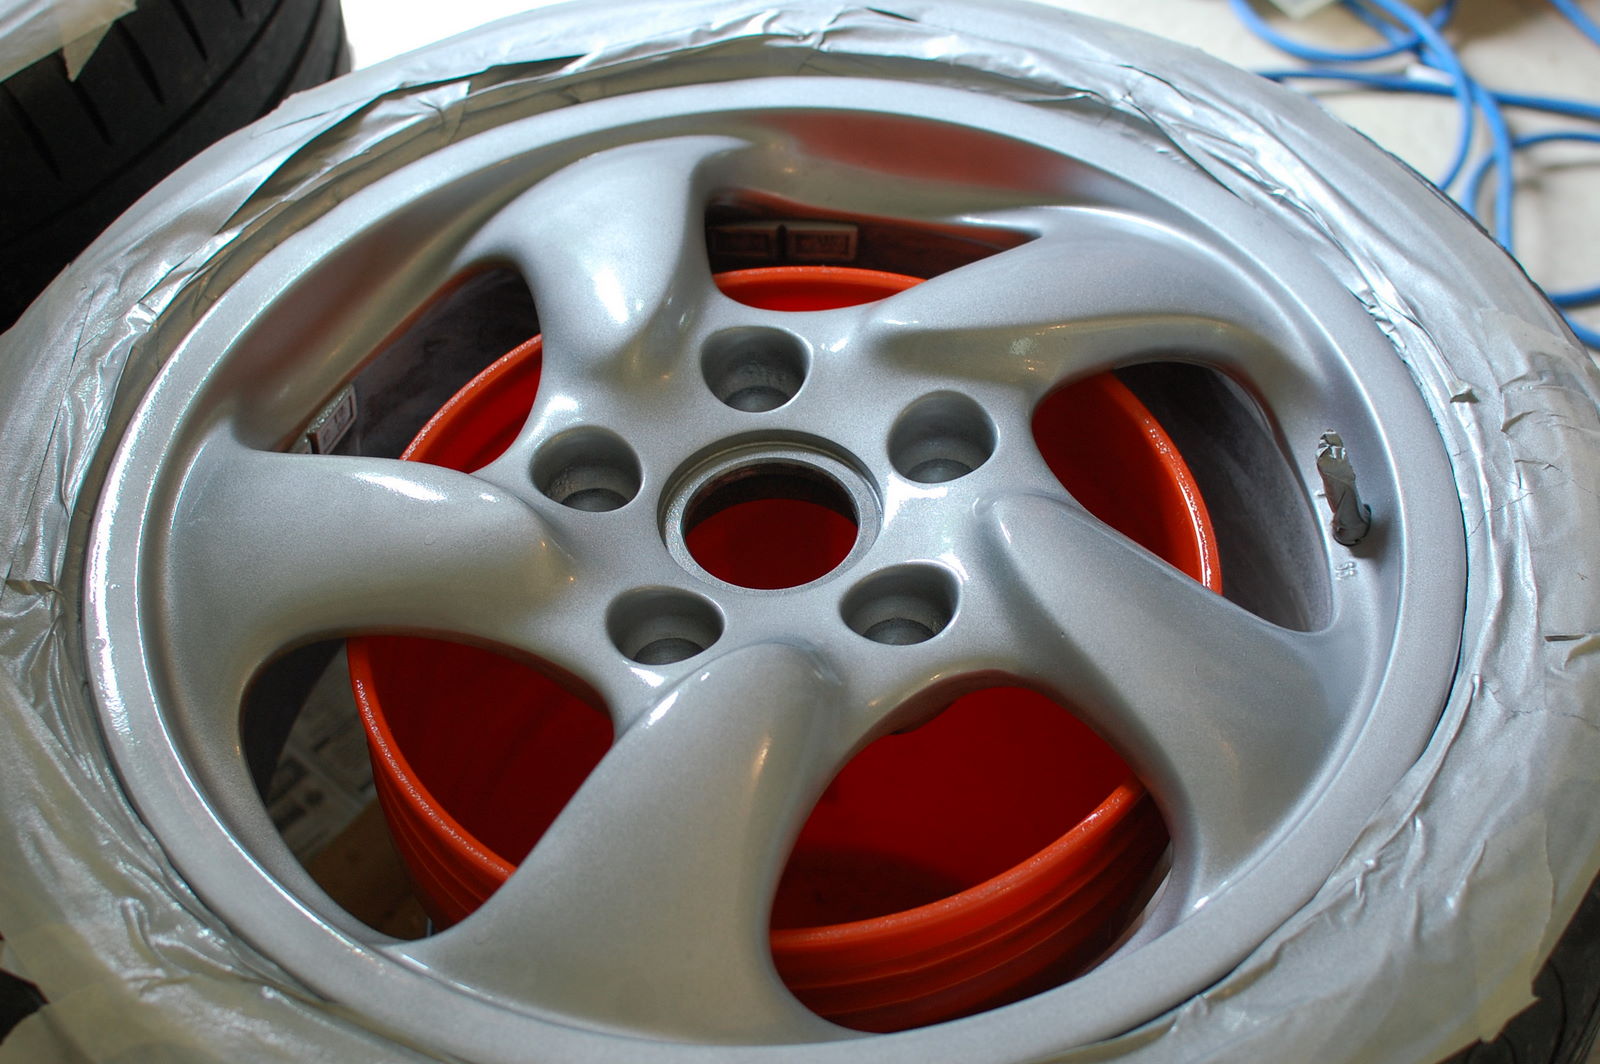
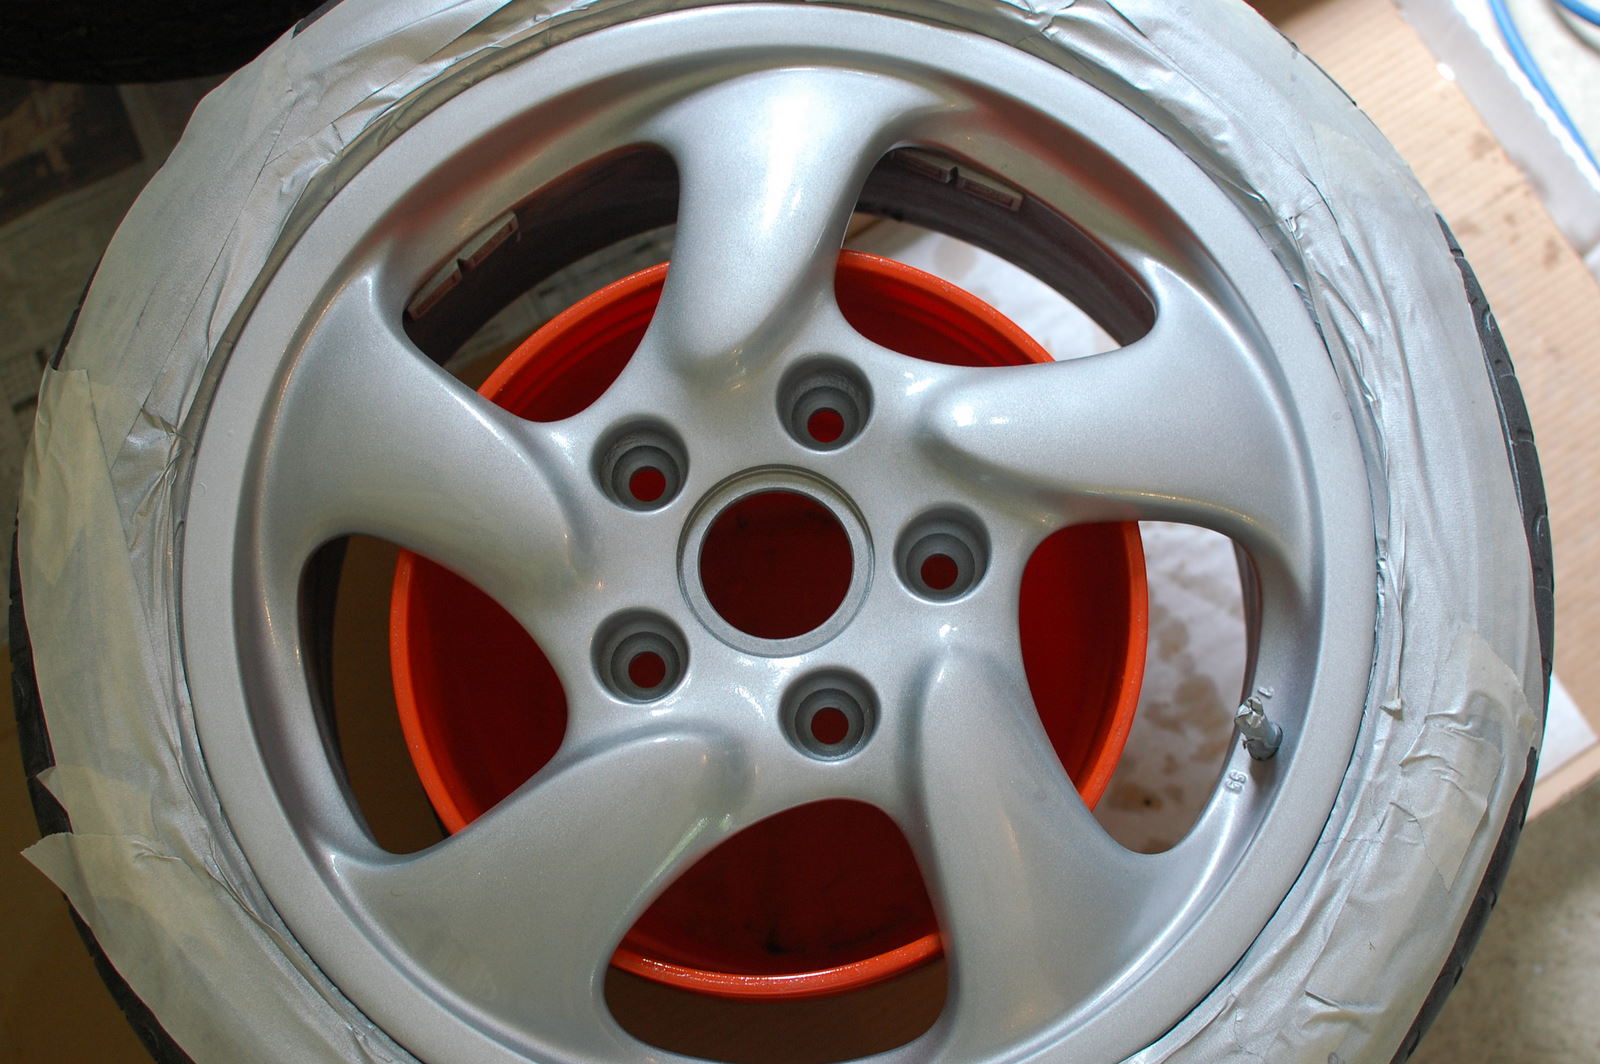
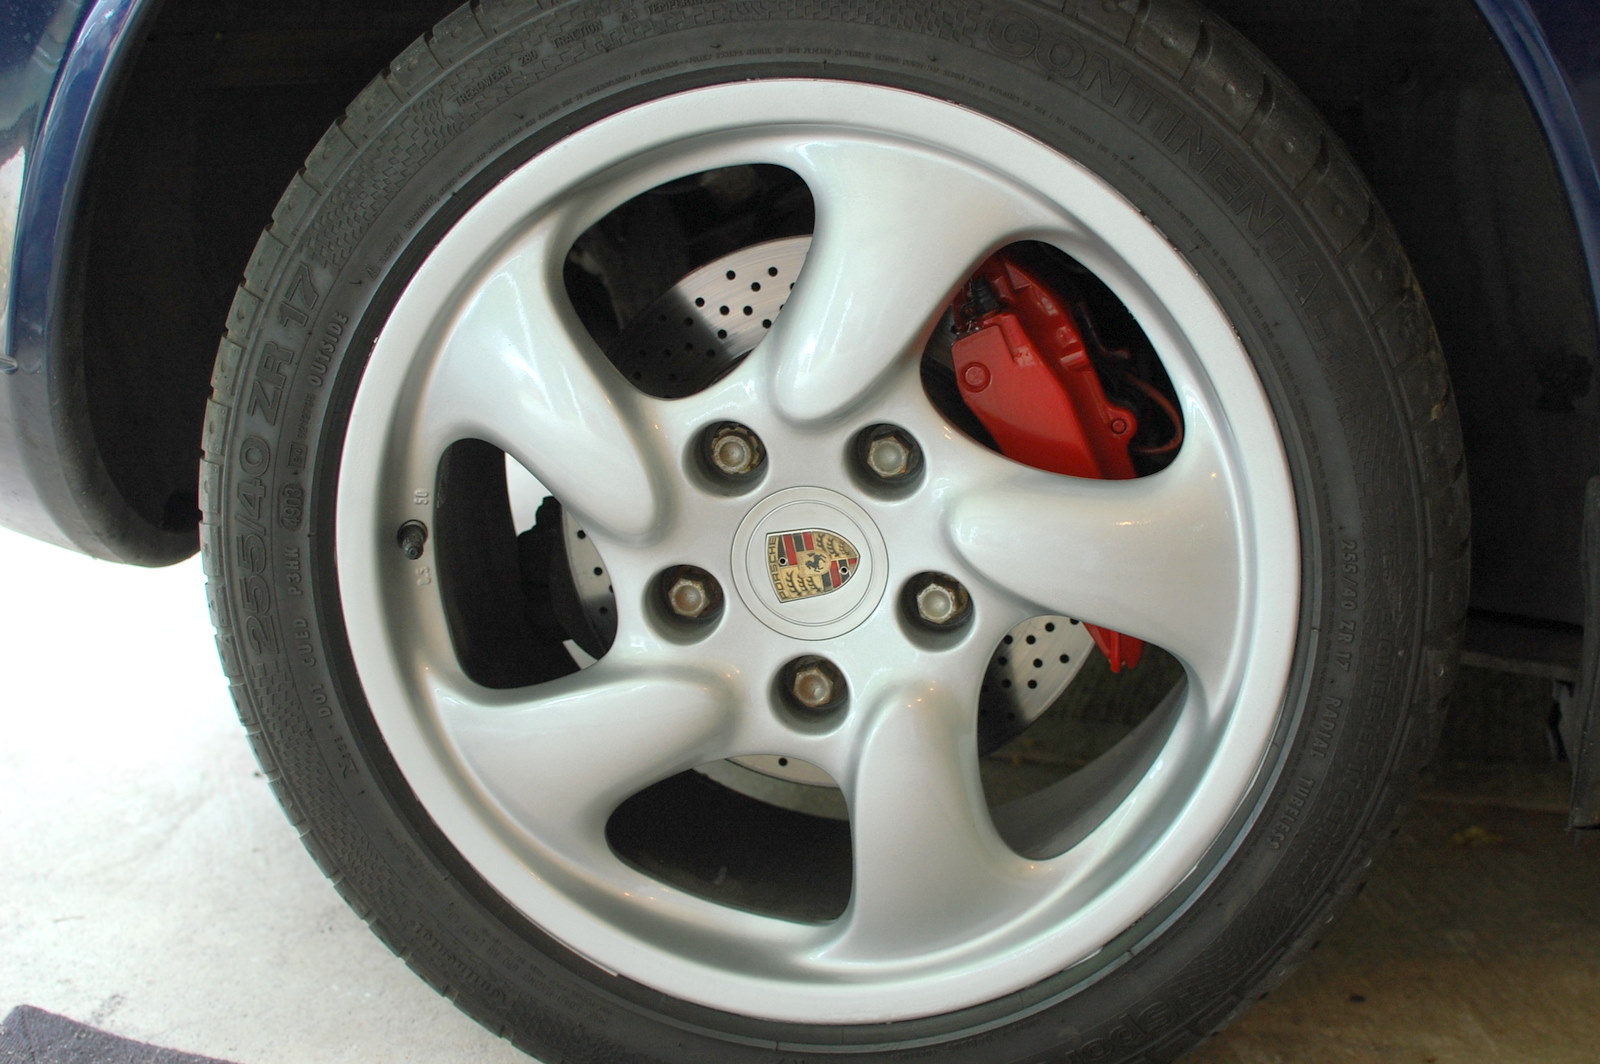
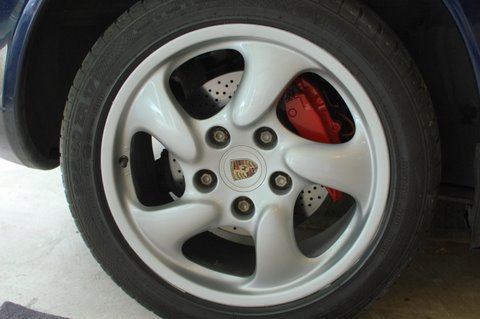
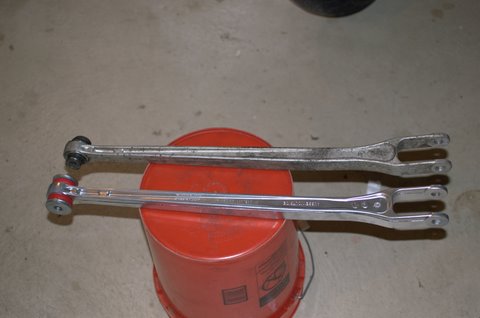
It was just rattle cans. However, the Clear coat from Spraymax , yields a professional spray gun type pattern (adjustable as well). I was skeptical at first but the output is about as spray gun like as can be had from a can. Also ,its a Poly urethane finish not Enamel as it 2 parts , downside is the pot life is 24 HRs ,use it or lose it. It will last much longer and should prove to be easiest to clean and keep clean is what Ill been told. If you look at one of the shots you will see where the Dupi can dripped from the nozzle but the sparymax never loaded up just a nice even puff of spray where you can cut in easily.Here a few more pix of my setup. Also ,in one picture the edge of the rim looks whitest that just a blown highlight from the camera. Thx Bob
-
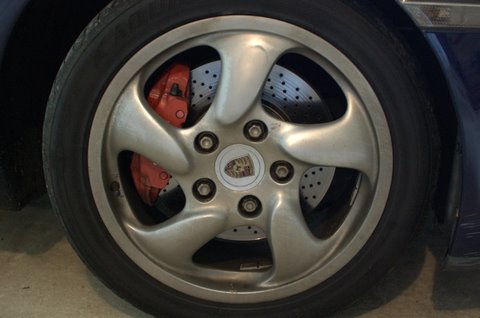
It was time... After looking at these pictures I was embarrass to post the before shot , anyway here's my results. All four wheels and calipers were painted by me. Calipers I used Dupilcolor Red ceramic paint and the wheels I use Wurth Silver and a 2 part clear coat from Spray Max 2 (expensive) but worth the cost. I cleaned with Brake Cleaner then rough off the old clear coat with 320/600/900 and 000 steel wool. No priming just 2 even coats of Wurths and 2 Coats of Clear. The caliper were prepared with Cleaner and a lot of wet sanding. I was as careful as I could be to remove very little of the factory powder coating. You need to feather out the edges where the clear is peeling. I was nervous using the Dupicolor it both matching the color and how well it sprayed. I very satisfied with the results. The 480 pic's photos do not do them justice. I was quoted 350+ (powder coating) for the Calipers and $400 for the wheels. My cost with apprx .$75 and 10+ hours labor in the garage. .
-
Boxster rear control arms (suspension noise)
RJG1 replied to kamran66's topic in 986 Series (Boxster, Boxster S)
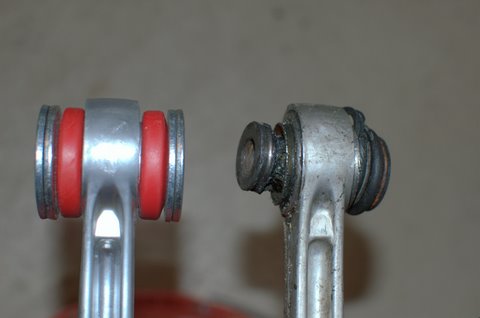
Here are two pictures of the Vertex Control arm replacement and the OEM part with the rubber boot removed. I installed one/ right side to resolve a clunking rattle. I also "did" the boxsterfarher fix but in my case it only worked for several hundred miles. I believe the swivel joint in the arm was well out of spec. Hence the nail punch fix was ineffective. Installation was a bit harder than the OEM (which is a very easy) as the bushings in the Vertex arm do not flex (L/R) so alignment of the bolt thru the joint into the captive nut required some persuasion ., RJG1 01 S
-
I have installed the SilverStar H7's on my Boxster S with litronics for the exact same reasons. The color of the silverstar is a 1,00,000 X better match to the higher temperature xeons. They (Silver stars) haven't any of the yellow tint the std bulb has... The cost was $35 US per set and installation is a breeze , see owner manual for bulb replacement instructions. Don't touch the bulbs with your bare hands.. Good Luck