Welcome to RennTech.org Community, Guest
There are many great features available to you once you register at RennTech.org
You are free to view posts here, but you must log in to reply to existing posts, or to start your own new topic. Like most online communities, there are costs involved to maintain a site like this - so we encourage our members to subscribe or donate. All subscriptions and donations go to the costs operating and maintaining this site. We prefer that guests take part in our community and we offer a lot in return to those willing to join our corner of the Porsche world. This site is 99 percent member supported (less than 1 percent comes from advertising) - so please consider an annual subscription or donation to keep this site running.
Here are some of the features available - once you subscribe RennTech.org
- View Classified Ads
- DIY Tutorials
- Porsche TSB Listings (limited)
- VIN Decoder
- Special Offers
- Paint Codes
- Registry
- Videos System
- View Reviews
- and get rid of this welcome message
It takes just a few minutes to register, and it's quality Porsche information at a low cost.
Contributing Members also get these additional benefits:
(you become a Contributing Member by subscribing or donating money to the operation of this site)
- No ads - advertisements are removed
- Access the Contributors Only Forum
- Contributing Members Only Downloads
- Send attachments with PMs
- All image/file storage limits are substantially increased for all Contributing Members
- Option Codes Lookup
- VIN Option Lookups (limited)

Silver_TT
-
Posts
779 -
Joined
-
Last visited
-
Days Won
15
Content Type
Profiles
Events
Forums
Exterior Paint Colors
Downloads
Tutorials
Links Directory
Collections
Classifieds
Store
Everything posted by Silver_TT
-

P1675 Porsche fault code 658 - Fault - engine purge fan
Silver_TT replied to Silver_TT's topic in 996 TT, 996 TT S, 996 GT2
Don't feel bad JFP. My better half is German (like real German, not of German descent). If this ends up being the fan I know she is going to point to that "Made in Italy" sticker on the fan (see post #5 of this thread) :huh: . I'm trying to get this fixed ASAP while she is out of the country because when she's back I'm not going to have much time to work on it. Thank you guys!!!! :notworthy:- 102 replies
-
- 1
-

-
- p1675
- engine purge fan
- (and 1 more)
-
P1675 Porsche fault code 658 - Fault - engine purge fan
Silver_TT replied to Silver_TT's topic in 996 TT, 996 TT S, 996 GT2
Ok, jpflip, well I don't feel so bad now that I couldn't get an ammeter. I went to Auto Zone and Home Depot both and even for $150+ all the multi-function meteres that include DC amperage measurability only go up to 10A. What's up with that? So, correct me if I'm wrong but it sounds like we are all in agreement that this is very likely the fan itself. jpflip, looks like that part # you have has been superceded. My fan looks like it already has been replaced because it shows part 997 624 046 01 (Loren says US MSRP is $119.85). I will call Sunset when they open in 1.5 hours and get this ordered. Hopefully it will be here middle of this week. While I would have liked to test this with a ammeter to drill deeper it seems like it's we have enough information to say, while not completely definitively, but highly probable that this is something to do with the fan. I owe all of you a huge thanks for guiding me through this. Will post the results once the fan gets here and I put it in (looks like a cakewalk to do). -
P1675 Porsche fault code 658 - Fault - engine purge fan
Silver_TT replied to Silver_TT's topic in 996 TT, 996 TT S, 996 GT2
jpflip - with the wiring harness uplugged at the fan, and telling Durametric to activate the Engine compartment purge fan, the LED light on the B4 fuse does NOT light up. This means it must be the fan, no? -
P1675 Porsche fault code 658 - Fault - engine purge fan
Silver_TT replied to Silver_TT's topic in 996 TT, 996 TT S, 996 GT2
I put in the LED fuse. Had durametric turn on the engine purge blower. Looked at the LED fuse, sure enough the LED fuse is lit up as I would expect. However, as soon as I unplug the wire from the fan the LED fuse goes off. Does this mean it's the fan that's causing the short?????? -
P1675 Porsche fault code 658 - Fault - engine purge fan
Silver_TT replied to Silver_TT's topic in 996 TT, 996 TT S, 996 GT2
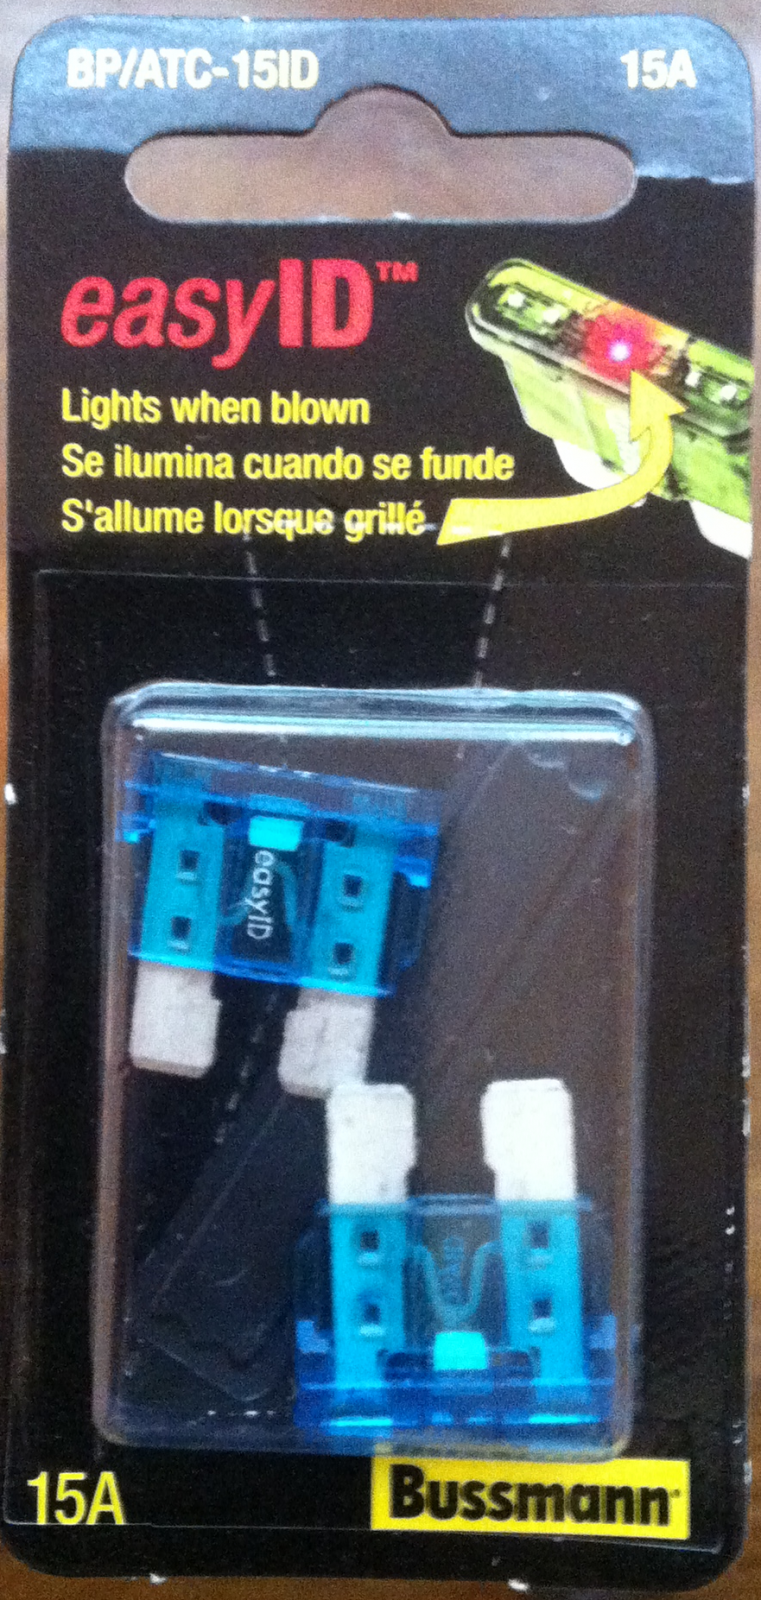
Just bought these at AutoZone and am going to install now. I will follow Ahsai's instructions with the fan and the 12-pin harness to start......: "Plug it in and let the fuse blow. After that, the LED on the fuse will light up whenever the circuit is powered (when you use durametric to turn on the fan). Now you can go disconnect each segment of the cable starting from the fan end. If the LED goes out, you found the segment that is shorted."
-
P1675 Porsche fault code 658 - Fault - engine purge fan
Silver_TT replied to Silver_TT's topic in 996 TT, 996 TT S, 996 GT2
Going to AutoZone now but FYI, I put in a new fuse to B4 and turned the ignition all the way to the last point before starting the engine (so full power to all electonics). I let it sit like that for about 60 seconds and my car is not warm because it sat in the garage all night without running. I turned off the ignition, pulled B4 and it's NOT blown. So then, jpflip, I think this confirms this is very helpful as it must mean it's between the relay and the fan then... I just wanted to do this explicit test now just in case to confirm this as it's very helpful to know it's after the relay. -
P1675 Porsche fault code 658 - Fault - engine purge fan
Silver_TT replied to Silver_TT's topic in 996 TT, 996 TT S, 996 GT2
Yes, I think this makes sense becuase only when I tell Durametric to turn on the engine compartment fan do I get the blown fuse. I have tried just plugging in the fuse, turning on the ignition (not > 172F in the engine), and when I pulled the fuse out again I did NOT see it blown. When I get these LED fuses that Ahsai suggested this should be even more clear to be 100% sure this is the case. But this is very useful information to know that B4 is always powered from the power source to the relay. We must be getting close.......... -
P1675 Porsche fault code 658 - Fault - engine purge fan
Silver_TT replied to Silver_TT's topic in 996 TT, 996 TT S, 996 GT2
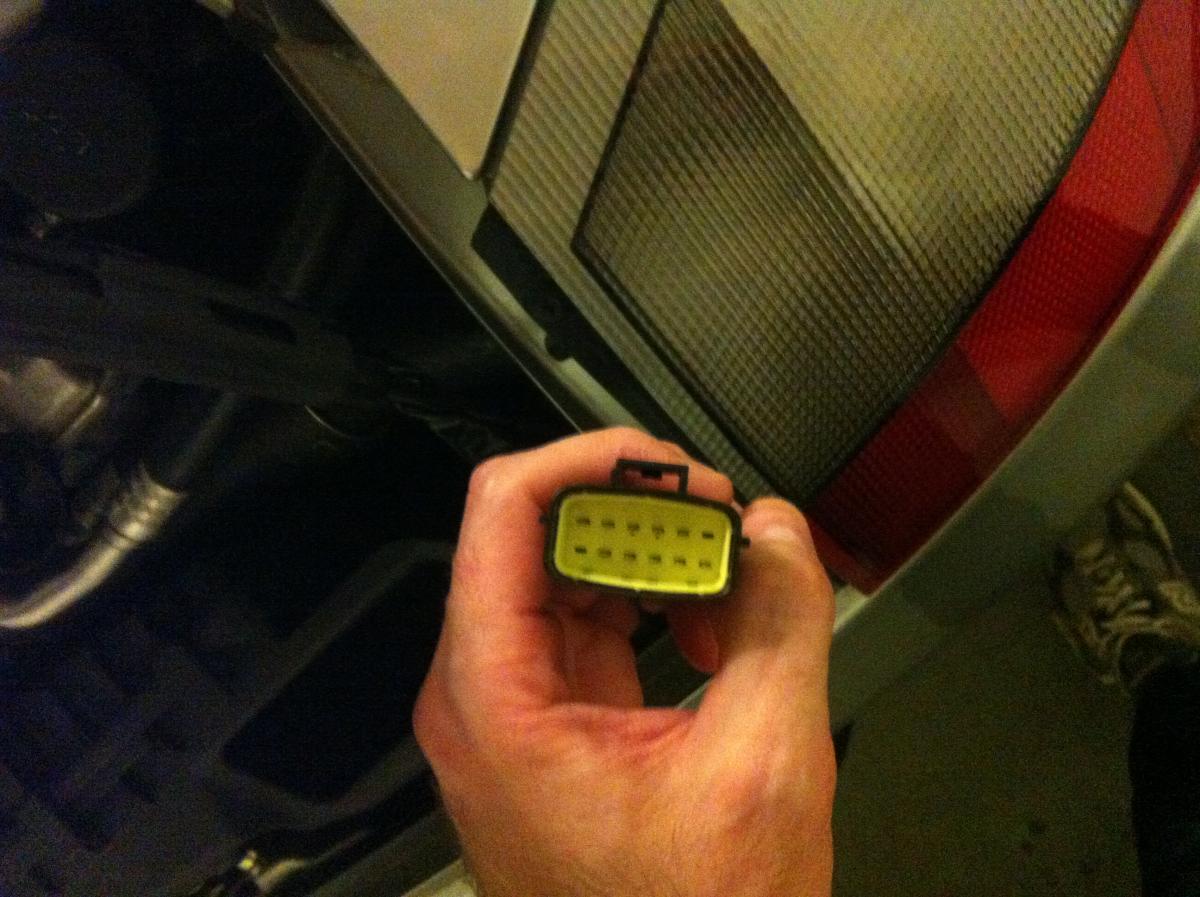
Trust me, I can use all the help I can get :) (and be very grateful for it). Thanks Ahsai, you were very helpful on my o2 sensors/cats previously. I saw those smart fuses at AutoZone so I will go get some now. They were right above the regular fuses I bought. jpflip - good to know that this must be between the fan and the relay. I'm assuming the connector (in the 3rd picture in my post #41 above IMG_0978.jpg) runs straight to the relay. So does this really have to be one of 3 things: 1. The fan (which it seems like it's not given our tests) 2. The wire that runs from the fan to that 12-pin connection jpflip wanted to look at last night 3. The wire from the 12-pin connection to the relay (I'm assuming there are no other segments in between, that this runs straight to the relay). -
P1675 Porsche fault code 658 - Fault - engine purge fan
Silver_TT replied to Silver_TT's topic in 996 TT, 996 TT S, 996 GT2
Yes, it is B4 that is always blowing. I agree it definitely seems like there is a short somewhere... this is what I was afraid of, it seems like it's in the wiring going deep into the car. The fuse doesn't blow until I tell the car to turn on the fan using Durametric. If I don't tell it to turn on the fan, the fuse does not blow. I had the gearbox taken out and repaired shortly after I got the vehicle, so it's possible that something could have happened while they did that??? But then again I didn't really have a ton of hours logged on the car before then. A long drive home and then a few hours after that. Maybe it's possible something happened to the wiring when they took the gearbox out, but it doesn't really seem like these wires would have anything to do with that. They also did an oil change and put on new tires. What steps can I take now to start to narrow down where the short is????? -
P1675 Porsche fault code 658 - Fault - engine purge fan
Silver_TT replied to Silver_TT's topic in 996 TT, 996 TT S, 996 GT2
Ok, here is the plug with the 12 wires. I can understand why you wanted to look at it because it's the harness connection that connects the wires that go up into the spoiler/tail. It looks ok to me. No signs of corrosion or discoloration. See pics attached.
-
P1675 Porsche fault code 658 - Fault - engine purge fan
Silver_TT replied to Silver_TT's topic in 996 TT, 996 TT S, 996 GT2
I just tested the fan. It seems to spin just fine. Spins real fast and sounds right. jpflip, let me see if I can find this plug you're talking about now. and post a picture of it. -
P1675 Porsche fault code 658 - Fault - engine purge fan
Silver_TT replied to Silver_TT's topic in 996 TT, 996 TT S, 996 GT2
OK, i just bought 12 feet of lamp cord at Home Depot. Will test the fan now. Jpflip stated I don't have to worry about which is +/- so I will wire that up now and should know in a few minutes. -
P1675 Porsche fault code 658 - Fault - engine purge fan
Silver_TT replied to Silver_TT's topic in 996 TT, 996 TT S, 996 GT2
jpflip, are you talking about the temperature sensor? looks like a long skinny black bottle nipple? i unplugged the connector to it and it looked good on the wire side. I can post a picture if you want to see it, it's easy to pull off. -
P1675 Porsche fault code 658 - Fault - engine purge fan
Silver_TT replied to Silver_TT's topic in 996 TT, 996 TT S, 996 GT2
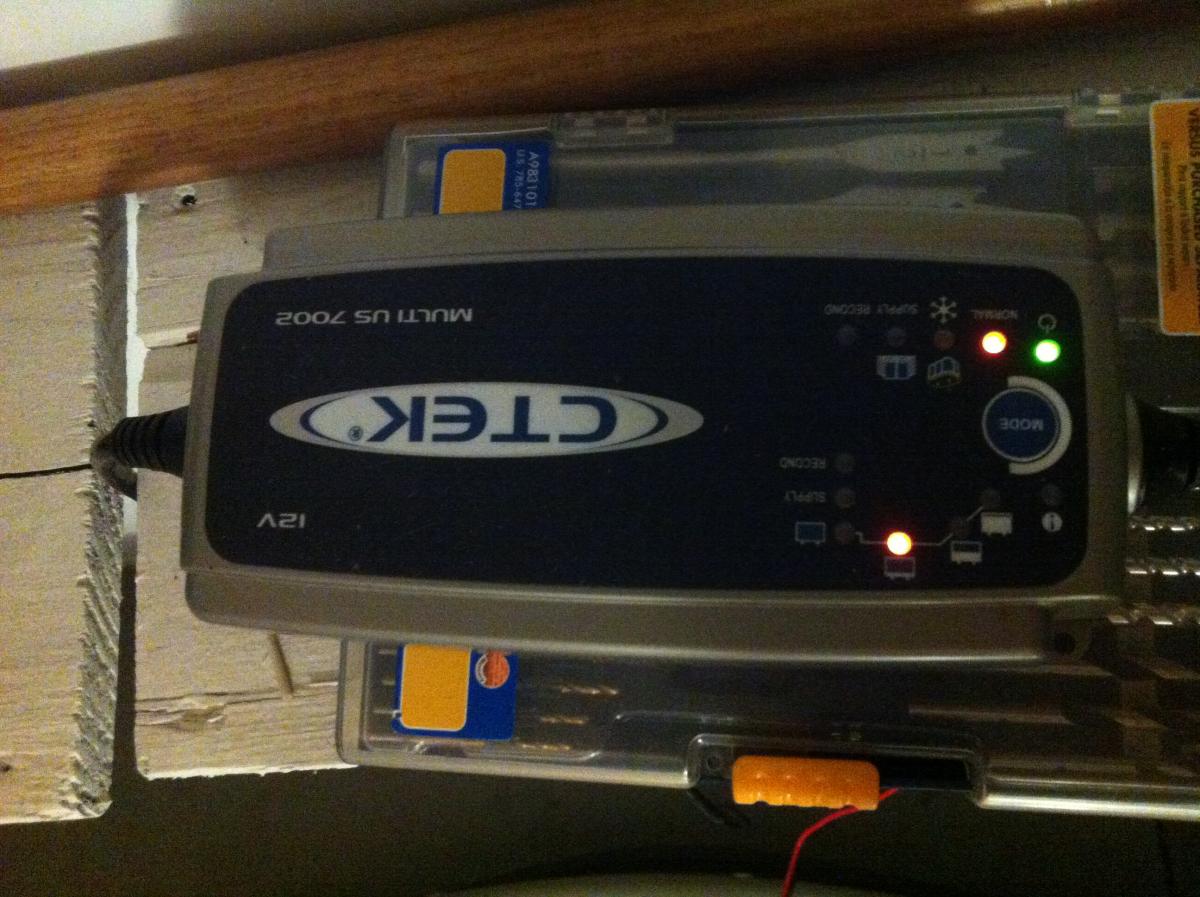
I can do that. One question -- I have a CTek 7002. Doesn't it have a mode where it can actually act as a battery? i wonder if I could use that??? Might be easier than removing the fan if that's possible. If this is possible I will try this now.
-
P1675 Porsche fault code 658 - Fault - engine purge fan
Silver_TT replied to Silver_TT's topic in 996 TT, 996 TT S, 996 GT2
JFP, 1. I will remove the relay #8. When you say to check both wires for continuity, I can perform this test as I did earlier today -- but which two leads am I going to be using for the test and which specific two wires? 2. I can definitely unplug the fan again, but how exactly can i rig up a set of jumper wires to power the fan independently? For what it's worth I know it will work at least briefly for a second because I've heard it run for half a second before the fuse blows each time. Pardon my ignorance. If it seems like I'm being anal I just want to make sure I'm really clear on these tests I'm running so I don't report back any false information to you guys and belabor this troubleshooting. REALLY apprecaite you guys offering your time and advice !!!!! -
P1675 Porsche fault code 658 - Fault - engine purge fan
Silver_TT replied to Silver_TT's topic in 996 TT, 996 TT S, 996 GT2
No need to apologize at all. I need all the smartest folks on this site like you andf JFP's help on this little gremlin. To answer your question it seems that the blades of the fan can turn fairly easily, however it's kind of hard to get my hand in there because the plastic grill is impeding my ability to really reach in there. Is there any other trick? I did not connect the fan directly to the battery. How exactly could I go about doing that? -
P1675 Porsche fault code 658 - Fault - engine purge fan
Silver_TT replied to Silver_TT's topic in 996 TT, 996 TT S, 996 GT2
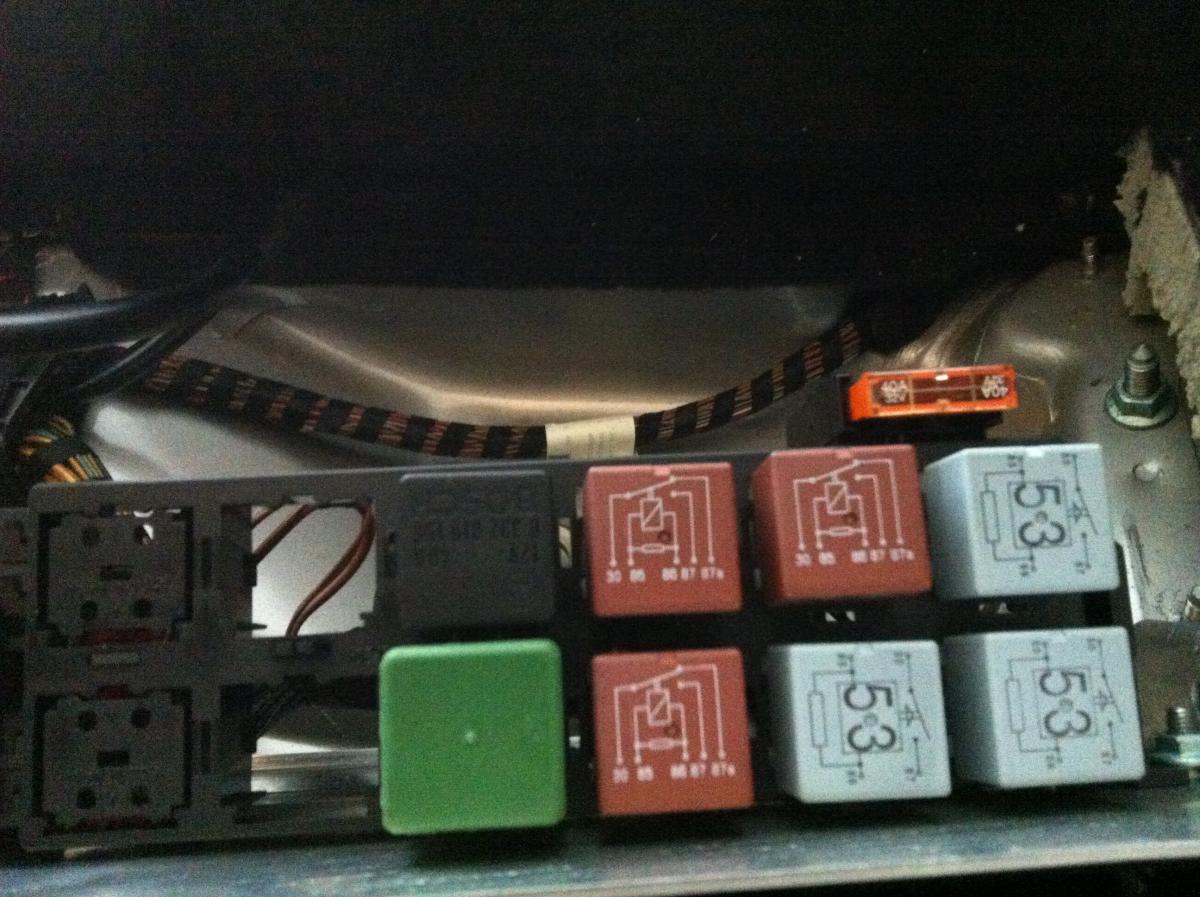
Shoot, no dice. Removed the relay circled in red and replaced it with the relay circled in blue (and left that one with nothing). Every time I try to activate the fan using the Durametric it blows the fuse. The short must be somewhere else. How else can I track this down? Does this just leave the wiring... or, God forbid, a problem with the DME. Electrical problems suck :) Any ideas what I should try next? Anything else I should be doing in the relays before I put that back together?
-
P1675 Porsche fault code 658 - Fault - engine purge fan
Silver_TT replied to Silver_TT's topic in 996 TT, 996 TT S, 996 GT2
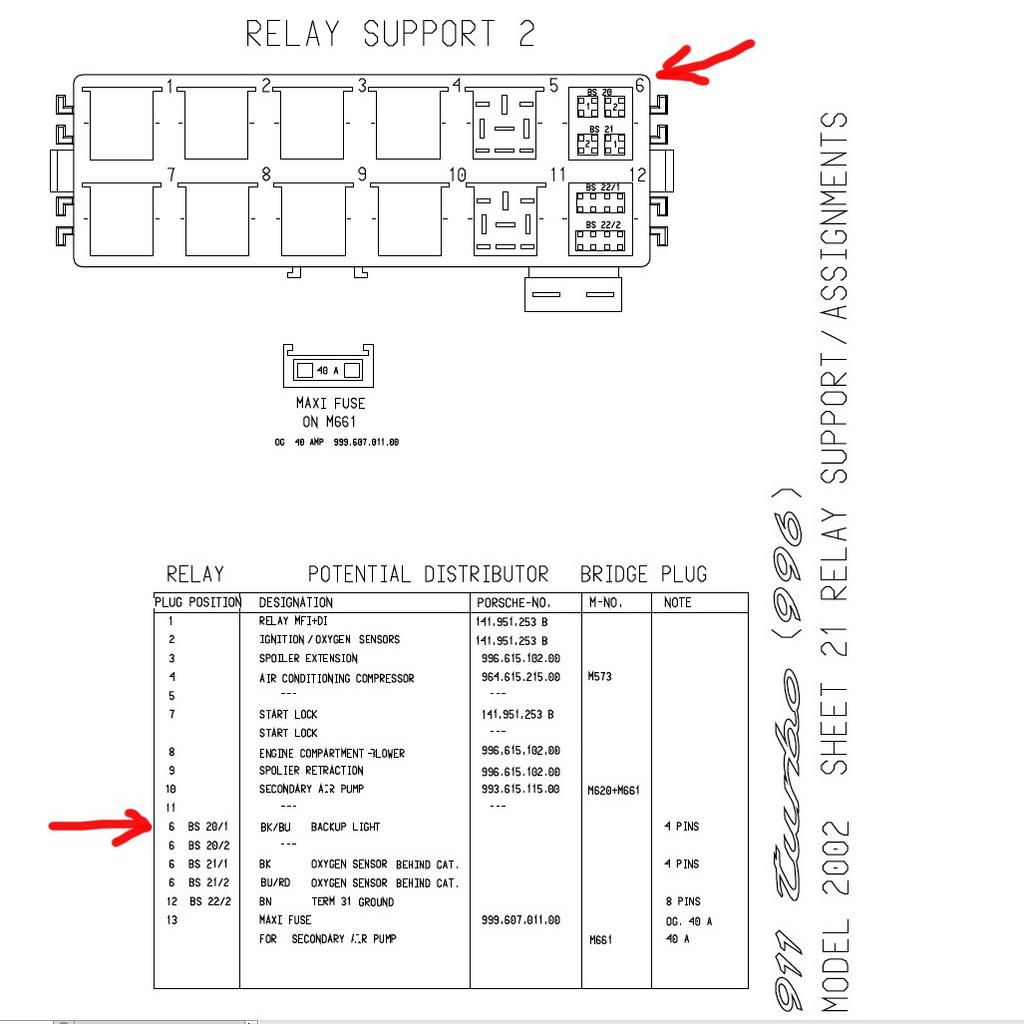
Here's the DME relays panel. Which one am I pulling out? And replacing with which one? Don't want to mess this up and fry my DME. I'm pretty sure it's one of those 3 burned orange colored ones. There's one for the engine purge fan and 2 for the spoiler. That diagram I provided earlier from jpflip may be for the passenger side or something...the numbers don't seem to match up....??? I'm in the panel behind the driver's seat side. Is this definitely correct?
-
P1675 Porsche fault code 658 - Fault - engine purge fan
Silver_TT replied to Silver_TT's topic in 996 TT, 996 TT S, 996 GT2
Got the parcel trim panel off. If you have the Bose option the face plates need to come off and then you need to unscrew the large silver bolt I have circlued in red above. Now time to swap the relay and see is the fuse blows..... -
Good job! Hope the information I pointed you to saved you some time. It is tight indeed and if it weren't for this it would be a 15 minute job tops. If you ever have to do it again I bet you can do it just half the time...... definitely not a 3 hour job to do for sure.
-
P1675 Porsche fault code 658 - Fault - engine purge fan
Silver_TT replied to Silver_TT's topic in 996 TT, 996 TT S, 996 GT2
One other thing... when I'm able to get to the relays and do the swap, assuming for the moment that the fan relay is bad, should I be plugging this into the slot that I took the relay from the spoilers? In other words if this is a bad relay, won't it blow the fuse for the spoilers too? Or would I want to try by taking the relay from the spoilers..... using that for the engine purge fan while leaving its original slot empty (not sure what electrical implications that would have but prefer not to break anything else in the process while testing). Just a thought as I'm trying to think through this. Also, is the relay #8 I'm seeking on the driver's side or passenger's side once I'm able to get this carpeted segment off? I know this is an awefully verbose sequence but hopefully when I'm able to solve this it helps someone else in the future that finds this thread........ -
P1675 Porsche fault code 658 - Fault - engine purge fan
Silver_TT replied to Silver_TT's topic in 996 TT, 996 TT S, 996 GT2
Trying to get the carpeted cover off behind the rear seats. I popped off the covers over the Bose speakers and see some bolts. There's a big one under each Bose speaker (see attached, circled in red). Anyone know what needs to get unscrewed to pop this off and get to the relays under there......? I also found the following from jpflip which may be helpful to anyone else in the future (see second attachment). It was with respect to something else but gives the numbered layout of the relays.
-
P1675 Porsche fault code 658 - Fault - engine purge fan
Silver_TT replied to Silver_TT's topic in 996 TT, 996 TT S, 996 GT2
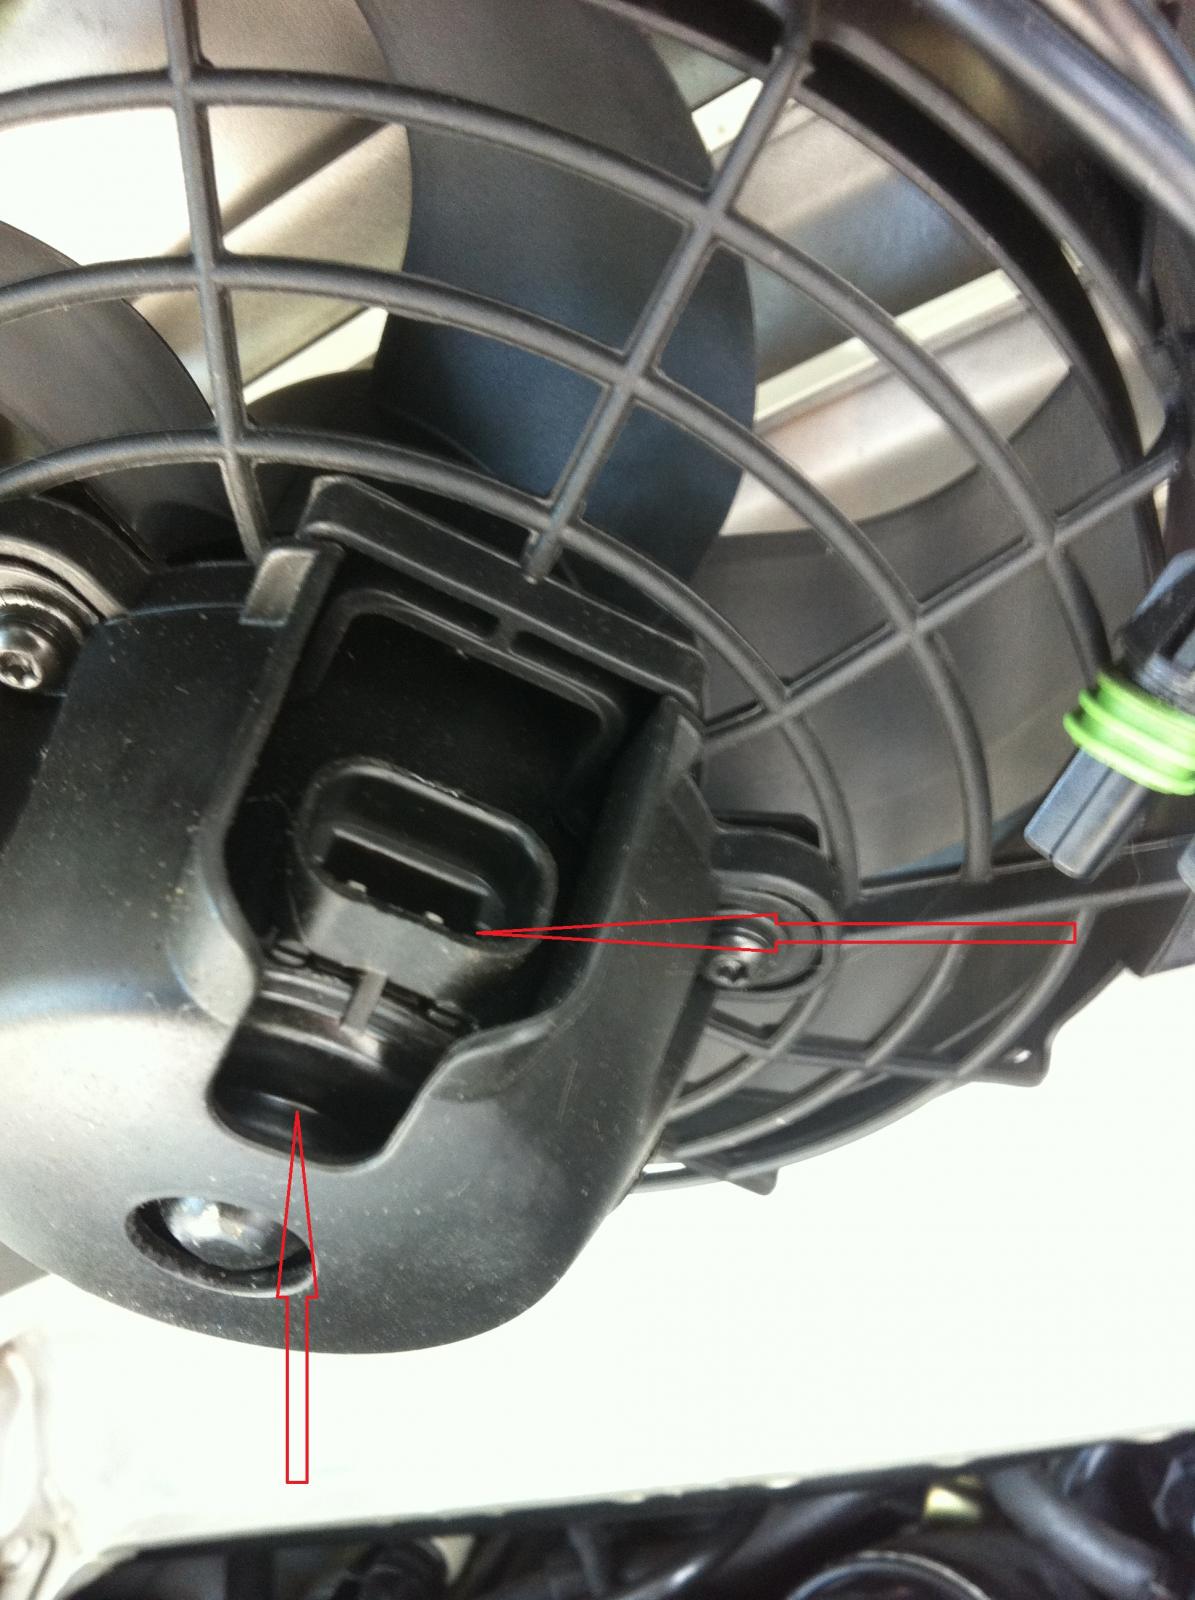
JFP - Regarding your last check of the fan before moving on to the relay, just to be clear I uploaded another photo. The left arrow shows the fan's two leads that I was putting one of the multimeter's leads to. The up arrow shows an area of the fan housing that is metal underneath the plastic cover. I was putting the remaining multimeter's lead to this metal. The multilmeter was reading "1". I tried both leads on the fan, and also the difference combinations of the red/black leads from the multimeter (although I don't believe it should matter and any single combination should achieve an answer to what we wanted to know doing this test). Time to dig into my back seats to try to access the relays and check this same resistance there?
-
P1675 Porsche fault code 658 - Fault - engine purge fan
Silver_TT replied to Silver_TT's topic in 996 TT, 996 TT S, 996 GT2
hmm.. i was trying to think though this. the fan housing is mostly plastic. when I touch the red or black lead to one of the fan's leads, and then the other of the multmeter's leads to what I think is metal (like in the very center of the fan) I appear to get a "1" reading. Down in my garage looking at this closer now...... -
P1675 Porsche fault code 658 - Fault - engine purge fan
Silver_TT replied to Silver_TT's topic in 996 TT, 996 TT S, 996 GT2
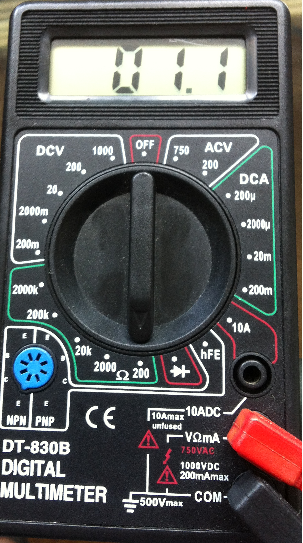
Thanks for sticking with me on this. As you can see my "greenness" is showing, but fortunately for me so is your patience/persistence. Here are some revised results with the multimeter now down at the 200 setting in the Ω section (see image showing a "01.1" reading with the red and black leads touching each other). REVISED READINGS on the 200 Ω setting: Reading of "01.1" when touching the red/black leads on the fan leads. Reading of "05.4" when touching the red/black leads on the wiring harness that plugs into the fan. Assuming I did this correctly......Correct me if I'm wrong but does this mean the fan is ok and I need to check this same resistance at the relay now next (which I understand to be the next point as we work backwards along the series)?