Welcome to RennTech.org Community, Guest
There are many great features available to you once you register at RennTech.org
You are free to view posts here, but you must log in to reply to existing posts, or to start your own new topic. Like most online communities, there are costs involved to maintain a site like this - so we encourage our members to subscribe or donate. All subscriptions and donations go to the costs operating and maintaining this site. We prefer that guests take part in our community and we offer a lot in return to those willing to join our corner of the Porsche world. This site is 99 percent member supported (less than 1 percent comes from advertising) - so please consider an annual subscription or donation to keep this site running.
Here are some of the features available - once you subscribe RennTech.org
- View Classified Ads
- DIY Tutorials
- Porsche TSB Listings (limited)
- VIN Decoder
- Special Offers
- Paint Codes
- Registry
- Videos System
- View Reviews
- and get rid of this welcome message
It takes just a few minutes to register, and it's quality Porsche information at a low cost.
Contributing Members also get these additional benefits:
(you become a Contributing Member by subscribing or donating money to the operation of this site)
- No ads - advertisements are removed
- Access the Contributors Only Forum
- Contributing Members Only Downloads
- Send attachments with PMs
- All image/file storage limits are substantially increased for all Contributing Members
- Option Codes Lookup
- VIN Option Lookups (limited)


Varianti
-
Posts
16 -
Joined
-
Last visited
Content Type
Profiles
Events
Forums
Exterior Paint Colors
Downloads
Tutorials
Links Directory
Collections
Classifieds
Store
Everything posted by Varianti
-
 Sorry for the confusion but as Ahsai wrote correctly: the IMS broke and that caused the bill of $17k. They took the engine apart and the only parts they changed were the compression rings of the pistons. $13k in labor. They said the IMS deteriorated and they had to check the cylinders for wear and hidden dirt from the IMS break. A replacement engine was quoted at $28k total cost to me. The only point I wanted to make is to have changed whatever you can proactively as the in and out costs of the engine is going to cost you around $1600.Every additional work to be done while the engine is out is easy and doesn't cost much. An example is the AOS. Part costs are $140. To take it in and out while the engine is out is approximately 10-15 min so roughly $30 in labor. Total $170 vs $1800 if you have to remove the engine.
 -
As dporto said: have it done. Mine started with the same story. RMS replaced at 30k and 49k. IMSB broke at 51k. Costs: $17k. If I would have to do it again I would have replaced the RMS and the IMSB. Cost: approx. $2500. While the tranny is out I would replace everything else which is suspicious or soon due with that car such as: - the clutch as mine was done by 35k (basically only parts cost plus some labor) - air oil separator (mine was done at 51k). I replaced it myself but this is a big PITA. Dealer quoted me $1800. Part cost are $135. - spark plugs (can be done yourself but if the engine is out it's a breeze) Maybe there are other things you should have replaced while the engine is out. Do some research. The most expensive part is the 6 hours they charge you to get the engine in and out. so I would replace everything I could. I don't know how much miles you drive a year. I do approx. 1-2k so I think in years rather than in miles in regards of replacing parts.
-
MkII AOS DIY sanity check
Varianti replied to Ahsai's topic in 996 Series (Carrera, Carrera 4, Carrera 4S, Targa)
Intake tubes are a PITA. I put them on with the manifold as it was too difficult for me to squeeze them in afterwards. I was able to rip them out but the other way back didn't work for me. Putting in the manifold with the intake tubes gives some stress on the green manifold sealing rings. You have to be very carefull that they don't get stuck on other stuff which is in the way. -
MkII AOS DIY sanity check
Varianti replied to Ahsai's topic in 996 Series (Carrera, Carrera 4, Carrera 4S, Targa)
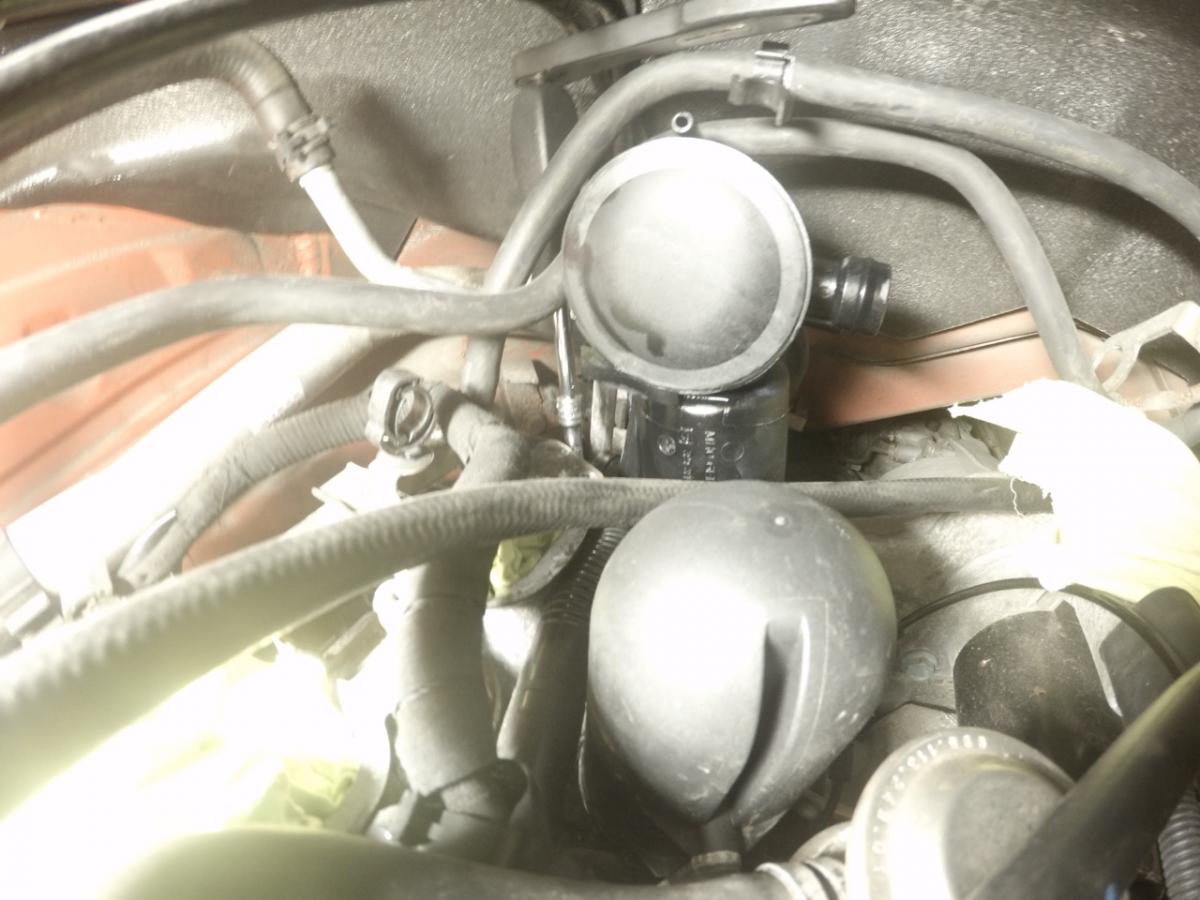
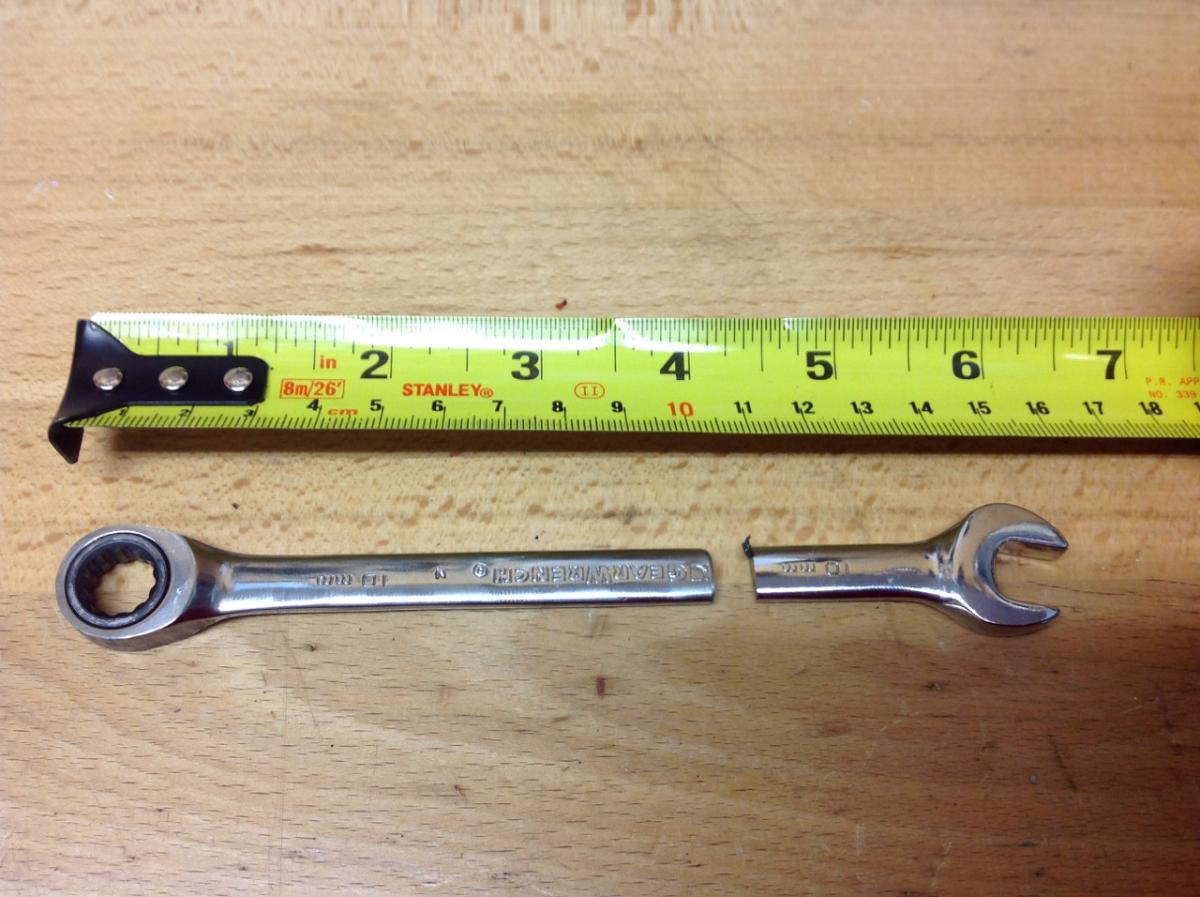
Check the pictures I took. As Ahsai said either AOS first and then manifold (his descriptions) or the other way around (my pictures). In your current state I would lower the engine, remove coolant tank, buy and modify ratchet wrench as described and tighten the bolt. Maybe it will work without removing the tank or lowering the engine but it was not enough room for me. In case you want to see what's going on use a Gopro or a phone and stream the video (Ustream app). -
Reliability of 996 Engines
Varianti replied to Loren's topic in 996 Series (Carrera, Carrera 4, Carrera 4S, Targa)
I just went through a similiar experience though I didn't have the same engine noises. Cost was $17,000 at the local Porsche dealer to replace the IMS and have them to disassemble the engine to check for wear and tear ($13,000 labor cost). They replaced the compression rings and I was at the end 'lucky'. That failure sucks big time. I should have spend the money the first time on a turbo model. Lesson learned too late... They quoted me $27,000 total cost for a new engine. -
MkII AOS DIY sanity check
Varianti replied to Ahsai's topic in 996 Series (Carrera, Carrera 4, Carrera 4S, Targa)
Without removing of the manifold? Respect! Did you lower the engine? -
Does this car car have the X50 option?
Varianti replied to Varianti's topic in 996 TT, 996 TT S, 996 GT2
Thanks. -
I'm looking for a turbo with the X50 package. How can I find out if VIN WP0AB299X2S686132 has the X50 option?
-
I would agree with the OP. The first time I drove the car I was disappointed of the brake feel. I had to push really hard to get some deceleration. I changed the brakes and I had the case that the inside of all 4 rotors was corroded. So I exchanged them and did a brake flush. It's somewhat better now but still not what I was hoping for. My Infiniti and Mercedes have better brakes with more bite. It might be an issue of having better feel when braking. I could imagine that the Porsche brakes are better on the race track but just daily driving they are not thrilling.
-
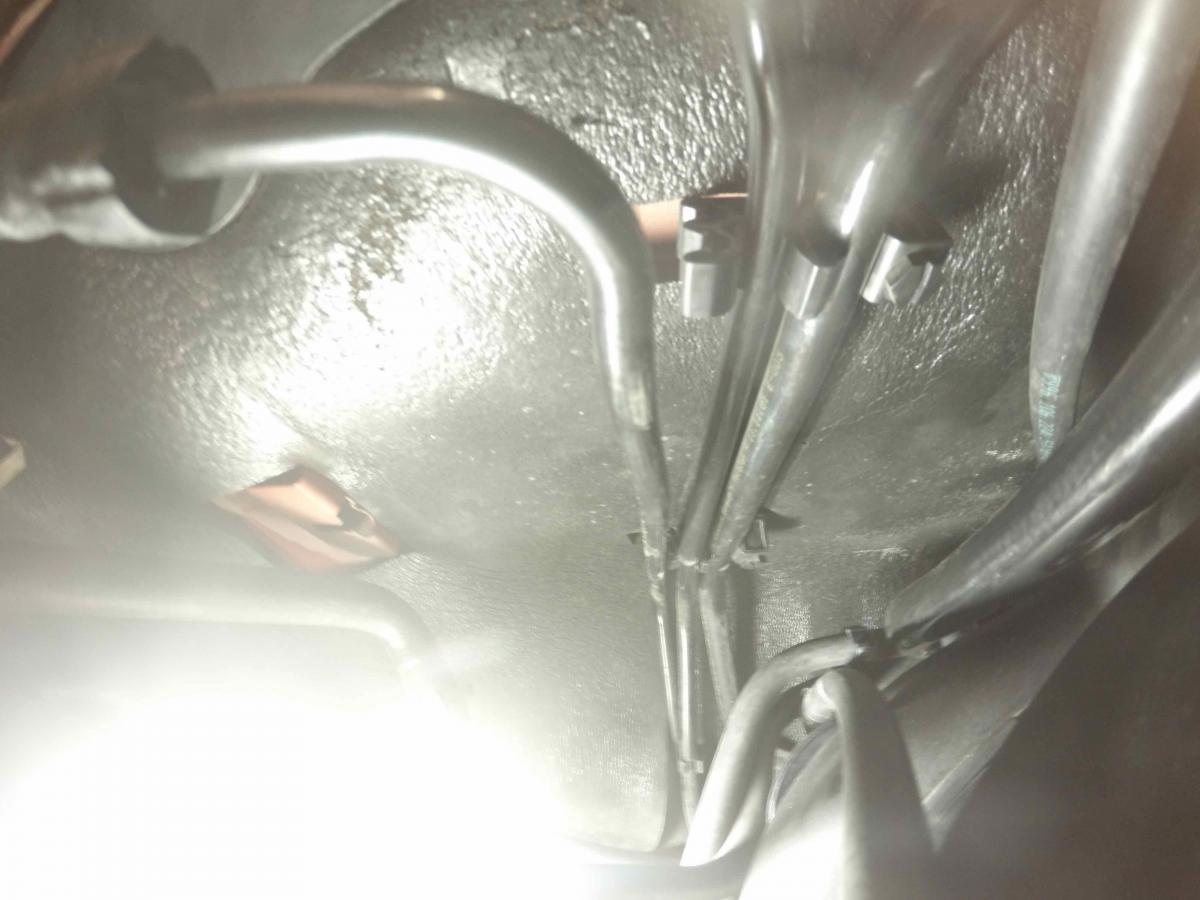
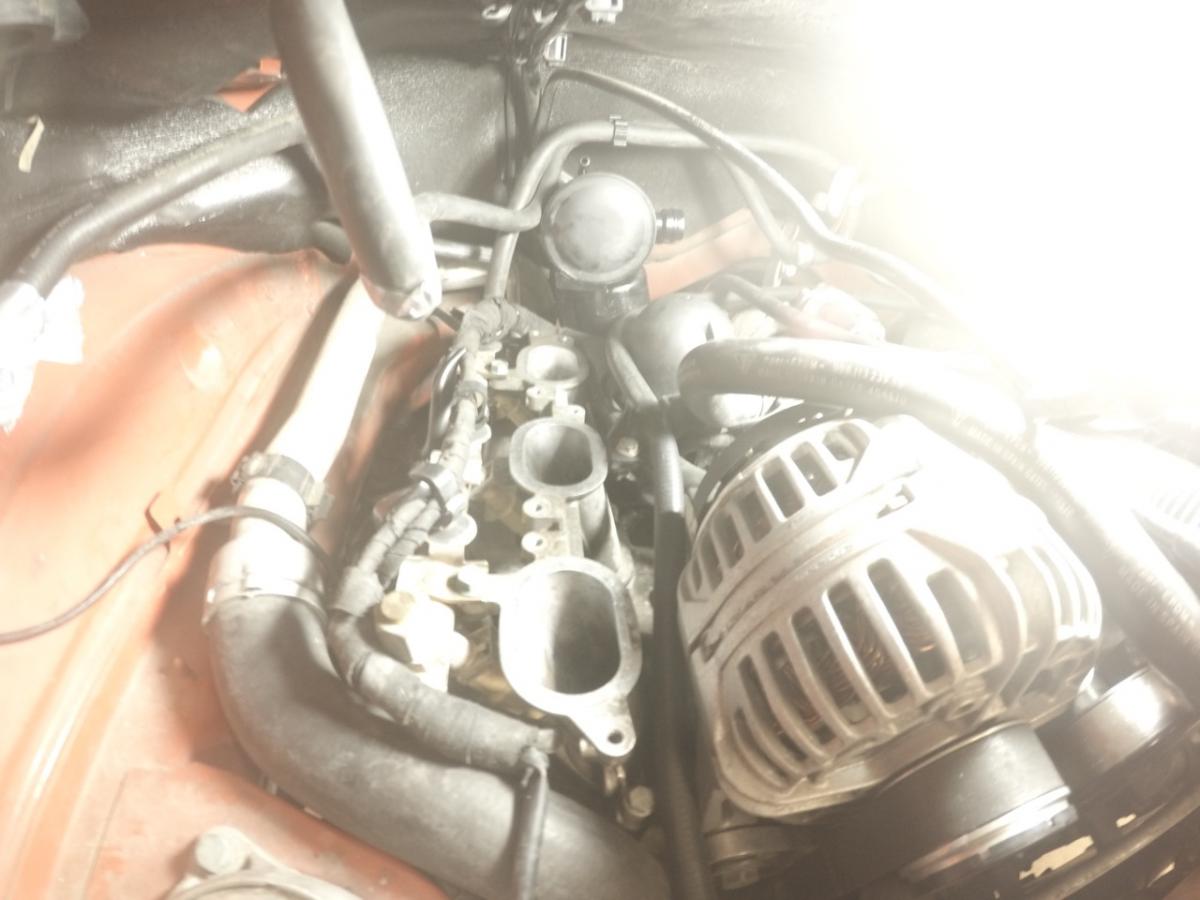
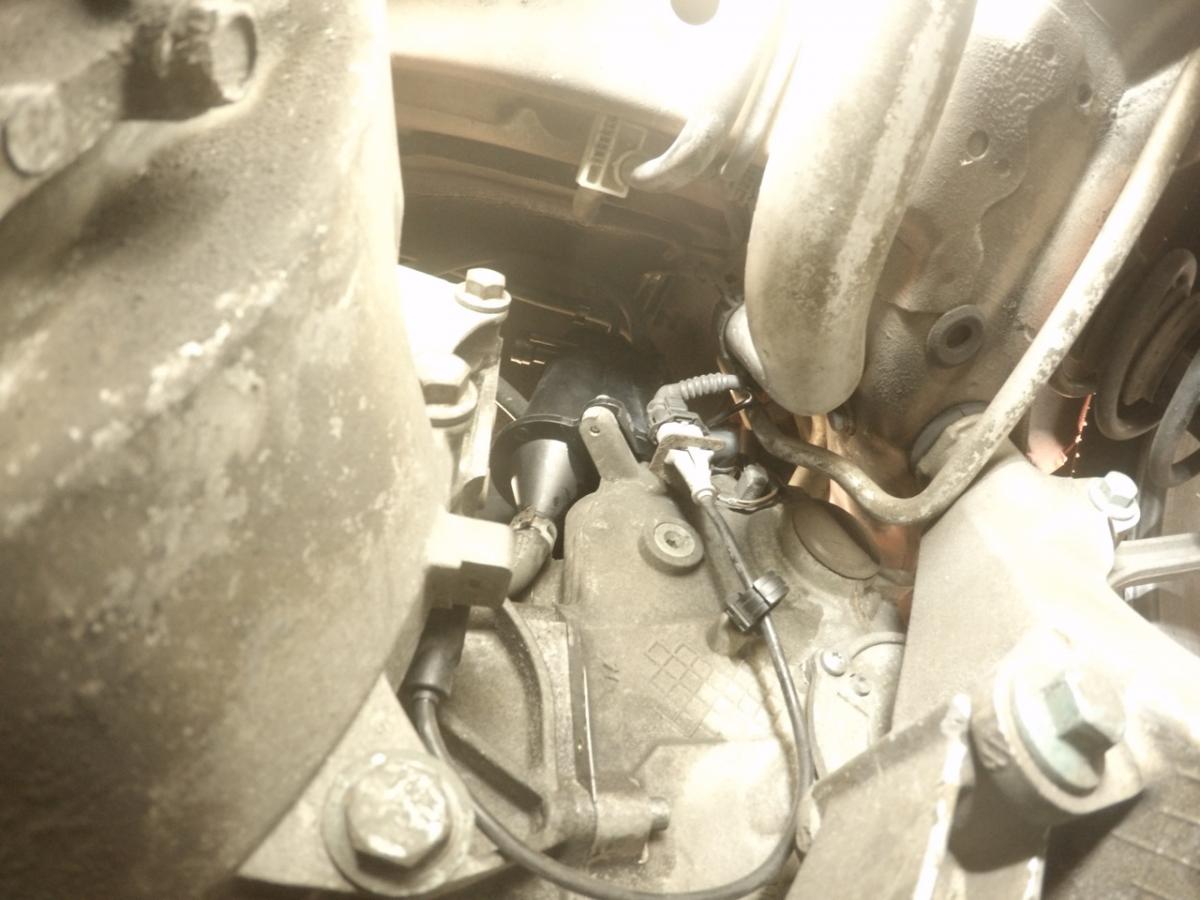
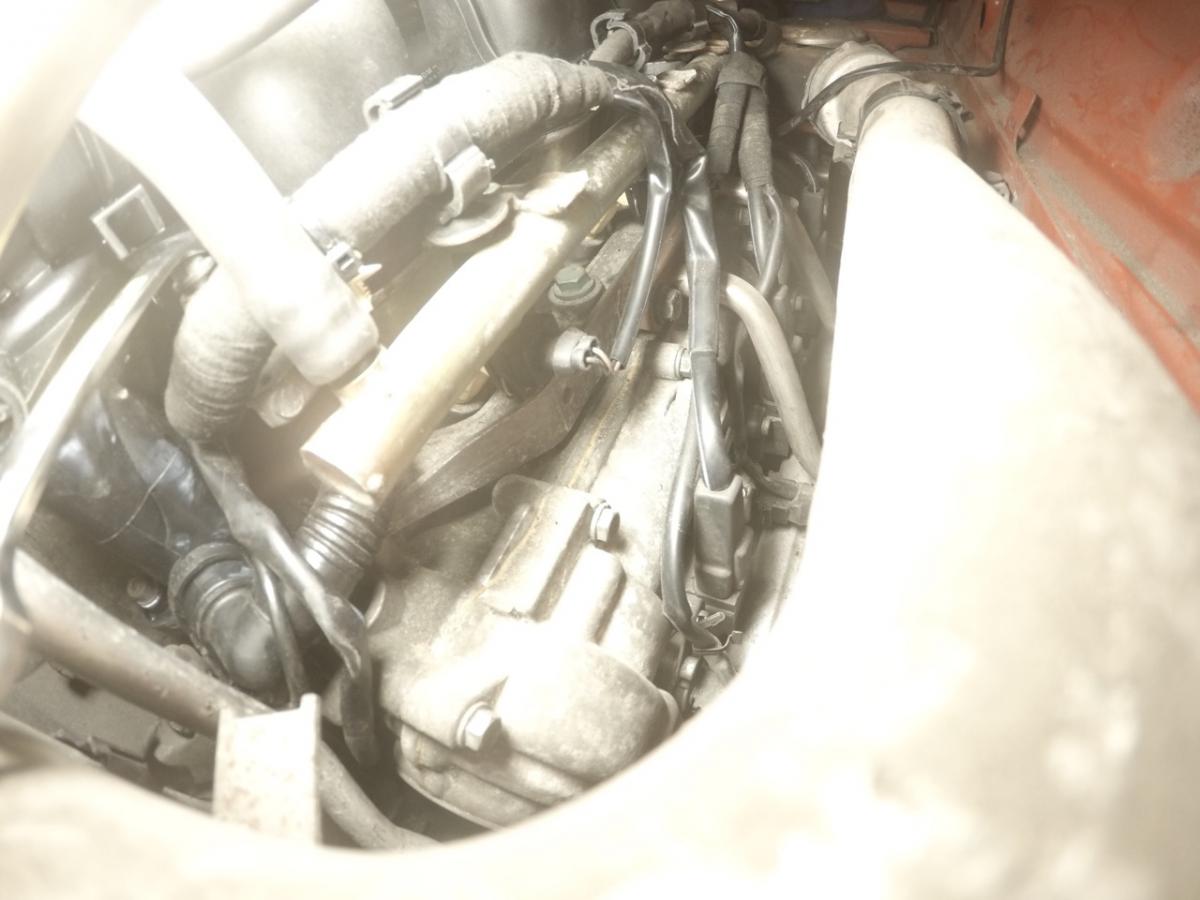
Attached a picture of the fuel and other lines above the left manifold. The left fuel line doesn't snap into the holder. It just doesn't seem to fit. Can anyone help an tell me how these lines are attached? 2002 996 3.6 convertible.

-
MkII AOS DIY sanity check
Varianti replied to Ahsai's topic in 996 Series (Carrera, Carrera 4, Carrera 4S, Targa)
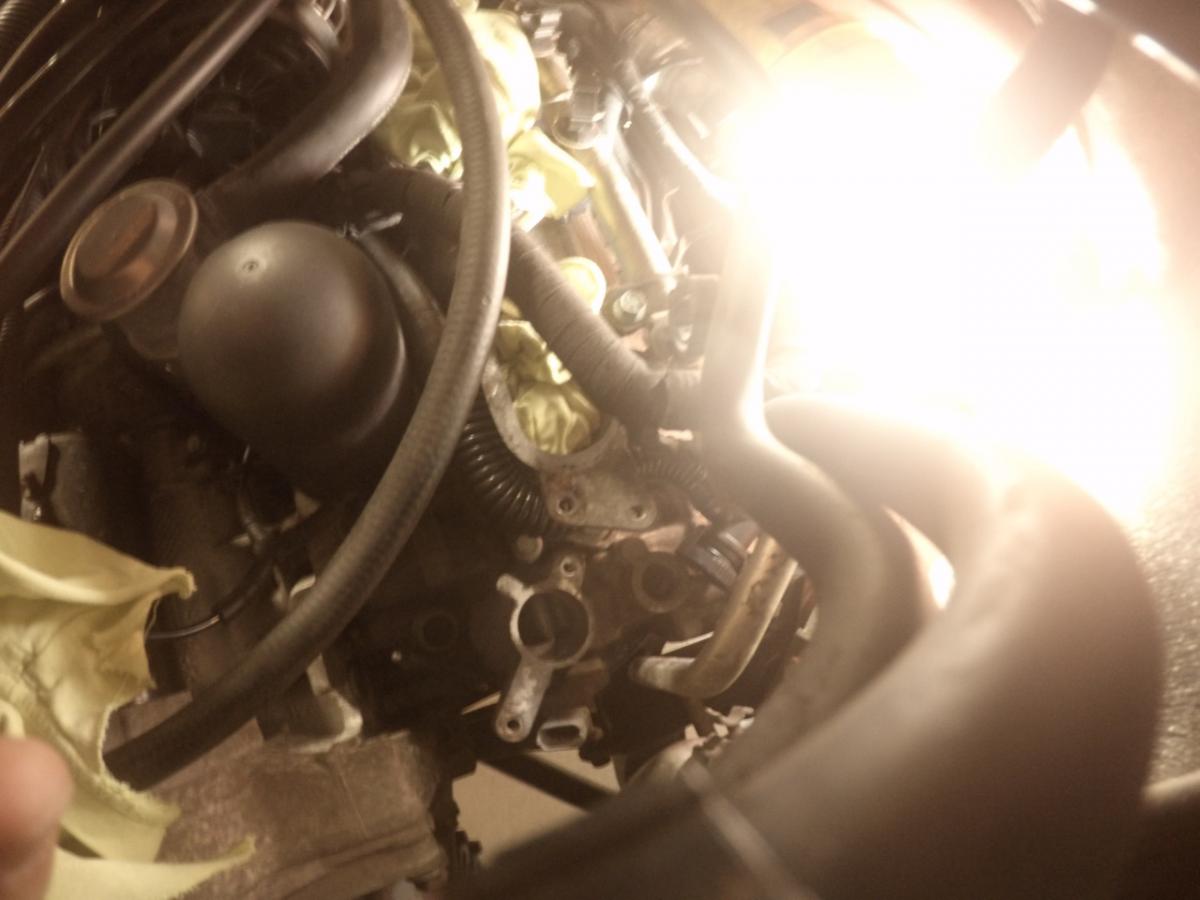
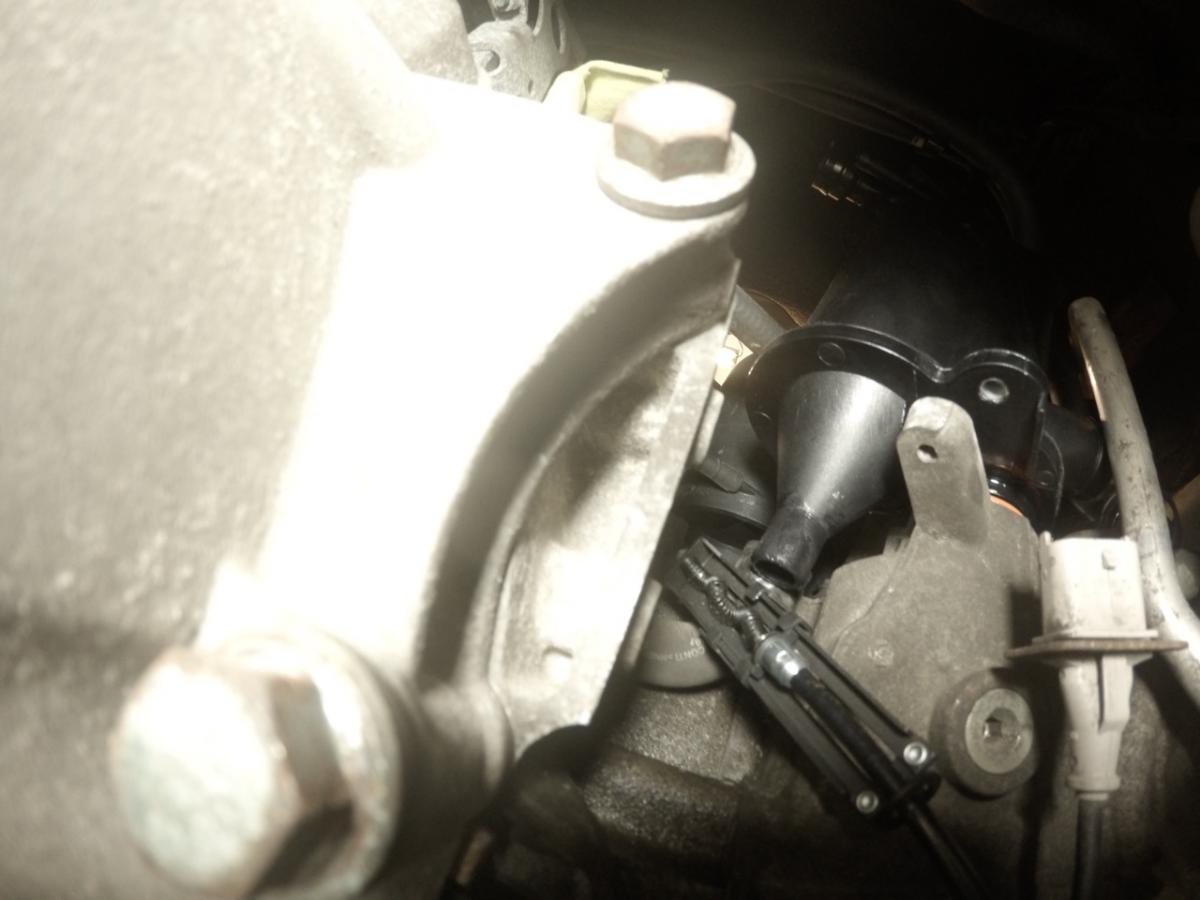
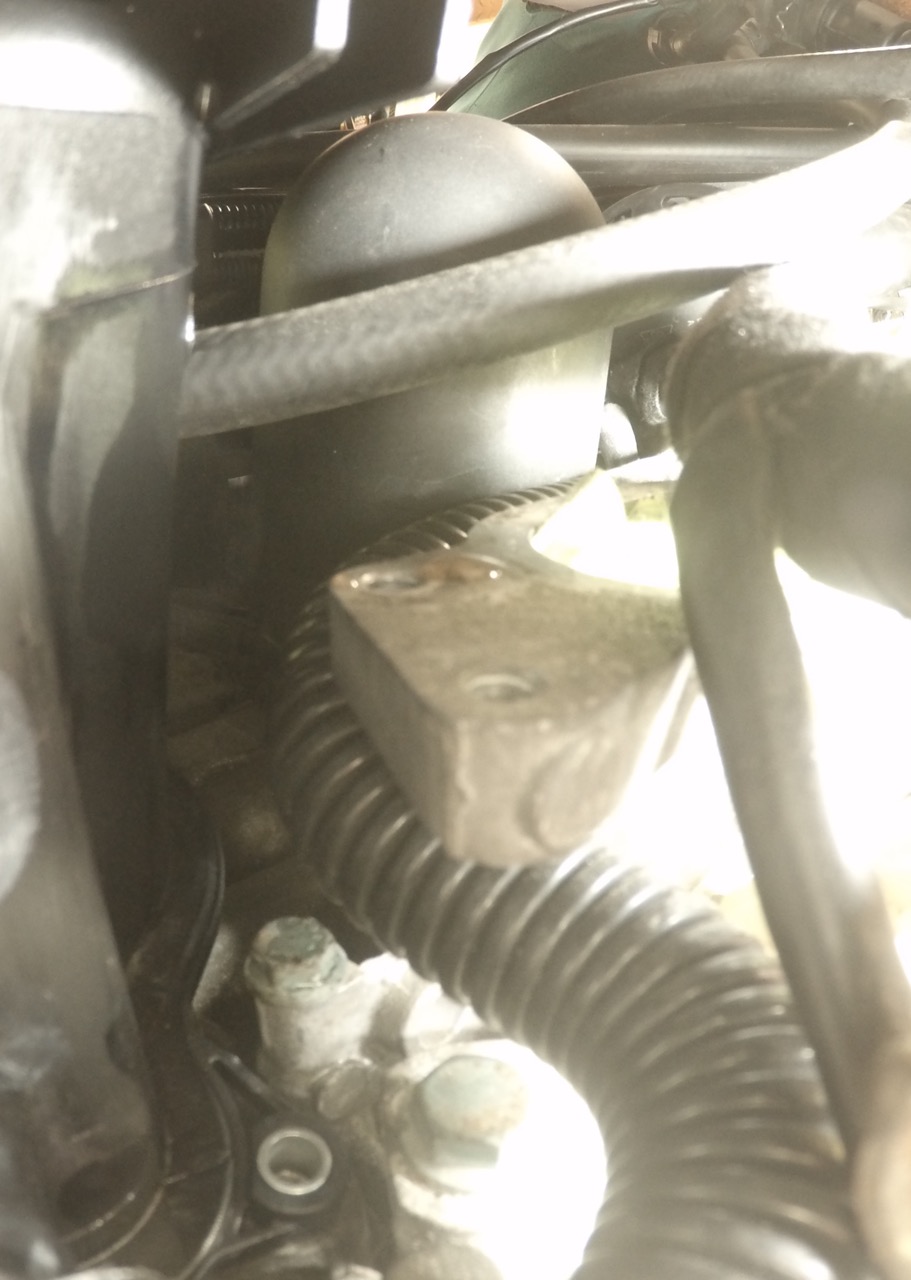
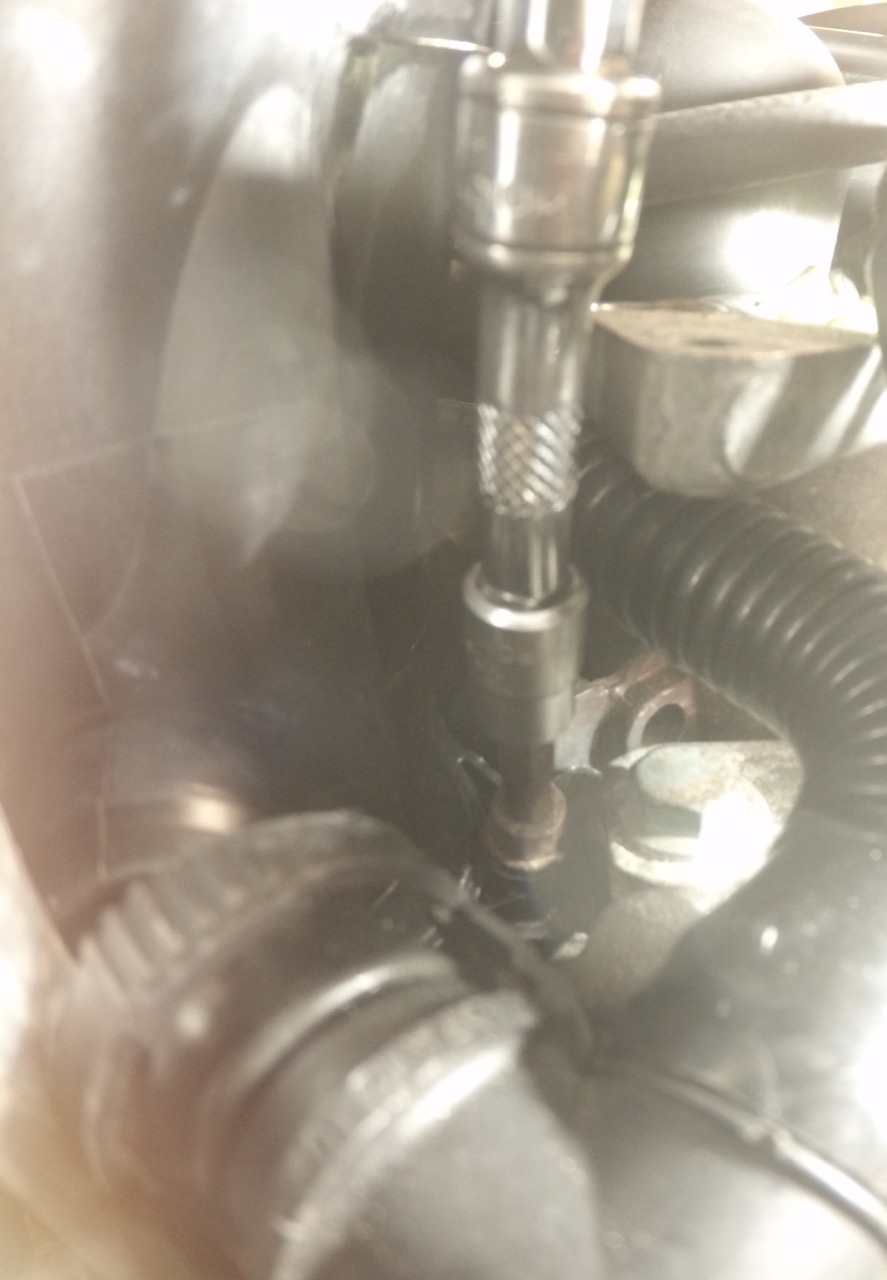
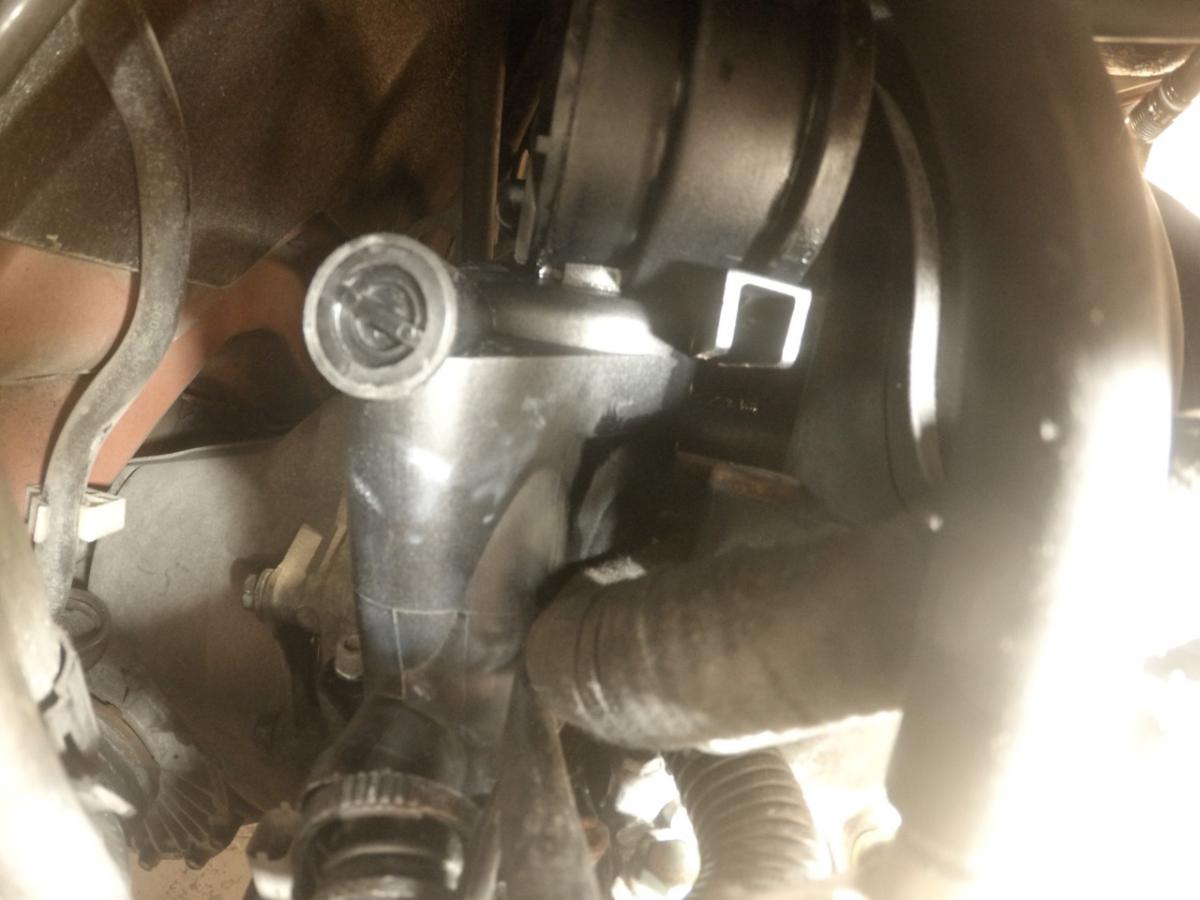
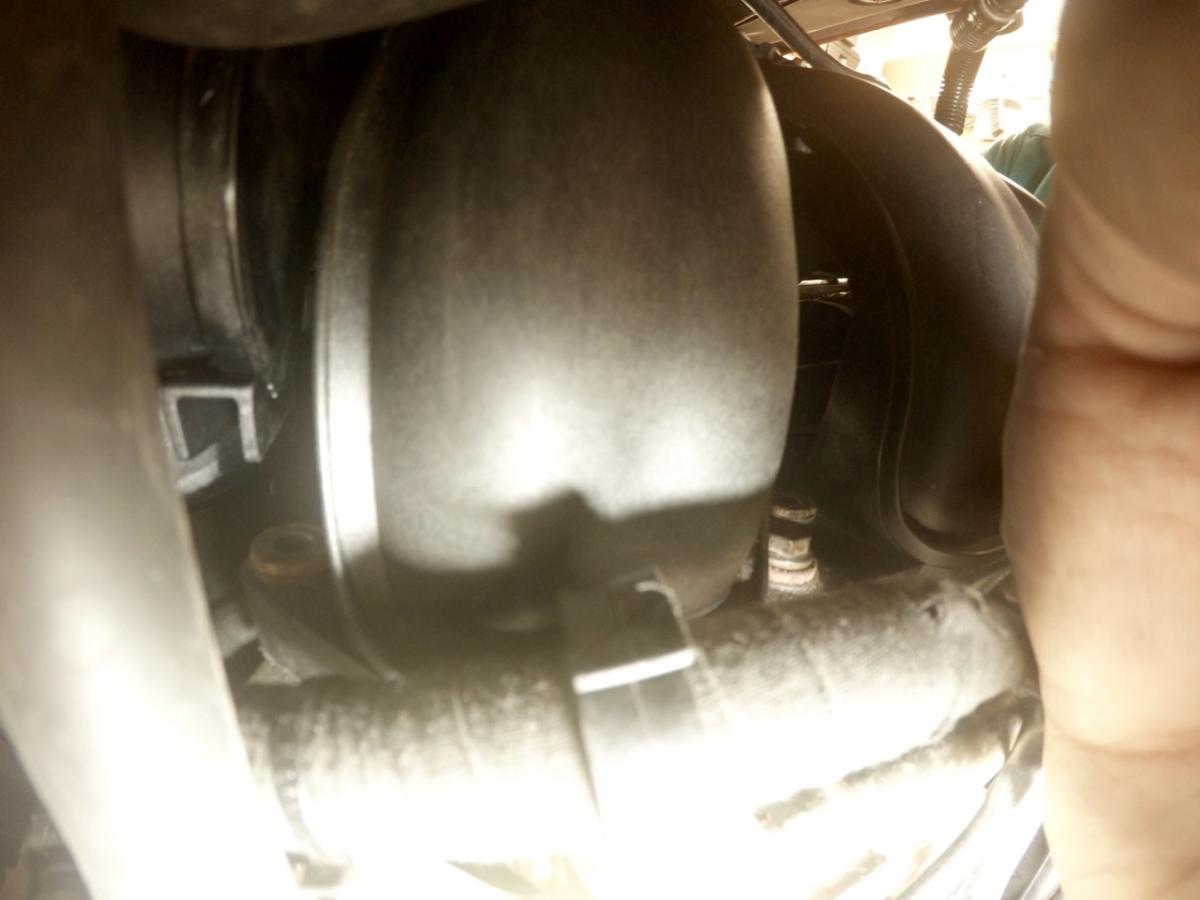
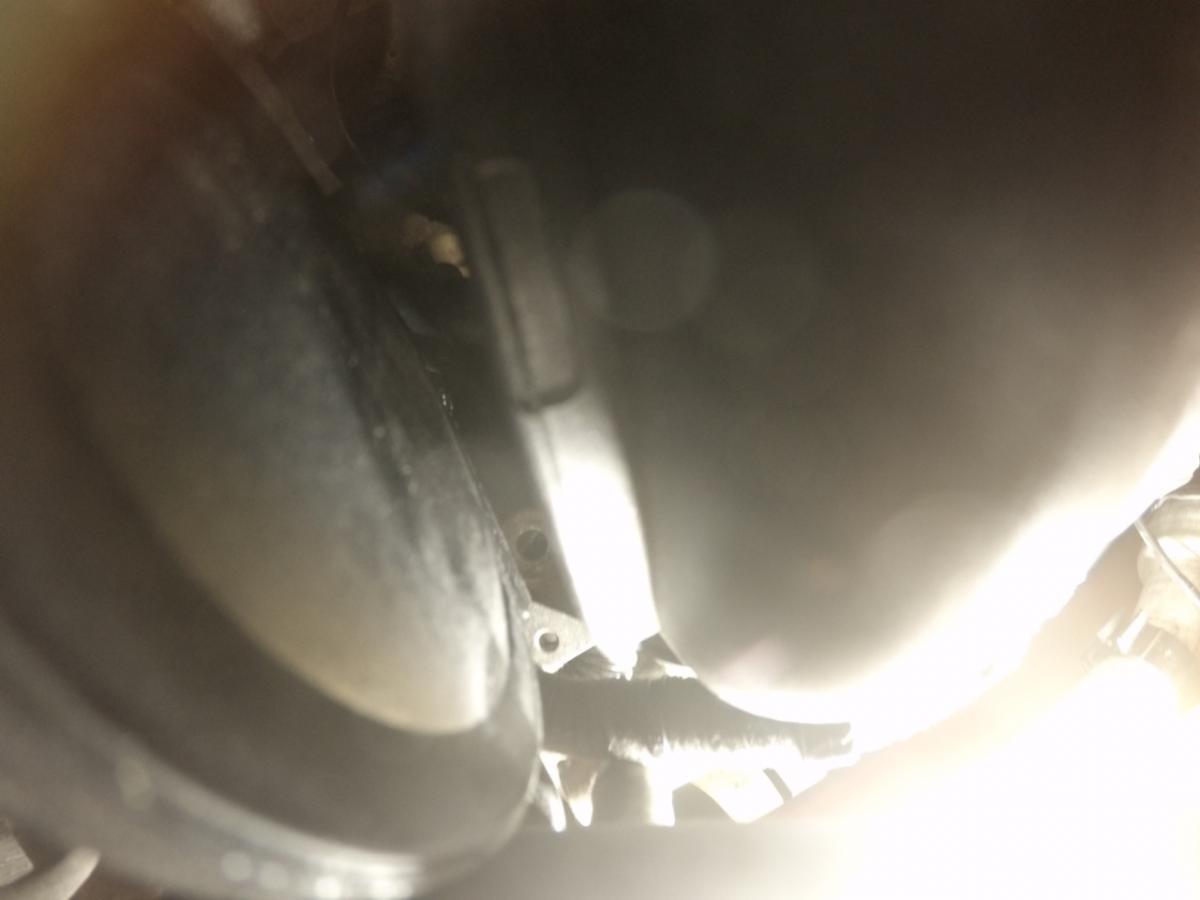
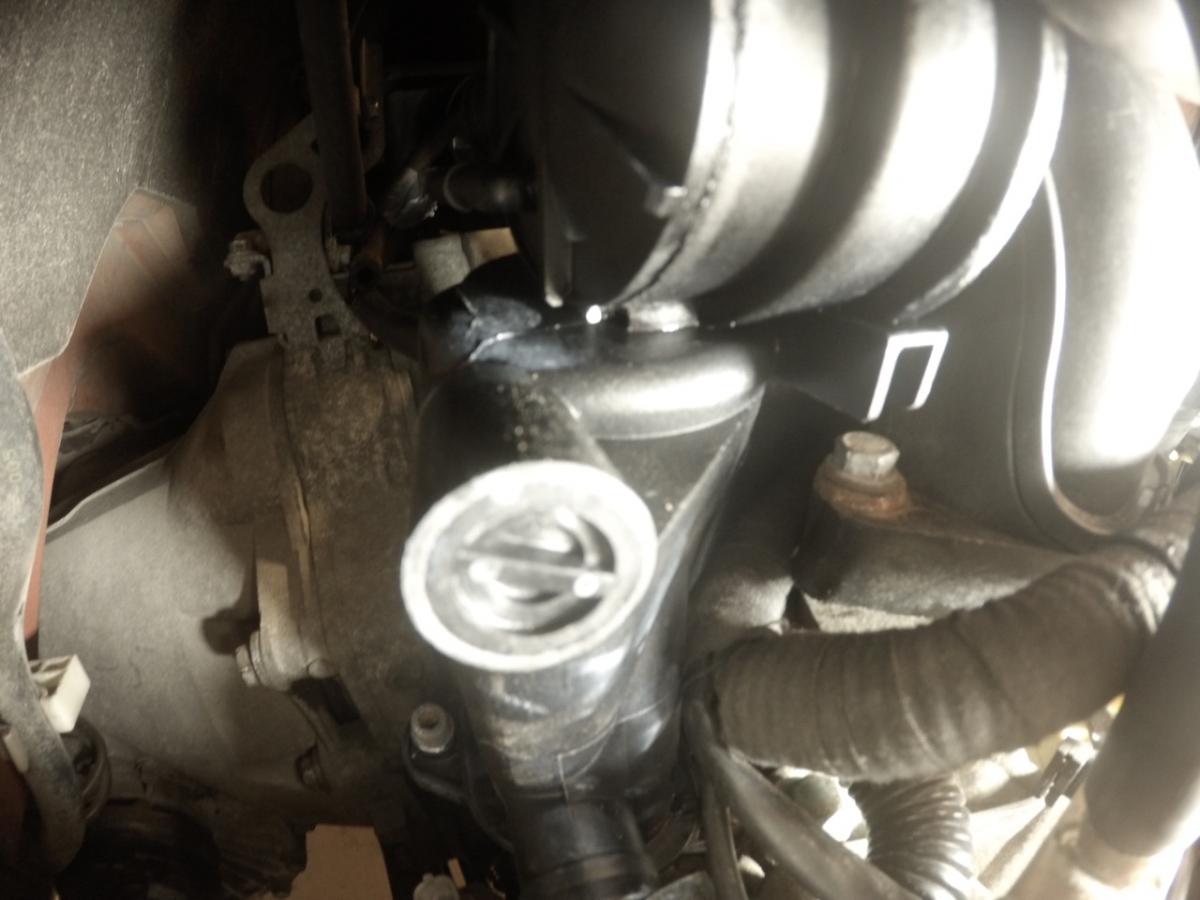
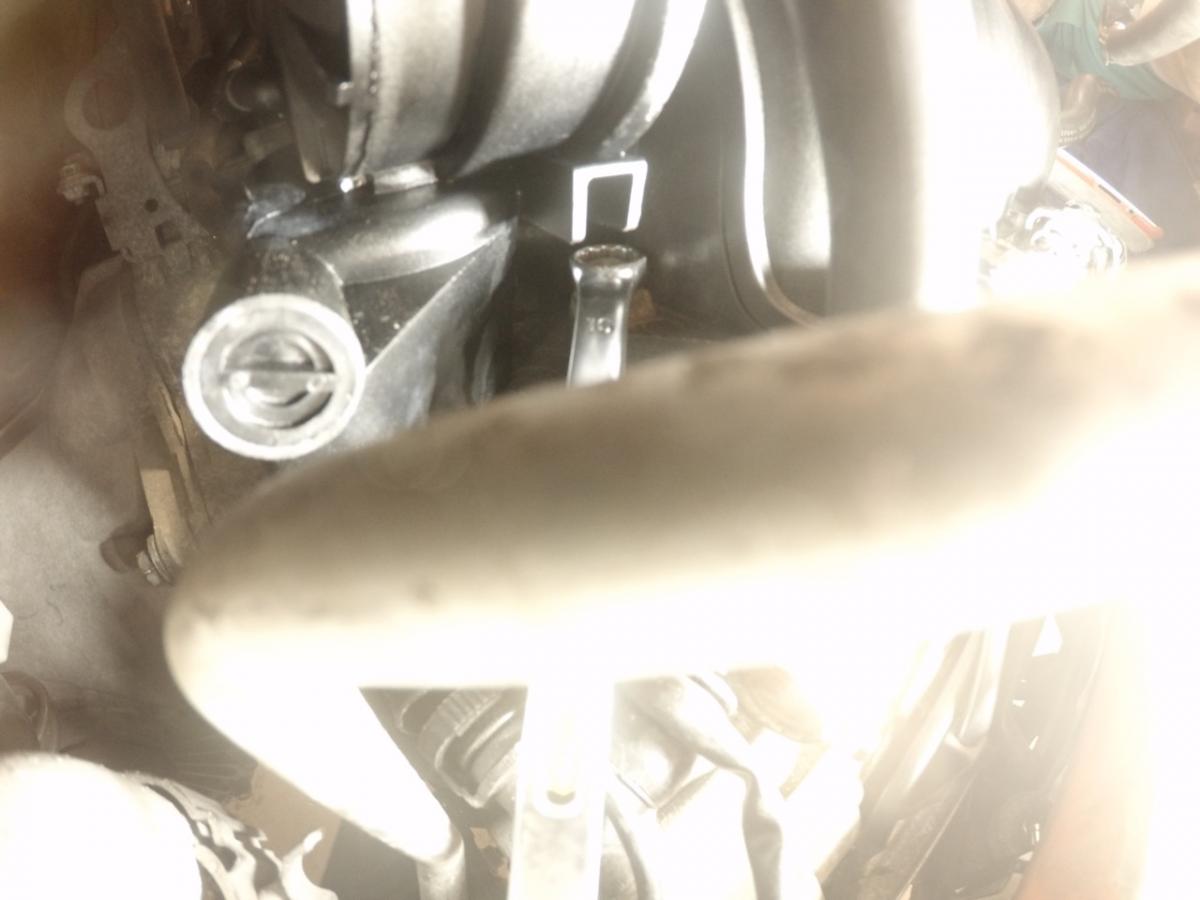
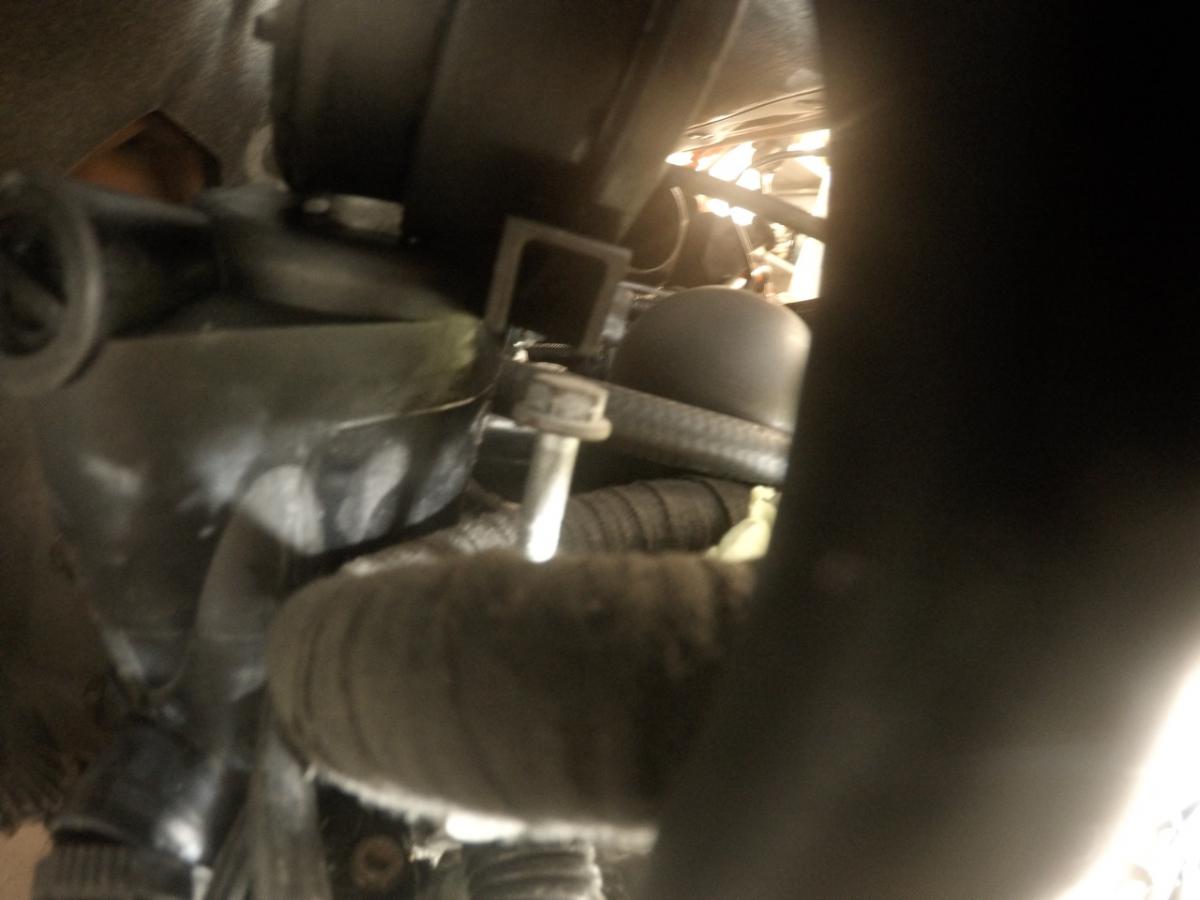
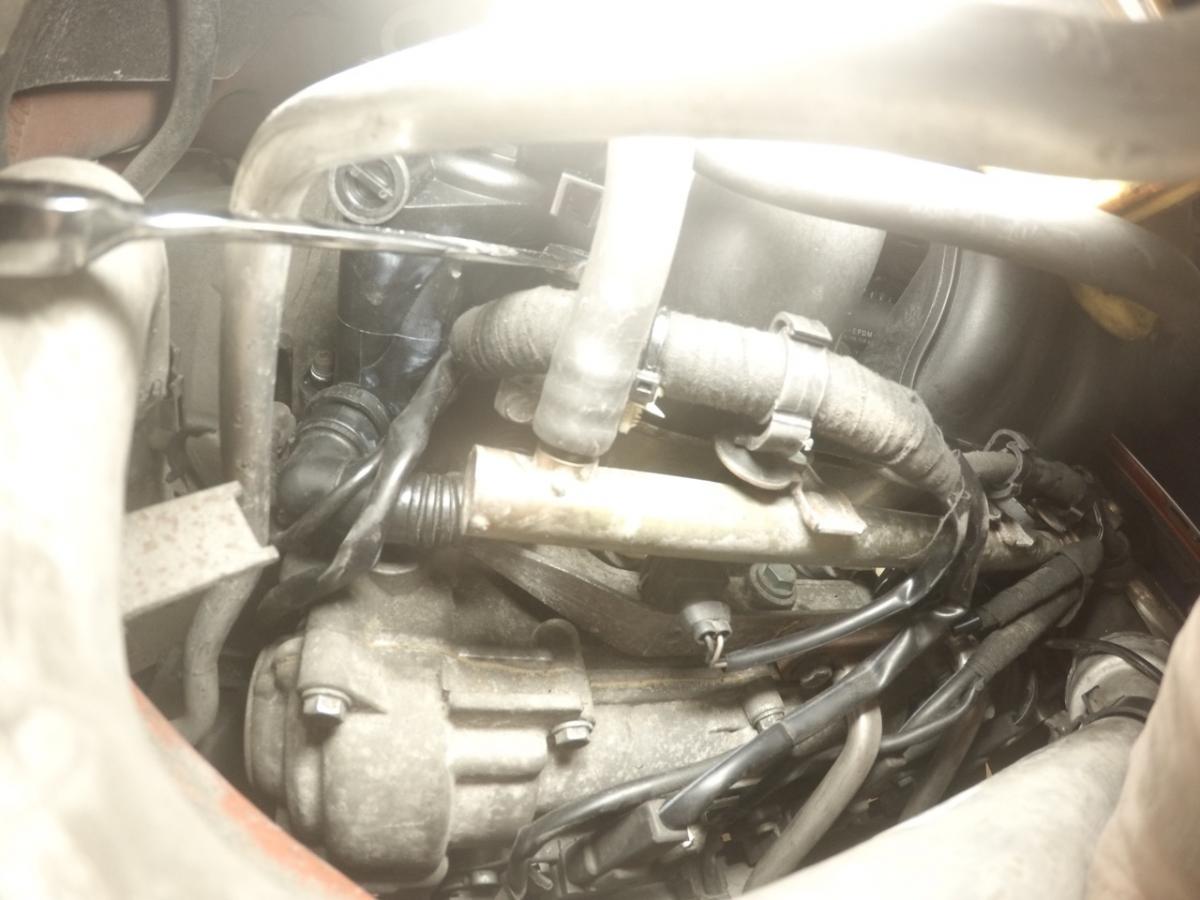
As I said here are some pictures taken with the GoPro. I wish I had them before the project. They show pretty good how it looks like in the back. The wrench shown in the pics only worked for loosen the screw. For tightening I had to modify the ratching wrench. To unscrew the sixth screw I loosened it with the wrench and then used my left hand but I had to take the fuel pipe between the thumb and first finger. i have short fingers and I barely reached the screw to unscrew it. They turned very easy once lose. 2002 996 MKII engine 3.6 convertible Admin: Sorry for the many pics. Maybe someone can generate a PDF file out of them. I will try to write something up but next weeks are very busy.
-
MkII AOS DIY sanity check
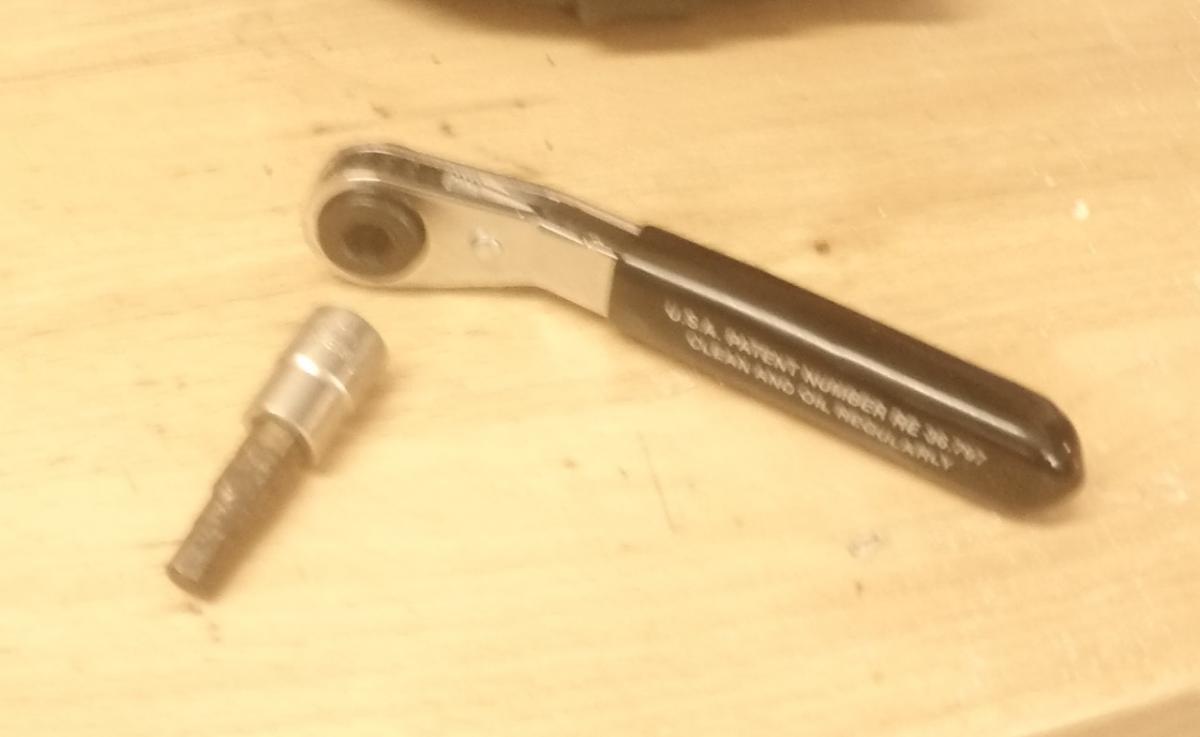
Varianti replied to Ahsai's topic in 996 Series (Carrera, Carrera 4, Carrera 4S, Targa)
Done. 5 hours later I had it back together. I'll post later some pictures when I can find them on my GoPro. Here are my short notes: - I put the AOS first in and bolted it on (these short ratchet drivers from the link above are very useful) and then the manifold. - I preassembled the manifold connections to the other bank and slid in the manifold. I wasn't able to put in the two connection pipes in after I had the manifold installed. - I slid in the manifold with the last screw already in (there is no way to insert the screw after the manifold is in. - I bought a ratchet ring wrench from Advanced Autoparts (10 mm) and had to cut it to 100 mm (4 inches) length. Additionally I had to grind down the perimeter of the ratchet wrench so that it would fit the screw. - With the help of the GoPro 4 (and wireless live video streming on my iPad) I was able to put the wrench on the screw head. Was not that bad. Once it's on it was easy to ratch it down. - Installation of the coolant tank was only possible because the front edge of the black holder was broken. Previous owner or shop broke it. This allowed me to relatively easy slide in the coolant tank, Special tools needed: cable operated hose clamp plier and the modified ratching ring wrench size 10. GoPro made the installation so much easier. Now smokeless. Thanks to all for the helpful tips and how-to's. Especially Ahsai. -
MkII AOS DIY sanity check
Varianti replied to Ahsai's topic in 996 Series (Carrera, Carrera 4, Carrera 4S, Targa)
I stumbled over a picture with a temp sensor clipped into the left manifold between the first two cylinders. I can't remember that I had this thing removed. Is that on all engines? -
I'm about to put together my engine after replacing the AOS. I wonder if anyone close to Pittsburgh has a removed MKII engine where I could have a look at how the AOS and manifold are assembled. I think it would make it much easier for me to put everything accordingly together. I couldn't take much pictures during disassembly.
-
MkII AOS DIY sanity check
Varianti replied to Ahsai's topic in 996 Series (Carrera, Carrera 4, Carrera 4S, Targa)
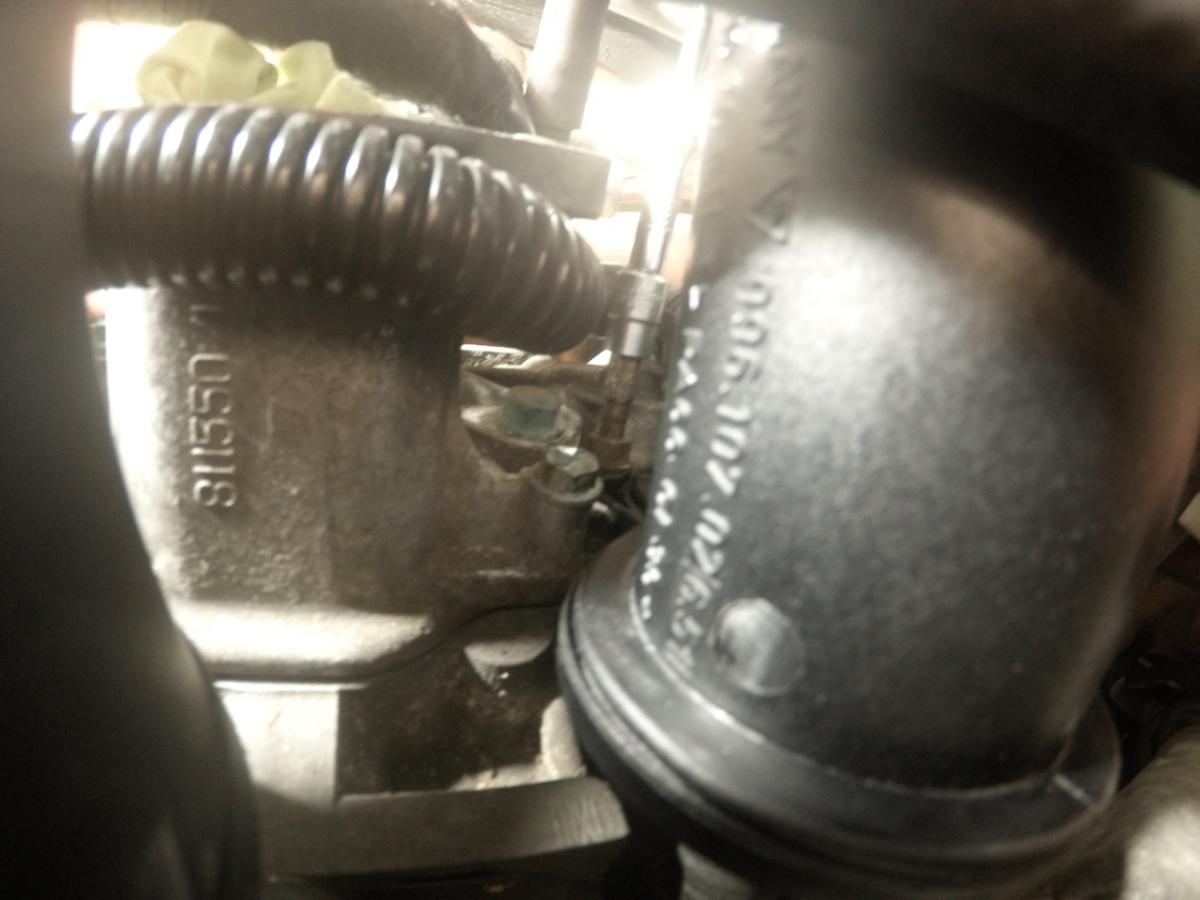
Thanks. That's what I just did. Went to the auto parts store and bought one of those. Wiggled the clamp with a long screwdriver and attached the clamp pliers from the bottom through the side. Was easy. Now the AOS is (finally) out. I still have a hard time to understand why I had such a hard time to remove bolt #6. My AOS had the part# 996 107 026 50 which is now replaced with the 996 107 026 51. The 50 part doesn't have the U shaped piece but I still couldn't get the socket on it. Does anyone has a picture of that area taken from above (from a removed engine) to show how the bolts are placed when everything is in place? -
MkII AOS DIY sanity check
Varianti replied to Ahsai's topic in 996 Series (Carrera, Carrera 4, Carrera 4S, Targa)
Thanks for the write up. I stumbled over your write up when I realized that I have a MKII engine and had a write up for a MKI engine. By then I had the manifold already out. I removed bolt number six with an open wrench and lots of f's. Suggestion for the write up between step 8 and 9: Remove 10 mm bolt which holds the connector in front of the AOS. Makes it easier to remove the lower AOS vent hose (if you have a weak left hand :blush:) I got stuck in step 13: The clamp is right against the housing and I can't get anything in there to open the clamp. Do you remember how you did it? It's frustrating as I'm almost done with the disassembly :cursing: .