Welcome to RennTech.org Community, Guest
There are many great features available to you once you register at RennTech.org
You are free to view posts here, but you must log in to reply to existing posts, or to start your own new topic. Like most online communities, there are costs involved to maintain a site like this - so we encourage our members to subscribe or donate. All subscriptions and donations go to the costs operating and maintaining this site. We prefer that guests take part in our community and we offer a lot in return to those willing to join our corner of the Porsche world. This site is 99 percent member supported (less than 1 percent comes from advertising) - so please consider an annual subscription or donation to keep this site running.
Here are some of the features available - once you subscribe RennTech.org
- View Classified Ads
- DIY Tutorials
- Porsche TSB Listings (limited)
- VIN Decoder
- Special Offers
- Paint Codes
- Registry
- Videos System
- View Reviews
- and get rid of this welcome message
It takes just a few minutes to register, and it's quality Porsche information at a low cost.
Contributing Members also get these additional benefits:
(you become a Contributing Member by subscribing or donating money to the operation of this site)
- No ads - advertisements are removed
- Access the Contributors Only Forum
- Contributing Members Only Downloads
- Send attachments with PMs
- All image/file storage limits are substantially increased for all Contributing Members
- Option Codes Lookup
- VIN Option Lookups (limited)
All Activity
- Today
-
 Antoine Hagneré joined the community
 -
 Kishore Joseph joined the community
 - Yesterday
-
 hello everybody. bought a 957 for winter which i better didnt buy. to many issues. Some specialist / last owner / changed the batterie , but not the way it should be. screws in front of the seat did not come out , so he tried a different way. i dont what he did but he destroyed in some way the mechanism under the seat. up and down, forward backwards , everything doesnt work like it should be. I am thinking to buy a used seat and change it. My question : Is it plug and play and are the seats from 955 fitting the 957 ? Thanks a lot for your assistance
 -
which side is it ? left or right ? what is the door ? left part or right part of the picture ? is the door hanging down ? the reason is just age - usually. i had a hanging door, bought some matal plates / Chims. see video. for me it was working
-
 Olivier Lucern changed their profile photo
 -
 2006 CAYENNE 955 4.5 V8 DRIVER SIDE PRIMARY CAT REPLACEMENT Full size pictures can be found HERE Writing this down hoping it can help out another pepper owner. SKip to the bottom if you want the short version. Had to replace the drivers side (LHD) primary catalytic converter as the flex pipe had completely corroded away and was flopping loose in the wind. I got lucky and found an aftermarket one on eBay for significantly less than what the dealer would charge me. You’ll need an assortment of tools for the job: Jack Jack stands Ramps for rear 10mm sockets 12mm sockets 13mm sockets Numerous extensions Wrenches in above sizes and flex head ratcheting are awesome 22mm O2 sensor wrench or crowfoot Straight ⅜” and ¼” ratchets and breaker bars for extra leverage as needed. Flex head ⅜” ratchet Long flathead screwdriver to open up the clip holding the O2 sensor wire T25 screwdriver or bit for your screwgun for trim pieces #2 screwdriver or bit for your screwgun for trim pieces Total actual work time was about 8 hours. I could have done it in about 5 or even less if I was truly ambitious, but was taking my time and making sure I didn’t break anything in the tight space. The time also included jacking up the car, removing the underneath skid panels, engine compartment plastics, drivers tire and wheel well liner as well as reinstalling them. See Pelican Parts for the skinny on accomplishing all of those tasks. I’ll skip those tasks here. https://www.pelicanparts.com/techarticles/Porsche_Cayenne_Tech.htm Also crack open the rear hatch and block it from locking as you’ll want to disconnect the battery ground. Here is a video that shows how. Super easy and never knew myself. No need to flip the seat. How to disconnect battery ground in Porsche Cayenne (955) I will preface my replacement with the added bonus of the car having the secondary CAT delete already done. So no fighting with those. So under the car, first things first was loosening up the connection between the tailpipe section and the straight pipe, which was connected to the primary CAT. As the existing bolts on the CAT were rusted and frozen, I just snapped them off knowing they would be replaced anyways. Don’t waste your time on PB Blaster or heat. Just break them off and be done with it. So with the easy work complete now it’s time to dive into the fun part. Move up under the car so you’re looking straight up where the CAT meets the exhaust manifold. You’ve got 3 bolts above you that you’re wondering how you’ll ever get to them without taking out the front O2 sensor and even then how. Give them a spray of PB Blaster or your choice of penetrant. Now move to the front of the car in front of the sway bar, there is an opening where you can see the 3 nuts on the exhaust manifold. With a combination of extensions you can reach the nuts with a 12mm socket. You can let them soak for a little while as you have another cup of coffee or beverage of choice. At this point you may be wondering why I haven’t mentioned the O2 sensor on the top of the CAT pipe. Well, because I drove myself crazy trying to figure out how to get it out. I went after it 8 ways to Sunday. From the top with swivels and extensions and the same from underneath. I could barely get a finger over it and did manage to get the socket on it but then couldn’t get it broken free as the leverage just wasn’t there, or the socket/crowfoot slipped off. Needless to say, I wasted about an hour or so on this and questioned my seemingly foolish decision to approach this project. In the process of doing all of this, I figured out I needed to remove the middle skid plate support bracket for more room to reach up in the small area. Working by myself created new opportunities to be resourceful, or stupid depending on point of view. Since I was already committed to this endeavour by already removing, AKA breaking, the lower sections of exhaust piping, **** the torpedoes and full steam ahead. I ended up just unbolting the CAT from the exhaust manifold, dropping it down and slightly rotating it. At that point I had a good view of the O2 sensor and slipped the O2 sensor socket right over it with a breaker bar attachment. With the room to get leverage and a straight shot at it, it came loose with a marginal amount of effort. Unscrewed the sensor by hand and pushed it behind the steering column. Now for the next problem. The CAT was just big enough to not slide out with the heat shield of the steering column shaft in place. So, prop the CAT in place and remove the heat shield (2-10mm bolts), giving that extra ¾ of an inch. And so with a small amount of finagling, out she came. Could I have worked a little more on it and fought it out? Maybe. But for two 10mm bolts, easy choice. At this point in time, I called it for the day as I was now about 5 hours into the whole job. Sunday morning - here we go for part 2. Now knowing how it came out, it should make it easy to go back in. And yes, it was. Reverse the process of the removal. Slide the new slimmer CAT up into the general position it needs to be, let it rest on the other parts while the O2 sensor is installed. I did unclip the connector up in the engine bay and hang it from the hood so it would spin freely while installing it. A tip I saw elsewhere, thank you. Now push the CAT up into position and viola!. NO! WAIT! The mounting bracket is farther forward than on a stock CAT by about a ½ inch and slightly rotated off the axis of alignment from the engine bracket. The CAT won’t go all the way forward to mate with the exhaust manifold. So… Now it’s pushing, rotating and mild cursing to get it around the engine bracket. In the end, I got it together. Final decision on the bracket, it’s staying unbolted. Not the preferred method, but that’s how we’re rolling since I don't have a welder anymore to move the bracket on the CAT. At this point I was able to get my hand up to get the nuts on the ends of the bolts and finger tight them. Slide around to the front with the long extension and reach in to tighten them up. Now, if you’re lucky, you may have an air ratchet or a battery operated ratchet, which I did, to tighten them up. Do so at this point. Back to the middle of the car to reinstall the short pipe piece to the flex end of the CAT and to the tailpipe. Reinstall the middle skid plate support bracket and you’re just about complete. I hope for all of you who lasted this far have good luck getting around the secondaries if you still have them or figure an alternate plan for that. Time to start the car before I put everything back on and drop it to the ground. Hook up the battery (sparky, sparky), key in the ignition, hand pushing the brake AND… nothing. PANIC!!! I know there’s power. The interior lights come on, chime is going ding-ding. Again.. Nothing. Hold on, let’s breathe a second. Oh lord, the wife will kill me if I killed her car. 3rd time, small prayer to Stuttgart and… SHE LIVES AND BREATHES!!! And much quieter too. Do a couple of start-stop operations to double check it’s all working and then off to reinstall all the plastics and drop her to the ground. I will say, fighting to get the wheel liner on, is an extraordinary test of patience and will power. I think I fought that alone for over 30 minutes. If anyone has tips for that process, I’d be eternally grateful. Couple of side comments on this. The CAT I purchased was an aftermarket unit I got off of eBay and have no idea who manufactured it. There were no studs in the flanges, just 3 bolts and nuts per flange. I was worried they were going to fall out during the install, but the new gaskets held them in place as the holes were the right size to screw the bolts through them by hand. I know this helped during the reinstall and not having to bend or cut off the bracket on the CAT. For the heat shield, some places had said to unbolt the steering shaft and move out of the way entirely. I did not want that headache to do a realignment of the shaft/steering wheel. So I just did the minimum I thought would work. Now that you’ve gotten to the end of my story, I hope it will give someone else the courage to take on the project. Take your time, step back, breathe from time to time and don’t rush it. It will happen. Please make sure to tip your waitress. SHORT VERSION Put car on jackstands or at least front end Put rear of car on ramps if only jackstands in front Disconnect battery Remove front left tire Remove wheel well liner Remove underbody skidplates/plastics up to bumper Remove heat shield from steering shaft Remove middle skidplate support bracket Unbolt/snap off bolts from primary CAT flex pipe to tailpipe/secondary CAT Remove short tailpipe section if secondary delete performed From front of car, reach in and unbolt the 3 nuts holding primary CAT to exhaust manifold Drop CAT down and rest it on car Using O2 sensor socket, reach up into area and remove sensor Pull CAT out of car Push new CAT up into the void and rest on car Install O2 sensor Push CAT up to exhaust manifold and bolt together Install engine support bracket (if applicable) Install tailpipe section to flex pipe end of CAT Install skidplate support bracket Install skidplates Install wheel well liner Install tire Lower car to ground Install engine compartment plastics Reconnect battery Start car CELEBRATE Now if someone can share an easy way to do the passenger side......
- Last week
-
Thanks - we'll keep this thread so it can help others in need.
-
FYI, it is confirmed, 99970346240 is the correct P/N, I've plugged all empty holes now, a total of 8 in the rear body area, behind the intercoolers. It does not show in any of the 996 PETs, the parts guy found it in the Cayenne 951 PET. May be in others as well.
-
 Hastin Taylor changed their profile photo
 -
 Anthony Gerada joined the community
 -
 Stefan Luczycki joined the community
 -
 Donald A. Troy changed their profile photo
 -
 Jim Glowienka joined the community
 -
 Bret Newman changed their profile photo
 -
 岩本直也 joined the community
 -
 Russ Goold joined the community
 -
 Nate Higgins joined the community
 - Earlier
-
 Waqas Riaz joined the community
 -
 Ryan Velting joined the community
 -
It's a plug. Me and my parts guy at the dealer now believe it is 99970346240. I've ordered 10 of them, I will know in a few days if that's what they are.
-
It that a plug or plastic pop rivet? I am only finding the plastic rivet.
-
 Jose Montes changed their profile photo
 -
 Chris Van Scoyk changed their profile photo
 -
I can't find the P/N of the plastic body plugs found under the intercooler areas, 996TT. They're 10mm inner diameter, 17.5mm outer diameter and are hat shaped. Out of the 8, I only have one survivor and would like to put them all back. Here's a photo, next to one of the M8 screws that holds the intercooler frames.
-
 James Martin Emms changed their profile photo
 -
-0001-0001.thumb.png.17f5bb25bf8ec261a17c21e6321c8492.png)
Retro fit cruise control
Loren replied to Overlanders's topic in 997-1 Series (Carrera, Carrera 4, Carrera 2S, Carrera 4S)
It should be pretty much plug n play replacement. It may also need a PIWIS tester to turn on cruise - (sometimes it is on and sometimes it is off default). -
 I'm looking to retro fit cruise control to my 997.1 . I've purchased the lower cowling, the cruise stork and cable. There used to be a DIY of how to fit to a 987, (same for 997) but it is no longer available on here. Has anyone fitted this mod. It looks like it's plug and play, but before I start to tackle this job, I'd like to find out what's involved. Would appreciate a steer on this if anyone has tackled it TIA
 -
 Mike Bishop changed their profile photo
 -
 mark gray changed their profile photo
 -
Is there a question here? I don't understand?
-
955
-

Ride height and M030 spring questions
Andrew Howell replied to Andrew Howell's topic in 986 Series (Boxster, Boxster S)
The factory specs say that my car should be around 150mm tall with the current springs but you can see from the picture that its sitting at 120mm right now. So maybe a fresh set of US M030 springs will actually raise my car by 10-20mm? I hope so. I don't want it to be any lower. The PSS-9 are out of my price range and would also push my car out of the factory optioned class with PCA. I did just find some US M030 springs so I'll update the thread in a few weeks when I get them installed and we will see how the ride height changes. Again, thanks for the input! -
Ride height and M030 spring questions
Loren replied to Andrew Howell's topic in 986 Series (Boxster, Boxster S)
Remember the new ride height will be 10 mm lower than the stock height - plus the springs, struts and swaybars will all be firmer than the stock items. As I said before another option PSS-9 (adjustable) Coilovers - likely easier to find as either OEM or aftermarket. -
Ride height and M030 spring questions
Andrew Howell replied to Andrew Howell's topic in 986 Series (Boxster, Boxster S)
I'm surprised that the springs would sag that much over time but perhaps you are right, it's the only explanation that makes sense. Just to confirm that I'm not making an error in my measurements, I've attached a pic of the front measuring point on my car. It shows that the head of the bolt is right about 4.75 inches from the ground, or around 120mm. Can you confirm that I'm measuring the height correctly or not? I'll try and source some US M030 springs to go with the struts but I wasn't having a ton of luck finding them online. Thanks again, Loren. I really appreciate your input!
-
 R allives changed their profile photo
 -
 Having spent months chasing down my very heavy steering (yes I know some like it like that) I have finally managed to over come the heavy steering by bypassing the servotronic system and locking it into 75% assistance effort. Here's how I did it, but I would appreciate any thoughts on why it wasn't working if anyone has any constructive comment about the acceleration sensor readings - which is what I think the main culprit is.
 -
 Anyone have any advise on what to do next?
-

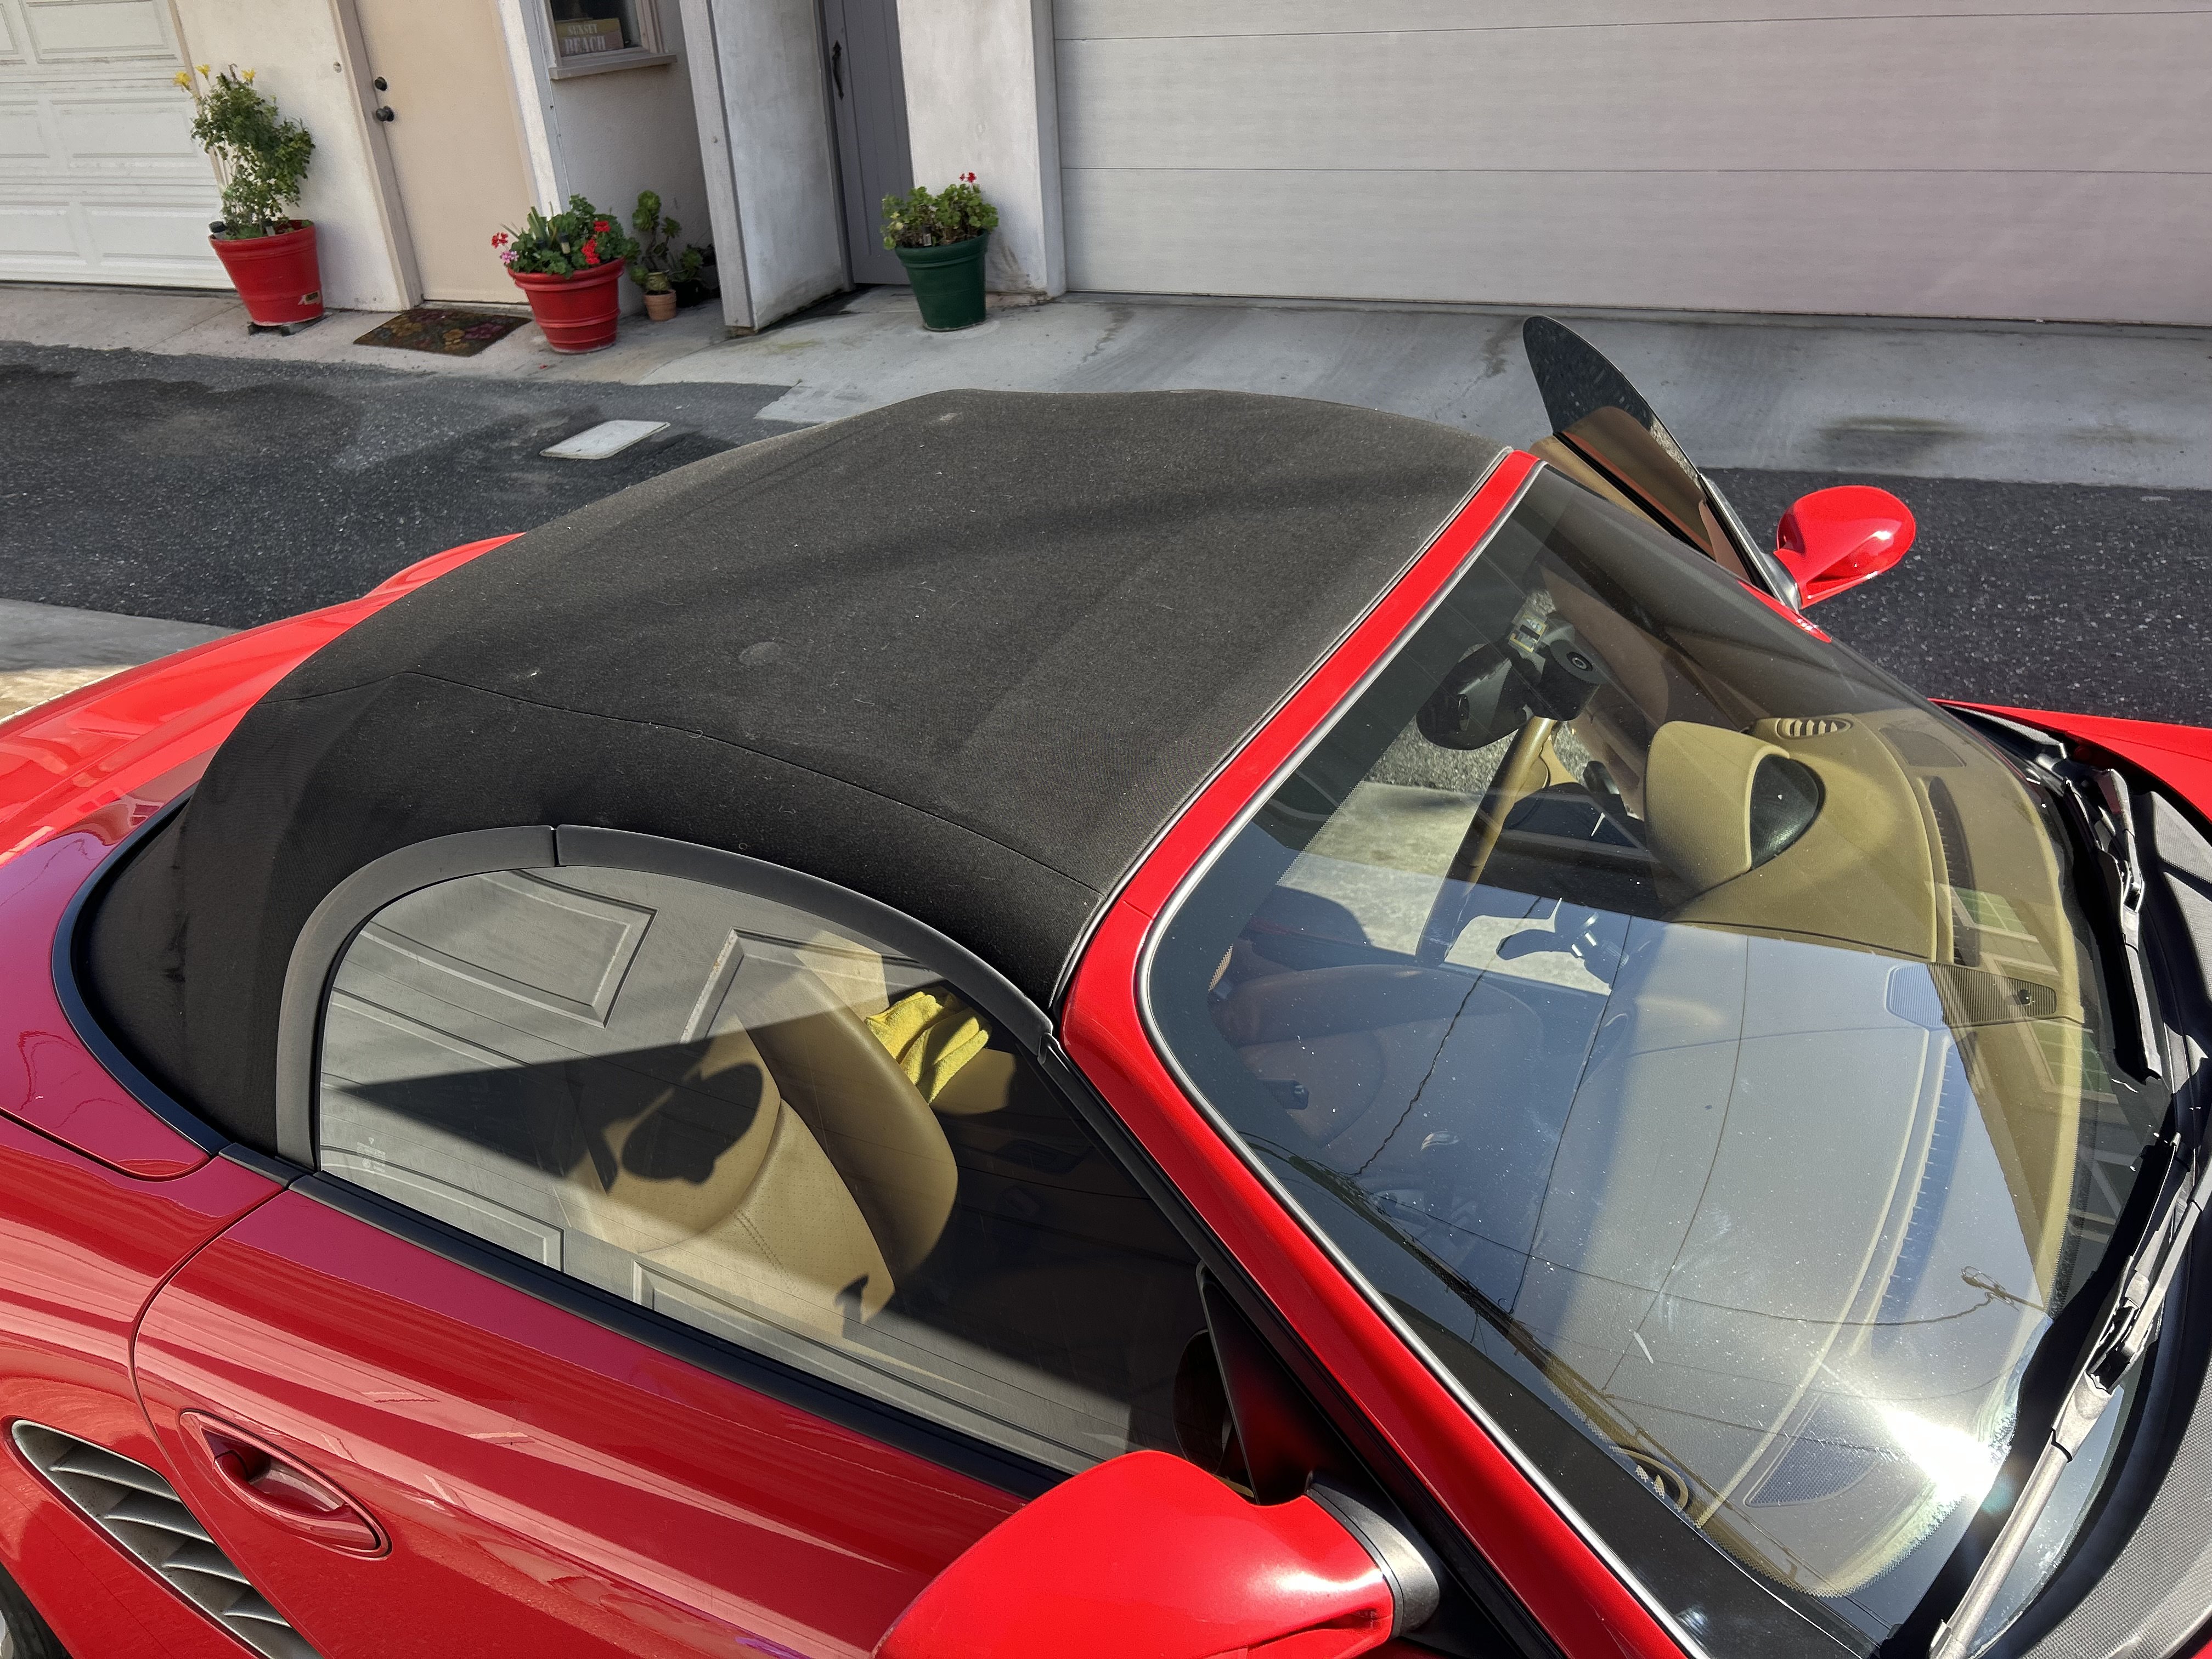
Convertible Top Life Span ?
jim_hoyland replied to jim_hoyland's topic in 987-1 Boxster Convertible Top Issues and Solutions
I went to get estimates on doing a replacement; seems like a legit upholstery shop wants 3K which includes the top, labor and taxes. Here’s a few pics of what my 19 year old top looks like.
-
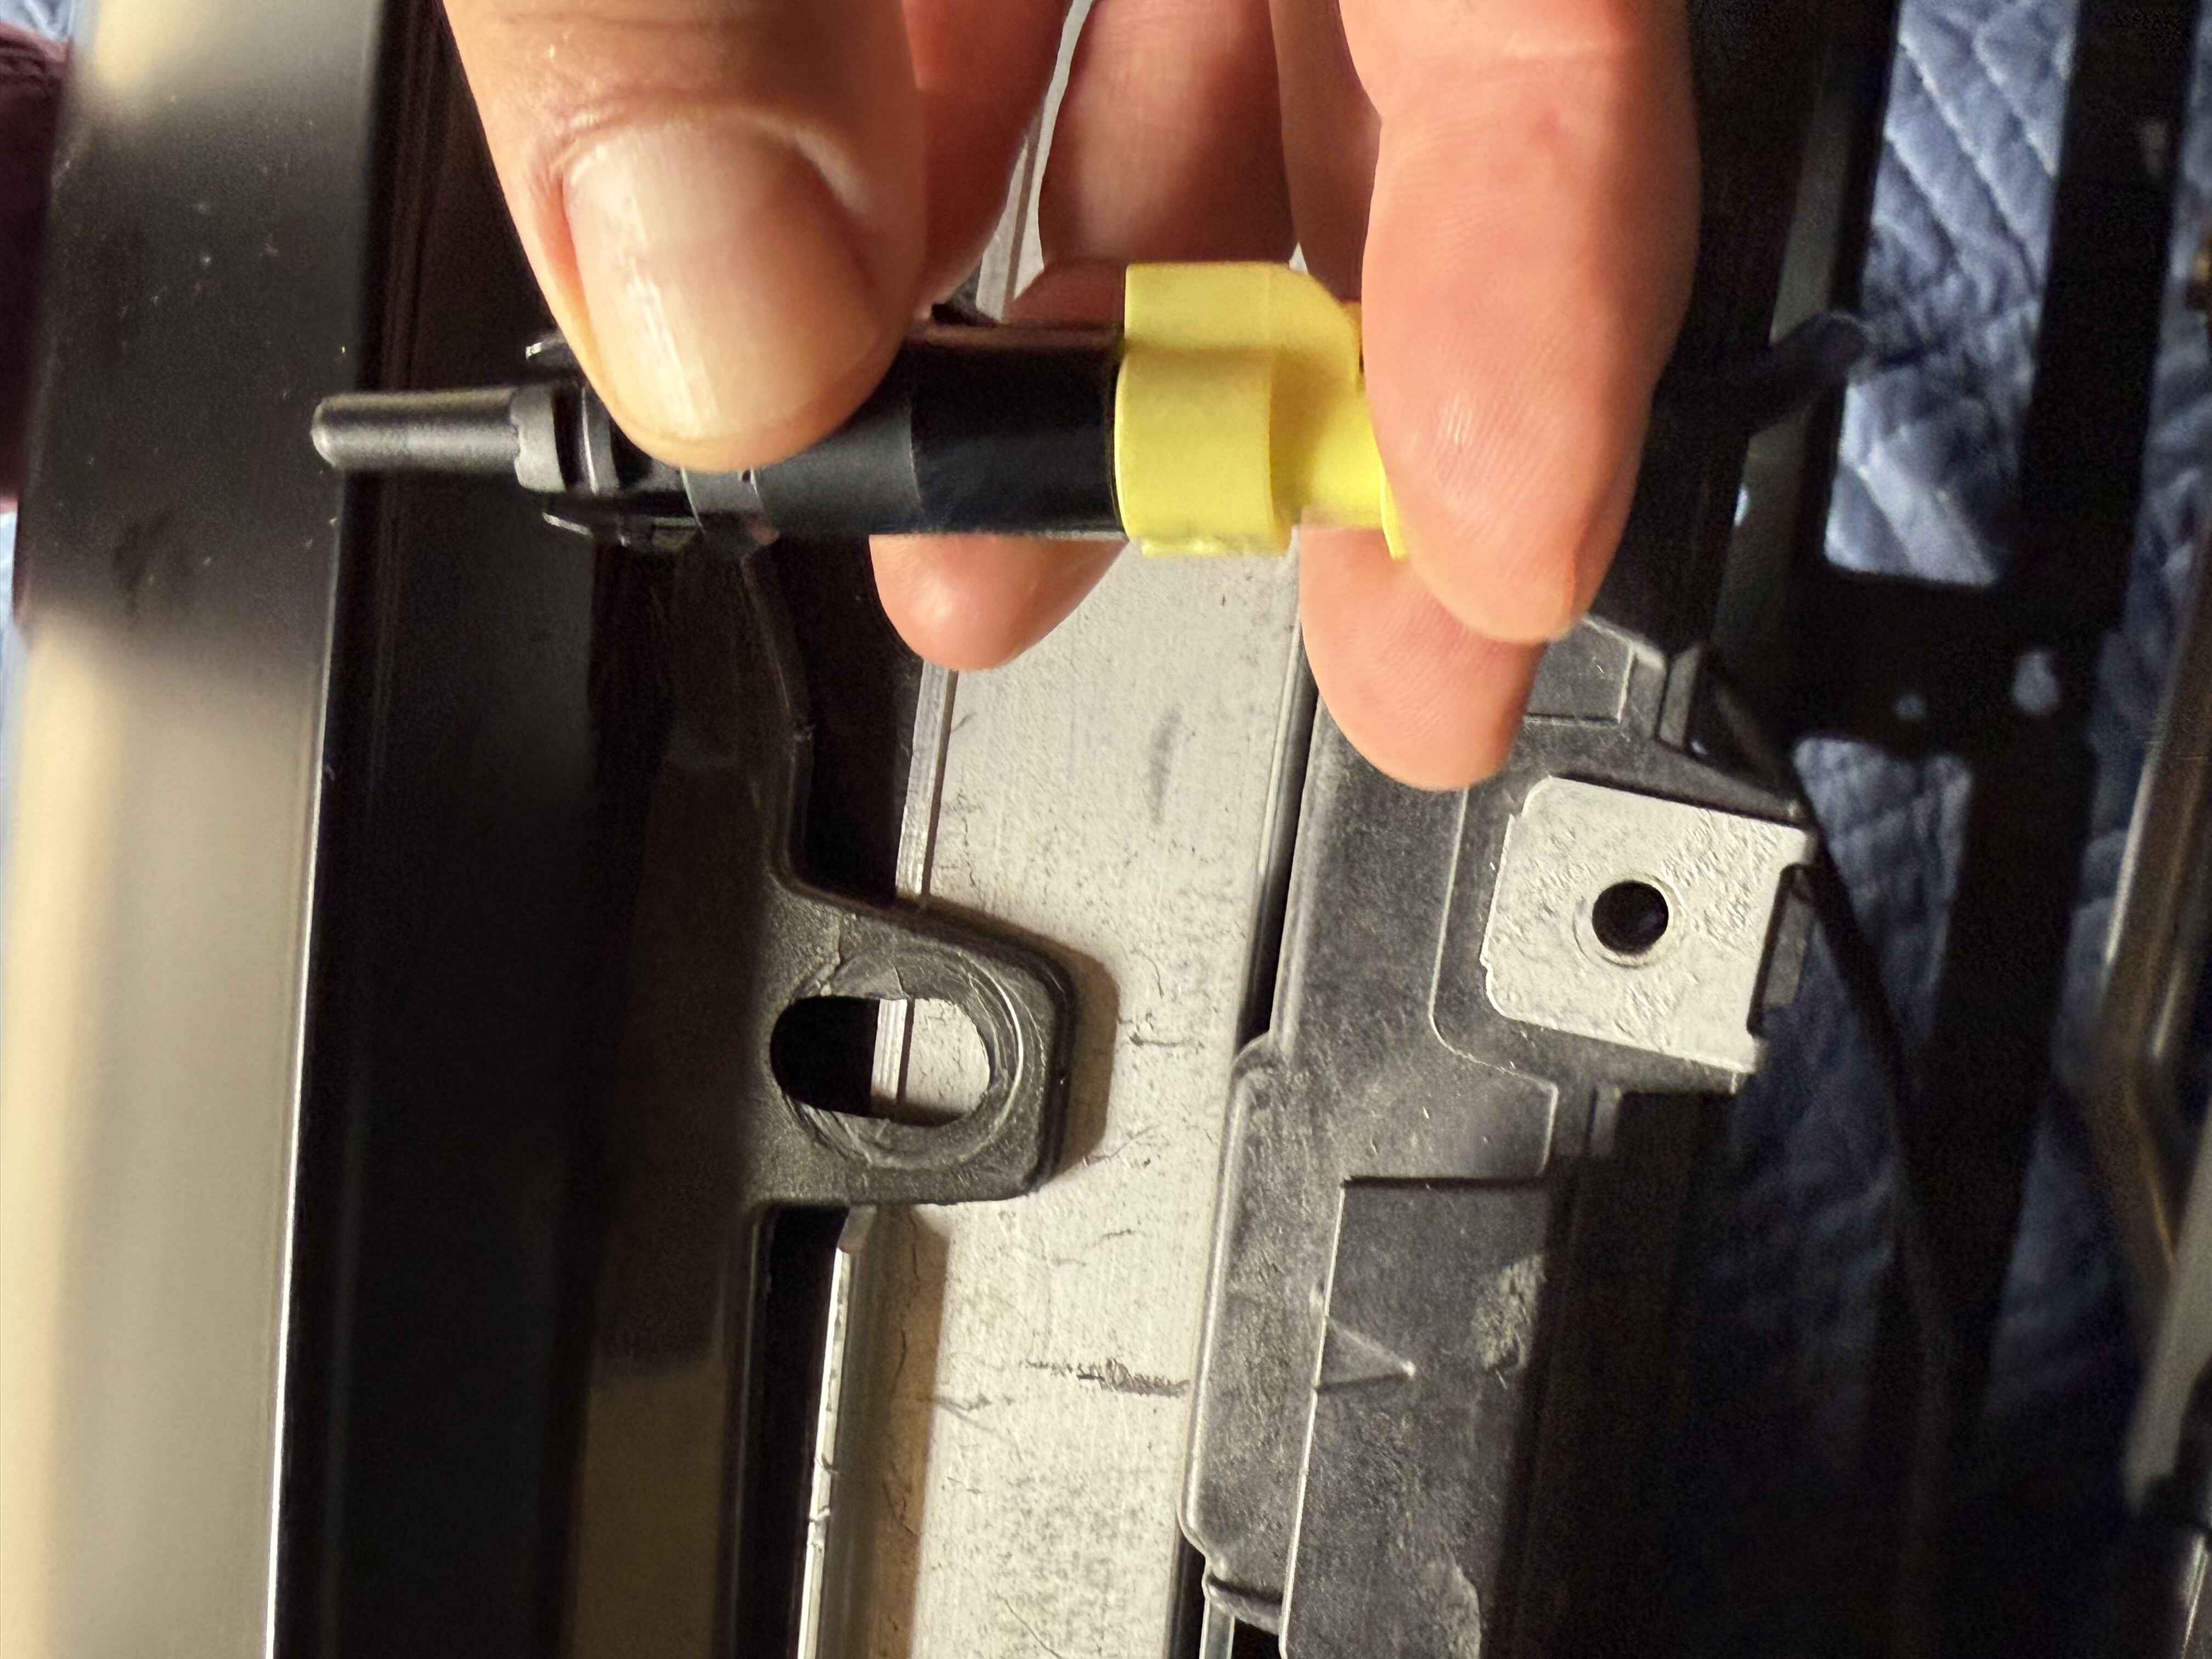
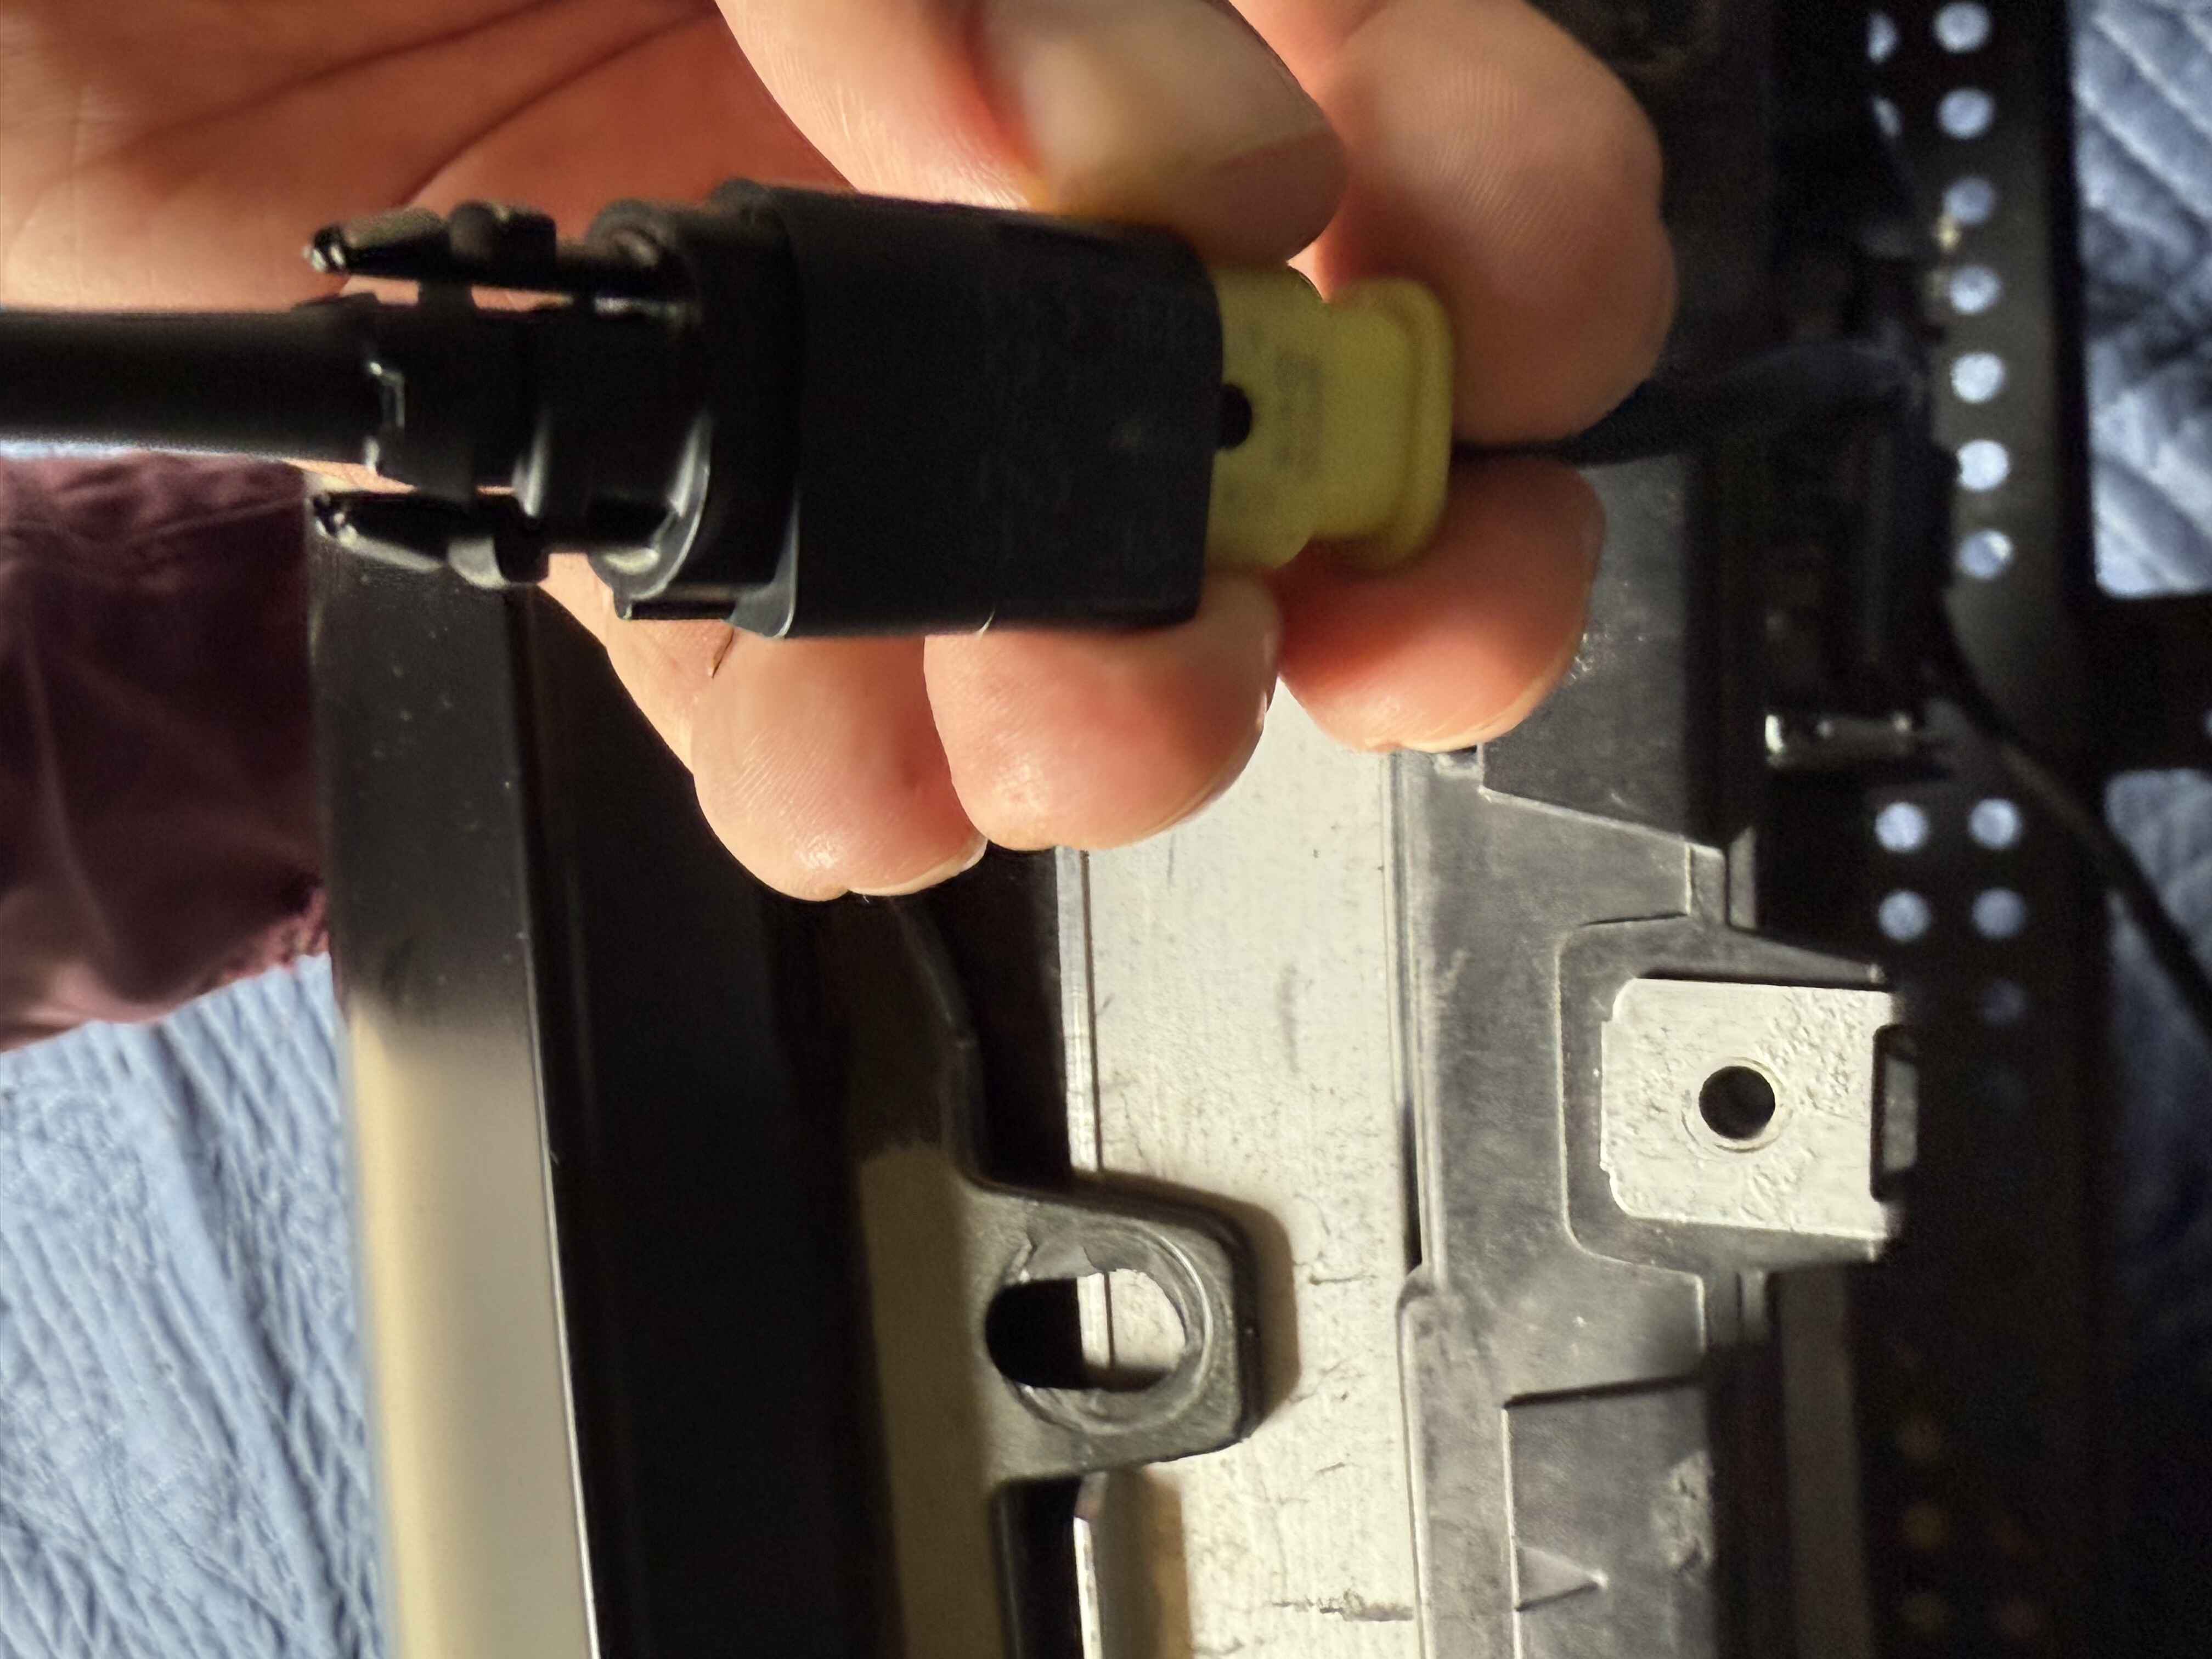
no I tried that it doesn't plug in. It's like a different connector. But I don't have a temperature sensor on the car I can find the wire for that. It makes no sense. Im really lost here.
-
 I'm trying to decide - pay a Dealer$hip? - or Do it Myself? I need to replace the Clock Spring/Squid Ring on a 2106 Cayenne Diesel. I do have a clean, bright, dry workspace, and more than average mechanical skills. Any advice? Any reviews? Anybody installed an aftermarket part?
 -
 Hi everyone, I’ve spent the last 18 months bringing a 2004 Cayenne S (4.5L V8) back from the dead. It sat outside for 5+ years and had a laundry list of issues. I just finished a massive diagnostic session and wanted to document the specific failures and fixes, especially regarding the "0L" CAN bus error and a terrifying compression test result that turned out to be a false alarm. The Patient Vehicle: 2004 Porsche Cayenne S (non-Turbo). History: Sat for 5 years outside in PNW. Incorrect turbo injectors installed by previous owner. Crank no-start (clogged drains, soggy floors caused the common splices under the carpets to disintegrate) Initial State: Running Condition: The car would crank and start after fixing the splices, but ran incredibly rough and would not idle without holding the gas pedal. Communication: Impossible. The Durametric scanner showed "Link Error" or could not find modules. The OBD-II port showed "0L" (Open Loop) when testing resistance between CAN High/Low (Pins 6 & 14). Phase 1: The "Invisible" Electrical Break The Symptom: I couldn't scan the car to diagnose the rough running because the Gateway wasn't talking to the OBD port. Multimeter showed "0L" (infinite resistance) across Pins 6 & 14, where it should be ~60 Ohms. The "Aha!" Moment: On 2003/2004 models (specifically my VIN with the 10th digit "4"), the Gateway is inside the Instrument Cluster. It is not a separate box under the dash like later models. The Fault: I traced the wiring and found: Continuity between OBD Pin 6 and the Green Plug on the back of the Instrument Cluster. NO Continuity between the OBD port and the main CAN splice under the Passenger Seat floor. The Fix: I bypassed the broken section of the dashboard harness. Spliced into the CAN High and Low lines near the OBD-II port. Ran a twisted-pair jumper wire directly to the factory splice point under the passenger seat carpet. Result: Resistance returned to 60 Ohms. The scanner immediately connected, showing "No Codes Found" (initially), confirming the network was back online. Phase 2: The "Smoke & Misfire" Scare Symptoms: With the electronics fixed, I could finally see what was happening. Smoke: Massive cloud of White/Grey smoke smelling strongly of raw fuel. Codes: P0300, P0303 (Cyl 3), P0308 (Cyl 8). Scary Symptom: A loud "Ticking" noise from Bank 2 (Driver's side), which often signals the dreaded bore scoring. The "False" Diagnosis: I performed a dry compression test and got terrifying numbers: Cylinder 3: 60 PSI (Dead) Cylinder 8: 100 PSI (Very low) Spark Plugs: The plugs on Cyl 3 & 8 were "steam cleaned"—the ground straps were perfectly white/clean, while the center electrodes were black. The Real Diagnosis (Fuel Wash): I performed a "Wet Compression Test" (added a tablespoon of oil to the cylinders) to see if it was rings or valves. Cyl 3 jumped to 190 PSI. Cyl 8 jumped to 230 PSI. (!) Conclusion: The engine block is healthy! The low compression was caused by Bore Wash. The cylinders were so flooded with gasoline that it washed the oil film off the walls, preventing the rings from sealing. The "Ticking" was likely a dry lifter or piston noise from the lack of lubrication. Phase 3: The Injector Diagnosis I had installed "Remanufactured" Bosch injectors (Part # 0280156101) thinking I was doing the right thing. Wiring Test: I tested the injector harness voltage (Key ON, Engine OFF) to ensure the DME wasn't shorted and holding them open. Bad Cylinders read ~7-8V. Good Cylinders read ~7-8V. Result: Wiring is perfect. The DME is functioning correctly. The Verdict: The "Remanufactured" injectors were mechanically stuck open immediately upon installation (likely due to debris in the rail or just being bad "reman" units). They were dumping fuel, washing the cylinders, and killing compression. Summary of Fixes No Comm/Rough Run: Fixed by running a dedicated CAN-Bus jumper from OBD port to Passenger Seat splice. Low Compression: Disproved engine failure via Wet Compression test (Results: 190/230 PSI). Misfire/Smoke: Identified stuck-open "Reman" injectors. Current Status: Waiting on Brand New injectors. The fuel rail is getting a deep clean, and the gas-contaminated oil is being drained. The 230 PSI result on the "Ticking" cylinder confirms the engine is saved! Hopefully, this helps someone else who sees "0L" on their multimeter or "60 PSI" on their compression tester. Don't scrap the car—check the wiring and the fuel!
 -
Outside temperature sensor?
-
 Happy new year everyone! I was wondering if anyone had experience with the bottom of the front doors not sitting flush with the car when closed? What could be the potential culprit, top door hinge, striker plate? Any ideas/info would be greatly appreciated. I have attached a picture from another forum as an example.
.jpg.dc738c9c4b596fb32dc8804f1d09ef17.jpg)
.jpg.2b81d572e107c855fcc8db3e25692ab0.jpg)
.jpg.24efdfb320157fc0d662df27ce09666f.jpg)
.jpg.5627410ee3b5654a00328f510510ffc0.jpg)
.jpg.28f08e8939116d70c2c8ac4733a62c82.jpg)
.jpg.276acbb530288b0b17cefec5ad944f23.jpg)
.jpg.e033379ecc7fcc3670ce0fa975ffbb59.jpg)
.jpg.2a8548c3ef4c34732f5f055bcb179355.jpg)
.jpg.96d241cf03b2076b1dd034ff7dfcab8a.jpg)
.jpg.80dc5a049e16cfce4249e767e003ee29.jpg)