Welcome to RennTech.org Community, Guest
There are many great features available to you once you register at RennTech.org
You are free to view posts here, but you must log in to reply to existing posts, or to start your own new topic. Like most online communities, there are costs involved to maintain a site like this - so we encourage our members to subscribe or donate. All subscriptions and donations go to the costs operating and maintaining this site. We prefer that guests take part in our community and we offer a lot in return to those willing to join our corner of the Porsche world. This site is 99 percent member supported (less than 1 percent comes from advertising) - so please consider an annual subscription or donation to keep this site running.
Here are some of the features available - once you subscribe RennTech.org
- View Classified Ads
- DIY Tutorials
- Porsche TSB Listings (limited)
- VIN Decoder
- Special Offers
- Paint Codes
- Registry
- Videos System
- View Reviews
- and get rid of this welcome message
It takes just a few minutes to register, and it's quality Porsche information at a low cost.
Contributing Members also get these additional benefits:
(you become a Contributing Member by subscribing or donating money to the operation of this site)
- No ads - advertisements are removed
- Access the Contributors Only Forum
- Contributing Members Only Downloads
- Send attachments with PMs
- All image/file storage limits are substantially increased for all Contributing Members
- Option Codes Lookup
- VIN Option Lookups (limited)
All Activity
- Today
-
 I'm about to install a brake controller for my trailer. I understand that it is supposed to be located under the bash near the steering column. Has anyone done this installation or removed the panels under the steering column? I'm a little concerned about removing the airbag panel under the dash so I thought I'd check to see if anyone had any advice.
 -
 I appear to have a passenger door window drop issue on my 1998 986 Boxster that I can't seem to diagnose. Here's the situation. About a week or so ago, the passenger door stopped doing the short "window drop" function when the outside door handle was pulled. The inside handle seemed to enable the drop as did releasing the convertible top latch enable the "long" window drop on both windows. The driver side door short window drop function worked fine with both the inside and outside handles (I replaced the regulator in the drive door 4-6 months ago, so re-did all the up-down and front-back adjustments at that time). Given the above, I decided it must be the outside door microswitch, so I purchased a replacement OEM outside door handle microswitch for the passenger door. When I removed the door panel to replace the outside door microswitch, I discovered that the microswitch at the connector had become disconnected: the microswitch pigtail wiring had come loose from both of the tabs that are supposed to secure the microswitch pigtail to the door body and out of the way of the window, so perhaps the window caught the pigtail on it on a lowering cycle and pulled the connector apart. I reconnected the microswitch (I did not replace it with the new one, thinking I would return it if the one in-place worked), secured the wiring out of the way of the window track with cable ties, and put the door back together. I then reprogrammed the window by holding the window switch down for 10 seconds after each fully lowering, then raising, the window. Now neither the inside door handle or outside door handle work properly with regard to the drop function. The outside door handle, when pulled, does nothing to actuate the window drop function. The inside door handle, when pulled, actuates the window drop function, however when the handle is released, the window goes back to a full upright/closed position. I would attach videos to show the inside door handle behavior but the forum doesn't allow it. The convertible latch, when released, still causes the long drop on both windows. Anyone have any ideas as to what is going on? Given the 2nd and beyond times of doing a job go exponentially faster, I plan to remove the door card/panel again and install the outside handle microswitch (as it is almost cheaper to keep than returning it) to see what happens, but if that doesn't work, would the lock actuator mechanism be the next part to throw at it? Thanks in advance for any help? austinporsche is online now Report Post
 -
 zeusautodealers joined the community
 - Yesterday
-
 Nelson Sanchez joined the community
 - Last week
-
 Roman Vasilenko joined the community
 -
 Chris Jing joined the community
 -
 Andrew Wong joined the community
 -
 Thanks Loren. Will do and will report back.
 -
-0001-0001.thumb.png.17f5bb25bf8ec261a17c21e6321c8492.png) When I see cabriolets' with starting problems the first I think of is the immobilizer box under the passenger's seat. These are prone to flaky operation once they have gotten wet. I would remove it and open it up to see if there is any sign of water damage.
When I see cabriolets' with starting problems the first I think of is the immobilizer box under the passenger's seat. These are prone to flaky operation once they have gotten wet. I would remove it and open it up to see if there is any sign of water damage. -
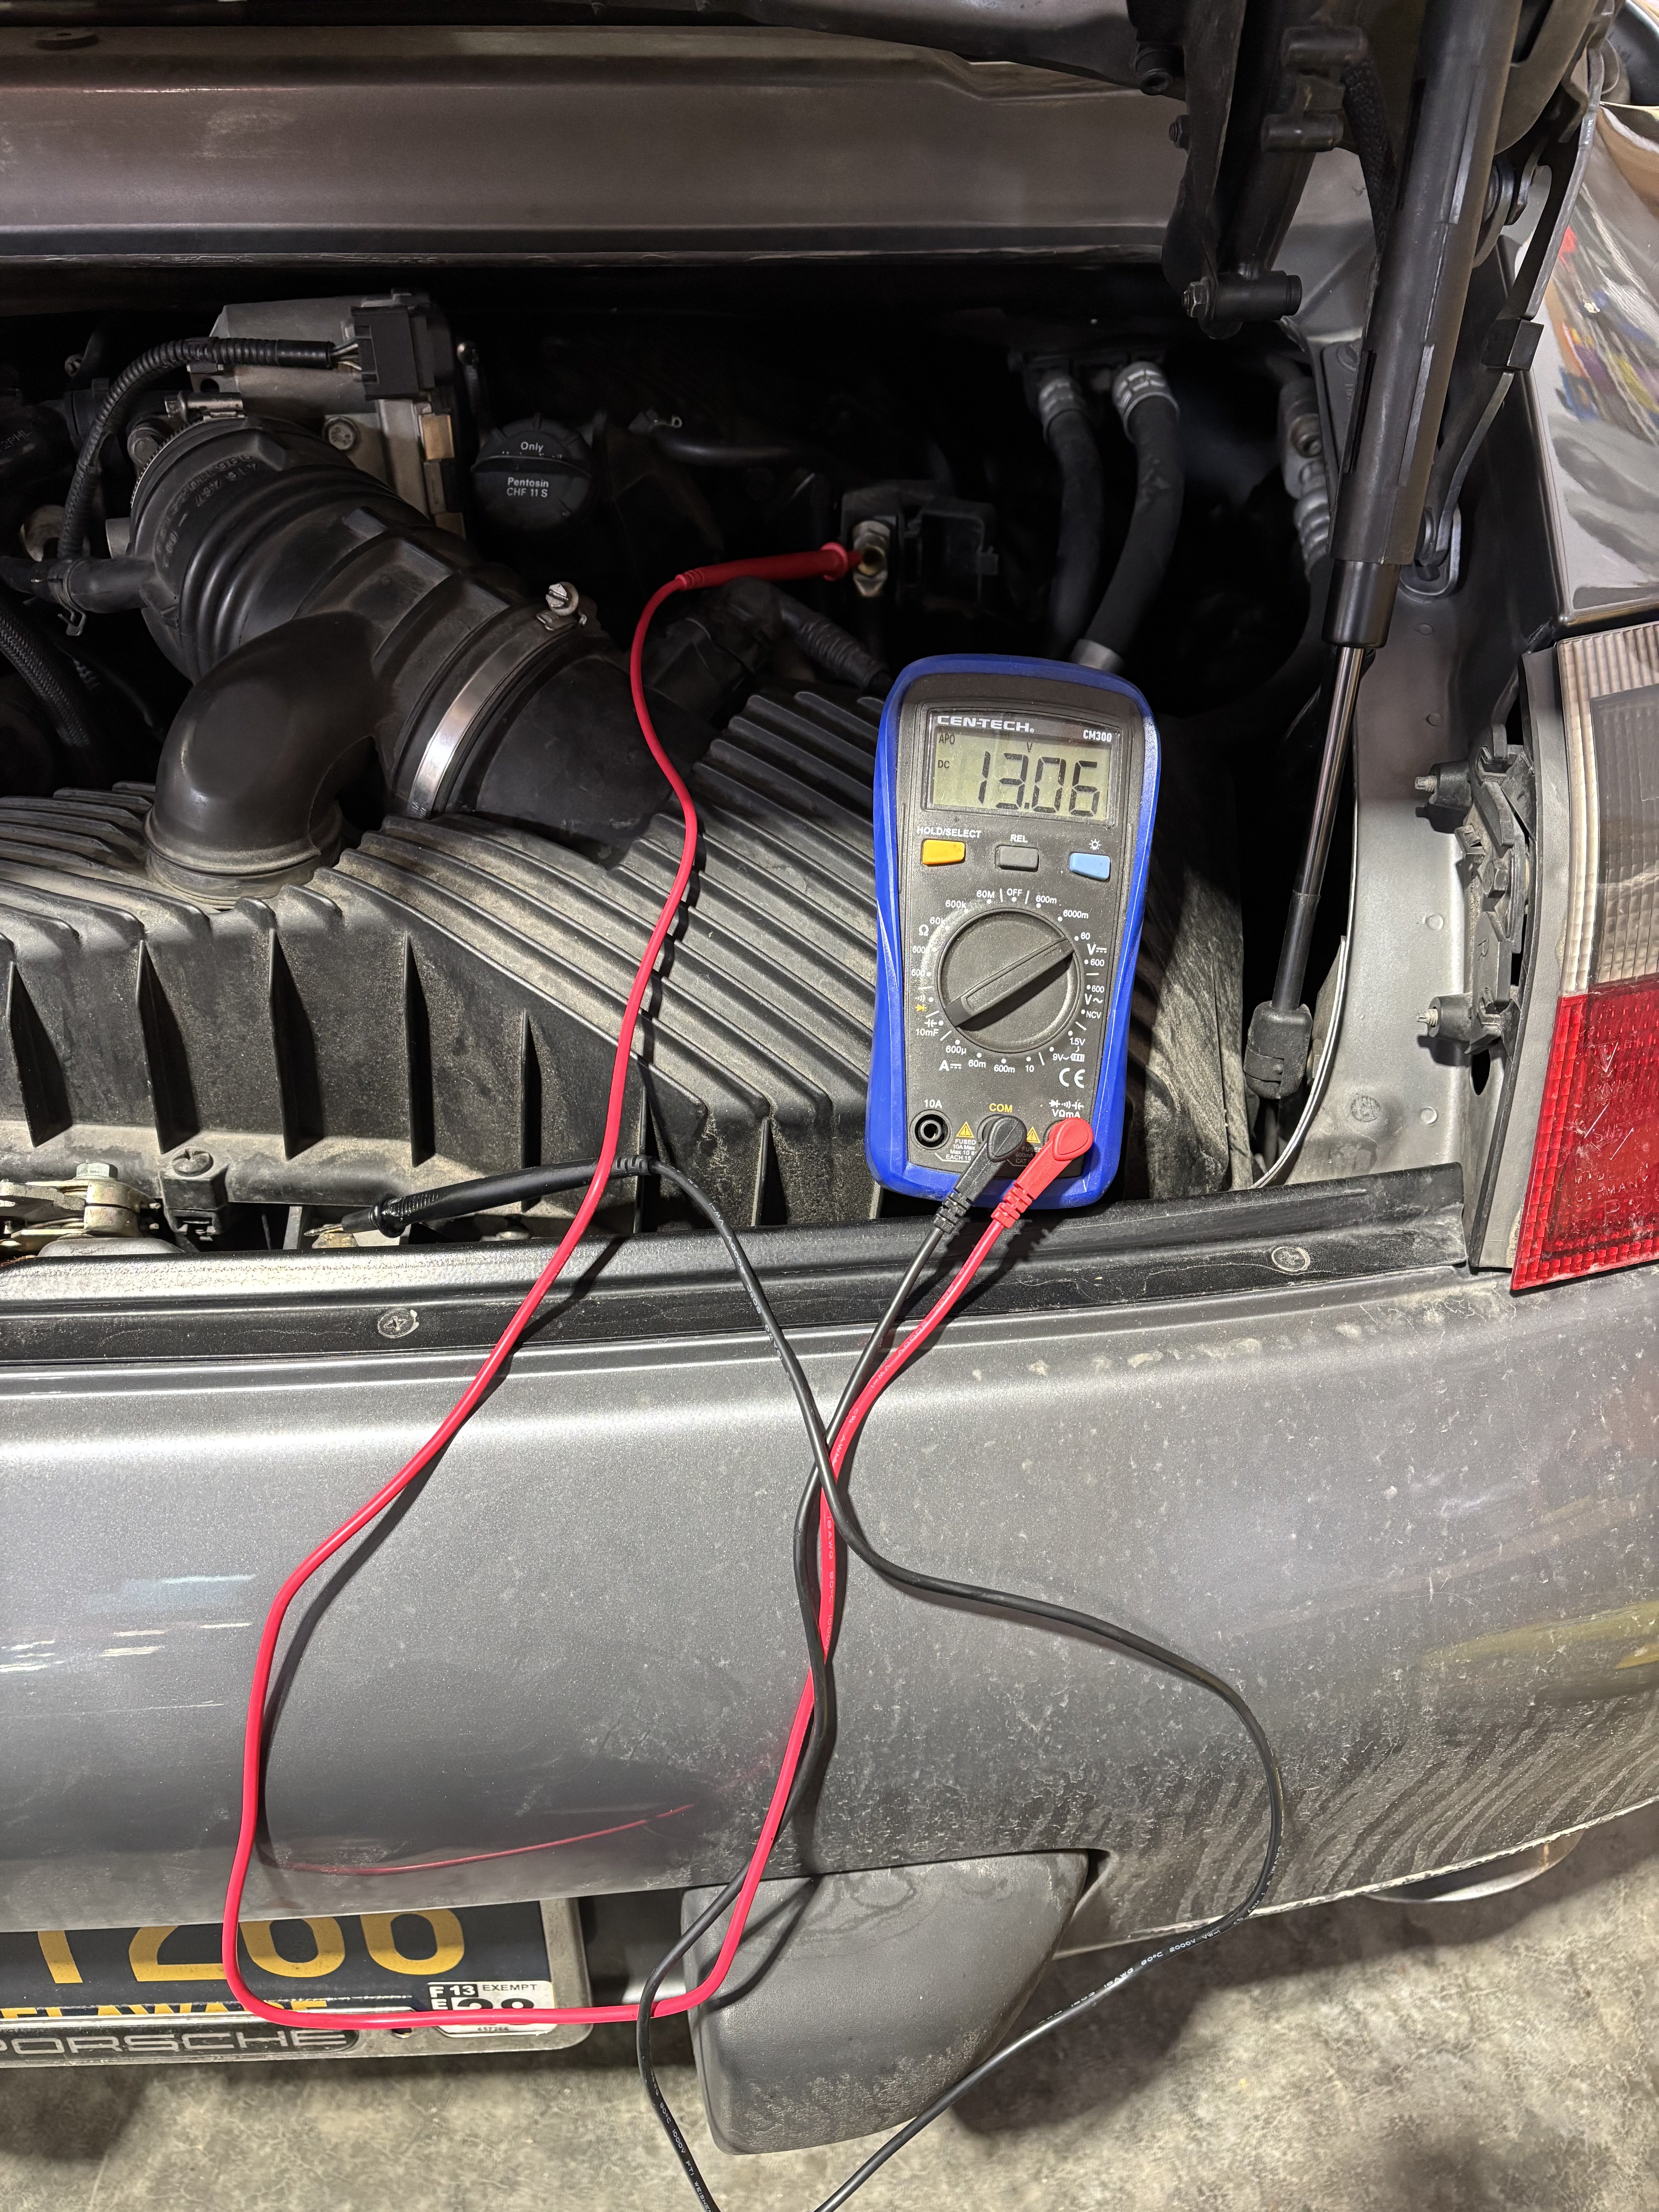
Today, I checked voltage at the battery and also at the post in the engine compartment. There is no voltage drop noted. Note, I had just taken the battery off of the charger and measured the voltage in the engine compartment first which will explain the higher voltage coming from the engine compartment. Yes, the charger was off although still connected. ….And, the car did start again today with the relay bypassed…

-
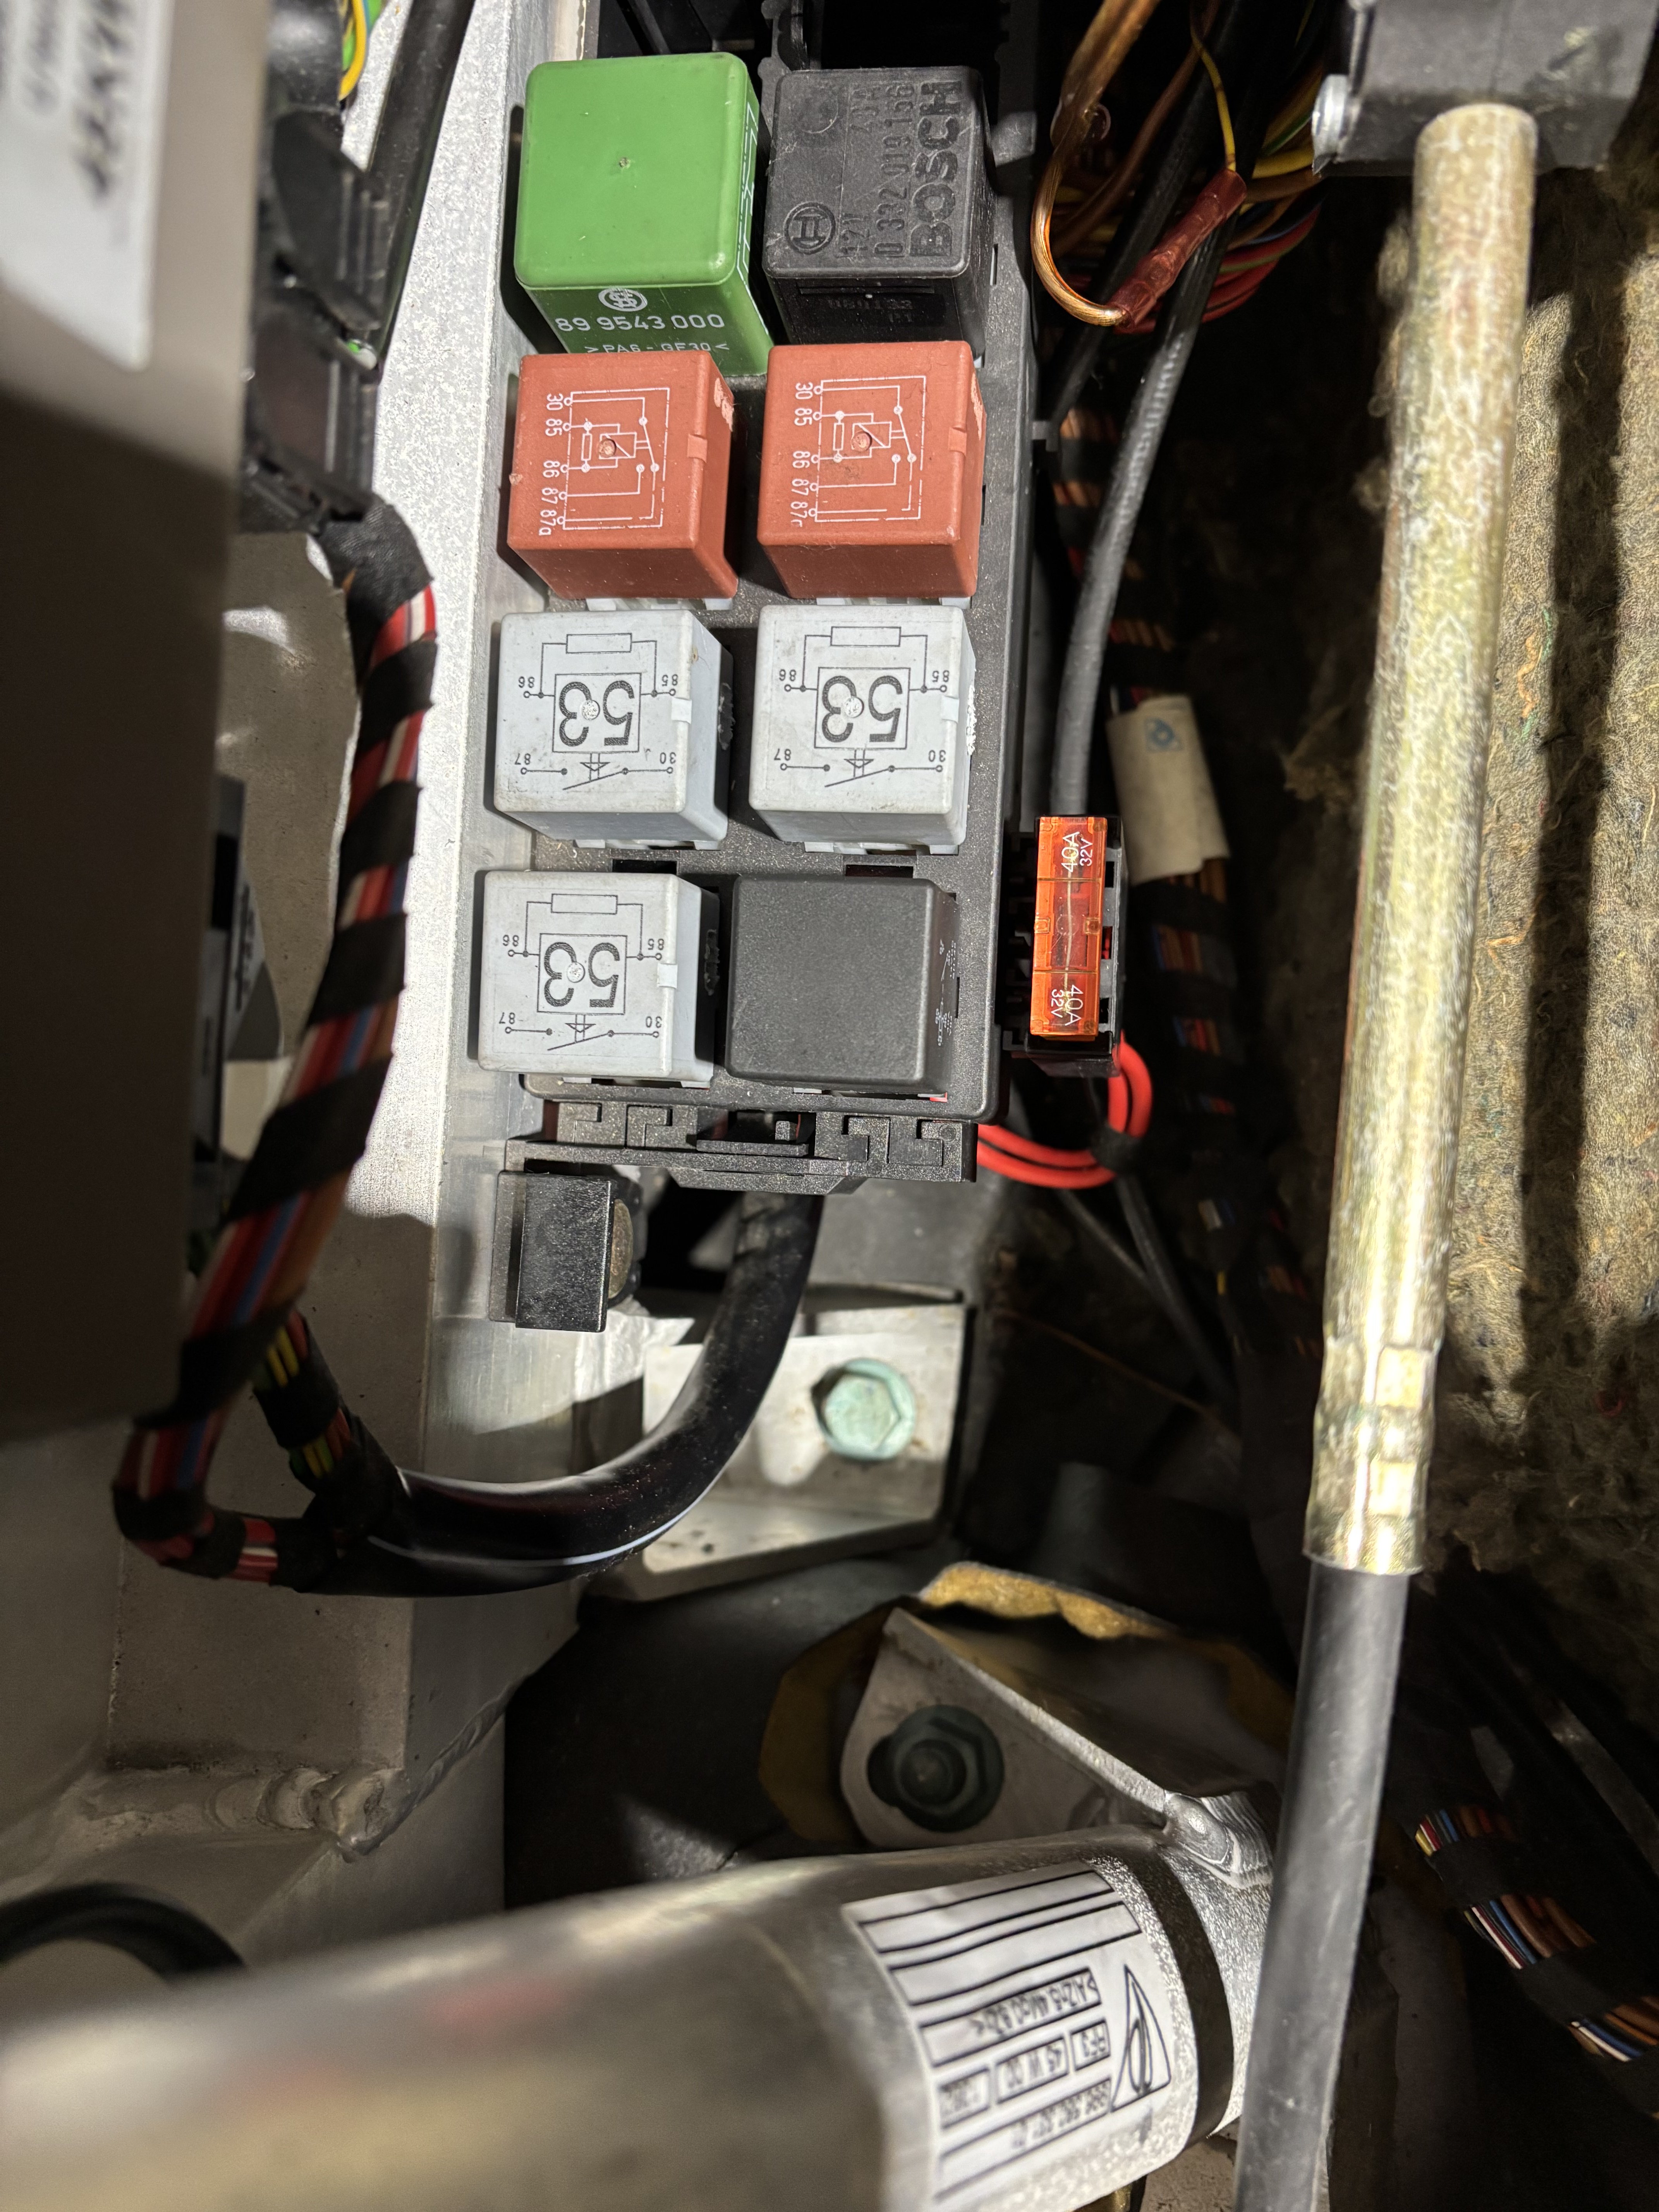
HI, I previously reported that my starting issue was solved. It’s not, and now the car won’t start unless the relay is bypassed. I originally swapped out the starter relay, and same problem came back as evidenced in the video. I purchased an aftermarket relay and installed it. That worked for a few days, and then stopped working. Now, I can only get the car to start if I bypass the relay. I thought if bypassed the relay, then a replacement relay would be the solution, but that did not work. Where should I go from here? IMG_3505.mov Aftermarket relay below: Car starts when the relay is bypassed: Where should I go from here?
-
Thank you so very much Loren it worked!
-
 Matthew German joined the community
 -

Dead fog light switch..,.
jim_hoyland replied to jim_hoyland's topic in 987-1 Series (Boxster, Boxster S)
I’d like to know whether a multimeter test can be done before I send the replacement switch back to PP -
- Earlier
-
Dead fog light switch..,.
jim_hoyland replied to jim_hoyland's topic in 987-1 Series (Boxster, Boxster S)
But wait ! The new switch arrived Friday ( Part# 997-613-535-01-A05-OEM ), but when I swapped it in, the fog lights still didn't work ??? Previously, we swapped in a known switch from another Boxster and the fog lights worked fine; this replacement switch won't turn on the fog lights. The switch has a ten (10) pin connector; is there a way to test the functionality ??
-
 Ricky Abichandani joined the community
 -
I appreciate it
-
Dead fog light switch..,.
jim_hoyland replied to jim_hoyland's topic in 987-1 Series (Boxster, Boxster S)
Ordered the replacement from Pelican Parts, $150 and free. shipping. Received the new switch in 2 days (they use Fed-Ex). -

Air Conditioning Additives
JFP in PA replied to Spartan1-6's topic in 987-1 Series (Boxster, Boxster S)
At the end of the day, it is your car and your money. Just be aware that there always has been a limit as to how cold an automotive AC can be allowed to get; some manufacturers actually set a minimum permissible temperature for their system in order to prevent some rather strange problems. We actually had a customer that complained his system seemed to be cooling fine and then would just shut off for no apparent reason during a rather warm and humid period. After some intense diagnostics, we discovered that his system was getting so cold (very low 30F air temps), that under some humidity conditions, the car was actually freezing over the inside heat exchanger, blocking air low until it defrosted, giving the appearance that the AC had quit. We traced the problem to an AC compressor replacement prior to his purchase of the vehicle, where the wrong part number compressor was installed that had a higher capacity rating than the factory unit. We evacuated the system, replace the compressor with the correct part number, recharged the system and found the air temps inside the car's ductwork now stayed at around 41F, one degree above the manufacture's minimum allowable internal air temp. The car never froze up again. While getting you system's AC temps as low as possible seems like a worth goal, sometimes the law of unintended consequences rears its ugly head............ -
 Rat Star joined the community
 -
 Edi Danalache joined the community
 -
I do not have a useful recommendation but would suggest contacting your local chapter of the Porsche Club of America as they typically have background on known Tiptronic repair facilities in your geographic location.
-
Hi, Thanks for the input. Looks like you may be from PA, do you have any transmission shops you would recommend? The Regulator looks easy enough to swap out, but my guess is a run of the mill shop would just recommend swapping out the whole valve body. I want someone whom I can have an honest conversation with. If they’re going to be in the transmission, they might as well swap out the #4 Pressure regulator and the torque converter plus check all wiring connections in the valve body. The kit on FCP Euro includes all of the solenoids/regulators so I would probably just have them swap everything out (or do it myself). My guess is a transmission shop would be able to diagnose all of the problems you mentioned and discern if it’s the regulator or the torque converter. That said, there are no drivability issues right now, and the car is not a trailer queen so I’d be inclined to drive a reasonable distance to a specialty transmission shop. Any suggestions?
-
 Bojan U joined the community
 -
Try 2642
-
-

Air Conditioning Additives
Spartan1-6 replied to Spartan1-6's topic in 987-1 Series (Boxster, Boxster S)
Hi thanks for your response. While I appreciate your opinion regards these kind of products and the systems they are put into in terms of whether you feel they need them or not, with respect that wasn't my question... I've researched these products in depth and know that they do work and have decided that I would like to use them. My question was around if anyone else had used them and how they had gone about that in terms of ratios of product to oil. Once again thank you for your response. -
Welcome to RennTech Tiptronic problems are never fun, and often complex and difficult to diagnose and repair, which is why many shops shy away from working on Tips. Potential issues causing P0740: -ATF supply (as you have fresh fluid and assuming it has been topped up correctly, this would only apply if the filter were the problem and not moving sufficient fluid) -The torque converter itself is bad. To properly diagnose this, you would need some very specialized and very expensive tooling. -Pressure regulator 4 is problematic -The electrical triggering connection to pressure regulator 4 is bad (shorted, disconnected) -Hydraulic control unit (read valve body has sticking valves)
-
Air Conditioning Additives
JFP in PA replied to Spartan1-6's topic in 987-1 Series (Boxster, Boxster S)
I always remain circumspect of "magic bullet" additives, especially those touted on the internet, and particularly when used in very expensive and sensitive systems like air conditioning. The ac systems in these cars have proven to be both effective and long lived as designed, I don't really see any advantageous reason to do this as a well maintained and functioning system doesn't need any help. -
Hi, New to the forum, but not new to classic cars, DIY mechanic projects, etc. I’ll give a brief history of the car I bought which is throwing a P0740 code. I have read all of the previous discussions on this topic both here and on Rennlist, but I still don’t see a good diagnostic path or solution. Below occurred prior to my ownership and all work done by a Porsche specialist with 30+ years experience: 1. Oct 2021 - 76,386 miles - new long block installed with L&N IMS bearing. All useable parts from old motor were re-used on new motor 2. Sep 2022 - 79,197 miles - used DME installed 3. Aug 2024 - 81,649 miles - used transmission installed. Used trans was pulled from another car with 52k miles. 9 liters of Pentosin ATF, new gasket/filter/seal/bolt installed I purchased car in Jan 2026 with 83,013 miles and drove it home 400 miles. Car now has 83,8xx miles. Feb 2026 - drove to DMV and while at DMV, had to shut off car so employee could connect scanner. The car would not turn back on and it was pushed out of the bay. I had car towed home, and after reading multiple posts, I diagnosed the issue as a faulty starter relay which was replaced. I then hooked my cheap OBD II scanner up to the car to check for any other faults and noticed a P0740 code. I reset the code, drove to DMV, passed inspection and drove home. The code returned. I took the car to a local Porsche specialist who topped off the trans with a “small amount” of fluid. This was done for free because they owed me a favor. Now the car is home, and I would like to solve the P0740 issue. I have read all of the tech posts and noticed a few paths including low/dirty trans fluid, Pressure Regulator # 4 and/or Torque Convertor. Also noted, no CEL, a hard up-shift at times between 3rd-4th when trans is cold and local Porsche specialist “won’t touch Tiptronics.” So I’m on my own for now, and I live in Delaware. If you have hung in this long, I appreciate you. Seeing as though the trans fluid/filter was replaced 2,500 miles ago, and just topped off within the past few days, I ruled out low/dirty trans fluid. Remember, the used trans installed in this vehicle currently has 55k miles on in. My question is, how do I diagnose if the issue is with the torque converter (which was not replaced when the new motor was dropped in) or, if the issue is Pressure Regulator #4? Please only post constructive comments. Yes, I can drive a manual trans, but bought an auto trans so the spouse could drive the car as well. Long story behind that lol. Thanks so much for your time and comments!
-
Hello everyone, Could someone please let me know if they have the radio code for my 2002 969 911? CCR 220 BE 6624 S.N.# 15000748 Kind regards, Douglas
-
 Brianne Pentz changed their profile photo
 -
Hi has anybody used this stuff in their car? It gets very good reviews online and YouTube videos.. Thing is.. I'm in the UK and over here when you take your car to the garage to get the aircon recharged, they use a premix system that puts in the refrigerant and the pag oil to the correct quantity. It's a big machine that they plug onto your AC system and you can't intervene to add anything. So I'd like to look at using this Cool Ox.. but the internet is saying for a 987.1, the correct amount of oil should be 195 ml. So currently my car is charged up with the refrigerant and presumably the right amount of oil. I've purchased an oil/dye injector that you can connect to the low pressure valve.. but I read that it's not a good idea to put too much oil in your AC system. So let me see if I can explain what I'm asking here... What would be the way to go about this.. would You just put the additive in as well as the 195ml of PAG (.. meaning the Cool Ox would not actually count towards the amount of oil already in there, presumably because it will go to work and be used up coating the metal surfaces), or do you add it INSTEAD of the PAG oil, or would you makeup the 195 ml from both the PAG oil AND Cool Ox..? I hope I've explained that ok... Thanks very much in advance.
-
Dead fog light switch..,.
jim_hoyland replied to jim_hoyland's topic in 987-1 Series (Boxster, Boxster S)
Solution found ! Went over to SMS in Huntington Beach. Branden took a light switch out of another Boxster and tested it in my car. Sure enough, it was the switch. Also learned how easy the light switch comes out. Ive ordered a replacement from Pelican. Free shipping…. Link to https://www.pelicanparts.com/techarticles/Boxster_Tech/87-ELEC-Headlamp_Switch/87-ELEC-Headlamp_Switch.htm
-

PCCM+ MOST box defective?
laalves replied to laalves's topic in 996 Series (Carrera, Carrera 4, Carrera 4S, Targa)
Thx! My case is that my car is not MOST, it was analog Bose (MY02 Turbo). So, I was considering using the MOST box to supply any of the available options in the market: Trioma (russian, cheapest), Audison (apparently made by Mobridge) and Mobridge itself. All are expensive but I've spent a lot of money in HiFi, cars, booze and XXXX (redacted) so it would be just a bit more of that 😁 Will check the cable for continuity as well.