Jump to content

Welcome to RennTech.org Community, Guest

There are many great features available to you once you register at RennTech.org
You are free to view posts here, but you must log in to reply to existing posts, or to start your own new topic. Like most online communities, there are costs involved to maintain a site like this - so we encourage our members to donate. All donations go to the costs operating and maintaining this site. We prefer that guests take part in our community and we offer a lot in return to those willing to join our corner of the Porsche world. This site is 99 percent member supported (less than 1 percent comes from advertising) - so please consider an annual donation to keep this site running.

Here are some of the features available - once you register at RennTech.org

  • View Classified Ads
  • DIY Tutorials
  • Porsche TSB Listings (limited)
  • VIN Decoder
  • Special Offers
  • OBD II P-Codes
  • Paint Codes
  • Registry
  • Videos System
  • View Reviews
  • and get rid of this welcome message

It takes just a few minutes to register, and it's FREE

Contributing Members also get these additional benefits:
(you become a Contributing Member by donating money to the operation of this site)

  • No ads - advertisements are removed
  • Access the Contributors Only Forum
  • Contributing Members Only Downloads
  • Send attachments with PMs
  • All image/file storage limits are substantially increased for all Contributing Members
  • Option Codes Lookup
  • VIN Option Lookups (limited)

Leaderboard

Popular Content

Showing content with the highest reputation on 12/31/2016 in all areas

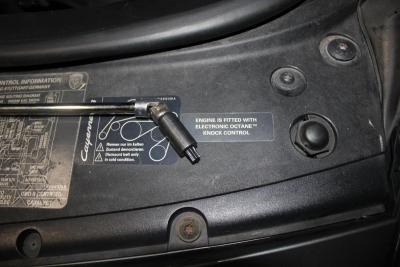
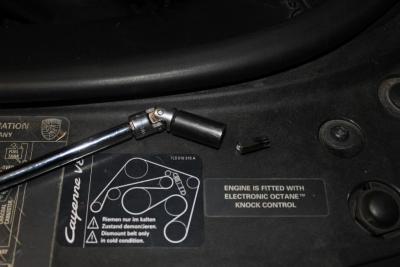
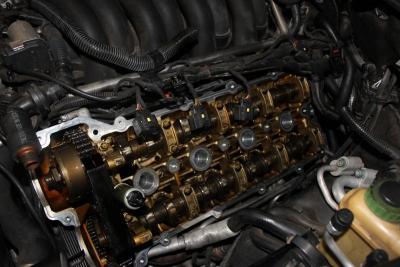
  1. Pics as promised to get the rear, lower corner bolts off the covers. I also had to use it on the left (driver's) second-to-the-rearmost bolt as well. In the process of doing the valve covers I broke both sides of the crankcase vent tube(s). You can cut off the hard pieces with a razor and use 3/4" heater hose to re-plumb it. The fitings are already barbed to accept the hose. Some hints along the way: if it looks like something will be in the way, it will be so just remove it so you don't fight it later. Remove the lower engine cover just like you would if replacing the oil filter. That way if (when) you drop something you can get to it quickly. It's also necessary to remove the AC harness plug on the left side. I couldn't get it off without unplugging it. The trick with it is the tabs that hold it together are facing into the freon fitting. You need to slide the connector off the mounting boss (grooved) to get to the tab. Once you get it off, rotate it 180 degrees as shown in the pic so the tab will be on the "visible" side and be easier to get to. I did have to route the wiring differently putting it all back together but with a couple of zip ties it fit just fine. Of interest after taking the covers off, it appears that Porsche put the silicone RTV on the valve cover side of the gasket where the front cover and head meet. In the manual you put the RTV on that seam to make sure it seals and there was nothing there when I pulled them off. Weird. I did this over two separate weekend days. It takes a lot of time just to remove and bolt things back on.
    1 point
×
×
  • Create New...

Important Information

We have placed cookies on your device to help make this website better. You can adjust your cookie settings, otherwise we'll assume you're okay to continue.