Welcome to RennTech.org Community, Guest
There are many great features available to you once you register at RennTech.org
You are free to view posts here, but you must log in to reply to existing posts, or to start your own new topic. Like most online communities, there are costs involved to maintain a site like this - so we encourage our members to subscribe or donate. All subscriptions and donations go to the costs operating and maintaining this site. We prefer that guests take part in our community and we offer a lot in return to those willing to join our corner of the Porsche world. This site is 99 percent member supported (less than 1 percent comes from advertising) - so please consider an annual subscription or donation to keep this site running.
Here are some of the features available - once you subscribe RennTech.org
- View Classified Ads
- DIY Tutorials
- Porsche TSB Listings (limited)
- VIN Decoder
- Special Offers
- Paint Codes
- Registry
- Videos System
- View Reviews
- and get rid of this welcome message
It takes just a few minutes to register, and it's quality Porsche information at a low cost.
Contributing Members also get these additional benefits:
(you become a Contributing Member by subscribing or donating money to the operation of this site)
- No ads - advertisements are removed
- Access the Contributors Only Forum
- Contributing Members Only Downloads
- Send attachments with PMs
- All image/file storage limits are substantially increased for all Contributing Members
- Option Codes Lookup
- VIN Option Lookups (limited)

K-man
-
Posts
13 -
Joined
-
Last visited
Content Type
Profiles
Events
Forums
External Paint Colors
Downloads
Tutorials
Links Directory
Collections
Classifieds
Store
Everything posted by K-man
-
 I got a container made by Reduce at Walmart a few years ago. Fits perfectly.
 -
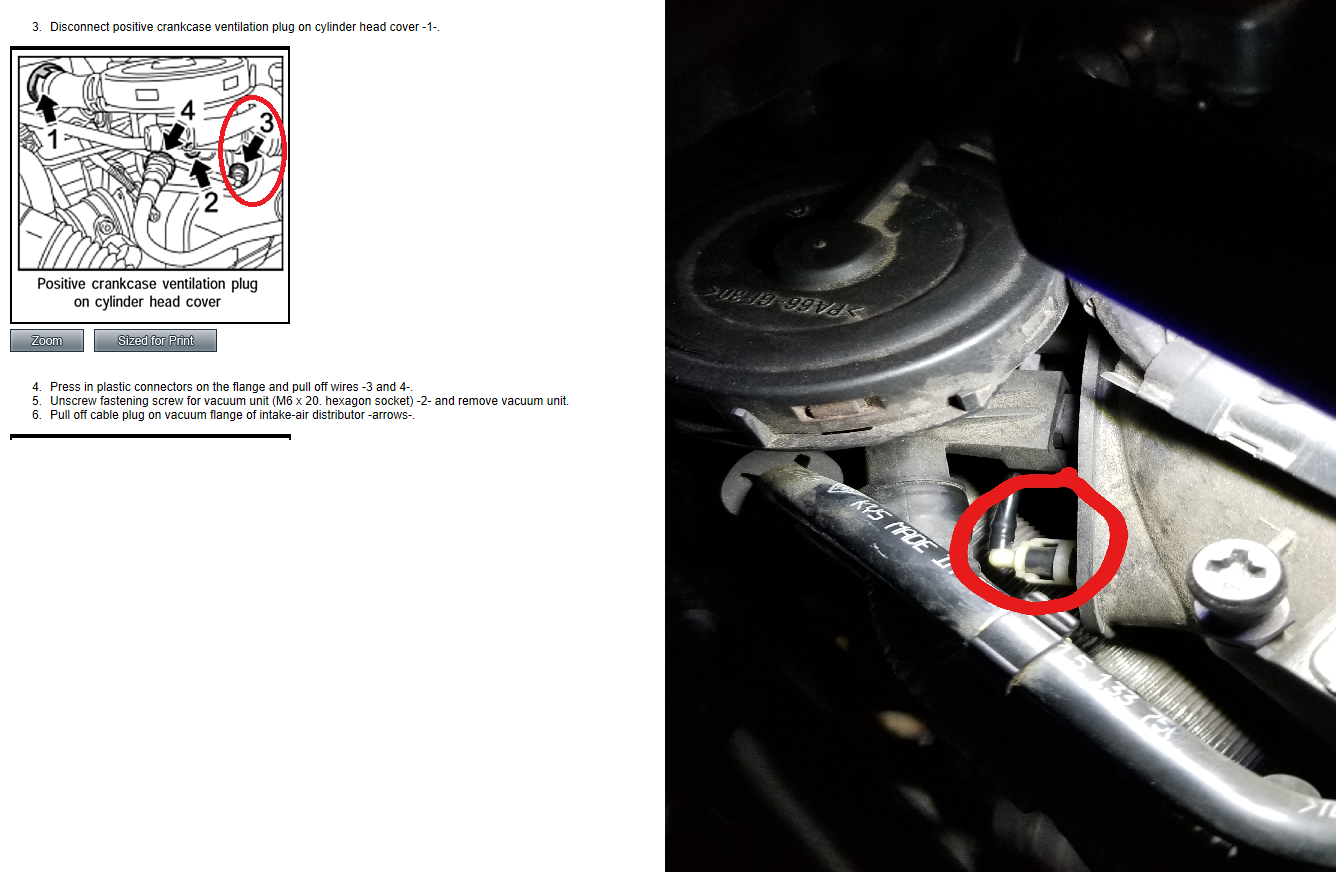
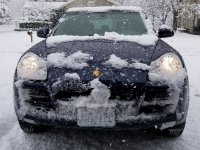
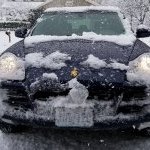
2006 Base model In December when I changed spark plugs and ignition coils, there was oil on both. I figured I'd go ahead and replace the valve cover gasket and spark plug gaskets. Now that the parts have arrived, I'm ready to tackle the project. Instructions are from ALLDATAdiy.com. I'm attempting to remove the intake manifold to gain access to the cylinder head cover. Their diagram on the left side of the attachment shows an Item #3 that needs to be disconnected. To me, it looks like the item in the picture on the right. (This line seems to go around the back of the engine to the driver's side and terminates somewhere near the brake booster.) I tried several different ways to get this to detach, but only succeeded in cracking the white plastic collar. Two questions: is this the part in the diagram AND, if so, how does it detach?

-
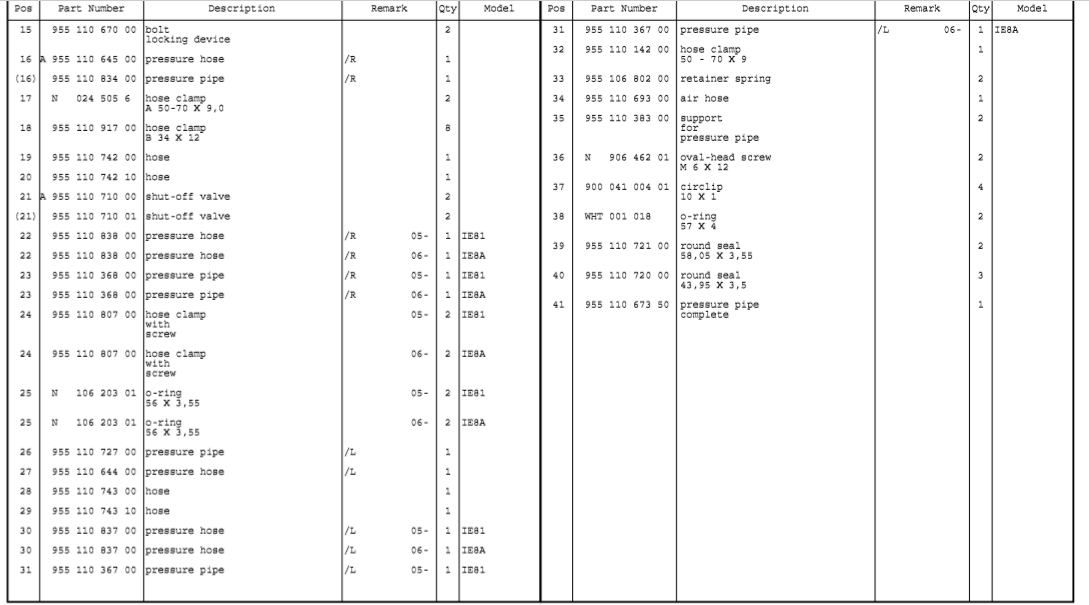
O-Ring For Boost Hose
K-man replied to Reborn996's topic in 9PA, 9PA1 (Cayenne) Part Number Requests
Here are those part numbers.
-
If anyone is looking for new headlights, make sure to include Rock Auto in your retailer price quotes. They had the best pricing I could find on the Valeo brand ones when I replaced mine about 18 months ago.
-
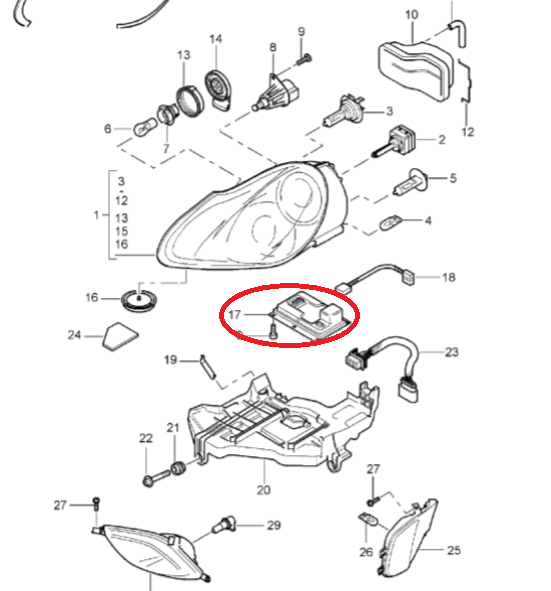
Also, Xenon ones will have the control unit (#17 in the picture). Halogen will not. Each kind also has a specific wiring harness, so that may be the issue.
-
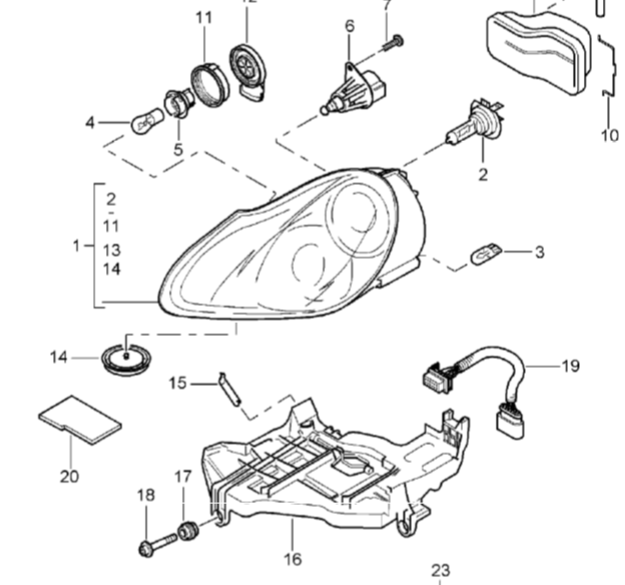
To remove the white plastic part on the headlight harness (#19 left side), you have to pinch the tops of the connector toward the center and wiggle it free from the plastic tray. It is also connected to the wiring on the other side via a socket (#19 right side). I removed beauty covers from under the hood and opened the air filter housing on mine to gain more access to the space, but mine is a 955 Base V-6, so yours may have a different layout. I also had to use a file to shave some of the plastic tab on the underside of the headlight to gain the leverage needed to seat it all the way back into the newly installed headlight harness using the headlight tool.
-
Fuel Filter Electrical Connection
K-man replied to tac27's topic in 9PA, 9PA1 (Cayenne) Part Number Requests
That part is 1J0 919 231. It is a VW/Audi part and you can see if any local dealerships carry it in stock. I had to get mine online.
-
Limit Exceeded
K-man replied to Cap’n Ray's topic in 9PA, 9PA1 (Cayenne, Cayenne S, Cayenne Turbo, Cayenne Turbo S)
I am wrong. The one on that you're seeing on the PCM display is turned on via the TRIP button. -
Limit Exceeded
K-man replied to Cap’n Ray's topic in 9PA, 9PA1 (Cayenne, Cayenne S, Cayenne Turbo, Cayenne Turbo S)
That is designed to pop up when exceeding the "MPH-LIMIT" selection on the "MAIN MENU" that you can access using the windshield wiper stalk. There is a toggle in there to turn that off. Is yours activated? -
Here is another thread that may help...
-
Pelican Parts has a really good write up on this (Rear Window Switch Replacement). It was the first repair I ever did on my Cayenne. You can remove the trim pieces off of the inside of the rear hatch and gain access to the guts of the hatch release. This should let you know the scope of the work. It sounds like you may be able to get away with splicing wires, but replacing the entire switch is not too difficult. The part runs in the mid-to-high $60 range.
-
Thank you, Loren.
-
I'm trying to replace part number 955-803-054-10, which is the rear-seat dual buckles for the center and driver's side back seats. Does anyone know what the torque spec is for the two nuts that hold this part down to the bracket?