Welcome to RennTech.org Community, Guest
There are many great features available to you once you register at RennTech.org
You are free to view posts here, but you must log in to reply to existing posts, or to start your own new topic. Like most online communities, there are costs involved to maintain a site like this - so we encourage our members to donate. All donations go to the costs operating and maintaining this site. We prefer that guests take part in our community and we offer a lot in return to those willing to join our corner of the Porsche world. This site is 99 percent member supported (less than 1 percent comes from advertising) - so please consider an annual donation to keep this site running.
Here are some of the features available - once you register at RennTech.org
- View Classified Ads
- DIY Tutorials
- Porsche TSB Listings (limited)
- VIN Decoder
- Special Offers
-
OBD II P-Codes - Paint Codes
- Registry
- Videos System
- View Reviews
- and get rid of this welcome message
It takes just a few minutes to register, and it's FREE
Contributing Members also get these additional benefits:
(you become a Contributing Member by donating money to the operation of this site)
- No ads - advertisements are removed
- Access the Contributors Only Forum
- Contributing Members Only Downloads
- Send attachments with PMs
- All image/file storage limits are substantially increased for all Contributing Members
- Option Codes Lookup
- VIN Option Lookups (limited)


tobias
-
Posts
12 -
Joined
-
Last visited
Recent Profile Visitors

tobias's Achievements
Member (1/1)
0
Reputation
-
Speaker upgrade, MOST
tobias replied to Karl's topic in 996 Series (Carrera, Carrera 4, Carrera 4S, Targa)
I bought a couple of Focal 100v2 and removed the door trim to install them. I saw that fitting it would be no problem, but it also looked like there would be room for a slightly bigger speaker... thinking that that the car has 11 speakers, and most of them very small, there should be no midrange feed to the door speakers, so I figured it would be best to fit as large a driver as possible, provoding it has a high efficiency. I went back to the shop and got a Focal 130V2 kit instead, and with a little knife-trimming of the plastic around the opening they fit just fine. Since they are brand new, they have not been properly broken in yet, but the difference in midbass is already dramatic. Next step is building a replacement for the BOSE-subwoofer enclosure for a JLAudio 6w0. I have bought a used amp (Rockford Fosgate 3001), a high-level to low-level signal adapter, ordered a JLAudio 6w0 and carpet that matches my interior (I amanged to find an almost exakt match at a regular carpet dealer, but they didn't have it in stock, they only had a small sample in a catalogue). (If you are buying a new amp, get the smallest class-D monoblock you can find instead, 100w RMS should be plenty for powering a 6w0 really, my amp is serious overkill). Don't bother looking for another sub, the JLAudio 6W0 looks like the only real candidate for 5 litre sub. Maybe you could get away with the slightly larger Carpower Raptor-6, but i figure the 6w0 will be a better choice for a 5 litre box. Otherwise, it seems hard to find and subs that REALLY work well in 5 litres. I am planning to build a closed sub-box that closely follows the dimensions of the BOSE-sub but has the speaker firing towards the passengers legs instead. The amp will be installed to the left of the bose amp in the trunk and i will use the existing cables to connect the new sub. I also plan to make it easy to take the amp and new sub out and restore everything to original. -
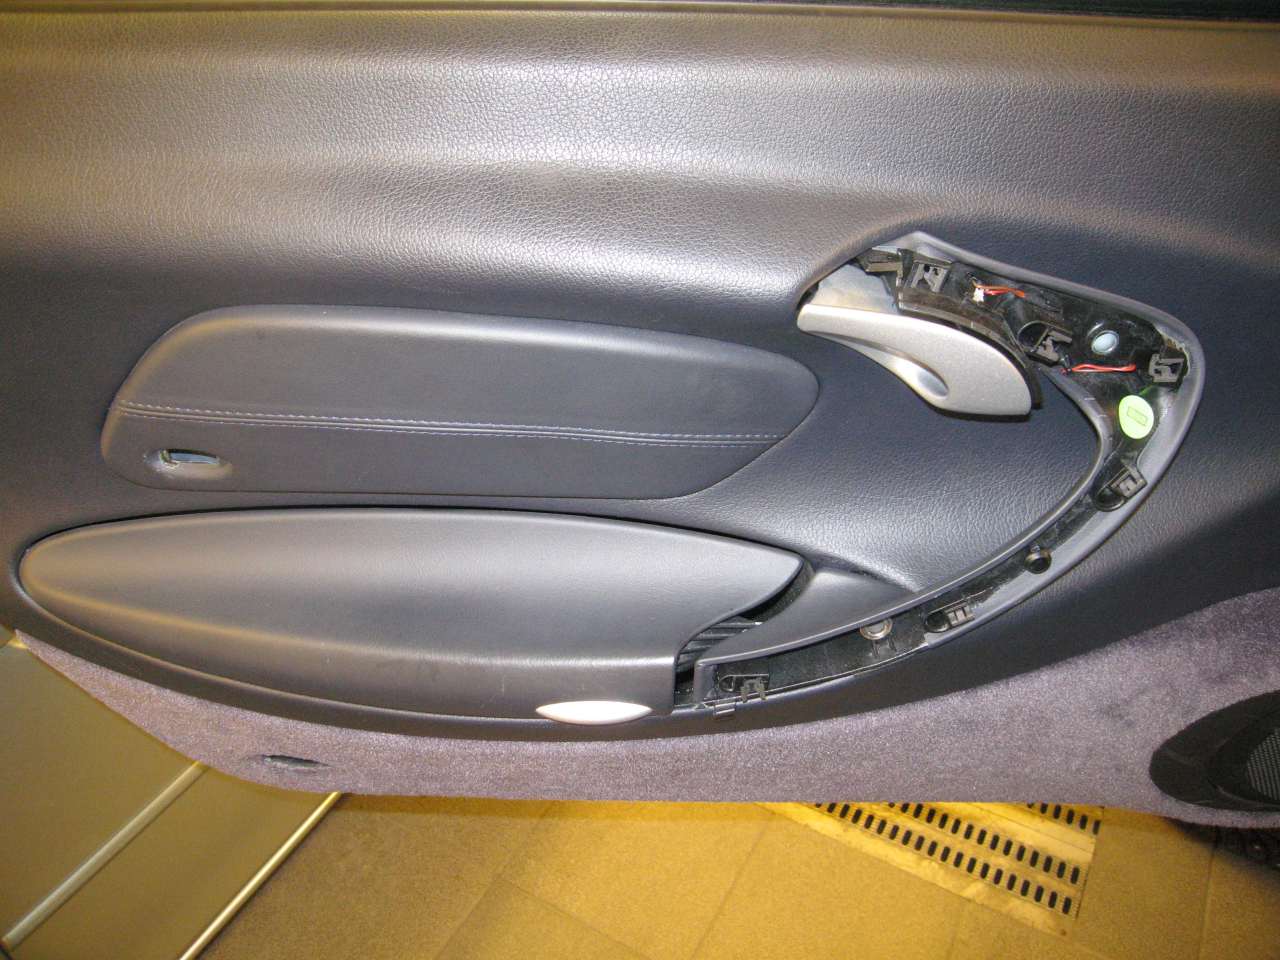
OK, I figured it out myself... At this point, just snap all the clips out around the edge of the door trim and bend it out from below. The trim now hangs to the upper front and corner and you can access the cables & stuff. (This is as far as you need to go to get at the door speaker, which is what I was going for replacing) BTW, the BOSE door driver is a paper cone with textile surround, which does not look like an ideal component choice...
-
Loren, I'm missing something here... After step 1 and 2, my door looks like this: I can't see any of the stuff I am supposed to get at in step 3, It looks like they should be somewhere behind the panel which at this stage seems to be firmly in place. What happened between step 2 and 3 that I missed? I would be grateful for a more detailed explanation!

-
Speaker upgrade, MOST
tobias replied to Karl's topic in 996 Series (Carrera, Carrera 4, Carrera 4S, Targa)
Anders/Karl, I am also investigating replacing the BOSE speakers in my -04 Targa and live in Gothenburg. So far I have found a sub that looks like it could be used in the 6-lite enclosure in the passenger footwell: JLaudio 6W0, sold by www.nardik.se and www.braljudibil.se. Really, I would like to find room somewhere for a small 15litre sub with maybe a Boston Acoustics Pro 8" or JLAudio 8W7-3 driven by an extra amp. I haven't taken the standard speakers out yet, but I fear that it will be all paper cones. Bose are infamous for using small paper midrange drivers for bass duties (sometimes in bandpass boxes...) and 1" and 2" paper cones instead of real tweeters... Does anyone know the respective DIN outputs for the 7 channels in the BOSE amplifiers? (I only know it's supposed to total 125W) Frequency range for each channel/driver? In my car, according to BOSE own documentation, we are looking at the following set of drivers: 4 x 2,5cm/1" drivers 4 x 8cm/3" drivers 2 x 11,5cm/4,5" drivers one 10,2x15,3cm/4x6" driver So, we have one midrange driver, two high midrange drivers and eight drivers for highs, but no real tweeters... This is a very weird setup and it's a miracle that it actually sounds as good as it does! A more reasnoble setup would be two tweeters, two 6,5" midrange drivers, two 8" mid-bass drivers and one 12" subwoofer... strange... -
Mixed Tyre Brands
tobias replied to Mike(UK)'s topic in 996 Series (Carrera, Carrera 4, Carrera 4S, Targa)
For me, one set of fronts lasts almost two sets of rears, it seems kind of wastful to ditch fronts with lots of thread left on them... Are there any compeeling reasons to change them all at the same time? /Tobias -
Evil, You can see all the tracks, but there are limitations. Read the manual before buying, see the link in my previous post. /Tobias
-
Popolou, Download the manual from http://www.dension.com/download_icelink.htm and you can see exactly how it works. (BTW there are usb sticks up to 32GB, whích is enough space for 370 hours of music at 192kb/sec) /Tobias
-
Popolou, The GW500 can only integrate ipod devices (so no plays-for-sure). When using USB-devices, the GW500 itself is the player. Other than this, GW500 can accept AUX-in, but then you only get line-in, no control from the PCM-unit. At least in theory, using an USB-device should give the best sound, since both the ipod- and aux-ports feed the GW500 an analog signal that is then digitized and transmitted digitally over the MOST-bus. When using a USB-device, the digital files are just converted to MOST-bus digital audio format (probably uncompressed 16-bit digital audio) and sent to the BOSE D/A converter optically. I would be surprised if the GW500 generates any significant heat, in the manual the maximum current draw that the GW500 is capable of is rated at 1.5A, which means 12x1,5=18W, which would hardly be enough to keep a cup of coffe warm... Cheers /Tobias
-
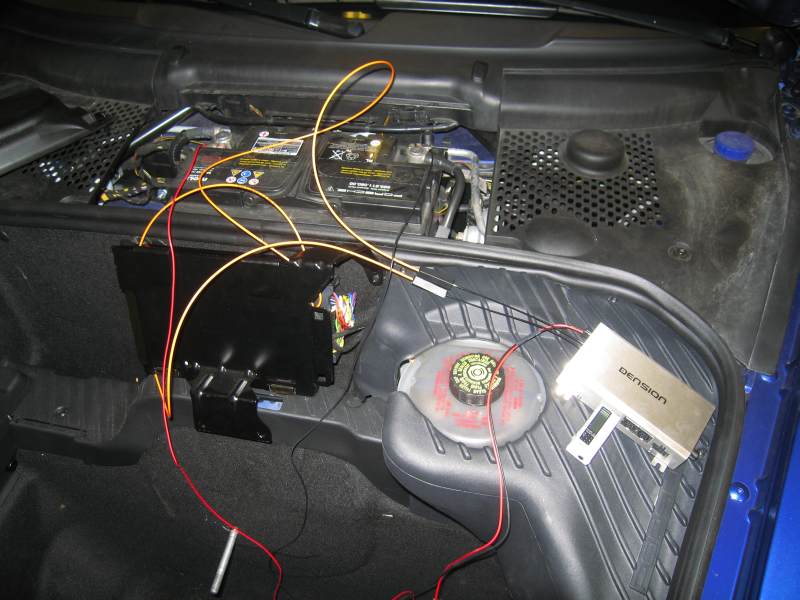
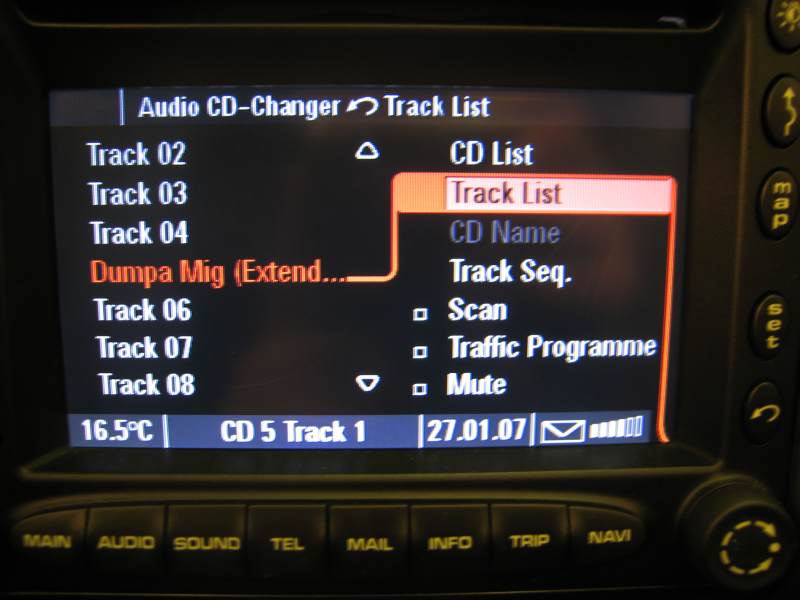
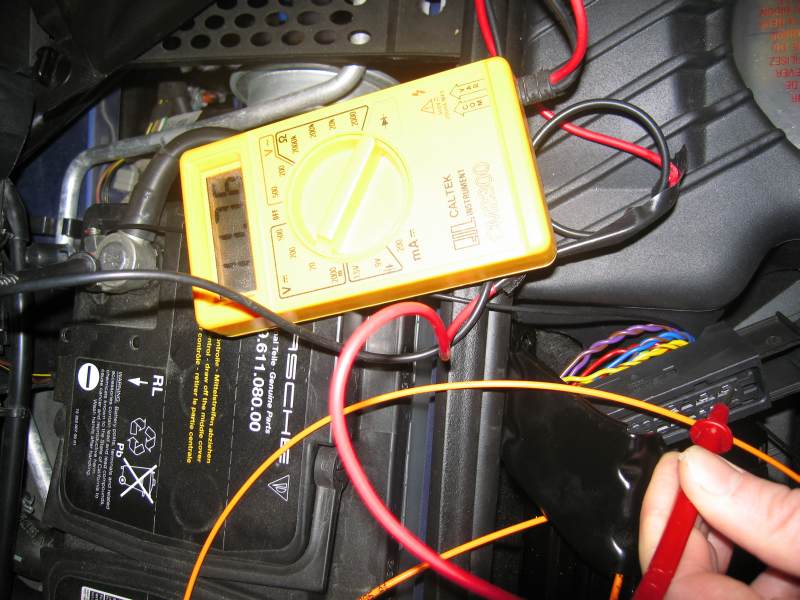
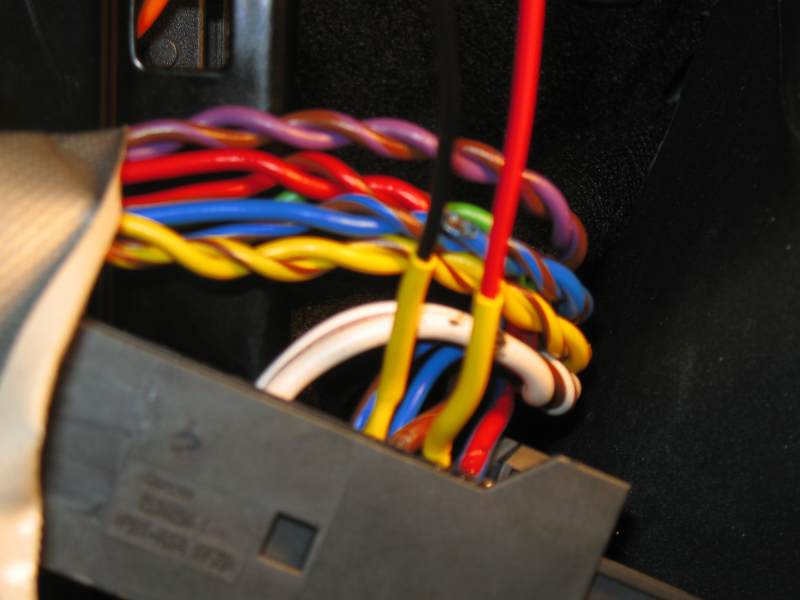
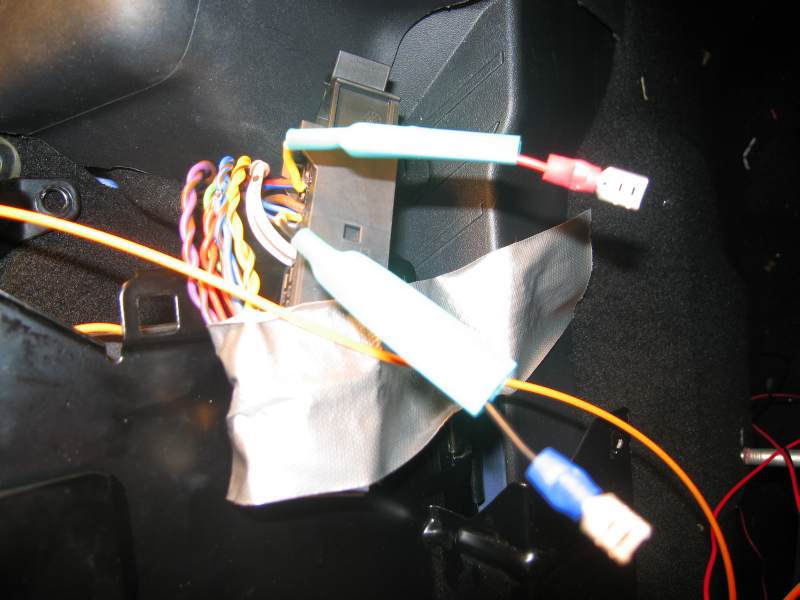
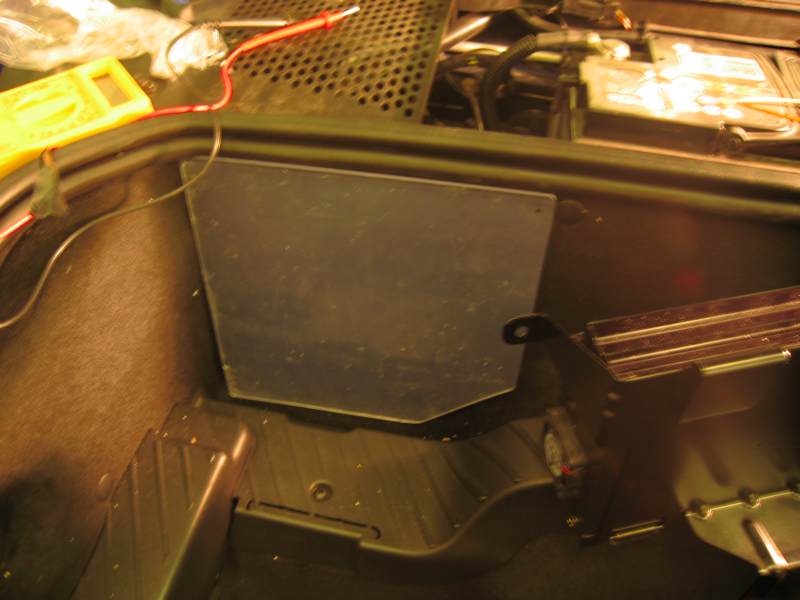
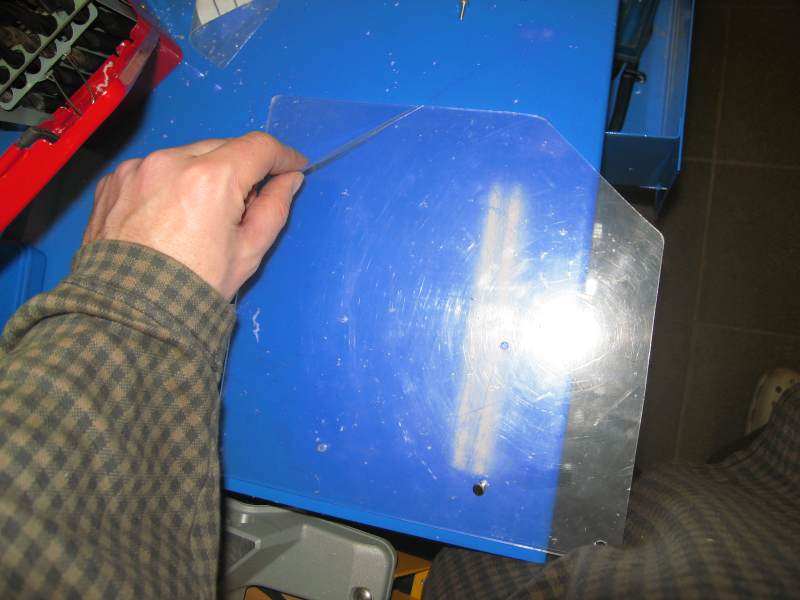
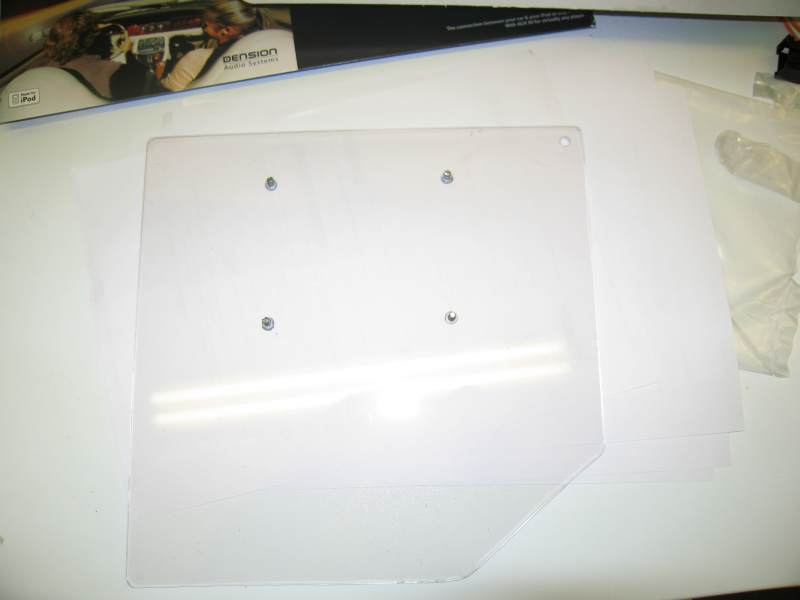
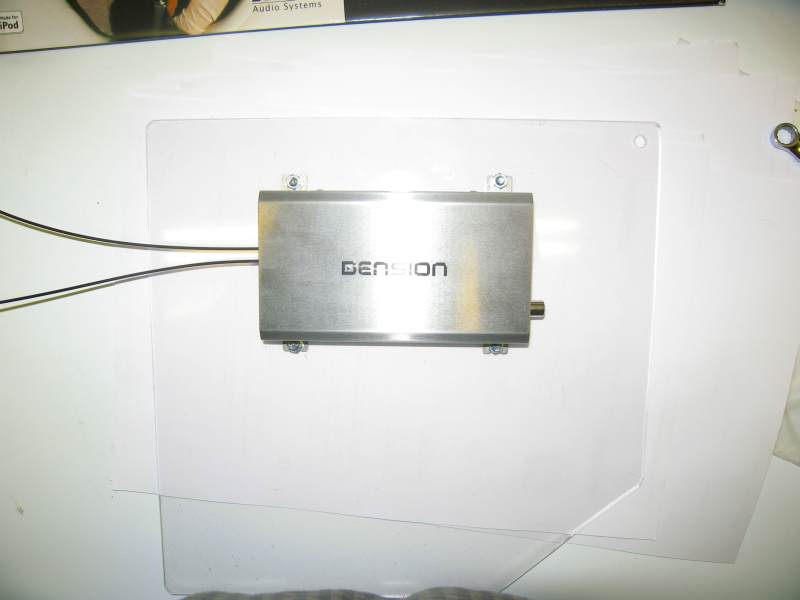
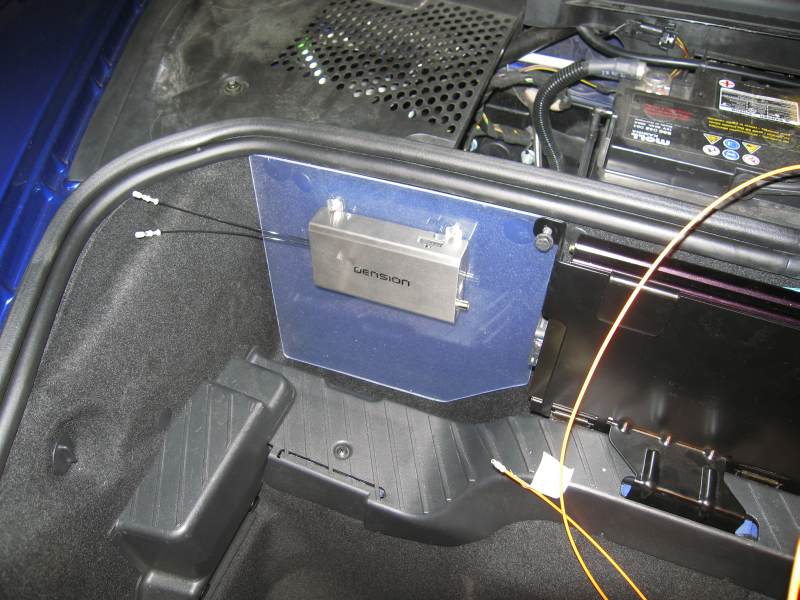
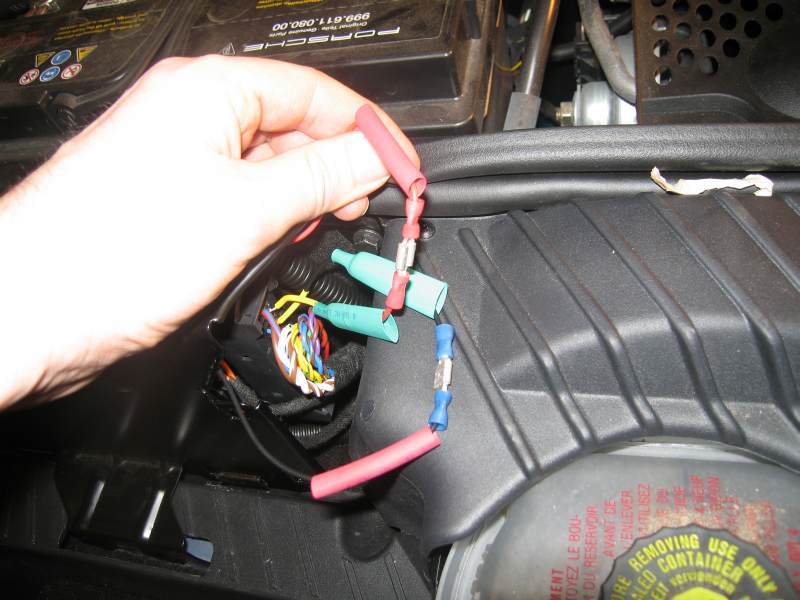
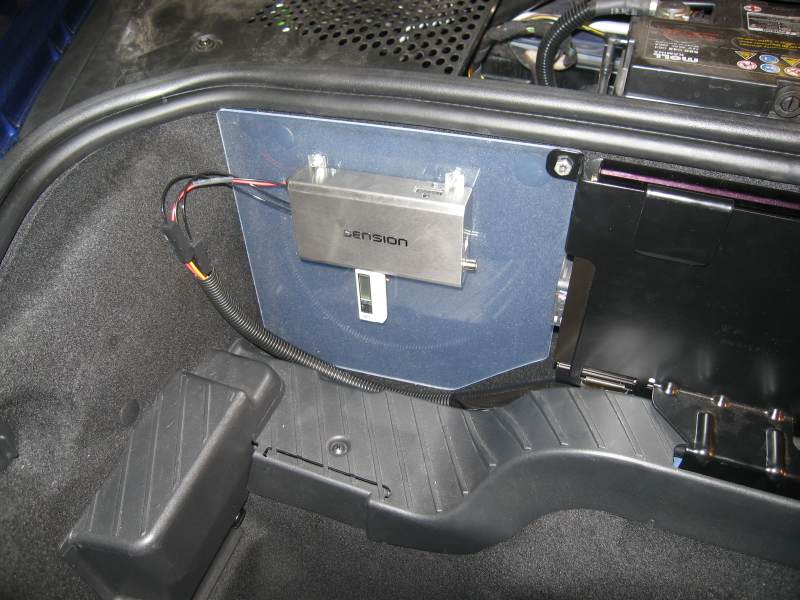
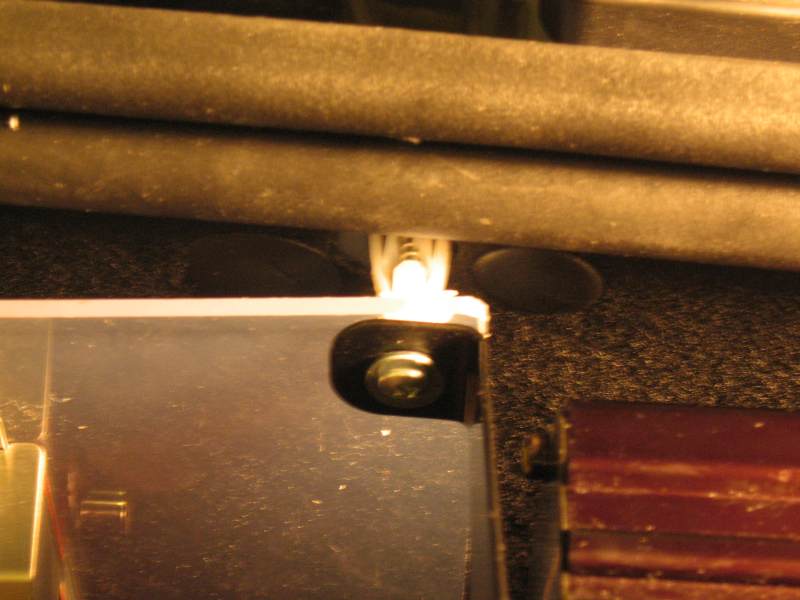
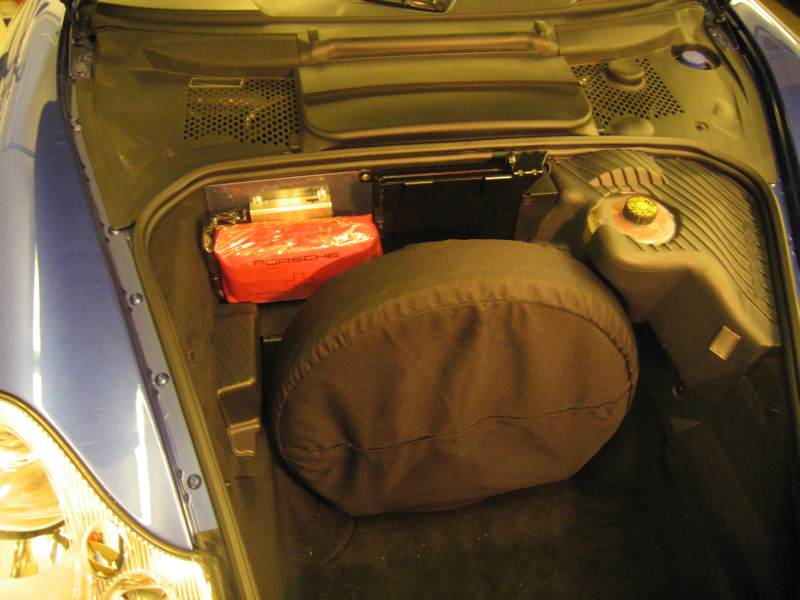
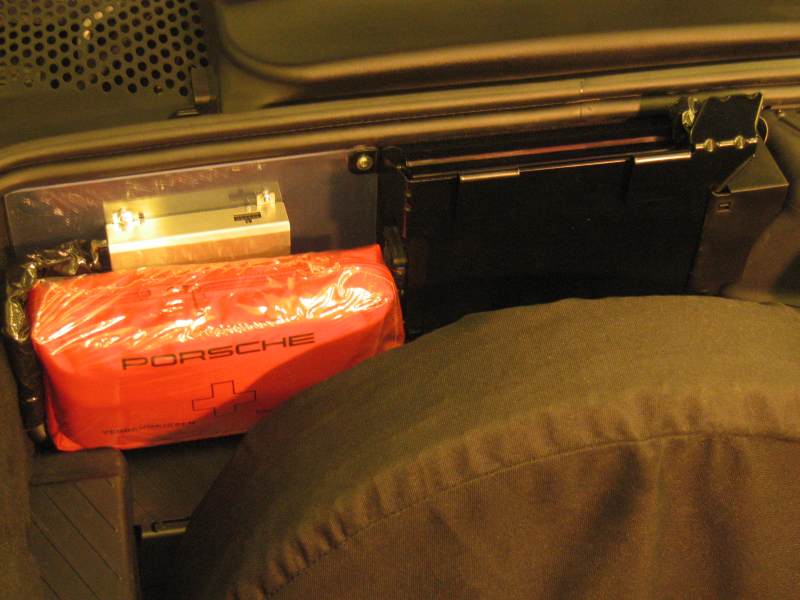
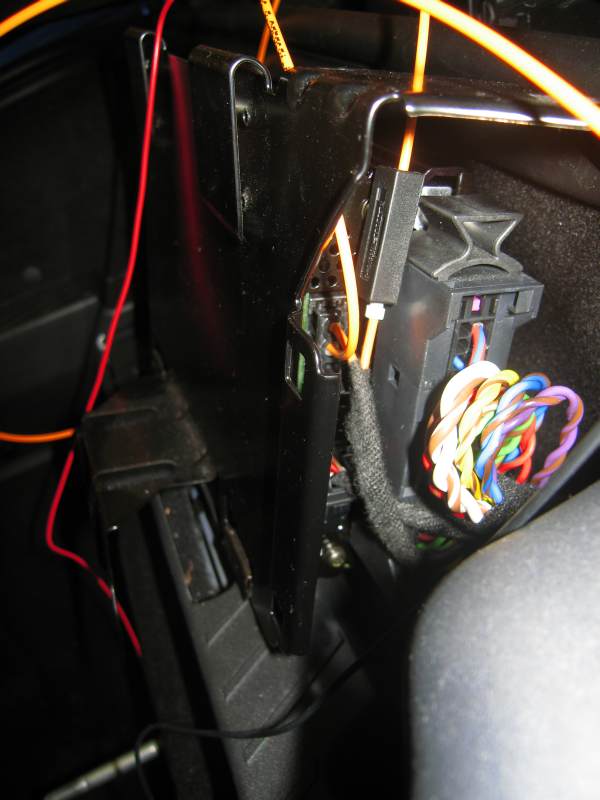
Rick is right! I just finished the install and mostly it went well, here are the pictures: I broke into the MOST-ring at the connector to what I think is the amp (there is no text on it that indicates what it is, could be the NAV-unit, exept I think that is in the cabin) First I just connected everything to see that it worked, taking power from the battery... It worked on first try! This pictures shows tracklist from USB-stick (only one song with a good ID3 tag though...) I looked at the big connector for the "amp" and found what looked like the power feed, it was. A soldered in a couple of short wires for the power connection I added some heats-shink tubing to repair any heat damage to the insulation from the soldering I crimped on cable shoes to enable easy disconnection of power, and added a large heat-shink tube, shrunk a little on one end for removable insulation. I had a large piece of foilprotected clear plastic laying around the garage, so i cut a 26 x 27 cm piece of this and started trimming it until it fitted. I ground down the heads of four bolts to less than a millimetre, so they wouldn't stick out to much on the back of the plastic I drilled holes for mounting the GW500 and one in the corner for the amp-mount bolt and removed the protective foil. This is what the platicc looked like with holes and bolts in place And with the GW500 mounted on it... Test fitting... A cable hose was routed under the "amp", the power cables were cut to match the optical fibres in length. Adding cable shoes to GW500-power feed cables Power connected and removable tubes slid over connection from both sides I wrapped the fibre optics and power cables in cloth before taping over with black weave tape. I managed to lose the washer on one side if the amp, and coud not recover it from the narrow compartment, despite fishing with hooks, magnets etc. I decided to leave it for now and machined down a plastic wing expander to take its place (the kind you use for hanging things from plaster boards) This is what the install looks like with the cloth taped over And with the spare and first-aid kit back in place And a final closeup. So in summary, not so difficult but beware of losing washers in hard to access spaces... I will keep the install as is for now and then see if I can make it more elegant when/if I buy and Ipod. I want the playlists, but I don't like the Idea of adding an extra D/A - A/D stage unnecessarily, sound should be better with a USB-stick. I might just buy a 16GB Corsair Voyager USB-stick or something. The Archos 605 is also an audibly better player than the ipod's and it's got s/p-dif on the dock and can act as a low-power USB-harddrive also... But I guess the playlists may still be more important! I hope this helps everybody who want's to install the GW500 in a 996! /Tobias
-
Thanks rickhuizinga, I also have Nav & Phone, so it should be very close to your install then! So, there was no need of doing anything to the PCM2 to get it to recognize the GW500 then, even though you did not have a CD Changer installed previously? (A pro installer told me he failed to install the GW500 in a mercedes and blamed it on the headunit not recognizing the GW500 because it was not set up to recognize a changer, but he could just be rationalizing...) I'm planning an attempt this weekend!
-
Thanks! That helps I think, but the install in the pictures is of a 997 with a CD-changer, my car is a 996 without one, so I guess I'll have to poke around a bit... /Tobias
-
I have a Cobalt Blue Targa-04 with PCM2/BOSE I just got my Gateway 500 yesterday. I was planning on having the shop install it, but in Gotheburg, Sweden where I live, there is currently snow and salt on the ground, so I'm not going to be able to drive to the shop until it clears... I'm considering installing it myself instead, but I have never attempted any prevoius DIY jobs on this car, I'm not even sure how I will get the PCM-unit out... Is there a guide on the net or a book showing how to get the PCM-unit out and where I can connect the power? (The manual says "non-switched", I suppose Denison wants the GW500 to have power also when the ignition is out???) By the way, the documentation in the box also says that the "mode switch" is not used for Porsche installations, meaning that it will be difficult to get both a changer and the GW500 to work together - not a biggie for me, I don't have a changer. I would be greateful for any useful advice - if you want pictures of the GW500 and the stuff in the box, I could do that. I guess, if there is interest, I could scan all the docs and post them somewhere. /Tobias