Welcome to RennTech.org Community, Guest
There are many great features available to you once you register at RennTech.org
You are free to view posts here, but you must log in to reply to existing posts, or to start your own new topic. Like most online communities, there are costs involved to maintain a site like this - so we encourage our members to subscribe or donate. All subscriptions and donations go to the costs operating and maintaining this site. We prefer that guests take part in our community and we offer a lot in return to those willing to join our corner of the Porsche world. This site is 99 percent member supported (less than 1 percent comes from advertising) - so please consider an annual subscription or donation to keep this site running.
Here are some of the features available - once you subscribe RennTech.org
- View Classified Ads
- DIY Tutorials
- Porsche TSB Listings (limited)
- VIN Decoder
- Special Offers
- Paint Codes
- Registry
- Videos System
- View Reviews
- and get rid of this welcome message
It takes just a few minutes to register, and it's quality Porsche information at a low cost.
Contributing Members also get these additional benefits:
(you become a Contributing Member by subscribing or donating money to the operation of this site)
- No ads - advertisements are removed
- Access the Contributors Only Forum
- Contributing Members Only Downloads
- Send attachments with PMs
- All image/file storage limits are substantially increased for all Contributing Members
- Option Codes Lookup
- VIN Option Lookups (limited)


seafeye
-
Posts
333 -
Joined
-
Last visited
-
Days Won
1
Content Type
Profiles
Events
Forums
External Paint Colors
Downloads
Tutorials
Links Directory
Collections
Classifieds
Store
Everything posted by seafeye
-
Wheel Bearings 101
seafeye replied to seafeye's topic in DIY Articles - Boxster (986) - Common Fixes and Repairs
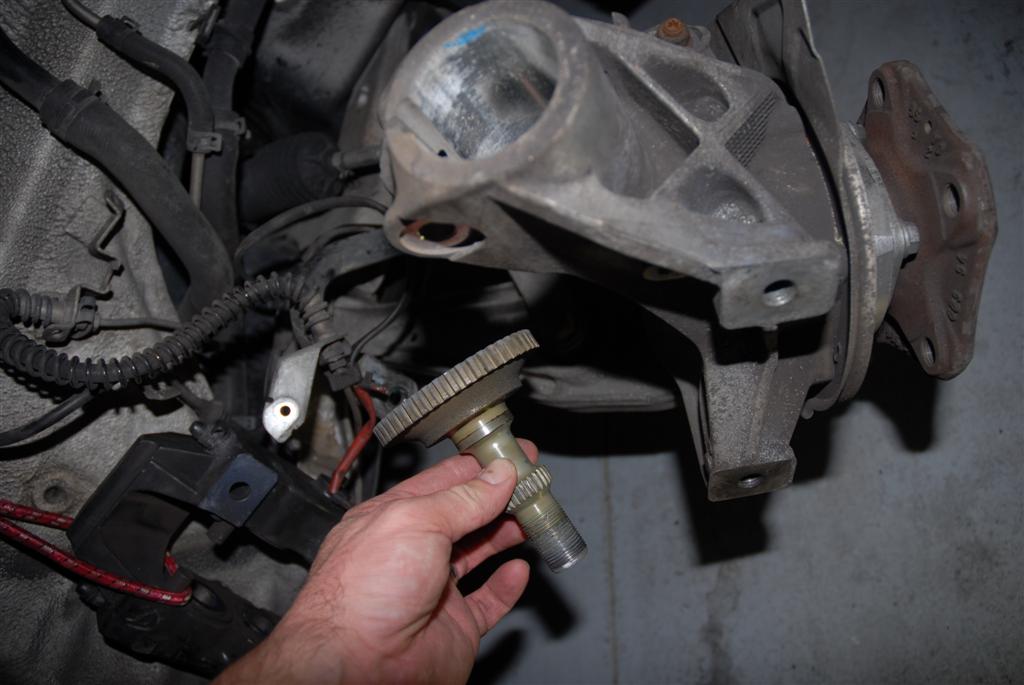
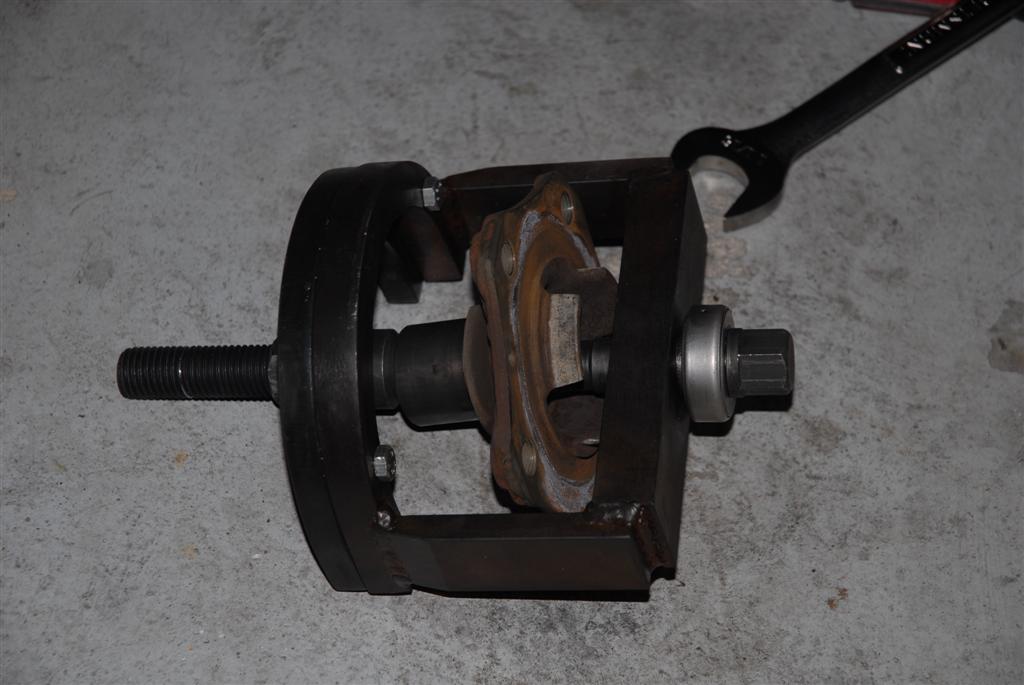
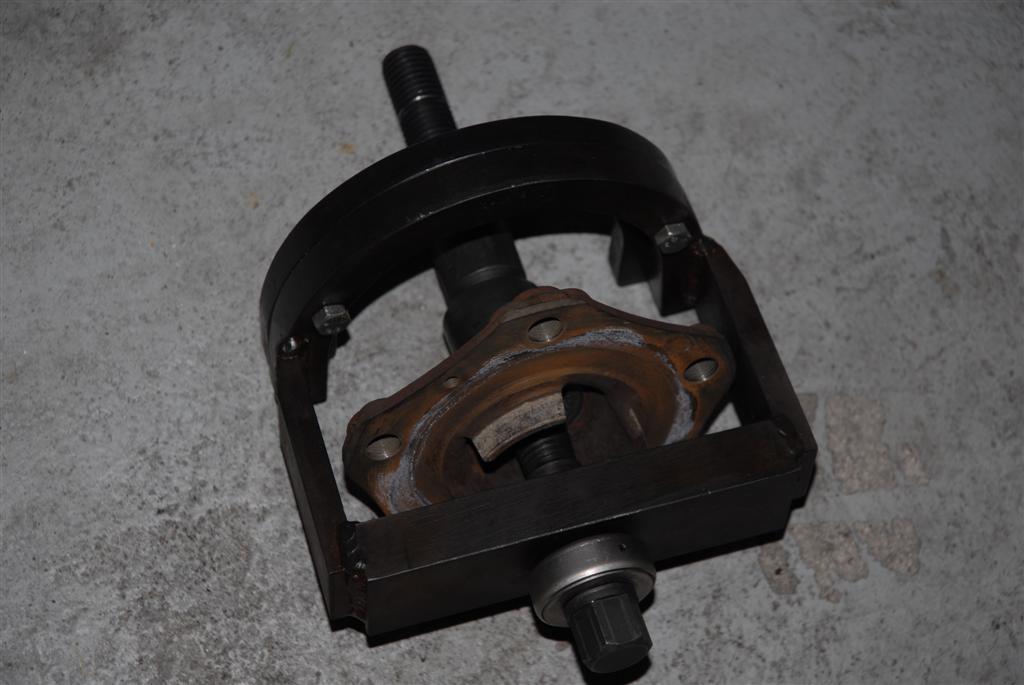
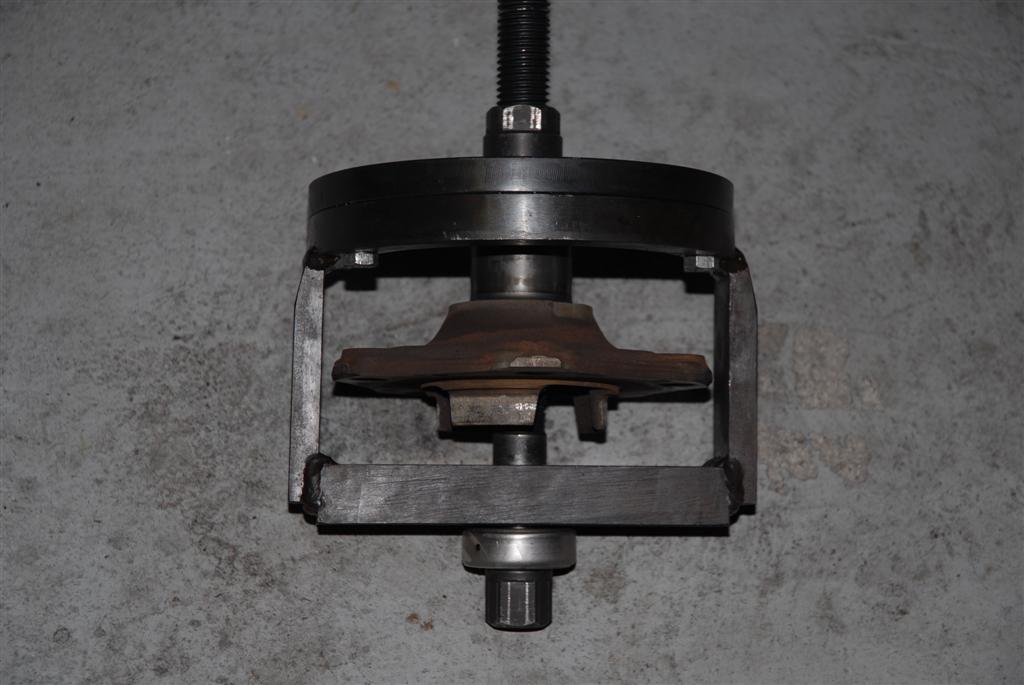
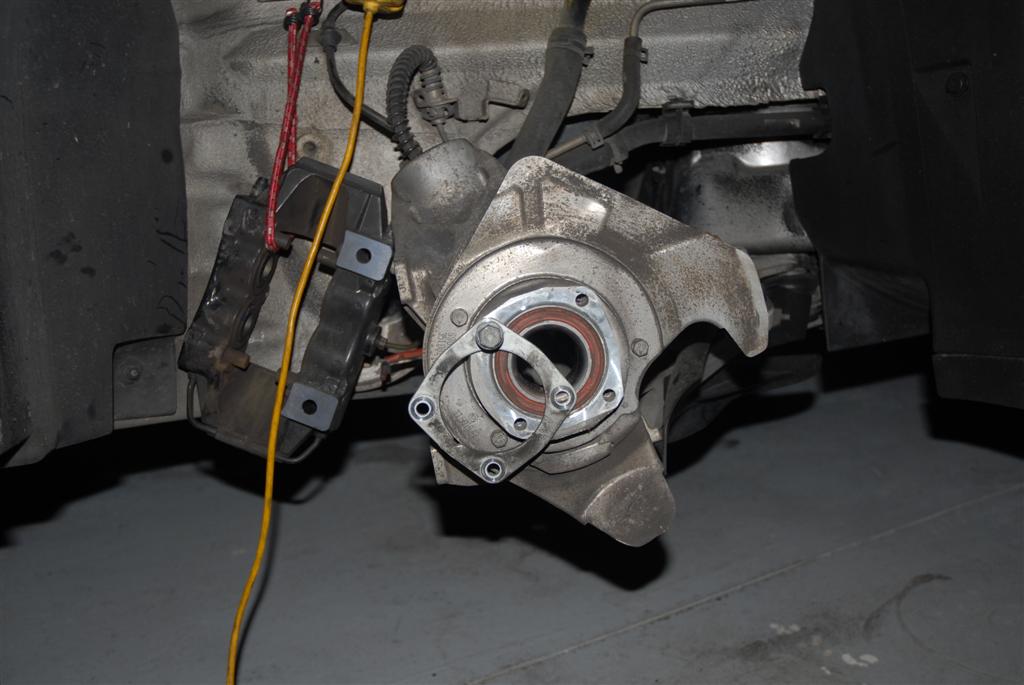
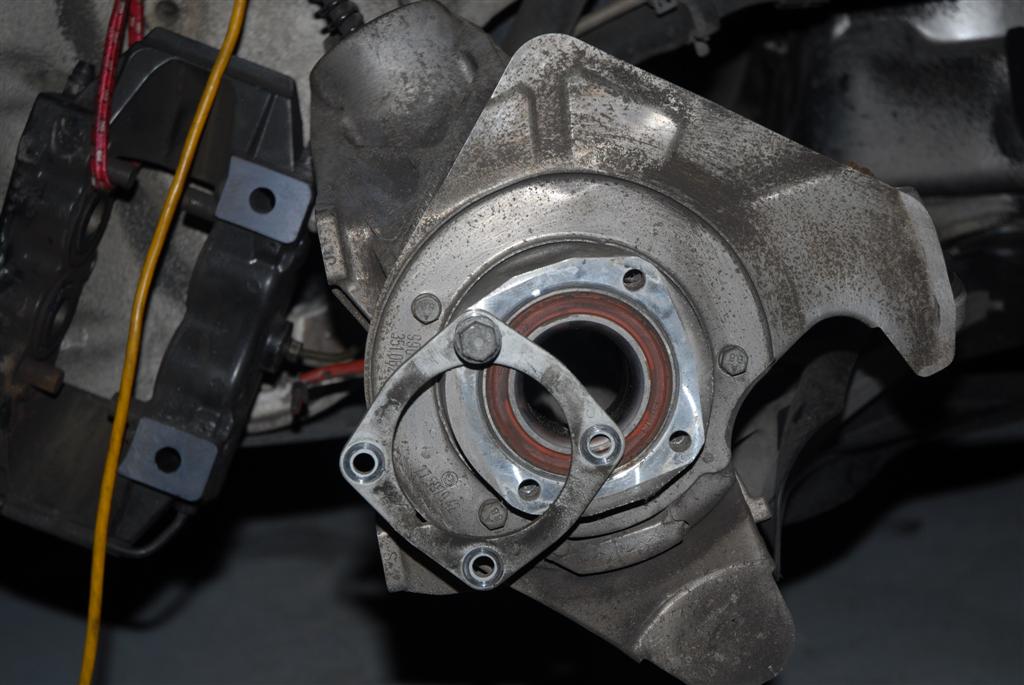
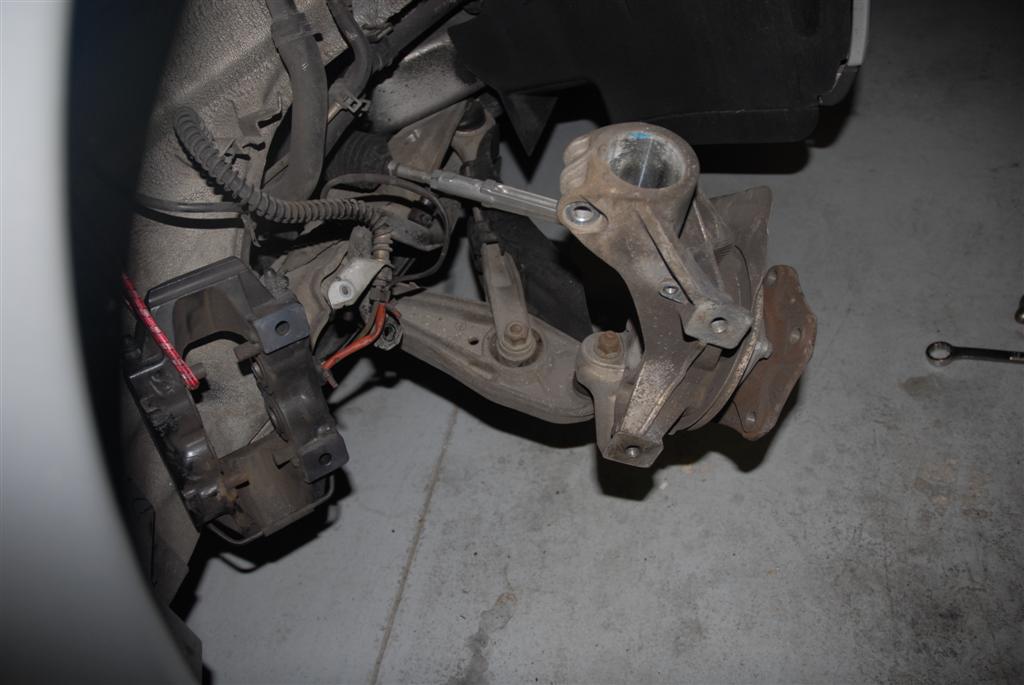
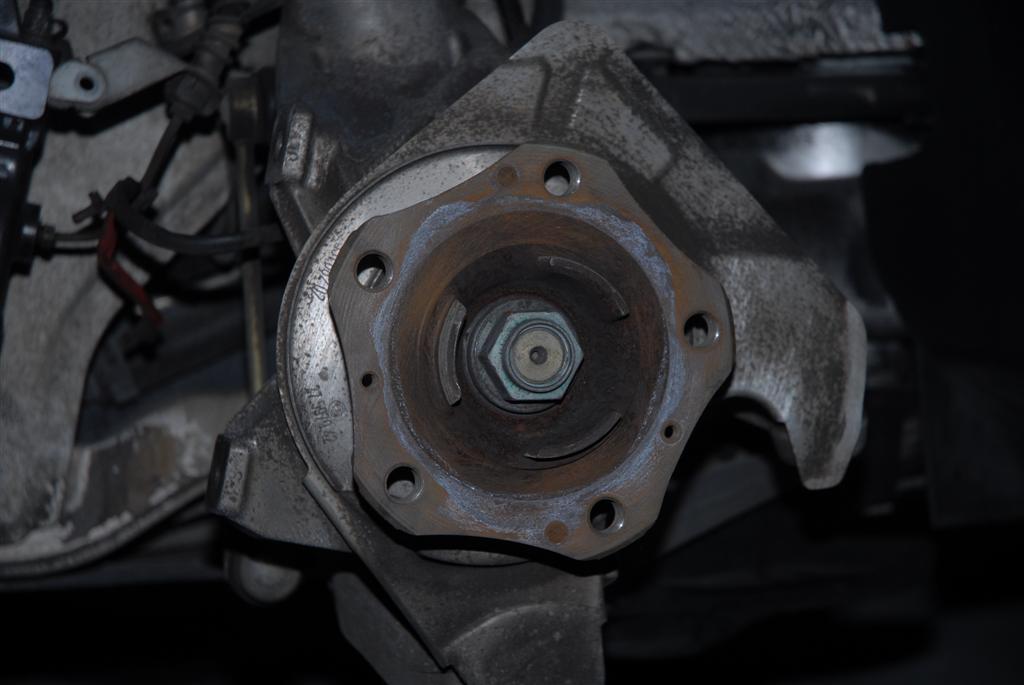
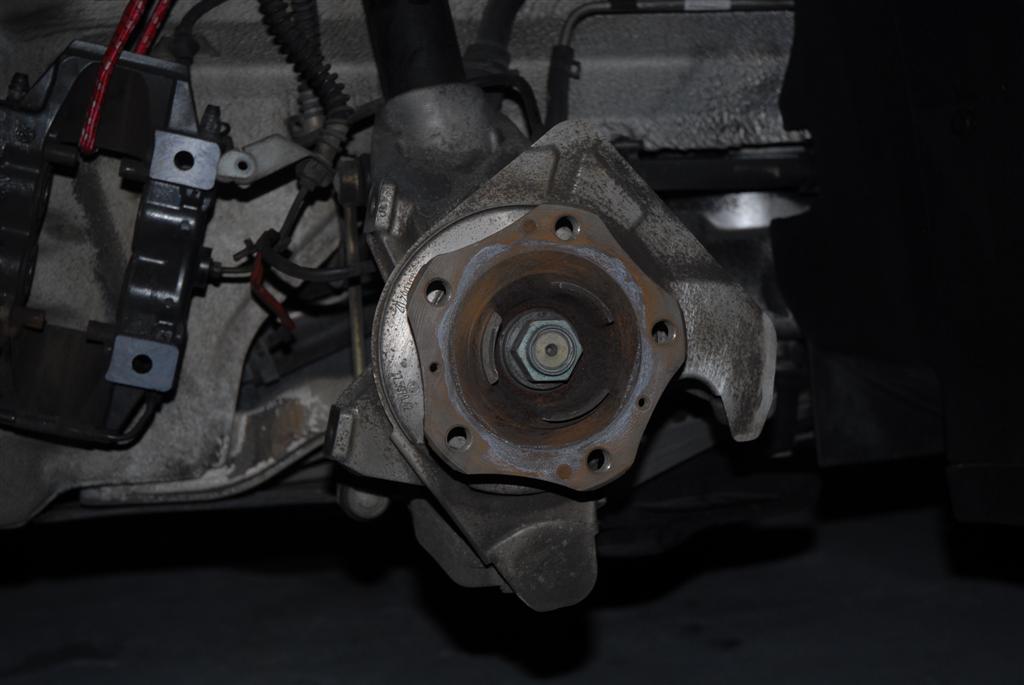
Now you can take out the spindle from the carrier. The only reason we remove the strut is so you can take this out. If you have aftermarket struts this might not be nessasary. Now for the fun part. Wooo look at the new tool.... The directions for the tool are great. Just look at the pictures and put the tool in the order they say. At first i couldn't understand that the horseshoe part of the tool rests on the the brake dust cover but it actually sits on the 3 nuts holding the cover on. So you will not destroy the shield using this tool. Assemble the tool around to pull off the hub. I was lucky because the hub came out no problem at all. It didn't even break the bearing like i expected it to. This is where two people are gold. It can be a real workout to do this single person. Ratchet the two ends and voilla the hub slides out of the bearing. Remove the 4 13mm bolts on the dust cover. Now all you are left with is the bearing in the hub. Rearrange the tool and press out the bearing. What beer are we on now?
-
Wheel Bearings 101
seafeye replied to seafeye's topic in DIY Articles - Boxster (986) - Common Fixes and Repairs
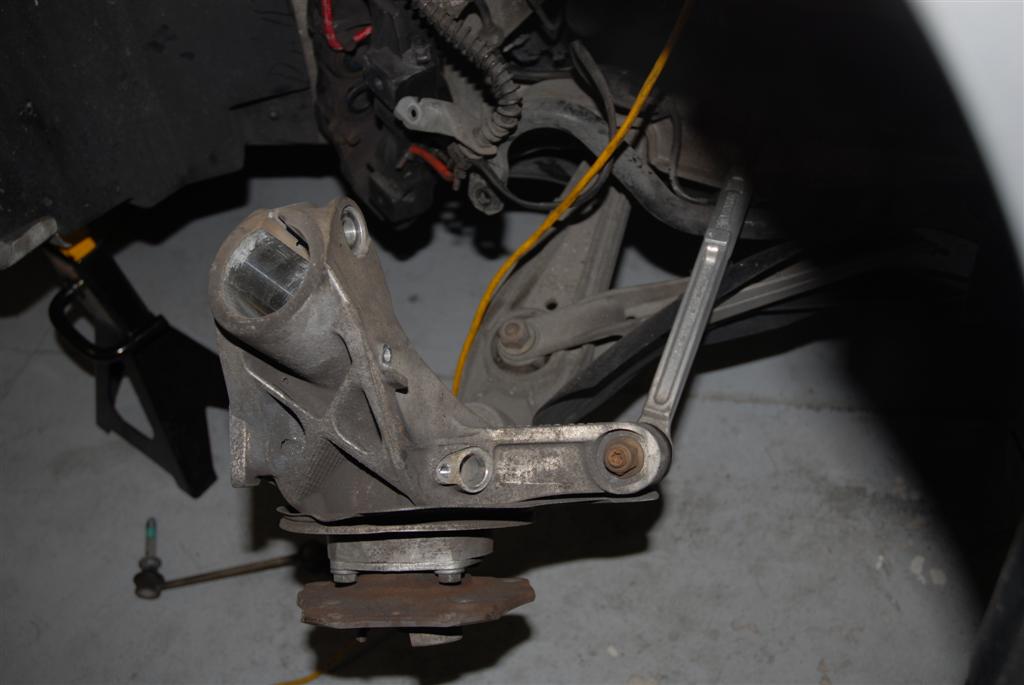
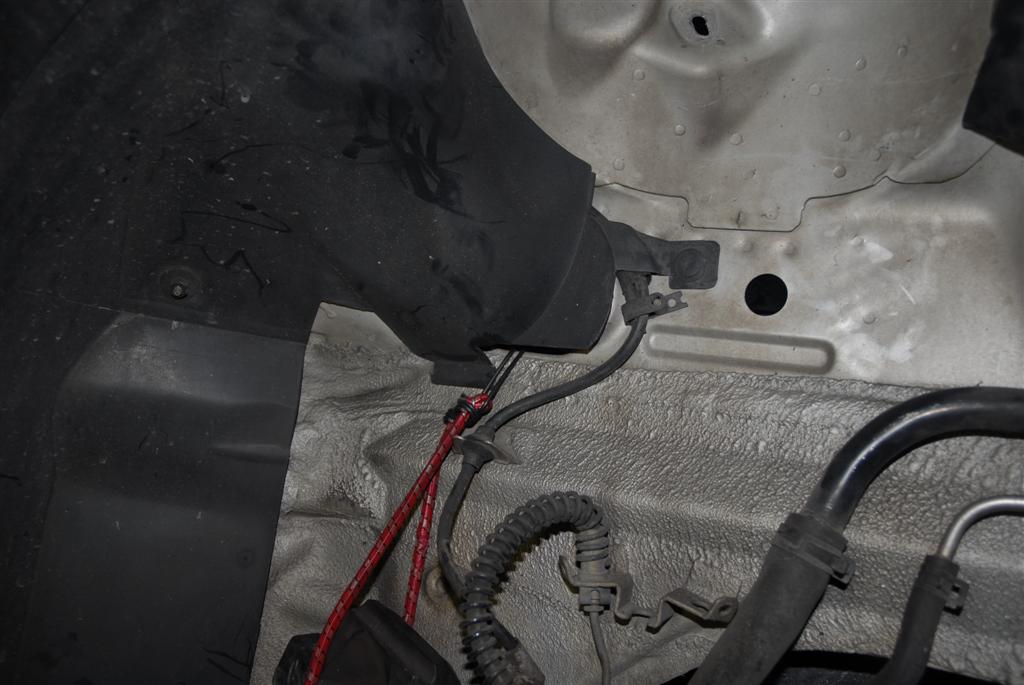
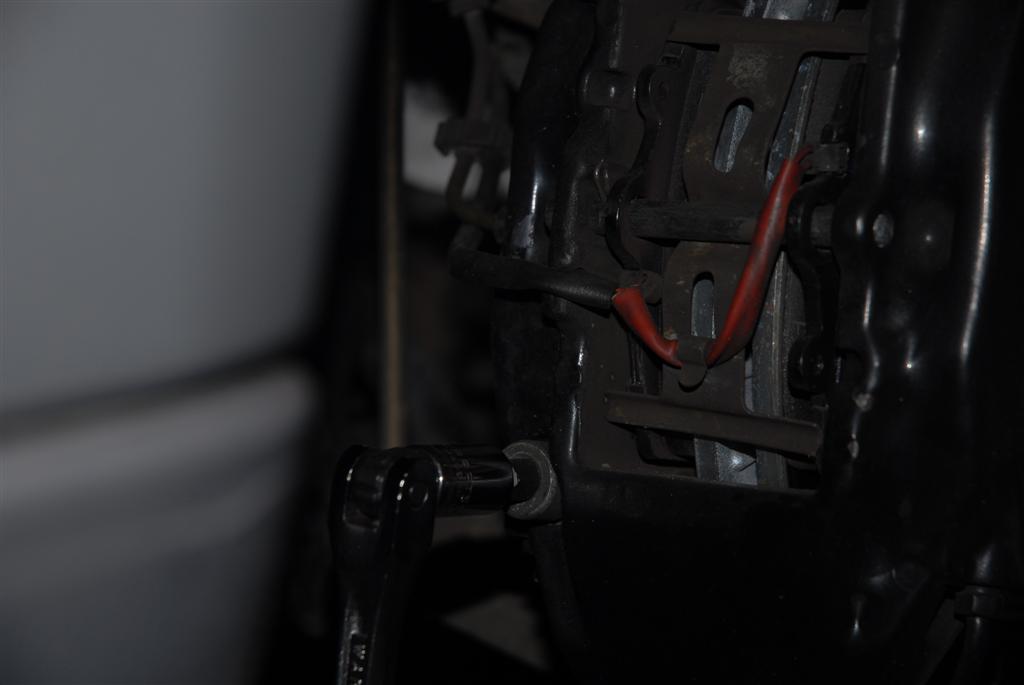
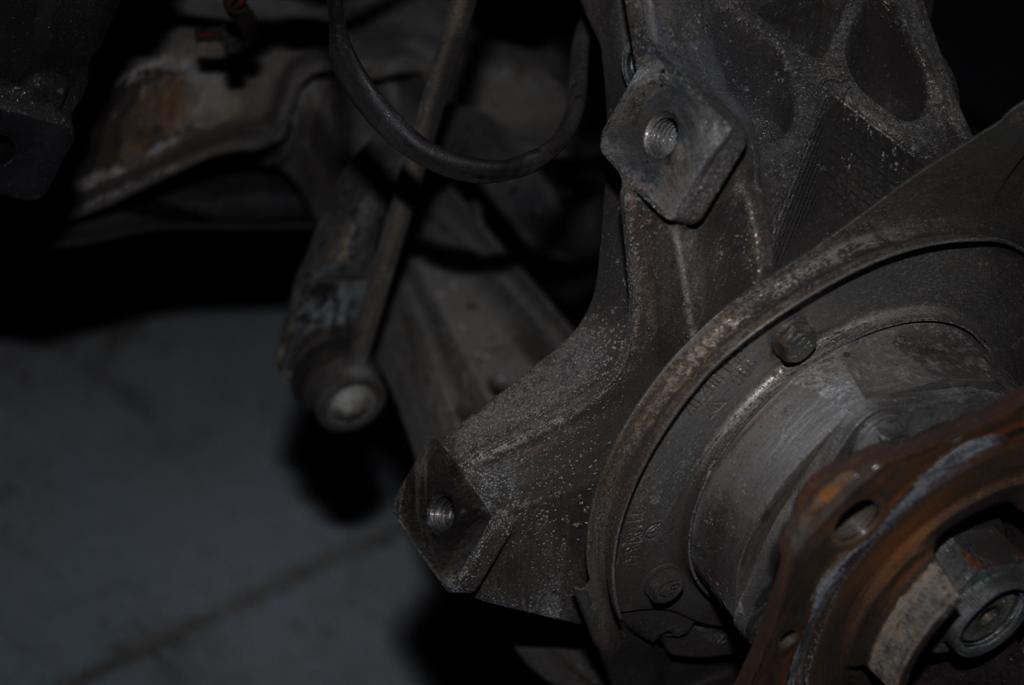
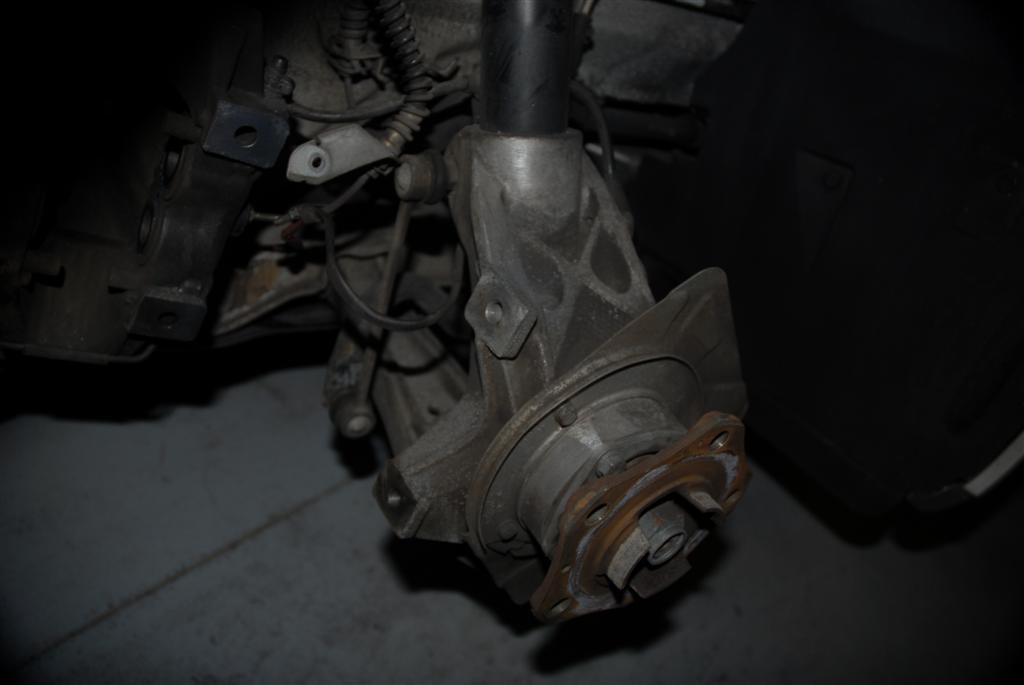
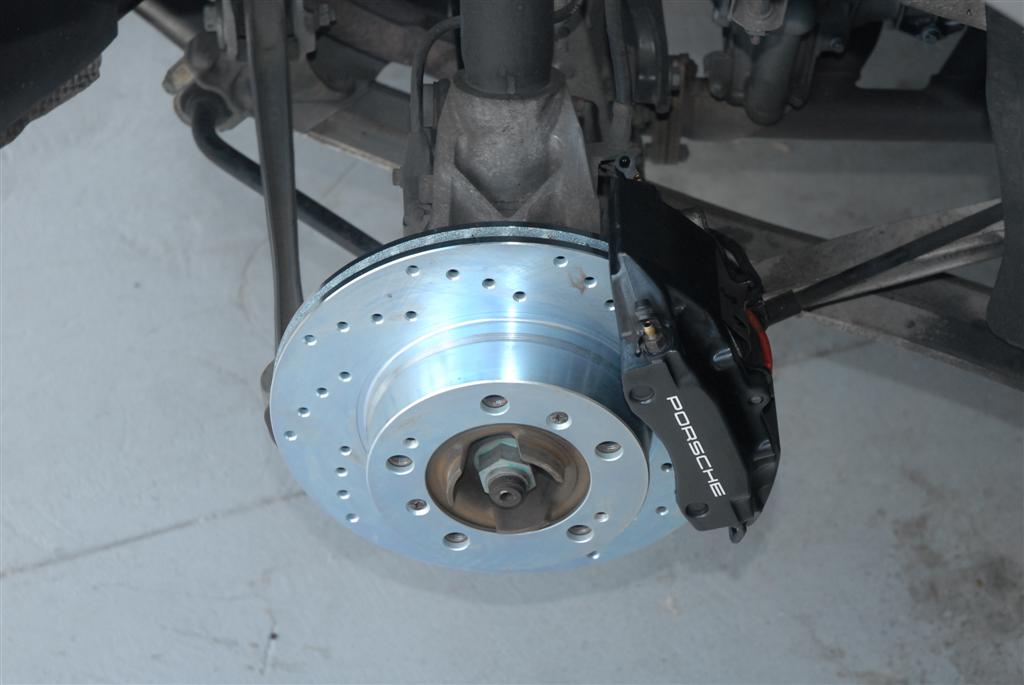
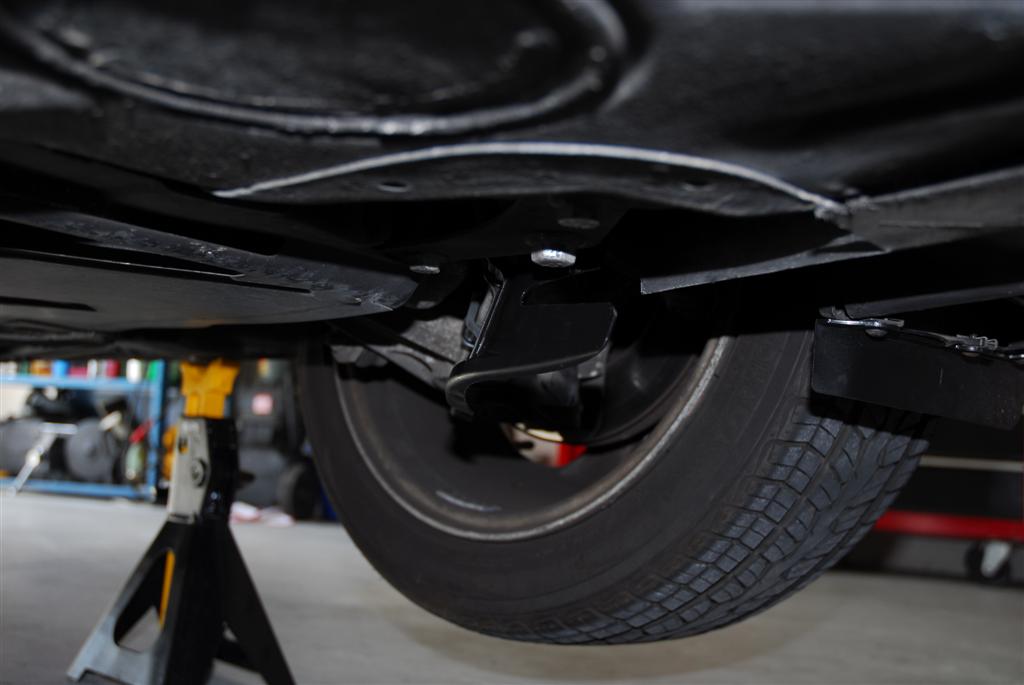
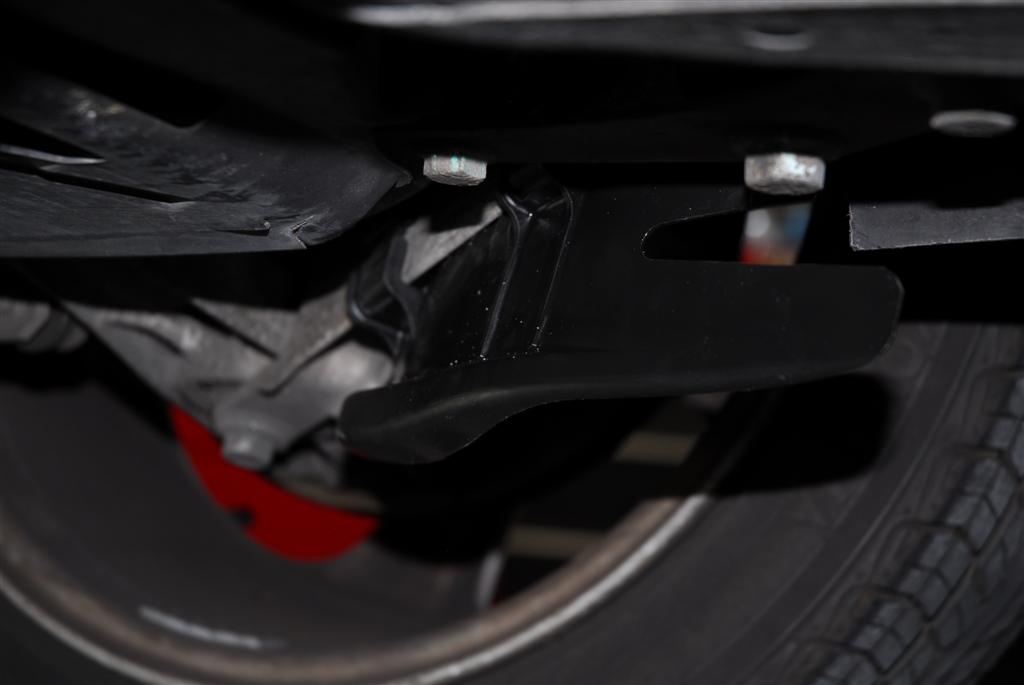
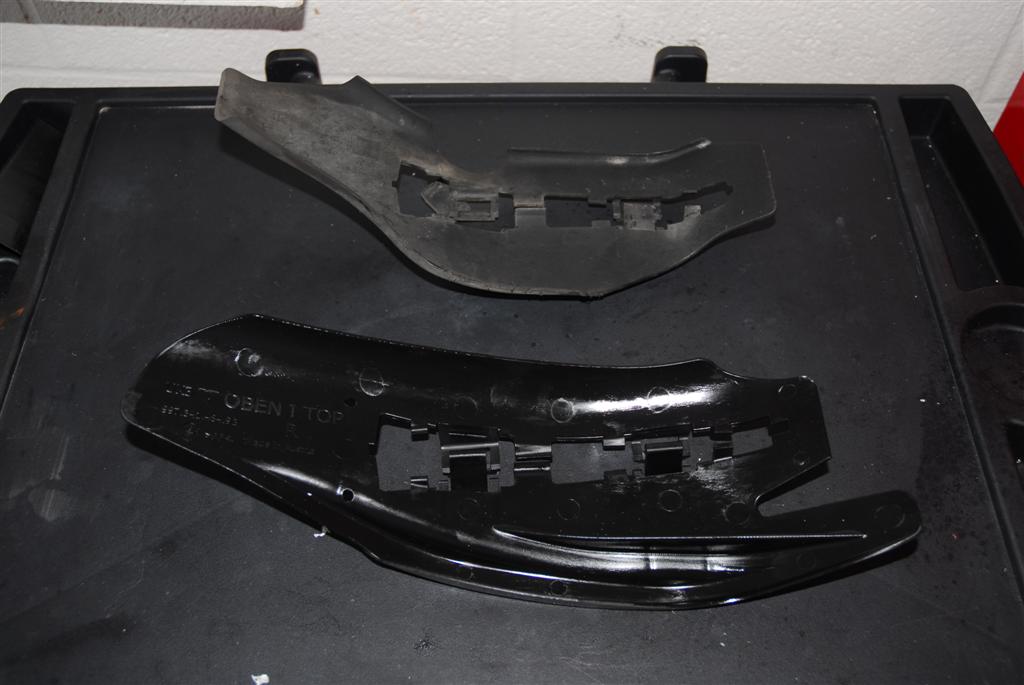
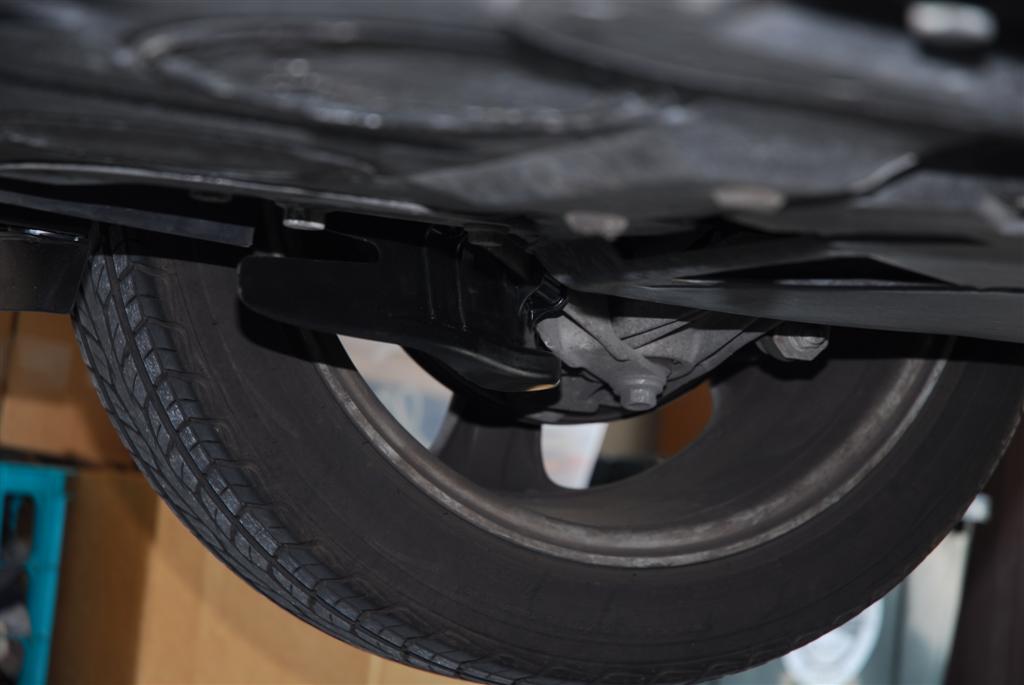
Here are some various photo's of your work so far. Look at where the caliper is held to. I found a great spot to keep it out of the way. Behind the plastic fender protector is a hole, perfect for handing the brake. All wiring out of the way etc...
-
Wheel Bearings 101
seafeye replied to seafeye's topic in DIY Articles - Boxster (986) - Common Fixes and Repairs
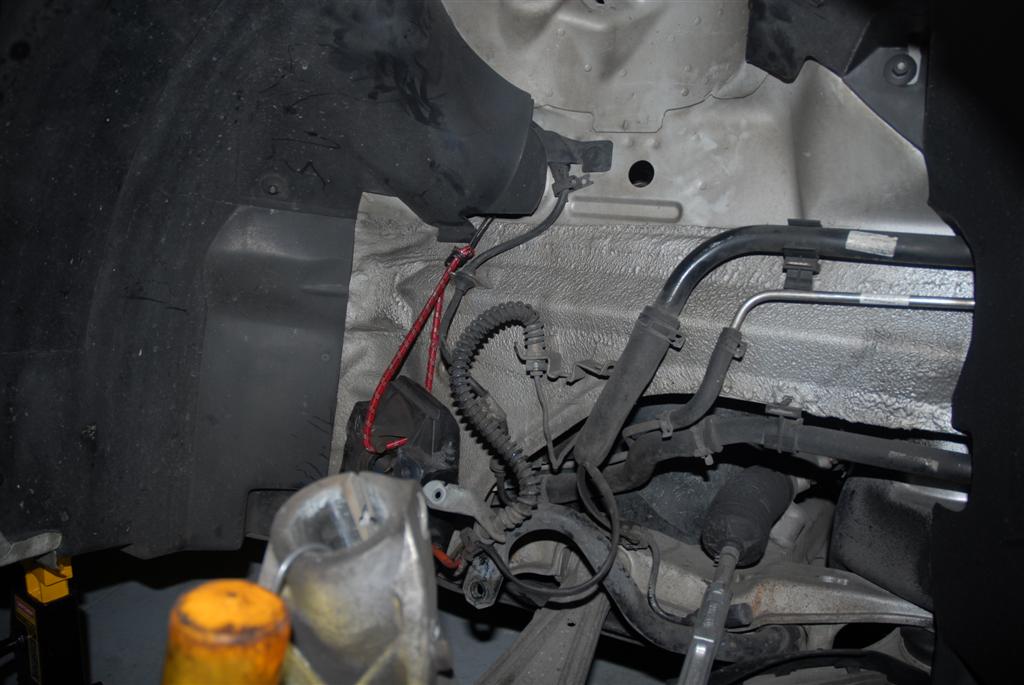
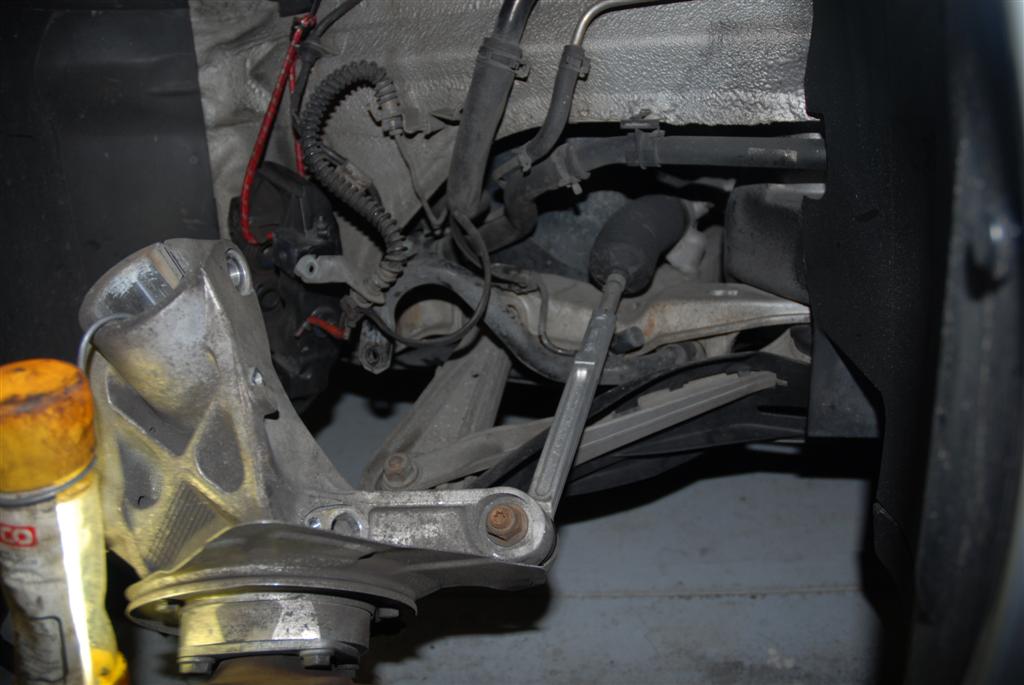
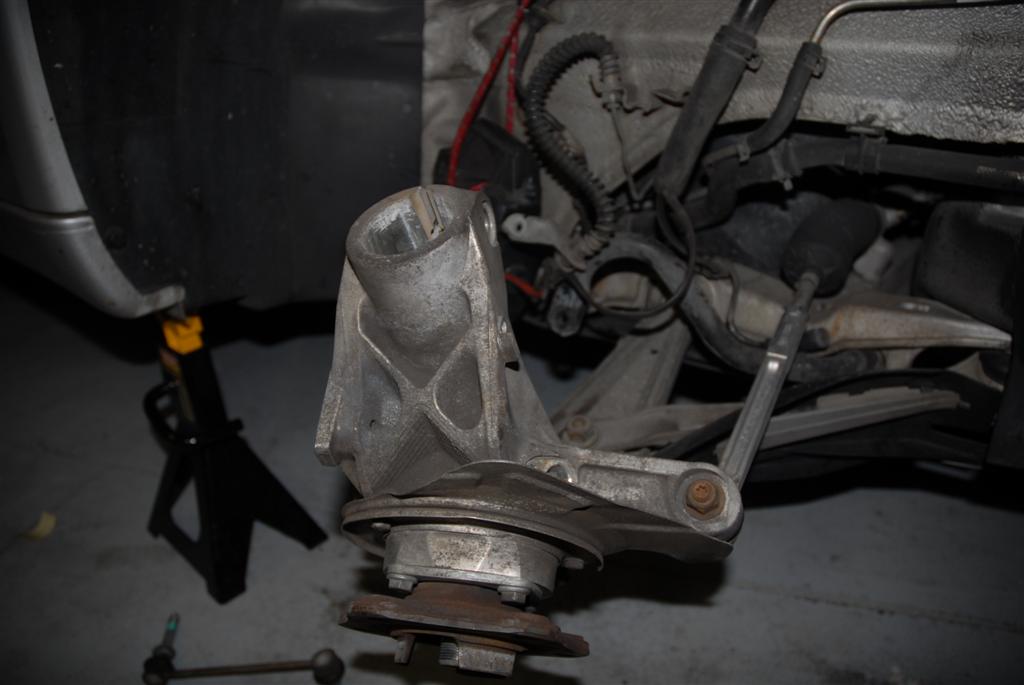
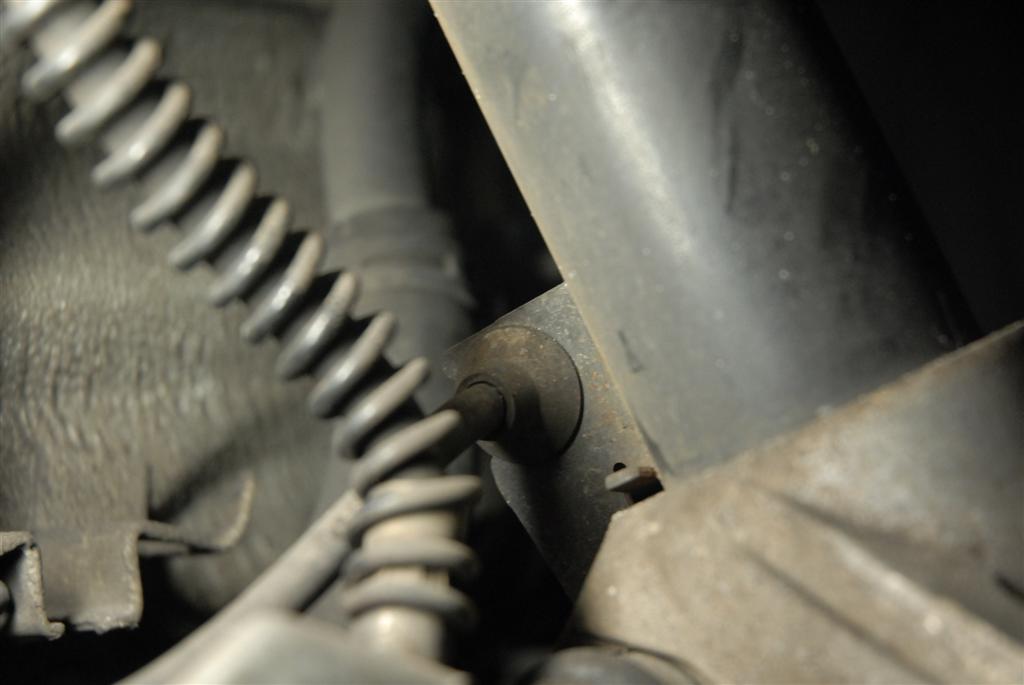
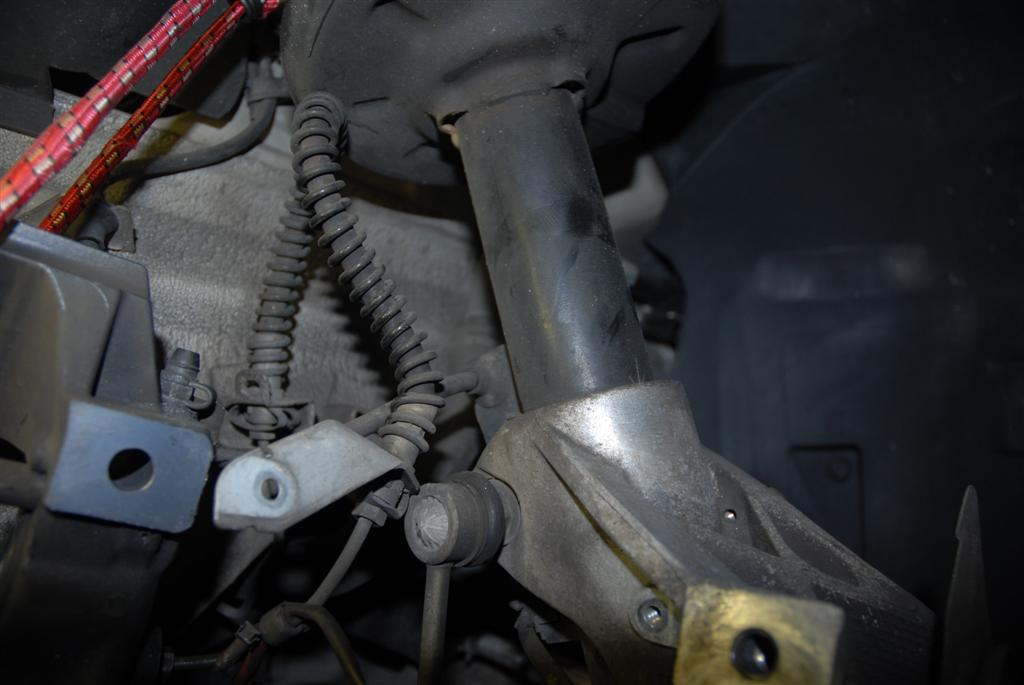
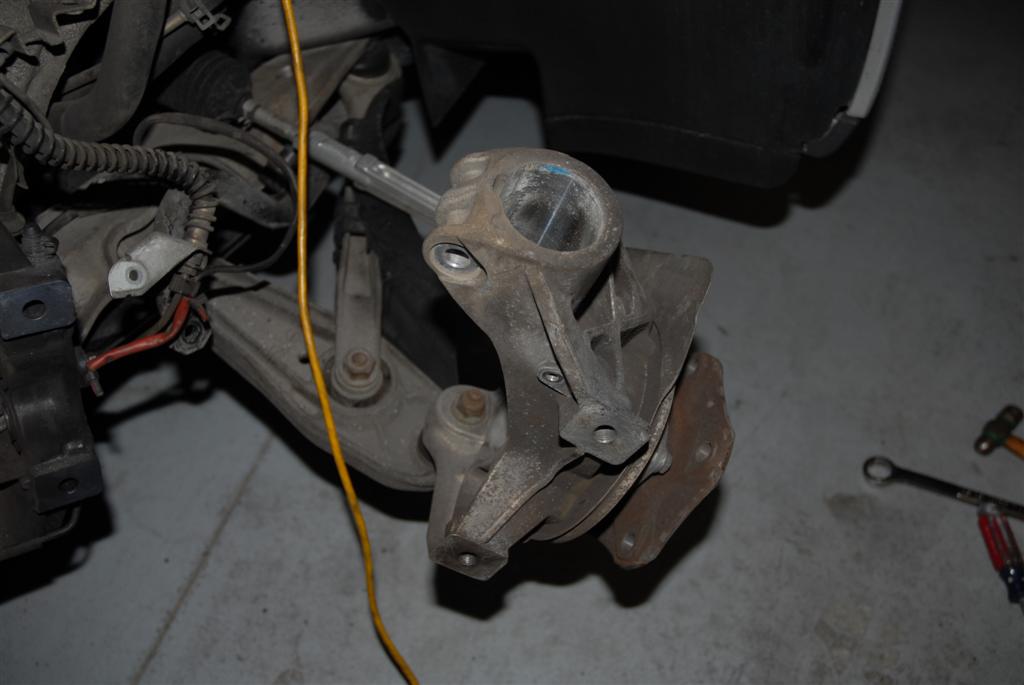
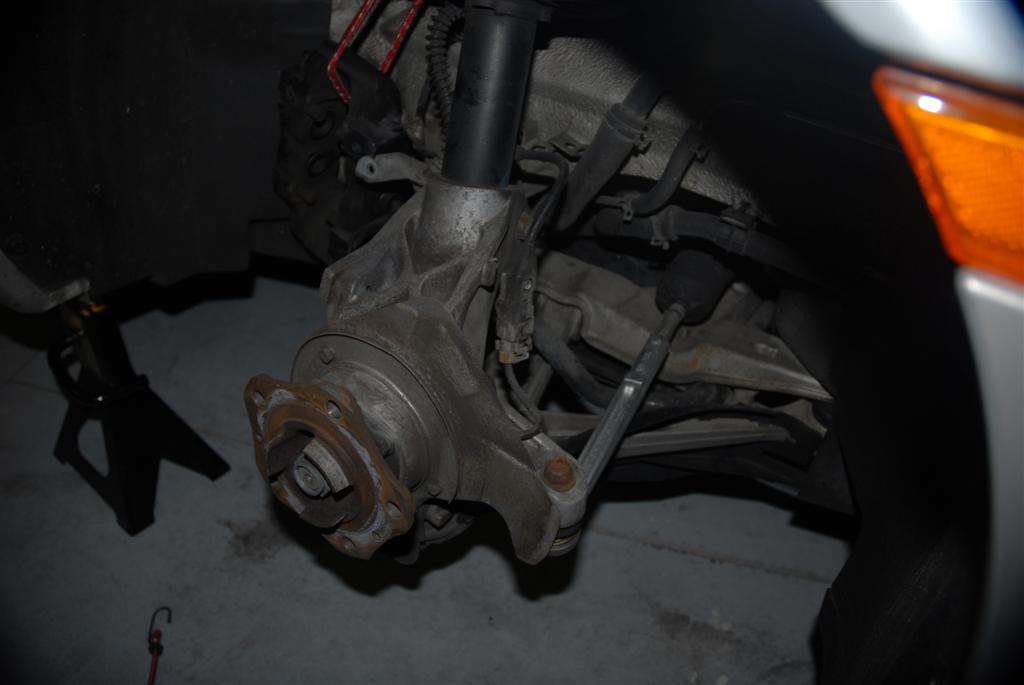
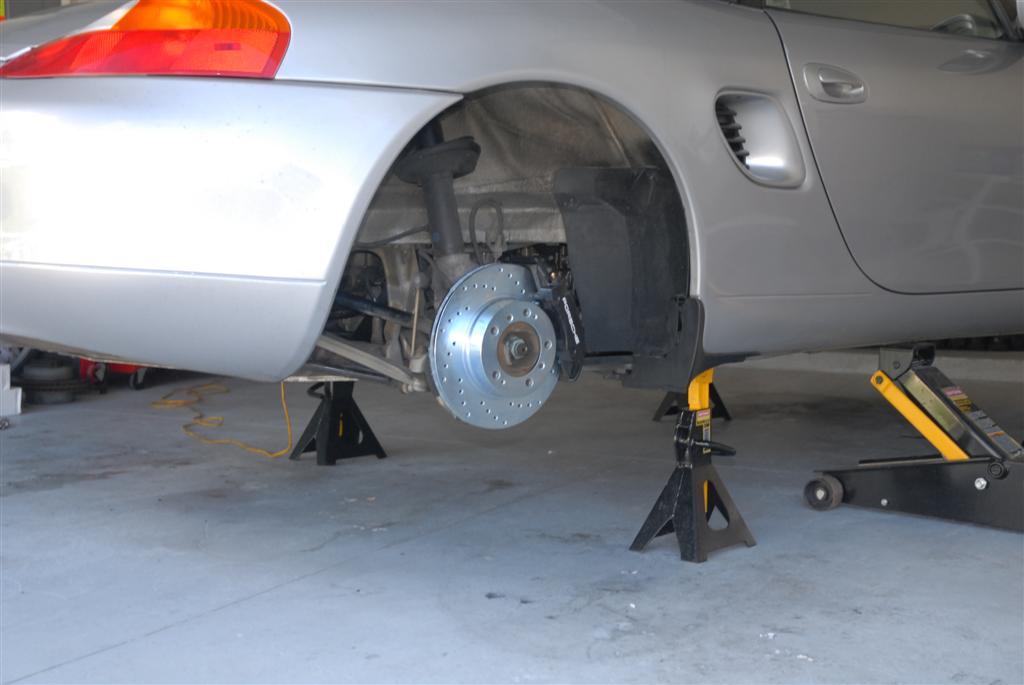
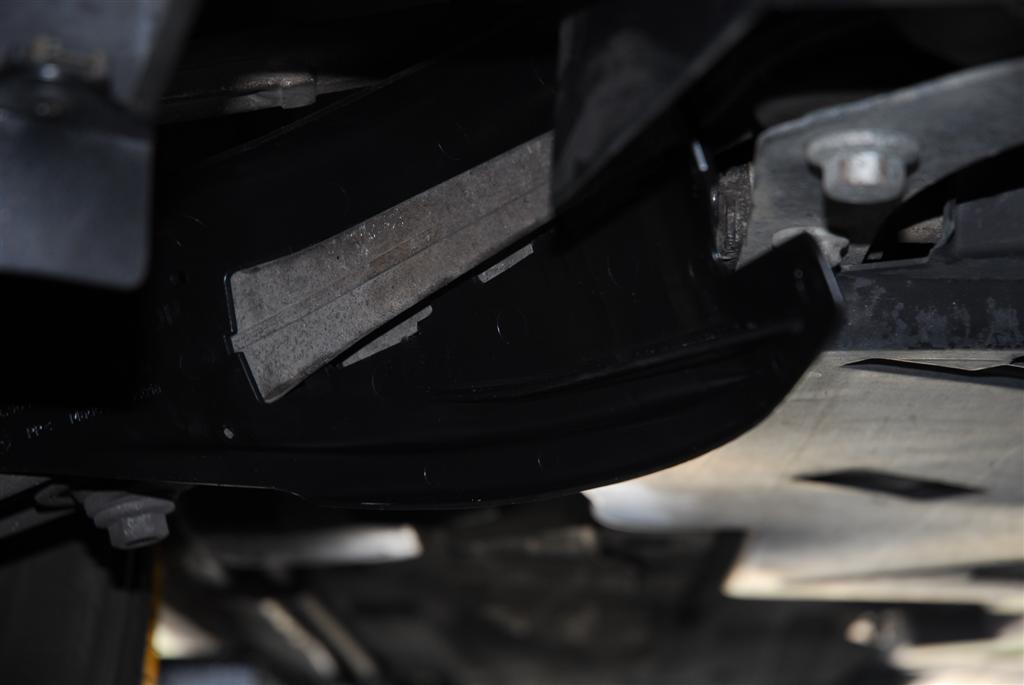
Next we are going to start to remove the strut. This is where you will hear all types of cursing and swearing. My brain is too small to understand how all these bits work together so if you have a better idea of how this should be done please post. Please. In your front trunk there is a plastic shield protecting the cabin filter (RIght side USA Cars) remove the torx bolt, take out the battery tray and shield. You will see the 3 nuts holding the strut to the body of the car. My torx bit came out with the rubber piece attached. It shouldn't, so i will have to go order a new one from Porsche $2. Take a sharpie pen and mark all the strut nuts. Draw a circle around them or whatever. You will have to place the strut back in this place when you reassemble the car. Now this is where there is many ways to skin a cat. Take you Jack and put it under the wheel carrier and compress the spring. Next take a spring compressor and attached it to the strut. Holding the spring. You will need a 17mm wrench and 18mm socket and ratchet to remove the sway bar bolt. I found it easier to completely remove the sway bar from the car. The bottom sway bar bolt is 17mm inside and 15mm outside. Take these apart. It may take some effort to take the bolt out of the strut. On the strut behind the wheel carrier is a tab. This prevents the strut from sliding down the carrier. Acts like a stop. If you can lower the wheel carrier now and straighten the tab, this will help you lower the strut into the carrier, thus making it easier to remove the whole strut. Next take the bolts out in the trunk. Don't lose them. Or anything for that matter. Beer 5... You should be able now to compress the strut and weisel it out the side of the car. Please be careful the compressed spring is more powerful than an Iraqi scud missle. It should just slide out from the carrier, Put it in a safe place away from kids and cats.
-
Wheel Bearings 101
seafeye replied to seafeye's topic in DIY Articles - Boxster (986) - Common Fixes and Repairs
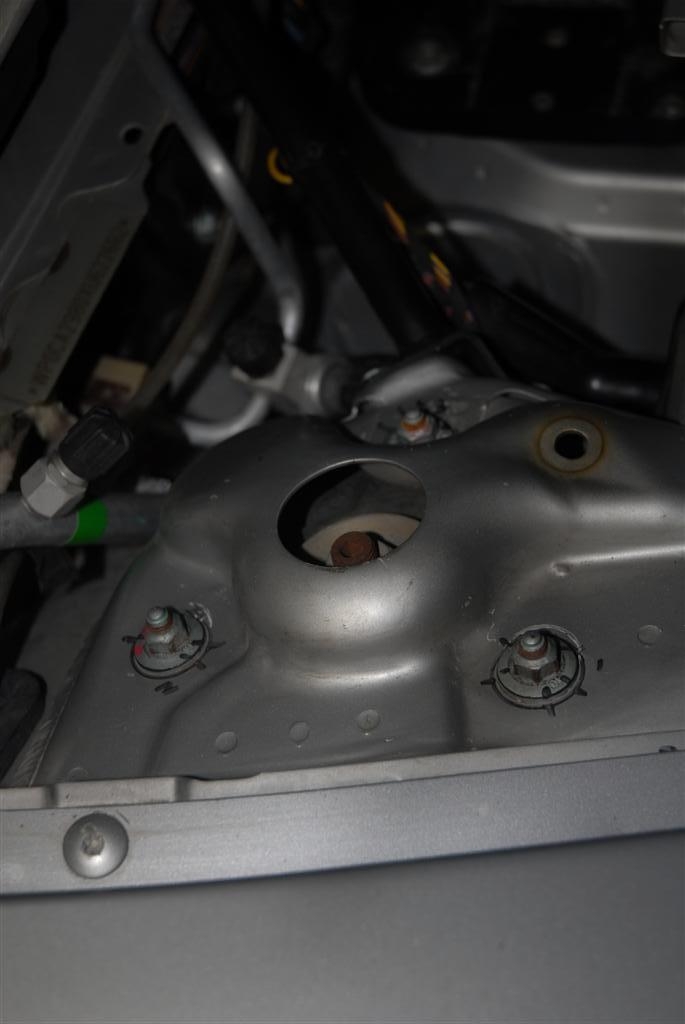
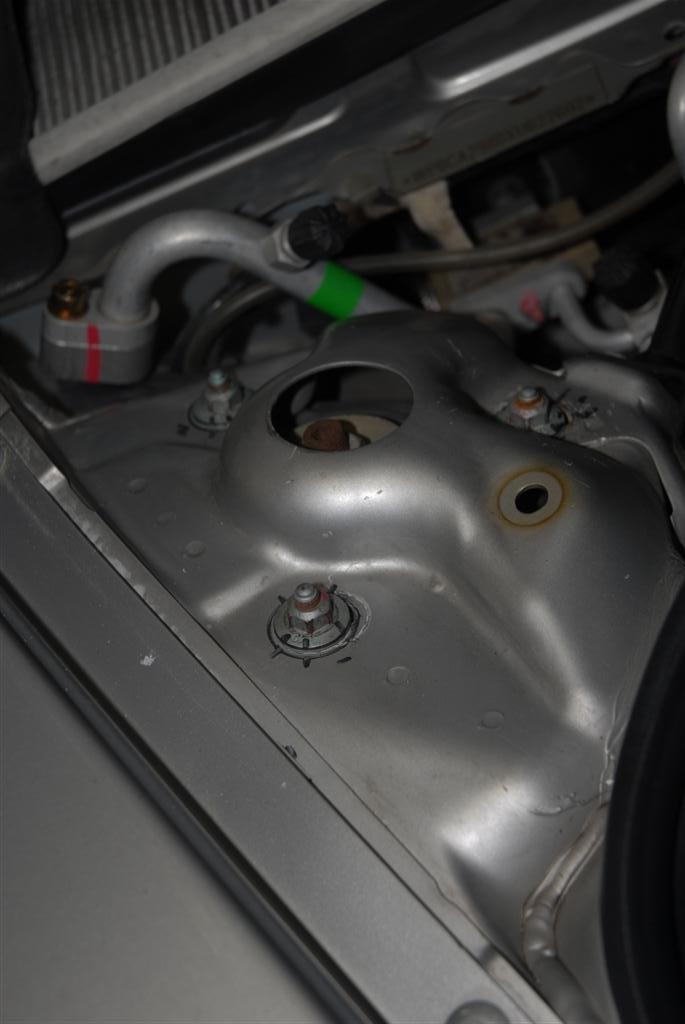
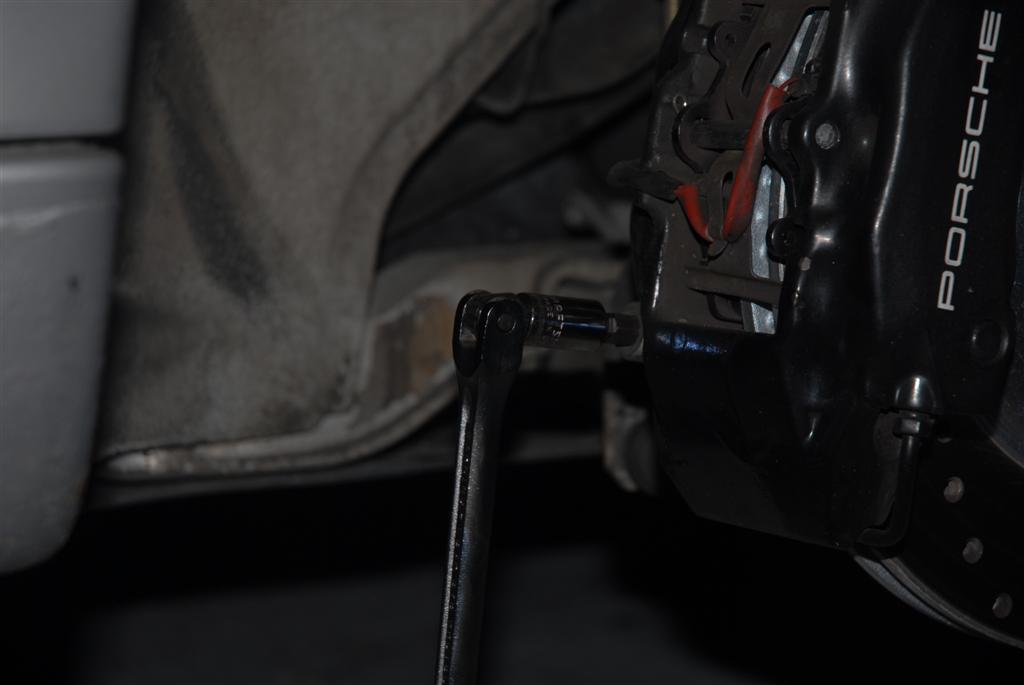
OK good you made it this far. The removal of the brake is going to go much faster. Count how many beers you have had. If you are over 3 then slow down, there is a lot more to do. So take out your allen key socket and remove the caliper bolts. You should probably take out the brake pad sensors and pads first...I didn't cause i was on beer 4. Remove the 10mm bolt holding the brake lines to the strut and grab a bungy cord to hold the caliper out of the way. You can take the caliper off but then you will have to bleed the brakes later. More work. Remove the 10mm bolt on the other side of the wheel carrier. This holds the cable for the brake wear sensor and the ABS control sensor. My ABS control sensor was held in with a small allen nut. On the other side of the car it was a torx. Part of my car might have been made in 1998 and the other in 1999. On the back of the strut is a plastic clip that holds some wiring for the brake sensor. It just pops out. I actually broke this plastic clip trying to take it off the strut. It was difficult to take a picture back there so there isn't one. On reassembly i tie wraped the clip back on the strut.
-
Wheel Bearings 101
seafeye posted a topic in DIY Articles - Boxster (986) - Common Fixes and Repairs
Wheel Bearings 101 Finally got around to doing the front wheel bearings on my 1999 Boxster. I bought the SIR Tools B-90 P2 kit. $259.00 Bearing seperator from China Freight $29.99 (ON Sale) Craftsman 32mm large socket. $11.99 4 foot bar extension or pipe. (Home Depot $10) Bearings from, I can't remember but a while back. $30ea Jack Stands Jack Important Anti Seize Compound $8.99 (NAPA) Large wrench set. Sears $59.99 (I kinda went overboard on the wrenches. They had them on sale and even thought Craftsman Author seafeye Category Boxster (986) - Common Fixes and Repairs Submitted 10/27/2007 06:47 AM -
Finally got around to doing the front wheel bearings on my 1999 Boxster. I bought the SIR Tools B-90 P2 kit. $259.00 Bearing seperator from China Freight $29.99 (ON Sale) Craftsman 32mm large socket. $11.99 4 foot bar extension or pipe. (Home Depot $10) Bearings from, I can't remember but a while back. $30ea Jack Stands Jack Important Anti Seize Compound $8.99 (NAPA) Large wrench set. Sears $59.99 (I kinda went overboard on the wrenches. They had them on sale and even thought Craftsman is a lot more than China freight they treat their employees well, i think they are made in the USA and we need to support American companies, my .o2) Various other tools sockets, punch, spring compressor etc...You will see as i go along. So first off is to open the front trunk and get out two tools. The wheel lock key and the wheel post. Start off with taking the center cap off the wheel while it is still on the ground. Take the 32 mm socket and loosen the big center bolt. You will need to use a large ratchet, small extension and stick the home depot bar on the end. Be careful to use a quality ratchet or it might break and you will be doing some paint work later. I had taken the steel bar and pounded it into an oval shape so it would fit overtop of the ratchet. This bolt is tight so make sure you have the parking brake on. Next loosen the wheel bolts and jack the car up. Take out one bolt then put the alloy peg in one of the holes. This helps line everything up and keep the wheel from falling onto your nice painted caliper. You should have the wheel off and put somewhere out of the way...You won't be needing that anymore...At least for a while. On the front of the rotor there are two phillops screws. I like to remove them now as the brake pads are holding the rotor from spinning. You may need a special tool to get these out if they are stuck. Just be careful not to strip them.
-
DIY guide for removing interior plastic pieces?
seafeye replied to panameras's topic in 986 Series (Boxster, Boxster S)
Paint looks great. Can i ask how much you had to pay for this? -
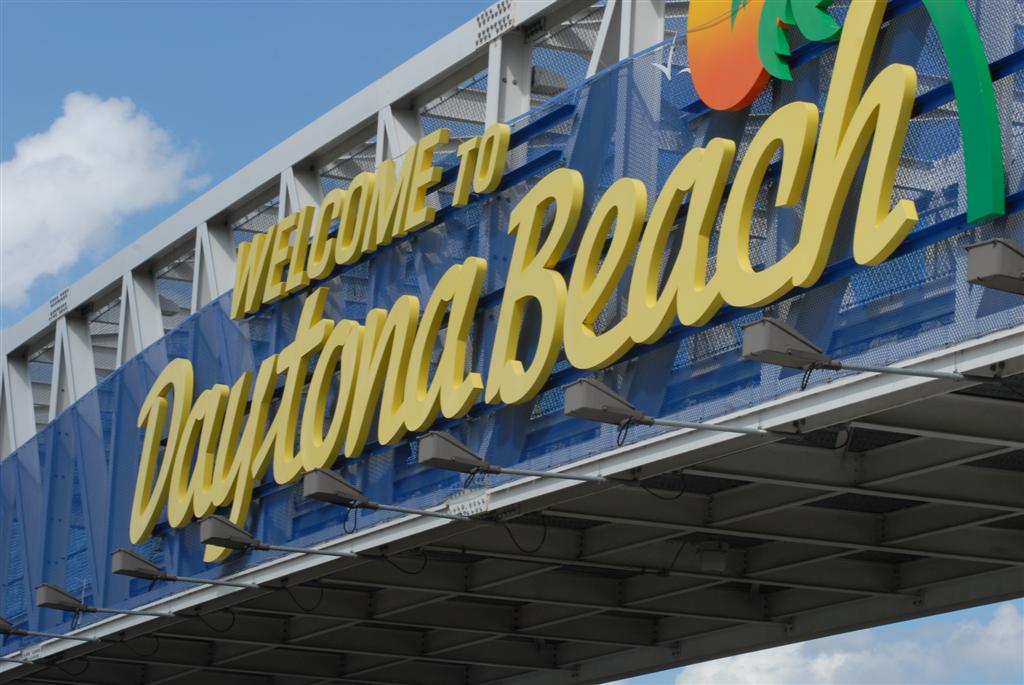
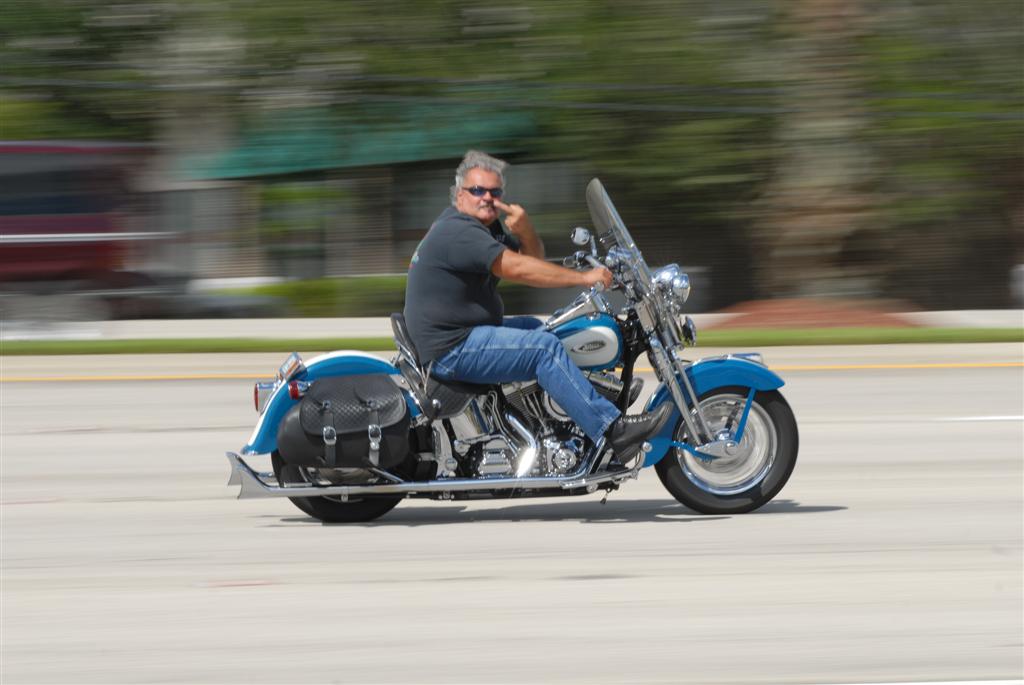
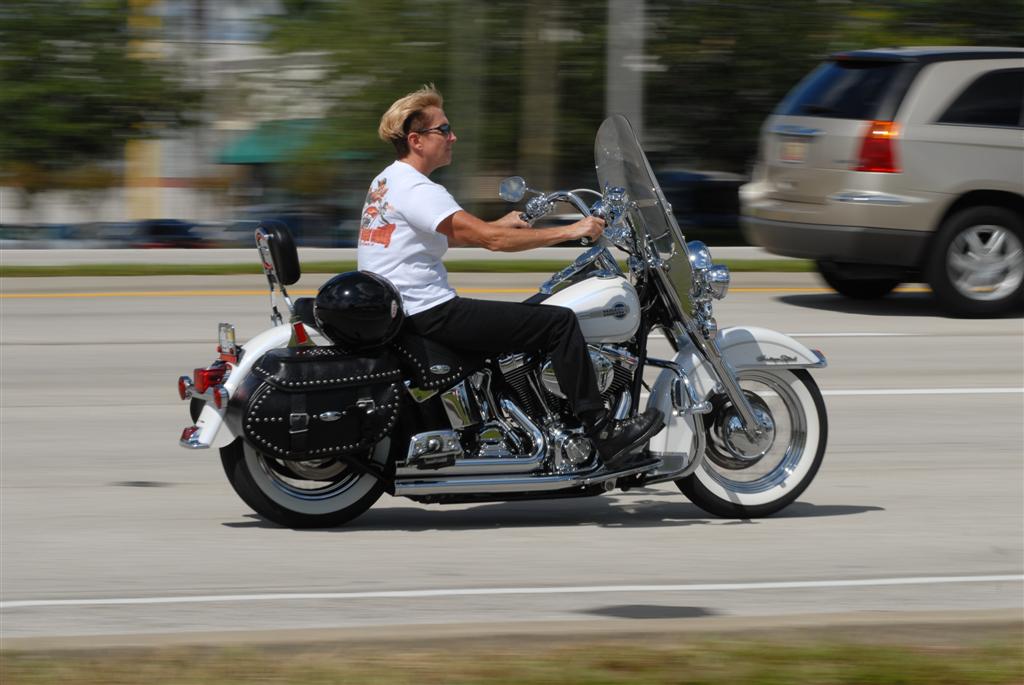
Daytona Beach Bike Week 2007 Some pics for you bike lovers... I will post some Porsche Renntech Reunion pics from here Nov 4th. Let me know what you want to see...
-
Is this worth worrying about?
seafeye replied to JonesnSince78's topic in 996 Series (Carrera, Carrera 4, Carrera 4S, Targa)
From what i understand from the rotor making process is that they are cast, then drilled, slotted then coated, plated, whatever...Then after all that is complete they put them on a machine to balance them. Alot like your tires, except material is taken off instead of weights added. Anyway they grind off till they are acceptable. You should be able to go to a NAPA auto parts or a machine shop and get them balanced if it worries you. They should have already been done but unless you see some work done it needs to be.
-
Boxster Suspension R&R
seafeye replied to Highlander's topic in 986 Boxster Suspension, Brakes, and Wheels
Just viewed the IExif Data on your picture....Showed that this was the 7520th picture that you took with your camera. Nice to see i am not the only one snapping away..... Cheers -
Unusual Brake Failure!
seafeye replied to ivass's topic in 996 Series (Carrera, Carrera 4, Carrera 4S, Targa)
Just for kicks you should try to get it covered under the 10 year rust warrenty! Then when they say no, threaten with a lawsuit. Looks like a factory design failure to me. Glad you didn't get hurt! -
Dummmmb question do you have a illustration on how to use the tool please Here's a pic from my suspension R&R (http://gwl.rmsolo.org/hacks/suspension): Just got back from NAPA and all they had was this tool....775-9096 Course mine is not black like in the picture. http://www.napaonline.com/MasterPages/NOLM...Joint+Separator Did i get the right tool? Thx
-
Next i need the courage to do the wheel bearings. Haven't decided if i am going to do the removal of the carrier and all or find the kit that lets me leave it on the car. When doing the front left brake the bearing felt horrible. So i wonder what all the rest are like...
-
Finally got around to putting new brakes on the car. New Rotors and Pads and caliper bolts. Got them on Ebay for $199 plus $80 for the pads. Shipping was $40 OUCH. So loran i have a question for you.... Got all the bits back together. Bleed the brakes etc... When i turn left i get a clicking sound from the left rear wheel? *NEW* Seems some dust? Metal parts? something got into the crack between the brake rotor and the dust shield. Cleaned it out and i can't hear the noise anymore....The metal parts i figure came from when the brakes were made i guess!!!
-
Saw this on Ebay....It is dark blue....i need a black one, so good luck... http://cgi.ebay.com/ebaymotors/PORSCHE-BOX...sspagenameZWDVW
-
Diagnostic Help -- Is it really my MAF?
seafeye replied to strawfordt's topic in 986 Series (Boxster, Boxster S)
I am sure there are plenty of more qualified people here that will be able to help but here is my $.03. The MAF does not affect your idle. So if disconnected you should still be in the idle range. If you are still having idle problems then this would lead me to believe you have to clean your throttle body or you fouled your plugs, bad gas etc... So, clean the TB and check your plugs. You will only be able to clean the MAF a couple of times. Very delicate. You could even run your car without the MAF, but doing so could, most likely would harm your Cat converters. That will get pricey. But you can run the car without it for a short period of time, and just suffer reduced performance and fuel economy to get to a dealership to buy that MAF. -
If you don't have the Boxster Owners manual then you should download it from here... http://www.renntech.org/forums/index.php?a...&showcat=15 Then put the top in service mode (You will find this information in the above manual). Go to Sears or wherever you can buy tools and get a Torx screw driver set. Take out the MAF and put in the new one. If you do some looking around you will be able to find one for less than $300. Do not buy used. Lastly take Shawn's advice...THe search option here is fantastic. Plenty on the MAF.
-
Aviation fuel OK?
seafeye replied to sailmotion's topic in 996 Series (Carrera, Carrera 4, Carrera 4S, Targa)
Down in Miami a while back and at Signature FBO they were charging $4/gallon for avgas. The owner of a navajo i was flying was considering parking it because of the high prices. On a different note...If you were to put avgas in your car i bet you wouldn't get to burn the whole tank down...your engine will be toast. That avgas burns HOT. I used to know the temp that it burnt at but not now.....i switched to JET A. -
When your friends tell you that you bought the "Poor Man's Porsche", show them all the 996 part numbers all over the car. You are the smart one for buying a 911 for a 986 price. Congrats... Did that engine you replaced have a 996 part # too? :huh: You should brush that chip off your shoulder. Hey there's no chip... I have owned a 1972 911, 1993 RS America, 1995 993 Cab and now the 986 (And a BMW 330CIC, Still need a 4 seater!) Got a lot less speeding tickets with the boxster and love it like all the rest. And yes the 986 motor has many 996 part numbers on it. Porsche didn't become the most profitable car maker in the world for nothing. Maybe people who bought the 911 are subsidizing boxster owners? Same car less money!
-
When your friends tell you that you bought the "Poor Man's Porsche", show them all the 996 part numbers all over the car. You are the smart one for buying a 911 for a 986 price. Congrats...
-
Yep,that's how much they cost. wow; for some reason i was under the impression they were like $230. for $30, it's a no brainer. Picked them up last week and installed them today. Very easy to install and fit great. Enjoy pics...
-
It is a shame what has become of the german cars. I owned a VW Jetta and from day one the sunroof didn't work, and that was the start of the nightmare. My wife had a Passat and she liked driving it but what a piece of crap. And these were all new cars. The passat never drove right. When you started from a stop the car would hessitate then jerk forward. The VW shop told be it was turbo lag. Ya i laughed and said i can't believe you want me to believe that. Never did get it fixed and traded it in on a BMW 330CIC. 1000% better than a VW just as i expected! Now my wife is happier than ever and we all know how that makes our lives easier. Hopefully the BMW won't be any more unreliable than the VW. and judging by VW's recent ranking on the quality scale (Excellence, Sept issue) they came last out of like 37 car makers. Porsche first, Lexus second and Hyundai third. Shame we all have to learn the hard way but if you stick with Porsche you will come out ahead.
-
Right the leather dash should not be shiny. Take some leather cleaner and sponge it clean. Make sure the finish is nice and flat when you are finished. Then take some leather conditioner and rub that in. After 10 or so min take a clean dry cloth (Lint free) and wipe it all down. It will look better than new. As far as the chemicals.... Sonus is great ($22 for the kit) http://www.autopia-carcare.com/ Lexol is sold at dealerships www.lexol.com Just some to get you started.
-
Or see if the dealership that you bought the car will sell you an extended warranty.
-
http://cgi.ebay.com/ebaymotors/ws/eBayISAP...839212&rd=1 Porsche 911 S Engine NEW 2005 - 2006 997 3.8L S Item number: 230161839212