Jump to content

Welcome to RennTech.org Community, Guest

There are many great features available to you once you register at RennTech.org
You are free to view posts here, but you must log in to reply to existing posts, or to start your own new topic. Like most online communities, there are costs involved to maintain a site like this - so we encourage our members to donate. All donations go to the costs operating and maintaining this site. We prefer that guests take part in our community and we offer a lot in return to those willing to join our corner of the Porsche world. This site is 99 percent member supported (less than 1 percent comes from advertising) - so please consider an annual donation to keep this site running.

Here are some of the features available - once you register at RennTech.org

  • View Classified Ads
  • DIY Tutorials
  • Porsche TSB Listings (limited)
  • VIN Decoder
  • Special Offers
  • OBD II P-Codes
  • Paint Codes
  • Registry
  • Videos System
  • View Reviews
  • and get rid of this welcome message

It takes just a few minutes to register, and it's FREE

Contributing Members also get these additional benefits:
(you become a Contributing Member by donating money to the operation of this site)

  • No ads - advertisements are removed
  • Access the Contributors Only Forum
  • Contributing Members Only Downloads
  • Send attachments with PMs
  • All image/file storage limits are substantially increased for all Contributing Members
  • Option Codes Lookup
  • VIN Option Lookups (limited)

kbrandsma

Contributing Members
  • Posts

    1,103
  • Joined

  • Last visited

  • Days Won

    8

Everything posted by kbrandsma

  1. The relacement bulbs are the same for both. They are H7 (55 watt) bulb. You can pick them up at any auto parts store like AutoZone, NAPA etc. In the front trunk is usually a tool kit, actually a roll up pouch (somewhere around the spare tire or under cover for the spare) that contains the OEM wrench that came with the car that is used to pop the light out. If you don't have the wrench it is a 5mm size socket. The link that Loren gave you (page 218) above will explain how to pop the light out with the wrench. Good to see a fellow Washingtonian on Renntech. Are you from Tacoma or from Snohomish County? OEM wrench
  2. If the front mount has never been changed in your 99 Boxster, that's probably the best place to start. How many miles does it have? There is a DIY in the 986 DIY Tutorial Section that might be worth a look. It is not difficult. Keep us posted!
  3. Here are a couple of shots of the installed LED lights. The first photo is from the driver's side taken from the floor matt looking straight up. The light is attached to the bottom of the horizontal vent tube. The wire leads continue along the vent tube and then go through the center console and above the foam cover on the passenger's side. The second picture is the exact same shot on the passenger's side. The red/black wire leads on the passenger's side go through an opening I made with a pencil through the foam cover. To make sure there was good adhesion I used my heat gun to warm up the 3M tape as well as the tube and foam pad. You can see on the passenger's side that there is a natural channel that the lights are attached in. Driver's Side: Passenger's SIde I stand corrected. The cost was $15.99 not $8.00 for the pair and they are 8" long. I knew there was an eight in there somewhere. Below is a shot of an unopened package at AutoZone. You can also see where you can cut them to make them shorter. The next photo shows the thickness and the last shot is taken at night from the driveway with the car's parking lights on. They give you a good idea on how bright the LED's are when compared with the door lights.
  4. I purchased them from AutoZone for about $8.00. There are two (2) in a set. I have also seen them at PEP Boys. I'll snap a picture of them installed and post. They are each about 6" long and have 6 LED lights each. You can cut them in half at a determined spot that is clearly marked on each light. Each light has about 3 feet of lead wire attached. In the package they have a battery pack attached that allows you to test them before purchasing. They also come in other colors like blue, red or green. They are very thin (about the thickness of two quaters.)
  5. Yeah, and keep the door sills clean to as well!
  6. I recently decided to place some bright white LED's in both the driver's side and passenger's side footwells of my '98 Boxster. The lights are super thin and come with a 3M adhesive. I placed the driver's side LED strip on the vent tube that runs horizontally and the passenger's side LED strip accross the bottom of the footwell foam cover in the natural grove channel. The foam cover is held in place by 2 screws with large heads. Both sets of lights are wired together and are joined together on the passenger side above the foam cover (and now new LED light) and connect to two (2) wires, positive and negative, that run up the passenger's side "A Pillar" trim piece, then accross the top and connect to the center interior light. The positive is soldered into the "Y" shaped copper rocker inside the light switch and the negaitve is wire tapped into the center wire entering the switch. It has the same off/on properities as the door lights with the added flair of manual on/off by turning on the center interior light. The center interior light and now footwells can be always on, always off and door and locking activated. Here is a shot of the driver's side in my darken garage.
  7. The 996 and 997 have totally different front ends, lights and bumpers. I think it can be done, just takes fender and hood upgrades as well. 986 front end 987 Front end
  8. Try one of the reputable used part yards like Oklahoma Foreign or LA Dismantler Los Angeles Dismantler for Porsche 911, Boxster, Cayman & Cayenne 9819 Glenoaks Blvd, Sun Valley, CA 91352 (818) POR-SCHE (767-7243) info@911pcar.com or 911pcar@gmail.com 818-768-0911 fax http://911pcar.com and http://ladismantler.com To contact Oklahoma Foreign: For general information: info@oklahomaforeign.com For Parts request: parts@oklahomaforeign.com By phone: 800.462.2446 800.462.2446 (Toll Free)
  9. :welcome: It also sounds like you have a bad battery. I would remove the battery and take it to AutoZone, PEP Boys or similar and have them load test the battery. If you have a way to check for any fault codes. Sometimes places like AutoZone will loan you a code reader. Although they typically only catch emission codes. Not a reliable as a Durametric or other Porsche specific reader. Fault Code 1602 indicates a bad battery. What year of Boxster is it? Tip? S? 5 speed? It is helpful to include specs on future posts. Welcome again and maybe someone else can chip in on immobilisor possibility.
  10. I'm mistaken. The original tool is 8mm outside (allen wrentch) and 5 mm inside (socket). I never leaned over and looked through the opening in the trunk to determne what the tool was turning. OEM Tool Closer look Definately 5mm socket
  11. Yeah, it's a number 8 (hexagon) metric allen wrentch. A socket is female, you need a male allen wrencth. Probably more AutoZone than HomeDepot though.
  12. I add a Techron fuel treatment everytime I change the oil. I am currently pushing 110K miles.
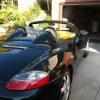
  13. :welcome: Looks great. I like the front bumper! Looks like smoked rear taillights. Tell us more!
  14. Seems to high. Are they charging you twice for labor? Once for the RMS and then again to remove tranny? Just asking?
  15. Yes, a smoke machine is the preferred way to go. A good Indy or shop should be able to do this locally and reasonably. If you end up purchasing one yourself and doing a DIY, let is know. A good write up will be very helpful! Good luck!
  16. Thanks! 3. RMS was replace just over a year ago at 30,700 miles with a new clutch. Odometer just turned 35,000 so I hope that's not it. From what I read here, RMS would dead center of the engine. This is the drivers side. You can see it just behind the wheel well. 4. I'll do some searches for IMS, but the car runs perfectly from what I can tell. Smooth and fast with plenty of power. I will also explore 1 & 2. cab It is also advisable to clean up the oil and then monitor it closely to determine the exact source. RMS's can also re-offend. I'm not sure where the oil cooler is located on your 996.
×
×
  • Create New...

Important Information

We have placed cookies on your device to help make this website better. You can adjust your cookie settings, otherwise we'll assume you're okay to continue.