Welcome to RennTech.org Community, Guest
There are many great features available to you once you register at RennTech.org
You are free to view posts here, but you must log in to reply to existing posts, or to start your own new topic. Like most online communities, there are costs involved to maintain a site like this - so we encourage our members to donate. All donations go to the costs operating and maintaining this site. We prefer that guests take part in our community and we offer a lot in return to those willing to join our corner of the Porsche world. This site is 99 percent member supported (less than 1 percent comes from advertising) - so please consider an annual donation to keep this site running.
Here are some of the features available - once you register at RennTech.org
- View Classified Ads
- DIY Tutorials
- Porsche TSB Listings (limited)
- VIN Decoder
- Special Offers
-
OBD II P-Codes - Paint Codes
- Registry
- Videos System
- View Reviews
- and get rid of this welcome message
It takes just a few minutes to register, and it's FREE
Contributing Members also get these additional benefits:
(you become a Contributing Member by donating money to the operation of this site)
- No ads - advertisements are removed
- Access the Contributors Only Forum
- Contributing Members Only Downloads
- Send attachments with PMs
- All image/file storage limits are substantially increased for all Contributing Members
- Option Codes Lookup
- VIN Option Lookups (limited)


kbrandsma
-
Posts
1,103 -
Joined
-
Last visited
-
Days Won
8
Content Type
Profiles
Events
Forums
External Paint Colors
Downloads
Tutorials
Links Directory
Collections
Store
Everything posted by kbrandsma
-
I had a similar problem. I took it to the dealer (Roger Jobs in Bellingham) and I was told there are 22 different key numbers. They kept trying each one until they found the right one, then they had to special order it. It took less than a week and cost me $24 plus shipping.
-
996 CDC-3 Changer Install
kbrandsma replied to roperin's topic in 996 Series (Carrera, Carrera 4, Carrera 4S, Targa)
Thats exactly what i need to know, I was trying to get ahead of myself because i don't receive this unit until the 8th of this month, so i don't know what exactly i am going to get but the unit is supposedly in original package, unopened. Can I get back to you when i receive it? I'll photograph what i receive and get together with you on installation, perfect ! Bob Leslie Sure PM me when ready. We'll post progress for future use. -
996 CDC-3 Changer Install
kbrandsma replied to roperin's topic in 996 Series (Carrera, Carrera 4, Carrera 4S, Targa)
I have done the CD Changer for a CDR 220 radio. I have photos for cabling information to the back of head unit if needed. What cables, brackets, etc came with your purchase? -
mesh wind "blockers" useful?
kbrandsma replied to Jinster's topic in 986 Series (Boxster, Boxster S)
I think the mesh wind blockers located between the roll bars actually do reduce the wind and noise inside the cabin. To prevent an easy theft or to keep them from blowing out, I would suggest using cinch ties to keep them in place. I used white in the photo to make them visible. When the ties are the same color as the mesh or rollbar and the extra tail cut off, you can't see them. -
Not sure if you are replacing the entire barrel unit. If so, I highly recommend also removing the gauge cluster and steering wheel plastic skirts. It really simplied the replacement for me.
-
Jack pad question
kbrandsma replied to Jon996's topic in 996 Series (Carrera, Carrera 4, Carrera 4S, Targa)
I have the exact same jack pad. First $30.00 takes it. -
Both the AMP and the Stock CD Changer are in the front trunk behind and above the spare tire.
-
White smoke (James Bond style) coming from tailpipe
kbrandsma replied to sobefun's topic in 986 Series (Boxster, Boxster S)
Sounds like the AOS has gone bad. Run a search on AOS (Air Oil Separator) using the search feature on this Board. Here is a link to Mike Focke's Web Page PRESS HERE -
Radar detector installation
kbrandsma replied to teamwenz's topic in 986 Series (Boxster, Boxster S)
I stand corrected. It is the unused harness for the OEM Cell Phone (not PCM) as JFP in PA suggests. Great Pictures JFP! Here is a photo shot of my current setup with the power cord running to the lighter socket. You can see it is a very short distance to the instrument cluster behind the 4 way. I ordered the needed wiring harness from Escort. Here is a LINK to the harness. -
Radar detector installation
kbrandsma replied to teamwenz's topic in 986 Series (Boxster, Boxster S)
I have the same unit and thought about a more permanent installation as well. I'm not sure the dome light is the best place to get power from however (fuse capacity). I was thinking of taking power out of the center console and running up and out of the back of the gauge cluster directly behind the 4-way flasher. There would only be a short wire exposed and it would be on the same side that the 9500ix requires. In the console at the bottom there is switched and unswitched power supplies from a unused PCM wiring harness or you can also run power directly from a spare slot in the fuse panel. To remove the gauge cluster you only need to loosen 2 easy to get at torx screws. I had the gauge off a couple of times. Once to install the OBC 4 way stalk and the other to place a microphone in the OEM microphone slot. The torx screws are loacted behind the 4-way flasher. Push 4-way to have it extend out and pull. The other is behind the microphone slot on the left hand side. Need a plastic uphostery tool to pry the round mesh cover out. -
Is the creaking sound inside the cabin underneath the airbag on the steering wheel?
-
How to Remove the Front Bumper
kbrandsma replied to Loren's topic in DIY Articles - Carrera (996) - Maintenance
I replaced my horns with a set from Griot's Garage. LINK HERE. I followed a thread on horns not to long ago, that included a post from Loren that was very helpful. Thread Here. Since the installation I have had several instances where the extra loud horn came in extremely handy. Good luck and good choice! -
clutch replacement/rear main seal
kbrandsma replied to masterbm's topic in 986 Series (Boxster, Boxster S)
+1 on the IMS Bearing -
Is the code active? Some alarm codes just have a counter that you can't reset. Reset the code with a Durametric and see if it comes back and the count frequency increases by 1.
-
Bubbling sound in the rear trunk
kbrandsma replied to dezpimpdada's topic in 986 Series (Boxster, Boxster S)
If your cap ends in 01, It should be replaced. I replaced mine last summer and I believe they end in 04 now. -
clutch replacement/rear main seal
kbrandsma replied to masterbm's topic in 986 Series (Boxster, Boxster S)
I have one. I had it made. I also have a short 10mm triple square you can use. The Porsche Tool however, determines the tolerance in the opening to help see if a new RMS will keep. My RMS wasn't leaking bad so I figured it wasn't to far out of center (eccentric) and it wasn't going to be an issue for me. Worked for me. Let me know. -
Horn works but alarm does not chirp when armed
kbrandsma replied to UtahWJR's topic in 986 Series (Boxster, Boxster S)
SOme leave the radio wire shorted out which will cause the same thing as leaving the armrest compartment open. -
Here is a link with some info that should help. PRESS HERE Also: 1. Make sure battery is disconnected and keys out of the ignition 2. Invest in a long T30 screw driver for removing air bag screws 3. The airbag screws where really tight and I used a pair of vice grips to gain additional leverage 4. After removing airbag turn steering wheel and front tires dead center before removing the steering wheel for reference on re-install Very straight forward and an easy DIY Project.
-
Glass Top and Rear Speakers
kbrandsma replied to imback's topic in 986 Boxster Convertible Top Issues and Solutions
Shoudn't be a problem. -
Coolant escaping through vent line
kbrandsma replied to saxman61's topic in 986 Series (Boxster, Boxster S)
Leave your coolant breather locking clip open, Section 19 of Bentley Service Manual. -
It is approximately 86 3/8 inches or 2193.9249999999997 mm
-
Gaps are 6mm on the clam shell I sent you a PM with more details.
-
Hi Bruno, Not sure exactly what you want. On the door the gap dimensions are: front side (under mirror) - 5.0 mm bottom - 4.4 mm back side (next to vent) - 4.0 mm What do you mean by small lid? Rear trunk?
-
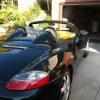
Very nice indeed!
-
It's been a year or more and don't remember.
