Welcome to RennTech.org Community, Guest
There are many great features available to you once you register at RennTech.org
You are free to view posts here, but you must log in to reply to existing posts, or to start your own new topic. Like most online communities, there are costs involved to maintain a site like this - so we encourage our members to subscribe or donate. All subscriptions and donations go to the costs operating and maintaining this site. We prefer that guests take part in our community and we offer a lot in return to those willing to join our corner of the Porsche world. This site is 99 percent member supported (less than 1 percent comes from advertising) - so please consider an annual subscription or donation to keep this site running.
Here are some of the features available - once you subscribe RennTech.org
- View Classified Ads
- DIY Tutorials
- Porsche TSB Listings (limited)
- VIN Decoder
- Special Offers
- Paint Codes
- Registry
- Videos System
- View Reviews
- and get rid of this welcome message
It takes just a few minutes to register, and it's quality Porsche information at a low cost.
Contributing Members also get these additional benefits:
(you become a Contributing Member by subscribing or donating money to the operation of this site)
- No ads - advertisements are removed
- Access the Contributors Only Forum
- Contributing Members Only Downloads
- Send attachments with PMs
- All image/file storage limits are substantially increased for all Contributing Members
- Option Codes Lookup
- VIN Option Lookups (limited)


HenryV
-
Posts
118 -
Joined
-
Last visited
Content Type
Profiles
Events
Forums
Exterior Paint Colors
Downloads
Tutorials
Links Directory
Collections
Classifieds
Store
Everything posted by HenryV
-
Burnt plastic smell
HenryV replied to andes's topic in 996 Series (Carrera, Carrera 4, Carrera 4S, Targa)
Clutch? -
You mean the clock adjustment button (to the right of the tachometer). Turn it left and hold for 5 seconds - that should switch from Miles to Km and back. (Ignition should be on). If you have the OBC, you can use the "SET" function to select Miles or Km in the display functions.
-
clock spring...help
HenryV replied to GoMo's topic in 996 Series (Carrera, Carrera 4, Carrera 4S, Targa)
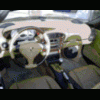
I have to look for an old post somewhere, but the noise you mentioned reminded me of an incorrectly positioned steering column assembly. If you look at TP's picture, you can see the gray housing that holds the unit in place. This unit can be moved up and down on the shaft. If you put it too far down on the shaft, the steering wheel column will make a ticking, or grinding noise when turning, because it is hitting the 'clock spring'. The solution that I am aware of is to move the entire assembly towards you (higher up on the shaft) to allow sufficient clearance underneath it. Greasing will not solve this problem. -
Headlights - the plastic will melt into an ugly yellow/brownish hue. Check with different bulb manufactures, some manufacturers sell their 50W light bulbs with an advertised 80W-100W output (e.g. PIAA). They do this by changing the filament, so more of the light is put forward, rather than scattered. Do not use 80W-100W bulbs.
-
Swap for CGT key
HenryV replied to bavarian's topic in 996 Series (Carrera, Carrera 4, Carrera 4S, Targa)
I was told the same thing for the MY00 boxster - the car receiver cpu can be programmed to only two remote keys. The ignition can be programmed to more keys. Dealer mechanic (Anderson-Behel) gave up on programming an extra key - I now have an extra key (with remote head) that starts the car, but does not unlock the doors remotely, essentially a second valet key. If you get the GCT remote key head you can get it programmed, but one of your current keys will stop working. But newer model years may have this restriction lifted, I don't know about those. They also have three buttons (one for the front hood latch). I'd check with Suncoast - they sell this key on their website: CGT key head at Suncoast -
Try Plexus, I have been very pleased with it. It seems to work on cloudy spots - but I haven't really had any trouble yet. Some people say that heat (mild heat - e.g. hair-dryer, or better, summer-sun) is sufficient to clear the plastic, then use Plexus to keep it clear. My car is the left most in the pic below (foreground).
-
Cleaning the motor (outside and underneath)
HenryV replied to scherb's topic in 986 Series (Boxster, Boxster S)
Wow - I have heard about people making their cars lighter, but this is the first one that actually 'floats' :clapping: -
Ask Horst on the Becker board, he should be able to help you out: Becker Board.
-
I assume that you have the CDR-220. The CDR-23 does not have a (user) code. Some dealers put the code on the inside for the hood (next to the option codes). I think Porsche recommended dealers to start doing this also for cars that came in for service for the last year or so. If you have the manuals, check for a loose card - it should have the (4 digit) number on it. Some owners stick it in the radio manual or write it inside this manual. Flip through the cover, maybe some pages and look for a 4 digit number. It won't be on the radio, but you'll need the unit's serial number (with VIN number) for the dealer to look up the radio code.
-
Looks like the metal cross members got a lot thicker ... for the added horsepower? Or are the ones we have considered weak?
-
Remote control in USA ??
HenryV replied to wilhelmy-it's topic in 996 Series (Carrera, Carrera 4, Carrera 4S, Targa)
American litigation. On american car models even the one-touch window feature originally worked only in the down mode - so you would not catch someones (maybe your own) head. New pressure sensors (that feel resistance) stop the motion and have gotten the approval from corporate lawyers to be used - see the electric sliding doors in minivans, self-opening/closing rear hatches, third row seats, and now also - convertible tops. Anyone see this commercial (right-click with save-as if doesn't open)? Ford's UK SportKa commercial -
Need break in tips for new Boxster
HenryV replied to HEDDOK's topic in 986 Series (Boxster, Boxster S)
So does mine: -
Need break in tips for new Boxster
HenryV replied to HEDDOK's topic in 986 Series (Boxster, Boxster S)
Porsche engines are 'factory broken in' meaning that they already have been duty cycled. Breaking in means smoothening (or grinding out of) pistons, bearings, camshaft, etc. to run with minimum resistance. They have all been manufactered within certain tolerances, but they need to 'settle in' inside the egine. Most of this occurs within the first few hours of running the engine. By manufacturers already doing part of this in the factory, they avoid most user problems. The 1,000 mile, commonly referred to, translates to about 30 hours of operating the engine for most of us. This is a large enough margin. During these first hours, the engine can locally overheat and deform, rather than form a smooth interior. These deformations can impact engine life and reliability. Typical causes for local overheat: over-revving the engine when it is cold (no oil yet), over-revving upon down-shift (insufficient oil), under-revving (hard braking), constant RPM cruising in first few hours (you'll get uneven hp response curve), high rpm (hard acceleration or speeding in lower gear). As the engine settles in, local resistance (and local heat) risks become smaller and smaller. To us it means treat the engine like a baby during the first 1,000 miles. No hard acceleration, especially when cold, no hard down-shift, no hard braking (with engine engaged), no constant and no high rpm cruising (change gears and/or speed all the time), no long idling. Other than than you can pretty much drive the car as you would drive any other car (but try to avoid the hard acceleration for at least the first 100 or 200 miles). Also, try to avoid short trips - it takes the engine about 20 minutes to heat up thoroughly. All other gear on the car is also new and needs to settle in. Steering, suspension, clutch, transmission, etc. Being easy on the car during the first 1,000 miles avoids future problems on these items as well. 1,000 miles is just an easy number to remember. Most critical are the first few hundred miles. In the old days, you had to run the first few hundred miles with an organic oil and then drain the oil to remove the sediments (grinds), and replace it with a synthetic oil. By the manufacturer 'breaking in' the engine they avoid this step for you as a customer. If you do get a remanufactured engine, I would still do this step. -
Oil level display somtimes stays on
HenryV replied to doughep's topic in 986 Series (Boxster, Boxster S)
Happens to me to. I vaguely remember that if you refuel with a warm engine, the oil levels are checked again and in this case the display stays on for several minutes. I also remember it staying on once a while during a cold start without any reason (oil levels are fine) - maybe it depends on how quickly you start rolling the car or the system does an automatic 'refuel check' every so often. -
more needy suspesion/wheel questions
HenryV replied to Darkshark's topic in 986 Series (Boxster, Boxster S)
Where do they put the Boxster with a 3.4L engine? Same class (stock) or custom? -
Cleaning the motor (outside and underneath)
HenryV replied to scherb's topic in 986 Series (Boxster, Boxster S)
Nice - do you have the plastic (see-through) engine cover to go with that? Before the Anderson-Behel location became a Porsche-Audi dealer, they use to carry Pontiac. Their service (at that time) was great -- I had purchased a Pontiac there and each time I brought the car in, they would steamclean the engine. Steamcleaning works great - the engine compartment looked like that of a brand-new car.Now I hear that with all the rubbers, etc., any type of cleaning has negative side-effects. Steam-cleaning is no longer popular. Best is to use lots of water and a mild soap to loosen the dirt. Make sure you rinse away any detergent you use. I guess Loren's suggestion is a good one to start with. Also look into degreases (Simple Green, All Purpose). But be careful, I have been reading here and on other boards that you may inadvertently 'loosen' plugs, connectors, sensors, etc., and start having gremlins in your car. Take a look at the Porsche recommended cleaners, and then look for similar products in the local autostore: Porsche Car Care Products Also, check out these sites: DIY - Engine Cleaning Engine Cleaners, water rinse Electric Steam Cleaners But be forewarned: "Degreasers and engine cleaners will strip your fresh finish off faster than a bug splatting against a windshield at 70 mph" Cleaning the car and engine -
Navigation System
HenryV replied to Draol's topic in 9PA, 9PA1 (Cayenne, Cayenne S, Cayenne Turbo, Cayenne Turbo S)
If you know the restaurant's name - call 411 I'm sure the restaurant will give you the address. -
more needy suspesion/wheel questions
HenryV replied to Darkshark's topic in 986 Series (Boxster, Boxster S)
Bilstein PSS9 are very impressive, albeit pricey. You want the lightest and strongest wheels. I'd go with the one-piece alloy - e.g. the OEM Carerra 5-spoke. If you get the 996 dimensions (8" up front versus 7.5" and 10" in rear versus 9") you'll get a slightly wider rim (same tire width) which may help you - but the rears require a spacer - check whether your class allows this or not. You can get the sport techno 18" in 11" width, allowing wider rubber, but they get very pricey. Check with the Wheel Enhancement guys - maybe they can recommend a light aftermarket wheel. -
Thought I'd share this with everyone. Useful if you are thinking about using your Ipod in the car: (Hint - click on the underlined links) Supposedly you can 'cheat the system' if you have a CD Changer using the CD-audio in connectors Cheating the 210/220 by using the CD audio cables for MP3 feed Another version of this bypass method MP3 (not Ipod) hookup, showing same method Use the telephone input - should work on CDR-220 and CDR-23. Don't know about the 210, but you can ask them A place to order the Aux-input cable but also :"For these units, Becker also sells a kit with an adaptor cable and tools for under $20 that lets you hook up an external sound source such as the iPod to the aux in, and you can select it on-screen after enabling aux in via the TP menu. (Part number 1319.116-276 from the Becker parts department at (888) 423-3537 x1209.)" Disccussion (2000) regarding the MPEG feed in using the Aux/Phone cable connector Warning that Becker is not compatible but - supposedly doesn' t work yet with Becker Icelink 1.1 car kit and Non P-car Icelink 1.1 review Alternatively A new device, unsure what it does with Becker - PAC AUX-POD I don't know what this is Becker mini ISO aux input - useable? Reference to Leo Monney (redwood city) - he could answer questions Archived discussion and Monney website The tried and true - FM transmitter Monster Cable FM transmitter
-
e-brake microswitch replacement procedure
HenryV replied to troomi's topic in 986 Series (Boxster, Boxster S)
Hi Tariq, did you try yanking the handbrake lever a couple of times? It often resets the switch if it tends to get 'stuck'. This may be a good time to do the Handbrake (Pin #15) Hack (I did the hack when I installed the one-touch top down - bahntech unit) If you replace it, it is only a $5 part. But you have to remove the entire console to get to it. You don't have to unto the handbrake assembly. Just lift up the handbrake, you should be able to find the switch underneath the brake handle - just pull out the connector, replace the switch and put the connector back in. The switch is not visible in the picture. -
Not at all - in my case I ended up taking the pin for the fog light out of the connector. That way I can solder the lead to the lamp to the running lights (rendering the fog-light switch useless). If you would like to keep the foglight feature, you can opt for a double-pole light bulb (both brake/fog and running light) and you have to make the harnass fit this. It is technically not too difficult, you just have to figure out how to make a custom harnass.
-
Help on replacing factory radio
HenryV replied to yipster's topic in 986 Series (Boxster, Boxster S)
Copper. As to the fiber optic plug - as Jeff points out this is a dual channel: one fiber coming in and one fiber coming out. The fiber channel forms a loop (MOST bus), and all the components are plugged in the same way (in and out). This may be a single connector, combining both channels in one plug. I believe all components, Radio, AMP, CD-changer and instrument cluster communicate over the bus with each other. I don't know if the radio has the internal amp/pre-amp still present. If so you should be able to activate the pins on the back. I guess you'd have to measure the pins, and if no signals, open the unit to find out. -
Possible Explanations for Brake Squealing?
HenryV replied to Jameslovesporsches's topic in 986 Series (Boxster, Boxster S)
Just don't drive afterwards with wet brakes :o FWIW - this applies to stock pads - using them (brake hard) seems to remedy the squeel. The inverse, not braking hard (easing in) seems to cause the squeel. My $.02. -
As I understand it, the -06 was the first ending, beginning with MY-97. This was upgraded to -07, valid until MY-03. Beginning with MY-04, the extension started as -14. Don't know about -16. (BTW- both 986 and 996 models share the same part, there is no 986/996 difference). If you have a pre-04 model, I assume you will need -07. If you have a MY-04 model, I assume you will need -14. There is a TSB on required upgrades to a 1997 for fitting 18" rims, as certain parts have to be reinforced. I don't know off-hand if the control arms were part of this and need replacement. Maybe somebody else can comment. Also call the parts department at the dealer, they can confirm any of this quite easily.
-
Proper offset for an 18x10 wheel
HenryV replied to Kevin369's topic in 986 Series (Boxster, Boxster S)
From the Christophorus 310 issue (10/11 2004), page 63: 986 18" Carrera wheel: 9Jx18 - ET 52 996 (I) 18" Carrera wheel: 10Jx18 - ET 65 but 996 (II) 18" Turbo look II wheel: 10Jx18 - ET 47 (but - doublecheck the Christophorus numbers - last time they recalled them) The 10J is 1" wider than the 9J, so it adds 1/2" to the offset (12.7mm) Check the ET on your 10Jx18 wheel as well as the ET on your 986 9Jx18 wheel. If your 986 ET is 52, I suggest you subtract (52-12=) 40 from that number: e.g. ET 65 -> 25mm spacer (I) and ET 60 -> 20mm spacer and ET 55 -> 15mm spacer and ET 47 -> 7mm spacer (II) and so on. You can be off by +/- 5mm for most fits, they will still fit fine. If you want to make absolutely sure, get underneath your car and measure the shortest distance (plane to plane) from the wheel well to the outside tire/rim, and from the strut/shock and brakeline to the inside tire/rim. If both numbers are identical, you have the tire mounted dead center. If one of them is off, you can adjust the spacer by half that amount (if outside is larger than inside, you add, otherwise you subtract). Be aware that the tire under heavy load (aggressive cornering) will tip inwards