Welcome to RennTech.org Community, Guest
There are many great features available to you once you register at RennTech.org
You are free to view posts here, but you must log in to reply to existing posts, or to start your own new topic. Like most online communities, there are costs involved to maintain a site like this - so we encourage our members to subscribe or donate. All subscriptions and donations go to the costs operating and maintaining this site. We prefer that guests take part in our community and we offer a lot in return to those willing to join our corner of the Porsche world. This site is 99 percent member supported (less than 1 percent comes from advertising) - so please consider an annual subscription or donation to keep this site running.
Here are some of the features available - once you subscribe RennTech.org
- View Classified Ads
- DIY Tutorials
- Porsche TSB Listings (limited)
- VIN Decoder
- Special Offers
- Paint Codes
- Registry
- Videos System
- View Reviews
- and get rid of this welcome message
It takes just a few minutes to register, and it's quality Porsche information at a low cost.
Contributing Members also get these additional benefits:
(you become a Contributing Member by subscribing or donating money to the operation of this site)
- No ads - advertisements are removed
- Access the Contributors Only Forum
- Contributing Members Only Downloads
- Send attachments with PMs
- All image/file storage limits are substantially increased for all Contributing Members
- Option Codes Lookup
- VIN Option Lookups (limited)


dphatch
-
Posts
233 -
Joined
-
Last visited
Content Type
Profiles
Events
Forums
Exterior Paint Colors
Downloads
Tutorials
Links Directory
Collections
Classifieds
Store
Everything posted by dphatch
-
Very nicely done. Have been contemplating this project and your DIY and pics covers everything so clearly that anyone could tackle the project. For the grill material attachment why not an epoxy adhesive vs. the screws ?
-
PCM error: cannot read DVD
dphatch replied to porsche356's topic in 997-1 Series (Carrera, Carrera 4, Carrera 2S, Carrera 4S)
Might not be under warranty . . . . It's a European location and they have different warranty terms then we have in the US. OOPS ! My bad. I'm sure you're correct. I got 4 years with my '07 and thought that was standard for Porsches in the states, passing on to the new owner when the car was sold. I missed the Netherlands address altogether. :o -
PCM error: cannot read DVD
dphatch replied to porsche356's topic in 997-1 Series (Carrera, Carrera 4, Carrera 2S, Carrera 4S)
Cars under warranty. Take it to the dealer and let them fix it . -
That's an interesting point but if the battery is disconnected is the circuit to the jump lug still active ? Buddy of mine has '99 that he removed the battery from for the winter and then closed the hood. When I suggested using the jump lug I starting thinking about it and then wasn't sure if it would work with both the positive and negative battery leads disconnected. Told him to use the wire located under the bumper that's there expressly for emergencies. Have you ever tried to open the hood this way with the battery out of the car ?
-
You could remove that battery and put it somewhere you can safely store it with a trickle charger attached.Only issue would be opening the front lid once it it has been closed without the battery hooked up, which due to the fact that is actuated electrically , won't work. The lid can be opened mechanically.Check your manual for details concerning opening the hood in this fashion. I would test the procedure prior to battery removal so that you're comfortable with the process and worry free knowing you can open it without the battery in the car before you remove it. No other solution I know of short of driving it regularly.
-
Weird steering
dphatch replied to AIB's topic in 997-1 Series (Carrera, Carrera 4, Carrera 2S, Carrera 4S)
Could be ball joints, but on a 4 year old car that would be very usual unless the car hit a curb or something. Could be the steering knuckle but again that's a pretty robust part that isn't likely to fail on such a young car. Tires might make the problem worse but wouldn't likely be the cause of the problem. Could be the steering pump. Whatever it is, it isn't safe to be driving the car. I'd have it looked at immediately by someone who can diagnose and repair it in short order. -
Inserted CD Upside Down!
dphatch replied to 355bhp's topic in 997-1 Series (Carrera, Carrera 4, Carrera 2S, Carrera 4S)
According to the fuse diagram list, there is a fuse for the PCM, and it's in Row D, F9. The diagram says that it's supposed to be a 7.5 amp, but there's a 10 amp in its place. Anyway, since the diagram was a bit confusing to me at the time (it still kinda is, but that's for another topic), I didn't pull any fuses, replaced the cover and started the car. I hit the Eject button for yells, and out came the CD! And it WASN'T upside down! Actually, I hit the button as soon as the PCM screen lit up and before the Main came up, and hit the button again after it did. Maybe all it took was for the ignition to be off overnight (or even momentarily), and of course, for the CD to be right side up! Glad to hear you solved the problem. Hope it was just a temporary gremlin. -
Invisi-Bra?
dphatch replied to bushmg's topic in 997-1 Series (Carrera, Carrera 4, Carrera 2S, Carrera 4S)
I installed the clear bra on my '07 C4S with the help of my oldest son and, while it was a challenge requiring some degree of patience, it came out pretty well. With that said, the 3M film I used may not have been as thick as the stuff the pros use which makes it easier to apply but might compromise its protective qualities somewhat.It came pre cut for my specific model for about $ 350.00. It covered the front bumper, hood, front fenders and mirrors. Overall I'm, pleased with the way it came out and unless you're looking for it you can't really see it. Keep in mind I put it on because the fabric bras are ugly, combersome to install and remove and shouldn't be left on the car all the time. The clear bra eliminates all those issues for all but the terminally anal. My install had a few flaws but they are preferable to chips in the front bumper which, after 6 months with the clear bra, I do not have. The following link is to an technical article about the clear bra film and is interesting reading. www.automotivearticles.com/Clear_Bra_3M.shtml -
Inserted CD Upside Down!
dphatch replied to 355bhp's topic in 997-1 Series (Carrera, Carrera 4, Carrera 2S, Carrera 4S)
Might want to check the fuse diagram list that's attached to the fuse cover in the driver side footwell but in the earlier cars the PCM fuse was located on the back of the PCM which would require its removal. -
All that's required are the mounts that bolt on to the car that receive the locks on the top. Mounts are specific to the locking pins on the car but for the '00 to '04 tops the parts numbers were 996-561-653-03 and 996-561-654-03. Mounts are left - right specific with the left mount having the electrical connection for the rear defroster included. Electrical hookup is plug and play as the 997 includes the harness for the defroster connection. Do you have photos of the parts inserted into the vehicle? I don't have pics of the mounts but if you look in the 996 PET for the hardtop they show all the parts including the mounts . First, thank you so much for all your help and time. As I want to make sure I purchase the correct items, I wanted to confirm the parts you listed. 996-561-653-03 and 996-561-654-03. The dealer said they were the wrong part as I needed the 997 numbers. I figured they wanted me to purchase the 997 parts so I would have to buy a $5,000 997 top. Second, the 996 parts will fit into my 2006 997? Third, the dealer was quoting me $225 per part. I believe you said you purchased them for $125 each. Where did you buy the parts? Thanks in advance, Randy With all due respect to your dealers parts guy, if all he/she is doing is looking at the 997 PET they are going to see the 997 part numbers which end in .04 which will not work with the locking pins on the older 996 tops. I did a good deal of research on it and even the Sunset guys weren't sure if it would work when I ordered the parts. The part numbers I listed and you show in your post, which end in .03, are the part numbers I installed in my 2007 C4S Cab for a top from a 2003 996 Cab. I purchased them from Sunset Imports (think I originally said in one of my earlier posts Suncoast, my bad) ) for $ 122 and change each. (shipping was extra) So long as the locking pins on the top are not the new threaded type ( looks like the threads on a bolt or screw) which would have had to be retro fit to a 996 top, than these are the part numbers you need if you are using an older 996 top. These locks have two pins sticking out from the sides of the end of the locking shaft which force themselves into the spring loaded mount. Should have taken pics of the install but it is simply a matter of removing the trim piece that covers the roll bars, removing the two black plastic spacers on either side and using the bolts that held in the spacer, plus one you'll need to supply, to bolt in the mounts which are marked left and right. It is not a complicated install. I'm sure I got that info from this site in the TSB section but I could walk you through it or take a picture or two to help you get started. PM me if you go ahead with project. What is the process of removing the panel that covers the roll bars. Does it pry off or are there screw that hold it in place? Sorry it took so long to get back to you. IF you're a contributing member go to the TSB lisdting and search for hard top. There are a couple of TSB's for changing the mounts that will give you some pictures , worth a thousand words, that will make my written instructions easier to follow.The proceedure for removal of the cover is as follows: 1. Place the convertable top in the service position ( almost closed with the rear top cover still in the open position as high as you can get it. 2. Disconect the two tension cables on either side of the top. They are located very near the back of the top storage location low down on the outer panels near the top hinges. If you reach down in that area you'll feel them. The lower most end of the cable pops off the ball socket attachement points. 3. Lift up the back of the top and fold it over toward the front of the car. This section will rest on the top. 4. If you'll pull back the thin molded carpet section at the center near the roll bar cover you'll notice a single screw that holds down the center of the roll bar cover. Remove the screw. 5. Now pry off the top oblong covers directly over the roll bars. Work from the rearward side of the covers not the front side. There are three spring clips, left , center and right so if you work with a wide bladed screw driver start at one side, then the middle, then the other side and the covers will pop off. 6. Once the covers are off you'll see one screw under each cover on the outside edge. Remove them being carefull not to drop them in side the roll bar frame. Lot's of room to work here so that shouldn't be as issue. 7. The entire cover will lift off now and exposing the roll bars and the carrier frame rails where the mounts bolt in. That's all there is to it. (You can remove the entire section of molded carpeting in the top storage area if you want to but I found I didn't have to as once the rolll bar cover is off you have complete access to the area where the parts bolt in. ) You'll notice once you have the cover off two plastic zig zag shaped spacers on either side of off the roll bar carrier frame. Each is held on with 3 threaded bolts despite the fact the mounting locks require four . Take one to your favorite hardware store and you should be able to match them up. You'll need one for each side. The mounts just bolt in, in place of the spacers. Note that the mounts are marked left and right. The left one ( drivers side) has a wire attached. Once installed the wire plugs in about 4-6 inches below the mount on the back side of the frame rail it is attached too. You'll may need to pull back the molded carpet to see the plug. It's a little bit a reach but do able. Plug only goes in one way so you can't mess it up. Be sure to note where the "L" shaped attachement points for the roll bar covers go as you'll need to re-attach them when you're bolting in the mounts as they hold the roll bar cover in place with the two screws you removed from either side of the cover. Reinstalling the roll bar cover is the reverse of the removal. The cover has a channel along the front side of it to receive the trim piece that goes across the back of the car's rear bulkhead. It's easy to line up just ends to be done before you start screwing the roll bar cover back in place. THe smaller covers go in front first ( where the hard plastic positioning clips are) then push down on the backs to get them to seat in. I used the screw driver blade to apply some pressure to the springs clips to ease the covers back on. Just be carefull not to scar the fabric covering on the cover. Hi, I have just purchased a 996 hardtop for my 2008 997TT cab---thanks to your detailed explanations I knew it would fit. I also inquired from Sunset Imports about the mounts, and they confirmed they would be $122.5 per, plus shipping. The only other questions I have is this: both 996 and 997 owner's manuals talk about fitting 'both protective covers into the trim panel' covering the rollbar, before installing the top; these are designated with the letter J on the diagrams. Do you happen to know the part number for those, as I do not think the top came with them? Many thanks in advance. Most probable part number would be 996-563-421-01 as that's the only part on the PET that refers to protective cover and I couldn't find anything else in the diagram.
-
All that's required are the mounts that bolt on to the car that receive the locks on the top. Mounts are specific to the locking pins on the car but for the '00 to '04 tops the parts numbers were 996-561-653-03 and 996-561-654-03. Mounts are left - right specific with the left mount having the electrical connection for the rear defroster included. Electrical hookup is plug and play as the 997 includes the harness for the defroster connection. Do you have photos of the parts inserted into the vehicle? I don't have pics of the mounts but if you look in the 996 PET for the hardtop they show all the parts including the mounts . First, thank you so much for all your help and time. As I want to make sure I purchase the correct items, I wanted to confirm the parts you listed. 996-561-653-03 and 996-561-654-03. The dealer said they were the wrong part as I needed the 997 numbers. I figured they wanted me to purchase the 997 parts so I would have to buy a $5,000 997 top. Second, the 996 parts will fit into my 2006 997? Third, the dealer was quoting me $225 per part. I believe you said you purchased them for $125 each. Where did you buy the parts? Thanks in advance, Randy With all due respect to your dealers parts guy, if all he/she is doing is looking at the 997 PET they are going to see the 997 part numbers which end in .04 which will not work with the locking pins on the older 996 tops. I did a good deal of research on it and even the Sunset guys weren't sure if it would work when I ordered the parts. The part numbers I listed and you show in your post, which end in .03, are the part numbers I installed in my 2007 C4S Cab for a top from a 2003 996 Cab. I purchased them from Sunset Imports (think I originally said in one of my earlier posts Suncoast, my bad) ) for $ 122 and change each. (shipping was extra) So long as the locking pins on the top are not the new threaded type ( looks like the threads on a bolt or screw) which would have had to be retro fit to a 996 top, than these are the part numbers you need if you are using an older 996 top. These locks have two pins sticking out from the sides of the end of the locking shaft which force themselves into the spring loaded mount. Should have taken pics of the install but it is simply a matter of removing the trim piece that covers the roll bars, removing the two black plastic spacers on either side and using the bolts that held in the spacer, plus one you'll need to supply, to bolt in the mounts which are marked left and right. It is not a complicated install. I'm sure I got that info from this site in the TSB section but I could walk you through it or take a picture or two to help you get started. PM me if you go ahead with project. What is the process of removing the panel that covers the roll bars. Does it pry off or are there screw that hold it in place? Sorry it took so long to get back to you. IF you're a contributing member go to the TSB lisdting and search for hard top. There are a couple of TSB's for changing the mounts that will give you some pictures , worth a thousand words, that will make my written instructions easier to follow.The proceedure for removal of the cover is as follows: 1. Place the convertable top in the service position ( almost closed with the rear top cover still in the open position as high as you can get it. 2. Disconect the two tension cables on either side of the top. They are located very near the back of the top storage location low down on the outer panels near the top hinges. If you reach down in that area you'll feel them. The lower most end of the cable pops off the ball socket attachement points. 3. Lift up the back of the top and fold it over toward the front of the car. This section will rest on the top. 4. If you'll pull back the thin molded carpet section at the center near the roll bar cover you'll notice a single screw that holds down the center of the roll bar cover. Remove the screw. 5. Now pry off the top oblong covers directly over the roll bars. Work from the rearward side of the covers not the front side. There are three spring clips, left , center and right so if you work with a wide bladed screw driver start at one side, then the middle, then the other side and the covers will pop off. 6. Once the covers are off you'll see one screw under each cover on the outside edge. Remove them being carefull not to drop them in side the roll bar frame. Lot's of room to work here so that shouldn't be as issue. 7. The entire cover will lift off now and exposing the roll bars and the carrier frame rails where the mounts bolt in. That's all there is to it. (You can remove the entire section of molded carpeting in the top storage area if you want to but I found I didn't have to as once the rolll bar cover is off you have complete access to the area where the parts bolt in. ) You'll notice once you have the cover off two plastic zig zag shaped spacers on either side of off the roll bar carrier frame. Each is held on with 3 threaded bolts despite the fact the mounting locks require four . Take one to your favorite hardware store and you should be able to match them up. You'll need one for each side. The mounts just bolt in, in place of the spacers. Note that the mounts are marked left and right. The left one ( drivers side) has a wire attached. Once installed the wire plugs in about 4-6 inches below the mount on the back side of the frame rail it is attached too. You'll may need to pull back the molded carpet to see the plug. It's a little bit a reach but do able. Plug only goes in one way so you can't mess it up. Be sure to note where the "L" shaped attachement points for the roll bar covers go as you'll need to re-attach them when you're bolting in the mounts as they hold the roll bar cover in place with the two screws you removed from either side of the cover. Reinstalling the roll bar cover is the reverse of the removal. The cover has a channel along the front side of it to receive the trim piece that goes across the back of the car's rear bulkhead. It's easy to line up just ends to be done before you start screwing the roll bar cover back in place. THe smaller covers go in front first ( where the hard plastic positioning clips are) then push down on the backs to get them to seat in. I used the screw driver blade to apply some pressure to the springs clips to ease the covers back on. Just be carefull not to scar the fabric covering on the cover. Hi, I have just purchased a 996 hardtop for my 2008 997TT cab---thanks to your detailed explanations I knew it would fit. I also inquired from Sunset Imports about the mounts, and they confirmed they would be $122.5 per, plus shipping. The only other questions I have is this: both 996 and 997 owner's manuals talk about fitting 'both protective covers into the trim panel' covering the rollbar, before installing the top; these are designated with the letter J on the diagrams. Do you happen to know the part number for those, as I do not think the top came with them? Many thanks in advance. Actually I noticed the same thing but was unable to get the parts. I believe they were designed to protect the cloth covering on the roll bar covers from being damaged if you missed the mounting hole when you put the top on. As no part of the top actually rests on the roll bar cover, these protective pieces only work when the top is being installed or removed. If you find them let me know but to date I haven't had any issues installing the top so it's not a critical issue.
-
Sound doors make when closing
dphatch replied to dphatch's topic in 997-1 Series (Carrera, Carrera 4, Carrera 2S, Carrera 4S)
There is enough access to easily do it with three horizontal pieces, one above the other. Here is a photo of what it would look like: Note that this is on my Boxster, but I believe it's similar enough (or the same exact door) as a 911. Piecing it together to get full coverage is just fine. Cleaning the surface with denatured alcohol or similar solvent will insure you get excellent adhesion. Regards, Maurice. Thanks for the suggestion and the picture ( always worth 1000 words ). When the weather improves, or I heat the garage - which ever comes first, I'll give it try. Having looked at the PET as RFM suggests, and POSES, it looks to be a little more of a challenge than I expected but do able none the less. At this point it's simply a matter of time and motivation. Maybe closing it more gently isn't such a bad idea after all. -
Sound doors make when closing
dphatch replied to dphatch's topic in 997-1 Series (Carrera, Carrera 4, Carrera 2S, Carrera 4S)
If you are up to it, you can remove the inner door panel and line the inside of the outer door skin with Dynamat Extreme and put the door panel back on. You will not believe the difference in the "thunk" sound and the reduction of outside noise from the door areas. Regards, Maurice. I might want to give that a try. How much access will I have inside the door, once the panels are removed, to apply the mat ? Does it need to be an uninterrupted sheet or can they be pieced together to get full coverage ? -
Sound doors make when closing
dphatch replied to dphatch's topic in 997-1 Series (Carrera, Carrera 4, Carrera 2S, Carrera 4S)
If you are up to it, you can remove the inner door panel and line the inside of the outer door skin with Dynamat Extreme and put the door panel back on. You will not believe the difference in the "thunk" sound and the reduction of outside noise from the door areas. Regards, Maurice. I might give that a try. How much access will I have inside the door with the panel removed ? -
What 's up with the sound the doors on my '07 C4S make when they close ? Sounds like a pickup truck. My '01 Boxster had a more solid sound to it. Is it me or do they all sound like that ?
-
Absent minded is a lot better than being stupid. Good thing Porsche came up with a way to open the trunk when the car was locked. Of course you realize that now anyone who wants to get into to your locked trunk knows how to do it :huh: Would store the good Scotch in the house from now on.
-
997 Rat damage
dphatch replied to jroach's topic in 997-1 Series (Carrera, Carrera 4, Carrera 2S, Carrera 4S)
So !!!!! :o How does one rat proof a Porsche ? I got all kinds of critters living in my yard, the woods next door, the corn fields...... and with winter coming they all tend to want to move in doors when they get a chance, like every time I open the garage doors. Short of sitting up all night in the garage with a shot gun anyone have any hints on defeating the hoard before they eat my car ?? :cursing: -
Given the cost of a new wheel I would suggest you have a pro do it. They can fix it and when they're done you won't be able to find the repair. Try it yourself, unless you have the skill, knowledge and proper equipment and you're likely to screw it up, no offense, and then wind up going to the pro to fix it anyway. Don't know where you live but look under wheel repair in your local phone book or Goggle it. Local will be quicker and cheaper but there are several places on the web that will repair or swap out your wheel for one that has already been repaired. I'd have your wheel repaired vs. a swap but it is an option. Have had curb rash repaired on wheels from several cars over the years and you won't be disappointed in the results. Should cost you around $ 200, give or take, to have it done so we're not talking a lot of $$'s here.
-
All that's required are the mounts that bolt on to the car that receive the locks on the top. Mounts are specific to the locking pins on the car but for the '00 to '04 tops the parts numbers were 996-561-653-03 and 996-561-654-03. Mounts are left - right specific with the left mount having the electrical connection for the rear defroster included. Electrical hookup is plug and play as the 997 includes the harness for the defroster connection. Do you have photos of the parts inserted into the vehicle? I don't have pics of the mounts but if you look in the 996 PET for the hardtop they show all the parts including the mounts . First, thank you so much for all your help and time. As I want to make sure I purchase the correct items, I wanted to confirm the parts you listed. 996-561-653-03 and 996-561-654-03. The dealer said they were the wrong part as I needed the 997 numbers. I figured they wanted me to purchase the 997 parts so I would have to buy a $5,000 997 top. Second, the 996 parts will fit into my 2006 997? Third, the dealer was quoting me $225 per part. I believe you said you purchased them for $125 each. Where did you buy the parts? Thanks in advance, Randy With all due respect to your dealers parts guy, if all he/she is doing is looking at the 997 PET they are going to see the 997 part numbers which end in .04 which will not work with the locking pins on the older 996 tops. I did a good deal of research on it and even the Sunset guys weren't sure if it would work when I ordered the parts. The part numbers I listed and you show in your post, which end in .03, are the part numbers I installed in my 2007 C4S Cab for a top from a 2003 996 Cab. I purchased them from Sunset Imports (think I originally said in one of my earlier posts Suncoast, my bad) ) for $ 122 and change each. (shipping was extra) So long as the locking pins on the top are not the new threaded type ( looks like the threads on a bolt or screw) which would have had to be retro fit to a 996 top, than these are the part numbers you need if you are using an older 996 top. These locks have two pins sticking out from the sides of the end of the locking shaft which force themselves into the spring loaded mount. Should have taken pics of the install but it is simply a matter of removing the trim piece that covers the roll bars, removing the two black plastic spacers on either side and using the bolts that held in the spacer, plus one you'll need to supply, to bolt in the mounts which are marked left and right. It is not a complicated install. I'm sure I got that info from this site in the TSB section but I could walk you through it or take a picture or two to help you get started. PM me if you go ahead with project. What is the process of removing the panel that covers the roll bars. Does it pry off or are there screw that hold it in place? Sorry it took so long to get back to you. IF you're a contributing member go to the TSB lisdting and search for hard top. There are a couple of TSB's for changing the mounts that will give you some pictures , worth a thousand words, that will make my written instructions easier to follow.The proceedure for removal of the cover is as follows: 1. Place the convertable top in the service position ( almost closed with the rear top cover still in the open position as high as you can get it. 2. Disconect the two tension cables on either side of the top. They are located very near the back of the top storage location low down on the outer panels near the top hinges. If you reach down in that area you'll feel them. The lower most end of the cable pops off the ball socket attachement points. 3. Lift up the back of the top and fold it over toward the front of the car. This section will rest on the top. 4. If you'll pull back the thin molded carpet section at the center near the roll bar cover you'll notice a single screw that holds down the center of the roll bar cover. Remove the screw. 5. Now pry off the top oblong covers directly over the roll bars. Work from the rearward side of the covers not the front side. There are three spring clips, left , center and right so if you work with a wide bladed screw driver start at one side, then the middle, then the other side and the covers will pop off. 6. Once the covers are off you'll see one screw under each cover on the outside edge. Remove them being carefull not to drop them in side the roll bar frame. Lot's of room to work here so that shouldn't be as issue. 7. The entire cover will lift off now and exposing the roll bars and the carrier frame rails where the mounts bolt in. That's all there is to it. (You can remove the entire section of molded carpeting in the top storage area if you want to but I found I didn't have to as once the rolll bar cover is off you have complete access to the area where the parts bolt in. ) You'll notice once you have the cover off two plastic zig zag shaped spacers on either side of off the roll bar carrier frame. Each is held on with 3 threaded bolts despite the fact the mounting locks require four . Take one to your favorite hardware store and you should be able to match them up. You'll need one for each side. The mounts just bolt in, in place of the spacers. Note that the mounts are marked left and right. The left one ( drivers side) has a wire attached. Once installed the wire plugs in about 4-6 inches below the mount on the back side of the frame rail it is attached too. You'll may need to pull back the molded carpet to see the plug. It's a little bit a reach but do able. Plug only goes in one way so you can't mess it up. Be sure to note where the "L" shaped attachement points for the roll bar covers go as you'll need to re-attach them when you're bolting in the mounts as they hold the roll bar cover in place with the two screws you removed from either side of the cover. Reinstalling the roll bar cover is the reverse of the removal. The cover has a channel along the front side of it to receive the trim piece that goes across the back of the car's rear bulkhead. It's easy to line up just ends to be done before you start screwing the roll bar cover back in place. THe smaller covers go in front first ( where the hard plastic positioning clips are) then push down on the backs to get them to seat in. I used the screw driver blade to apply some pressure to the springs clips to ease the covers back on. Just be carefull not to scar the fabric covering on the cover.
-
All that's required are the mounts that bolt on to the car that receive the locks on the top. Mounts are specific to the locking pins on the car but for the '00 to '04 tops the parts numbers were 996-561-653-03 and 996-561-654-03. Mounts are left - right specific with the left mount having the electrical connection for the rear defroster included. Electrical hookup is plug and play as the 997 includes the harness for the defroster connection. Do you have photos of the parts inserted into the vehicle? I don't have pics of the mounts but if you look in the 996 PET for the hardtop they show all the parts including the mounts . First, thank you so much for all your help and time. As I want to make sure I purchase the correct items, I wanted to confirm the parts you listed. 996-561-653-03 and 996-561-654-03. The dealer said they were the wrong part as I needed the 997 numbers. I figured they wanted me to purchase the 997 parts so I would have to buy a $5,000 997 top. Second, the 996 parts will fit into my 2006 997? Third, the dealer was quoting me $225 per part. I believe you said you purchased them for $125 each. Where did you buy the parts? Thanks in advance, Randy With all due respect to your dealers parts guy, if all he/she is doing is looking at the 997 PET they are going to see the 997 part numbers which end in .04 which will not work with the locking pins on the older 996 tops. I did a good deal of research on it and even the Sunset guys weren't sure if it would work when I ordered the parts. The part numbers I listed and you show in your post, which end in .03, are the part numbers I installed in my 2007 C4S Cab for a top from a 2003 996 Cab. I purchased them from Sunset Imports (think I originally said in one of my earlier posts Suncoast, my bad) ) for $ 122 and change each. (shipping was extra) So long as the locking pins on the top are not the new threaded type ( looks like the threads on a bolt or screw) which would have had to be retro fit to a 996 top, than these are the part numbers you need if you are using an older 996 top. These locks have two pins sticking out from the sides of the end of the locking shaft which force themselves into the spring loaded mount. Should have taken pics of the install but it is simply a matter of removing the trim piece that covers the roll bars, removing the two black plastic spacers on either side and using the bolts that held in the spacer, plus one you'll need to supply, to bolt in the mounts which are marked left and right. It is not a complicated install. I'm sure I got that info from this site in the TSB section but I could walk you through it or take a picture or two to help you get started. PM me if you go ahead with project.
-
All that's required are the mounts that bolt on to the car that receive the locks on the top. Mounts are specific to the locking pins on the car but for the '00 to '04 tops the parts numbers were 996-561-653-03 and 996-561-654-03. Mounts are left - right specific with the left mount having the electrical connection for the rear defroster included. Electrical hookup is plug and play as the 997 includes the harness for the defroster connection. Do you have photos of the parts inserted into the vehicle? I don't have pics of the mounts but if you look in the 996 PET for the hardtop they show all the parts including the mounts .
-
All that's required are the mounts that bolt on to the car that receive the locks on the top. Mounts are specific to the locking pins on the car but for the '00 to '04 tops the parts numbers were 996-561-653-03 and 996-561-654-03. Mounts are left - right specific with the left mount having the electrical connection for the rear defroster included. Electrical hookup is plug and play as the 997 includes the harness for the defroster connection.
-
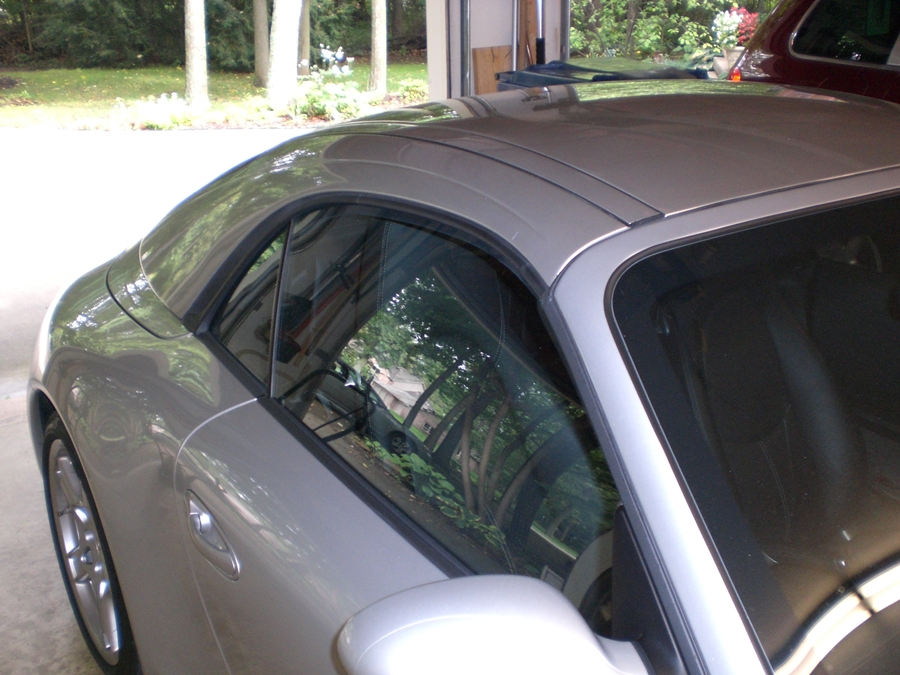
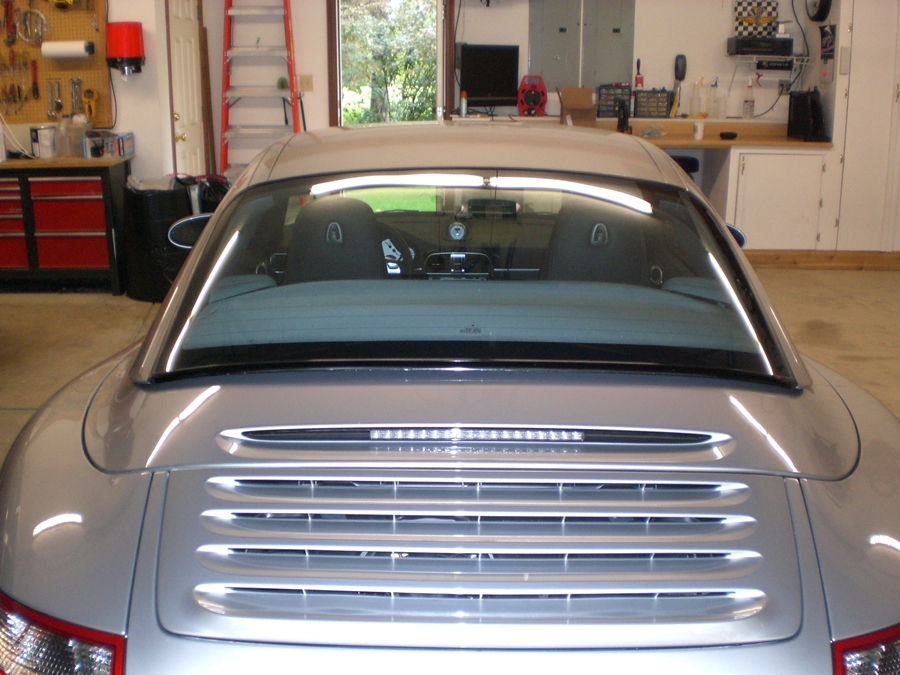
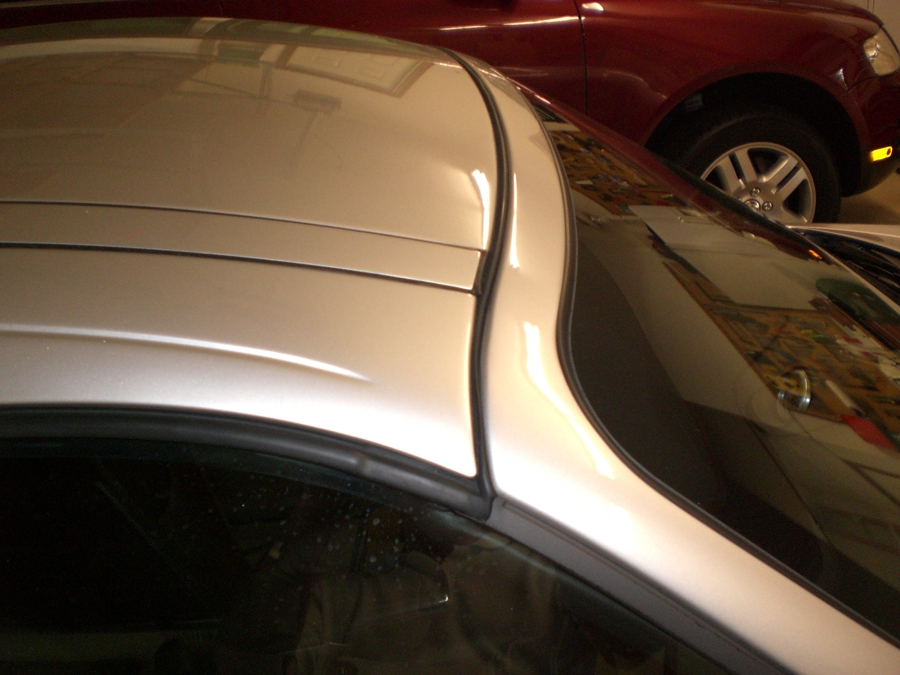
Update to my earlier 996 hardtop retrofit to a 997 C4S- Top fits perfectly. Total cost of parts was $ 250, not including the top itself. Job took all of 30 minutes to complete and on a difficulty scale of 1 to 10 I'd rate it a 1. Once that parts came in putting them on the car is pretty straight forward. Pic below show key fitting areas. Top fits snuggly and all mounting points matched up perfectly without any adjustments to the latch points. Top was purchased off ebay and was made in 2003.

-
Hard Top
dphatch replied to hauto18's topic in 997-1 Series (Carrera, Carrera 4, Carrera 2S, Carrera 4S)
The short answer to the question of whether or not the 996 hardtop will fit the newer 997's is yes. Finally received the top I purchased off eBay from what I believe was an '00 to '04 996. I using it on my '07 C4S. The older top has the earlier style lock pins and while I haven't installed the mounting brackets yet, I have test fit the top and it works fine. The front "catches" or alignment tabs also work fine. Had read in a post somewhere that they were a little different on the new tops but at this point the seal between the top and "A" pillar appears to be fine. Mind you, I haven't checked in a rain storm for leaks in this area so can not be 100% at this point in time till I do. Once I've installed the mounts ( they are not installed at the factory on the '05 and up cars) and adjusted the fit of the top I'll be able to better assess the front alignment but the top itself fits the car perfectly. Installing the mounts is a simple job. The only decision left at this point is whether to install the older style mounts that match the existing lock pins or replace both with the newer style parts. Am not convinced it's worth the extra expense of buying the newer parts as the lock pins retail for almost $ 300 a piece. Given the fact the older pins were used for many years I think I might be able to live with whatever problem they weer designed to correct. Will attach pics once the top is fully installed and intend to post pics of the mount install process with part numbers.