Welcome to RennTech.org Community, Guest
There are many great features available to you once you register at RennTech.org
You are free to view posts here, but you must log in to reply to existing posts, or to start your own new topic. Like most online communities, there are costs involved to maintain a site like this - so we encourage our members to donate. All donations go to the costs operating and maintaining this site. We prefer that guests take part in our community and we offer a lot in return to those willing to join our corner of the Porsche world. This site is 99 percent member supported (less than 1 percent comes from advertising) - so please consider an annual donation to keep this site running.
Here are some of the features available - once you register at RennTech.org
- View Classified Ads
- DIY Tutorials
- Porsche TSB Listings (limited)
- VIN Decoder
- Special Offers
-
OBD II P-Codes - Paint Codes
- Registry
- Videos System
- View Reviews
- and get rid of this welcome message
It takes just a few minutes to register, and it's FREE
Contributing Members also get these additional benefits:
(you become a Contributing Member by donating money to the operation of this site)
- No ads - advertisements are removed
- Access the Contributors Only Forum
- Contributing Members Only Downloads
- Send attachments with PMs
- All image/file storage limits are substantially increased for all Contributing Members
- Option Codes Lookup
- VIN Option Lookups (limited)

-0001-0001.png.112c13ee97acfad0cb1e70d195cc9a0e.png)
Loren
-
Posts
37,296 -
Joined
-
Days Won
530
Content Type
Profiles
Events
Forums
External Paint Colors
Downloads
Tutorials
Links Directory
Collections
Store
Posts posted by Loren
-
-
I think your car is a 993 (not a 996) and I think the problem you describe is fairly common on 993's. Here is a copy of post from the PCA website where a person fixed this problem without spending a lot of money.
cleaning secondary air injection ports -- SUCCESS!I just finished cleaning out the air injection ports. It was a lot easier than I expected. I did deviate from your procedure in one respect, which I think made it easier. I replaced the check valve between the air pump and the camshaft housing. Instead of pulling off the solid pipes that supply the camshaft housings, I poured Techron in the hole that the check valve came out of. Doing it this way, I didn't have to mess with the power steering pump or any of the plastic parts on the left side of the engine.
The only issue was that I had to plug all six ports at once. To do this, I cleaned the exhaust port with a carb cleaner and a small wire brush on the end of a drill and then plugged the holes with used chewing gum. It wasn't perfect, but it worked well enough to get the job done. After running the Techron through, I sprayed carb cleaner both from the top and from the bottom using the little red plastic tube that comes with the carb cleaner. It was flexible enough that I was able to stick into each port and spray the carb cleaner up into the passage way. I then blew compressed air through from the top and let everything dry out.
All of the air ports were open, though the #3 exhaust port itself had more carbon build up than the others. Is this common?
The whole job took about 6 hours, which included about an hour of trial and error modifications to a 15/16ths inch wrench with a bench grinder and a torch to fabricate a tool to remove the check valve. One reason it was fairly easy is that I have a lift in my garage. I imagine it would have taken longer with jack stands. Now that I have the tool to remove the check valve and know what I'm doing, I figure I could do this again in about 4 hours.
How often do you suggest to clean the ports as preventative maintenance? Feel free to post this on the PCA website if you wish. I read that some people in Sacramento were going to clean their ports, and I'm wondering how their efforts turned out. Thanks for all your help. It gives me a certain peace of mind knowing that I could see that the ports are completely clear and that the dreaded check engine light isn't going to come on at any time---not because of clogged secondary air injection ports anyway. Take care, Rob.
-
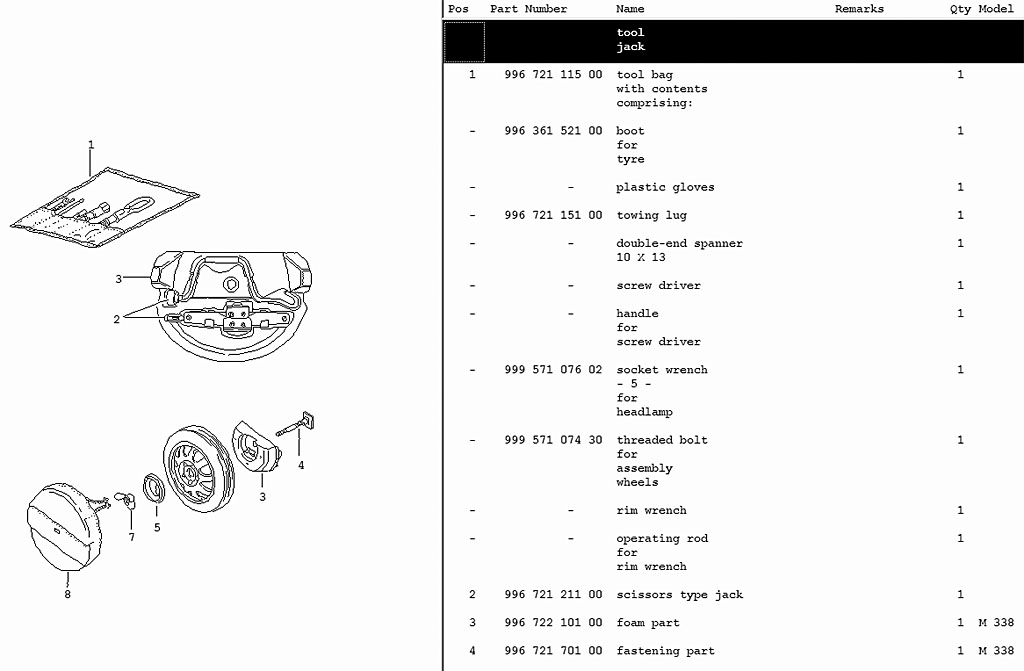
The "retail" prices I have (as of Dec 2004) are:996 731 619 30 Left Door Mirror (Carbon)996 731 620 30 Right Door Mirror (Carbon)
There does not appear to be any special "RS" mounting hardware in the parts list.
Loren, do you know how much porsche charges for the mirrors? I'd imagine its quite a bit since their markup on CF is rediculous.
996 731 619 30 Left Door Mirror (Carbon) $966.24
996 731 620 30 Right Door Mirror (Carbon) $966.24
It pays to shop around - try Sunset Imports (link at top of the page). They sell at dealer cost plus 15% handling and shipping cost -- AND -- no sales tax.
-
The click is normal. This is the microswitch on the clutch pedal that keeps you from accidentally starting the car with the car in gear.Hey Loren,How about some kind of electric relay sound? I hear this "click" as soon as I start depressing the clucth pedal... I always forget to ask when I am at the dealer's...
-
Have alook at this thread
-
Do you mean like this?

-
We will need a photo and/or the part number on the wheel to tell you.
-
Here are some instructions for the OBC stalk hack which includes the steering wheel removal and replacement. Good photos of each step. I think Dan at D2 Performance did this step by step.
-
1 quart every 1000 miles is considered "normal" by Porsche. If you are using more than that I would start looking for leaks.
-
Relay position 8 on the DME relay panel.
Fuse is a 40A fuse on the same panel.
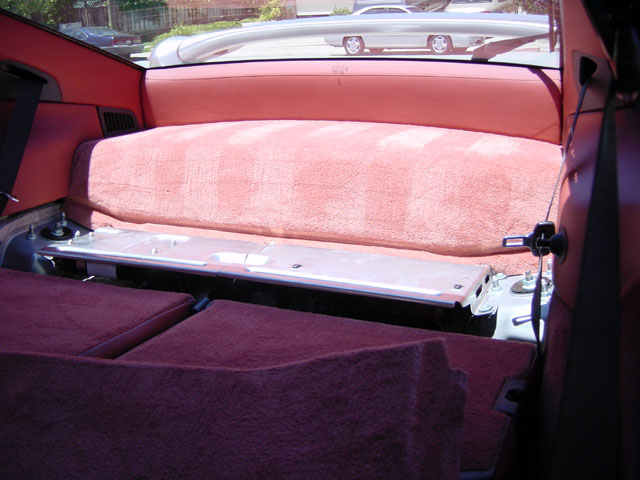
The DME panel is under a metal plate that you get to behind the rear seats.
-
Thew PST2 can only load existing programs (to my knowledge). To make this kind of change you would need to re-program the chip - something that a few Porsche tuner shops can do.
-
As far as I know the only way to not get the CEL after removing this would be to reprogram the DME.
-
These bolts are microencapsulated. That is, the bolts have a special sealer on the threads and once they are tightened the sealer activates and seals for leaks. If the bolts are removed then the sealer is destroyed and they must be replaced. Just get the torque setting right (see the TSB because they are different depending on location) and they should be fine.
Availability is likely a result of how many RMS replacements they are doing :lol:
-
The O2 sensors are just that - sensors. They are likely not the problem but the problem reporting mechanism.
P1123 Oxygen Sensing Adaptation Area 1 (Cylinders 1 - 3) - Lean Threshold
P1125 Oxygen Sensing Adaptation Area 1 (Cylinders 4 - 6) - Lean Threshold
This would mean that the fuel/air mixture is so rich that sensing is up to it's lean threshold and can not lean the mixture enough.
My list of probable causes are: fuel pressure too high; fuels injector(s) leaking; EVAP canister purge valve open.
Could be the charcoal canister (which should be covered under emissions warranty) or fuel pressure too high because of dirt stuck in one of the valves or a bad fuel pressure regulator vacuum connection. In the end all of these may be covered by your emissions warranty (unless it was caused by a dirty fuel filter/fuel).
-
Yes - except they are Red
-
Yes - except they are Red
-
If you haven't lately... replace the plugs, wires, cap, rotor. Change the fuel filter and check the fuel pressure. Adjust the valves. Check for intake or vacuum air leaks.
Unfortunately any of these could cause your problems - so you just need to eliminate them one at a time.
-
Well, if the seal were to actually "blow out" (instead of just leaking a little) you will know it as your oil light will come on and all of your oil will be on the ground. I've only seen two of those - one owner shut it down and saved the engine and the other didn't. Both were covered under warranty.
Time to stop worrying and start driving ;)
:drive:
-
Most of the 997 options not currently available say they will be available "between October and December" (according to the dealer newsletter from PCNA). I think they had better hurry - December is almost over. ;)
-
All of the Porsche Sport Exhausts I know of default to open.
If you manually close them it should be easy to hear the difference.
-
Well, I know a 996 steering wheel will work on a 993 so it should.
I don't know if the stalks will be in the way though. In the old days (showing my age) we cut the stalks on our race cars so you wouldn't accidentally hit them turning the wheel - but they could still be used.
-
You will not have the cut out at approx. 45 kmh / 28 mph to approx. 68 kmh / 42 mph. if the electronics and vacuum controls were not installed. In a factory option install the electronics and vacuum stuff is always installed. If a dealer (or owner) installed then it is optional. Without the electronics and vacuum stuff the exhaust is always open.
-
Remember there were two GT3 styles from the factory. The pre MY2002 GT3 (for RoW) and US Aerokit Cup and the MY04 GT3 that has the new style fenders and headlights. The bumpers are not interchangeable since the fenders and headlights are different.
So if your car is a MY02 or newer you would want the MY04 GT3 style (or Aerokit II style) front bumper.
I personally wouldn't worry about being a poser -- the fact is the GT3 style bumpers have larger openings for air to the radiators. I can't think of a good reason not to have that.
I believe all of Gert's (Carnewal.com) bumpers are factory parts unless you specifically ask him to get another brand.
BTW... RennTech.org does not have advertising sponsors per se. What the featured vendors here do (to be a featured vendor) is give RennTech.org members a discount - RennTech.org receives no advertising monies from any vendor.
-
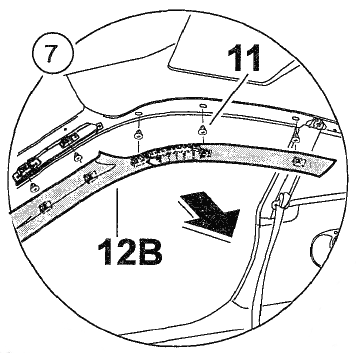
Pull the A-pillar trim inwards along the roof frame and windscreen frame. The A-pillar trim as of MY2000 is characterized by a changed curvature and the notch for the deformation element.
Before installation, check that the deformation element is seated properly. Check sheetmetal clips and replace if necessary. Insert the A-pillar trim at the side of the windscreen frame (transition point to dashboard), clip in the A-pillar trim along the roof frame.
-
For what year car? The A pillars changed in MY2000.
And, do you want A pillar or defroster strip (lower piece on dash)?

What wheels are these.
in 996 Series (Carrera, Carrera 4, Carrera 4S, Targa)
Posted
They are not factory (or optional) wheels for the 996 series. I do not know the brand.