Welcome to RennTech.org Community, Guest
There are many great features available to you once you register at RennTech.org
You are free to view posts here, but you must log in to reply to existing posts, or to start your own new topic. Like most online communities, there are costs involved to maintain a site like this - so we encourage our members to subscribe or donate. All subscriptions and donations go to the costs operating and maintaining this site. We prefer that guests take part in our community and we offer a lot in return to those willing to join our corner of the Porsche world. This site is 99 percent member supported (less than 1 percent comes from advertising) - so please consider an annual subscription or donation to keep this site running.
Here are some of the features available - once you subscribe RennTech.org
- View Classified Ads
- DIY Tutorials
- Porsche TSB Listings (limited)
- VIN Decoder
- Special Offers
- Paint Codes
- Registry
- Videos System
- View Reviews
- and get rid of this welcome message
It takes just a few minutes to register, and it's quality Porsche information at a low cost.
Contributing Members also get these additional benefits:
(you become a Contributing Member by subscribing or donating money to the operation of this site)
- No ads - advertisements are removed
- Access the Contributors Only Forum
- Contributing Members Only Downloads
- Send attachments with PMs
- All image/file storage limits are substantially increased for all Contributing Members
- Option Codes Lookup
- VIN Option Lookups (limited)


DUTCH VanAtlanta
-
Posts
90 -
Joined
-
Last visited
Content Type
Profiles
Events
Forums
External Paint Colors
Downloads
Tutorials
Links Directory
Collections
Classifieds
Store
Everything posted by DUTCH VanAtlanta
-
Everything is up to date. Something is getting in the way of my accessing the file. I just cleared all the history, etc in MSIE8; and still get the same error message. I'll give it another try in Firefox. Edit. Went into Firefox and cleared Porsche.com Cookies. Then it worked fine. I guess it left a cookie from when I was last there. Now I wonder when they're going to update the list. It's really a shame that they don't have something like the Mercedes-Benz Electronic Parts List (EPC). In that one, you enter your VIN and it will only bring up parts specific to your vehicle. It is an excellent tool; and is 100% free for North America users; although I'm pretty sure that there is something similar available for Europe.
-
It worked fine for me. Are you in the US or Canada? I have not tried this outside of North America but I assumed there is a version for other countries through Porsche.com In the US; and I tried it with two different browsers: Mozilla Firefox and Microsoft Internet Explorer 8.0. I wonder if I need to clear my cache.
-
The link for Cayenne 2007 and newer gives a "Dokument nicht gefunden" message for me.
-
I ordered the car built, and did not order the $1550 VR1 Running Boards option. With this option, the Off-Road Technology Package has a different Option Code and price, too. Attached is a shot of the non-running board sliders on a Transsyberia.

-
The ones in the photo will not provide any step capability at all. I have them on my Transsyberia; and they are strictly rock sliders, not steps.
-
Please do. Hit the Edit Your Post button. Then click on the Full Edit. Just below your composition box is the place to add your attachments.
-
Which version of the PCM? On PCM3, it's the following sequence: INFO->OPTION->SET PCM->Display->Display->Brightness. Then use the up or down arrows to set your brightness. In PCM2, it can only be done in the Map Mode. See the attached file. (PS - If you become a contributing member here, the Owner's Manual is available for download.) PCM_2_Display.pdf
-
Interesting. That's not what Porsche says in the bulletin posted above; but what do they know anyway! :notworthy:
-
Of interest is the fact that the 2008 Cayenne Owner's Manual, posted here, gives detailed specifics on how to access and replace the battery. My 2010 Cayenne Owner's Manual does not provide any of that information; and tells you to take it to the dealer for replacement.
-
I used a MityVac on my Transsyberia (GTS DFI V8) yesterday, and was able to pull about 8 qts. That left only about 1 qt in the oil pan for much easier draining. Since the bottom protective cover needs to be removed ti get at the filter, you might just as well get that last qt out of the pan through the drain plug, too. However, handling 1 qt in a small drain pan while laying under the car is a whole lot easier than having to maneuver a big drain pan with 9 qts sloshing around in it. :jump: See here for specifics on the oil change: http://www.renntech.org/forums/index.php?s...mp;#entry163791
-
Is it cloudy on the outside from grit blasting, or on the inside from off gassing of the hot parts?
-
This is my first attempt at an oil change on this car; and it has been a real learning experience. Lots of slopped oil, which prevented taking any photos. Next time I'll know how to prevent this and will take some photos to add to this thread. This car has the GTS DFI V8; and, as such, has only one crankcase drain plug. (I've been told that all DFI V8's are this way now.) Also, being a Transsyberia, the front engine protective underplate is metal. Not sure whether this is true for the S, GTS or Turbo. Steps taken to do the job. 1.) Drive the car to warm up both the coolant and the oil. 2.) Pull the car on a level spot and raise it to the maximum off road height. This allows enough room to crawl under the car to access the protective plates, drain plug and filter housing. As a note, because of the location of the drain plug at the very back of the oil pan, you could probably use ramps under the front wheels to give easy access and still drain all the old oil completely. 3.) (Optional step) I have a MityVac vacuum fluid extractor. I started to remove the old oil by vacuum through the dipstick tube. FWIW, I was able to pull out about 8 qts this way, which only left about a qt in the oil pan and filter housing. Doing this eliminated the need for having to maneuver an overly large drain pan under the car. (Much less slop) 4.) Remove the 8 black wide headed screws (T25) holding the front plastic splash piece and slide it back to free the tabs at the front edge. 5.) Remove the 9 stainless screws (T30 or 10 mm standard hex head. Either will work.) holding the large engine protective underplate. At this point the front edge of the rear plastic under protection panel can be dropped down for easy access to the crankcase drain plug. It's not necessary to remove this panel, although there are several screws along the back to do this, if you wish. Not necessary in my case. 6.) Slide a catch pan on top of the front edge of that plastic panel and remove the crankcase drain plug, T50!! Please note the proper bit size, This plug is aluminum and it's very easy to strip the socket in that plug!! An 8mm in-hex looks like it will work; and luckily it did for me to remove it; but closer examination when it was out of the car showed it to be a T50. Use the T50! 7.) Allow the oil to drain completely and replace the plug along with a new aluminum sealing washer. Torque to 50 Nm. 8.) There is a large u-shaped hydraulic line, which is part of the power steering, that prevents easy access to the filter housing. There are two 10 mm hex nuts on its support that can be removed to move this line out of the way. Access is still very tight, but better than with the line in place. 9.) Mark the filter housing and its base mount so you know how far to turn it when reinstalling. This was done in my case because I did not have the proper wrench to be able to torque it back in place. 10.) I did not have the proper filter removal tool and my strap wrench would not pull hard enough to loosen the filter housing. There is a large (36mm ?) hex nut moulded into the end of the housing. I had to use a channel lock wrench on this moulded nut to carefully remove the housing. As it gets loose and can be turned by hand, slide a zip-lock back over it to catch the oil that is going to come slopping out. (I didn't; and ended up with oil all over under there. Remove the old filter cartridge. 11.) Install a new o-ring on the filter housing and lube it with clean new oil. Also lube the two inner diameter openings of your new filter cartridge with clean oil, and carefully slide it into place on the engine block mounting point. You'll probably have to push fairly hard, as it's a tight fit. 12.) Carefully line up the filter housing and carefully screw it into place, being sure that you don't cross thread it when getting started. Torque it to 25 Nm or bring the marks you made in Step 9 back into alignment. Wipe any spilled oil clean. 13.) Reposition the power steering hydraulic line, and tighten the two 10 mm nuts. 14.) Replace the metal under plate with the 9 screws and tighten. 15.) Insert the tabs along the front edge of the plastic splash piece and then use the 8 black screws to hold it firmly in place. Don't ever tighten these, or you'll strip the holes. Hand tight is adequate. 16.) Add 9 qts of oil, start the engine to circulate it and fill all the nooks and crannnies. Let it run for a few seconds. 17.) Stop the engine and check the oil level. In my case it was right in the middle of the min-max range on the dipstick. 18.) Close the hood, drop the car to normal operating level and you're ready to go. This first go-around took me about 3 hrs because I was charting new ground for me. Next time I should be able to do it in 1-1&1/2 hrs. A pneumatic or electric drive handle would certainly speed up removal of the fasteners for the under panels, and a proper wrench for the filter would make that part go quicker and easier, too. Keep in mind that this is a Transsyberia with some added underprotection; but I hope this information is helpful. Happy Trails!
-
Cayenne S Transsyberia Oil Change (DFI engines) This is my first attempt at an oil change on this car; and it has been a real learning experience. Lots of slopped oil, which prevented taking any photos. Next time I'll know how to prevent this and will take some photos to add to this thread. This car has the GTS DFI V8; and, as such, has only one crankcase drain plug. (I've been told that all DFI V8's are this way now.) Also, being a Transsyberia, the front engine protective underplate is metal. Not sure whether this is true for the S, GT Author DUTCH VanAtlanta Category Cayenne (9PA, 9PA1) - Maintenance Submitted 12/27/2009 09:46 AM Updated 03/14/2017 07:08 AM
-
I just picked up the Transsy today from the 3rd service attempt and 20 days in shop service (out of 56 ownership days from new) in attempts to remedy the continuously recycling air suspension compressor. First service visit they changed the valve body. Second visit they did nothing, since the ride height did not settle or drop over night and over the weekend. This 3rd visit they replaced the compressor. It is now much quieter, but continues to cycle on and off repeatedly while driving and making no changes in the ride height or ride comfort settings. This continuous cycling of the compressor cannot be right! There has to be a leak somewhere. Do you guys with the air suspension have continuously cycling compressors without changes to the ride height or ride comfort settings? The dealers shop foreman says my car is operating within spec. I don't believe it. Can you say "Lemon Law"?
-
One additional comment. It is unfortunate that you must put the transfer case in low gear before you can lock the differential(s). The low gearing puts too much power/torque on the wheels; and this leads to more slipping and spinning in the snow. It would be better to stay in high gear in the transfer case, which will give you better traction; and above all, go easy on the accelerator if you want traction.
-
See the attached file. Off_Road_Driving.pdf
-
That switch goes through several stages. First is to go into low gear in the Transfer Case; and your transmission should be in Neutral to make this switch.. Second is to lock the center diff. There is no front diff. Third, only if you have the off road technology option, is to lock the rear diff. Also, if you have the air suspension, you might want to raise the car to the highest level.
-
Agreed, except I would get it good and hot; and suck it out through the dipstick tube on MB engines. Experience on two different MB engines showed I got more out with the MityVac than I did with a drain through the plug; and if you do it while it's hot, you'll have the crap well suspended and removed, too. The Transsy will get its oil & filter changed for the first time at just less than 2,500 miles. I would have preferred between 1,000-1,500 miles, since lots of crap comes loose during break-in; but the timing just couldn't be worked out. Then at 5,000 miles and every 5,000 miles thereafter - always with Redline synthetic, since I'm not a big fan of Mobil 1. Overkill? Possibly, but very cheap insurance.
-
I plan to test this within a week (depending on when I get it back from dealer service) on my 2010 Transsyberia. The new V8's have only one drain plug. I'll suck as much as possible out through the dip stick tube with the MityVac, and then drop the drain plug to see how much more comes out. With the oil filter located on the underside of the engine, I have to crawl under there and drop the skid plate to access the filter anyway. As an aside, you can change the oil and filter on all new MB engines in your Sunday best; and not get dirty. The oil filter is on the top; and when you loosen the canister, all the oild drains back into the block in down to the oil pan. All oil can be sucked out the dip stick tube with the MityVac. Complete oil and filter change with clean clothes!
-
PSM Issues
DUTCH VanAtlanta replied to 955_turbo's topic in 9PA, 9PA1 (Cayenne, Cayenne S, Cayenne Turbo, Cayenne Turbo S)
My 2010 Transsyberia is throwing an intermittent "PSM FAILURE" message in the multifunction display. The first time the dealer said there was a stored fault code related to the Yaw Sensor, and they replaced it. It did it again this weekend, after a leisurely trip to Costco. It disappeared after a restart and a short drive. It's scheduled to go in for the third time on air suspension issues. I wonder what they'll find this time. -
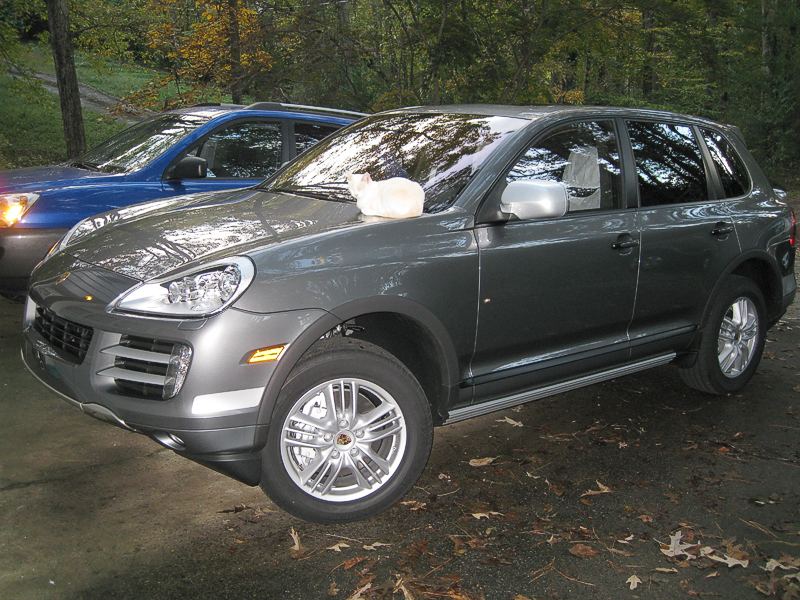
Here's mine as it was delivered from the factory. The hood ornament is an aftermarket addition. :lol:
-
Found Porsche's on line parts manual. This helped a bunch. No need for further help. Thanks.
-
Is there a sketch of the general layout of the air suspension on the Cayenne available anywhere? I'm not looking for specific parts or locations, but just a general schematic or sketch of how it works or is laid out. I'm trying to determine if the air compressor supplies air directly to the struts through control unit valves; or if it first goes to the reserve tank located under the floor of the cargo area, with the reserve tank supplying to the struts through the control unit and valves. I'm pretty sure that there is a leak in the system somewhere, since the air compressor runs almost constantly with very brief periods off for the first few miles of driving the car after it's been parked for a while.. Dealer service measured the ride height before and after it was parked over the weekend, and found that it did not drop. They use this to say that there is no leak in the system. I'm thinking that this only proves that there are no leaks in the struts and back as far as the control unit valves If the compressor supplies the reserve tank and the reserve tank supplies the struts, I am thinking that the leak may be between the compressor check valve (replaced in this quest) and the reserve tank or between the reserve tank and the control unit valves. I really want to get this fixed, but the dealer has thwon up his hands and says that, since it doesn't settle overnight, it's within spec; and there's nothing more that they can do. I really don't want to have to go LemonLaw on this thing. I have had two different passengers ask me "What is that noise?" when the compressor starts running at first drive. It's very noisy! So a sketch or a functional schematic of the system would really be helpful in trying to make sense of this problem. TIA if you can help!
-
Tire chains?
DUTCH VanAtlanta replied to geoff's topic in 9PA, 9PA1 (Cayenne, Cayenne S, Cayenne Turbo, Cayenne Turbo S)
Why? All reports I've heard on the guy have been good. Curious. -
If you do have the PJ1 - Thermally Insulated Glass option, you are very limited as to where the V1 will work. See the attached for Porsche's response. The big problem is how to hang it up there. ThermalGlass.pdf