Welcome to RennTech.org Community, Guest
There are many great features available to you once you register at RennTech.org
You are free to view posts here, but you must log in to reply to existing posts, or to start your own new topic. Like most online communities, there are costs involved to maintain a site like this - so we encourage our members to donate. All donations go to the costs operating and maintaining this site. We prefer that guests take part in our community and we offer a lot in return to those willing to join our corner of the Porsche world. This site is 99 percent member supported (less than 1 percent comes from advertising) - so please consider an annual donation to keep this site running.
Here are some of the features available - once you register at RennTech.org
- View Classified Ads
- DIY Tutorials
- Porsche TSB Listings (limited)
- VIN Decoder
- Special Offers
-
OBD II P-Codes - Paint Codes
- Registry
- Videos System
- View Reviews
- and get rid of this welcome message
It takes just a few minutes to register, and it's FREE
Contributing Members also get these additional benefits:
(you become a Contributing Member by donating money to the operation of this site)
- No ads - advertisements are removed
- Access the Contributors Only Forum
- Contributing Members Only Downloads
- Send attachments with PMs
- All image/file storage limits are substantially increased for all Contributing Members
- Option Codes Lookup
- VIN Option Lookups (limited)


Hilux2400
-
Posts
458 -
Joined
-
Last visited
-
Days Won
1
Content Type
Profiles
Events
Forums
External Paint Colors
Downloads
Tutorials
Links Directory
Collections
Store
Everything posted by Hilux2400
-
I didn't know that the 997 does not have jump start points in the engine compartment. Sorry if I Ied you on a chase. It's easy to get to the front release cable once you know where it is. It's a good reason for not parking the car with the right front wheel arch close to a wall. Unlikely for a RHD car, but more than possible for a LHD vehicle.
-
I tried a full beam HID kit for a few months and they gave outstanding lighting. Unfortunately, they also caused an infrequent problem with warning lights coming on for no reason when I used the headlight flasher. This happened a few times. I wished I could have kept them, but I could not put up with the warning lights. Others have also had this problem. They were a good quality kit - cost about £35. If you do use them they are easy to fit, but the control box has to be mounted outside the light unit on the flat portion of the bodywork next to the headlight guide rails. You will also have to cut a hole, about 25mm in dia, in the back of the light unit to get the fitting through. There is a flat area where the hole can be cut. Wish you luck
-
Opening a 996 when the battery is flat Getting into a 996 when the Battery is Flat. The conventional route seems to be opening the front trunk lid with the emergency wire and then applying jump start leads to the battery. This certainly works, but sometimes the wire is hard to find and with the wheel in place it is difficult to get behind the front wheel arch liner. In my view, it is a great deal easier to get in from the back, with the emergency release wire, and then to apply power to the jump start points in the engine c Author Hilux2400 Category Carrera (996) - Common Fixes and Repairs Submitted 12/30/2014 08:10 AM Updated 09/05/2017 05:06 AM
-
Opening a 996 when the battery is flat
Hilux2400 posted a tutorial in Carrera (996) - Common Fixes and Repairs
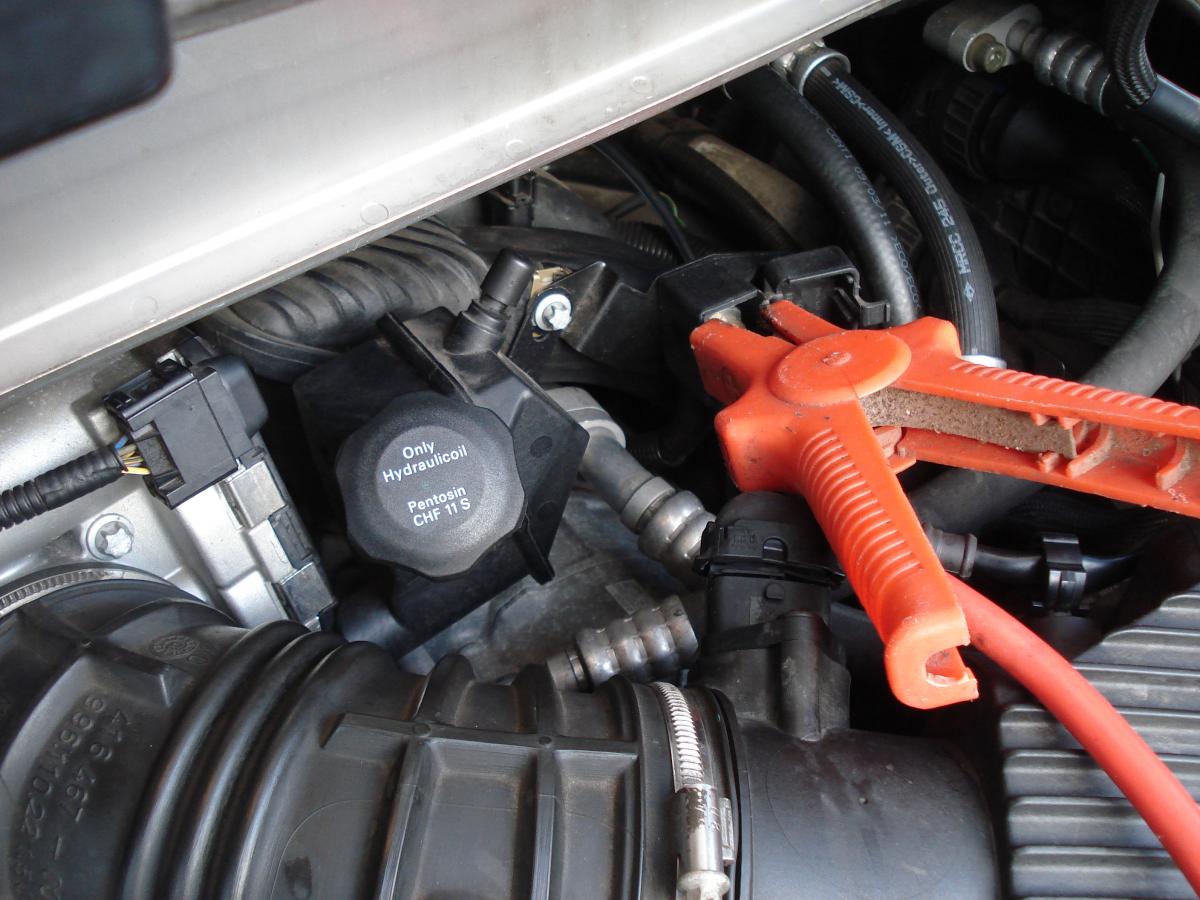
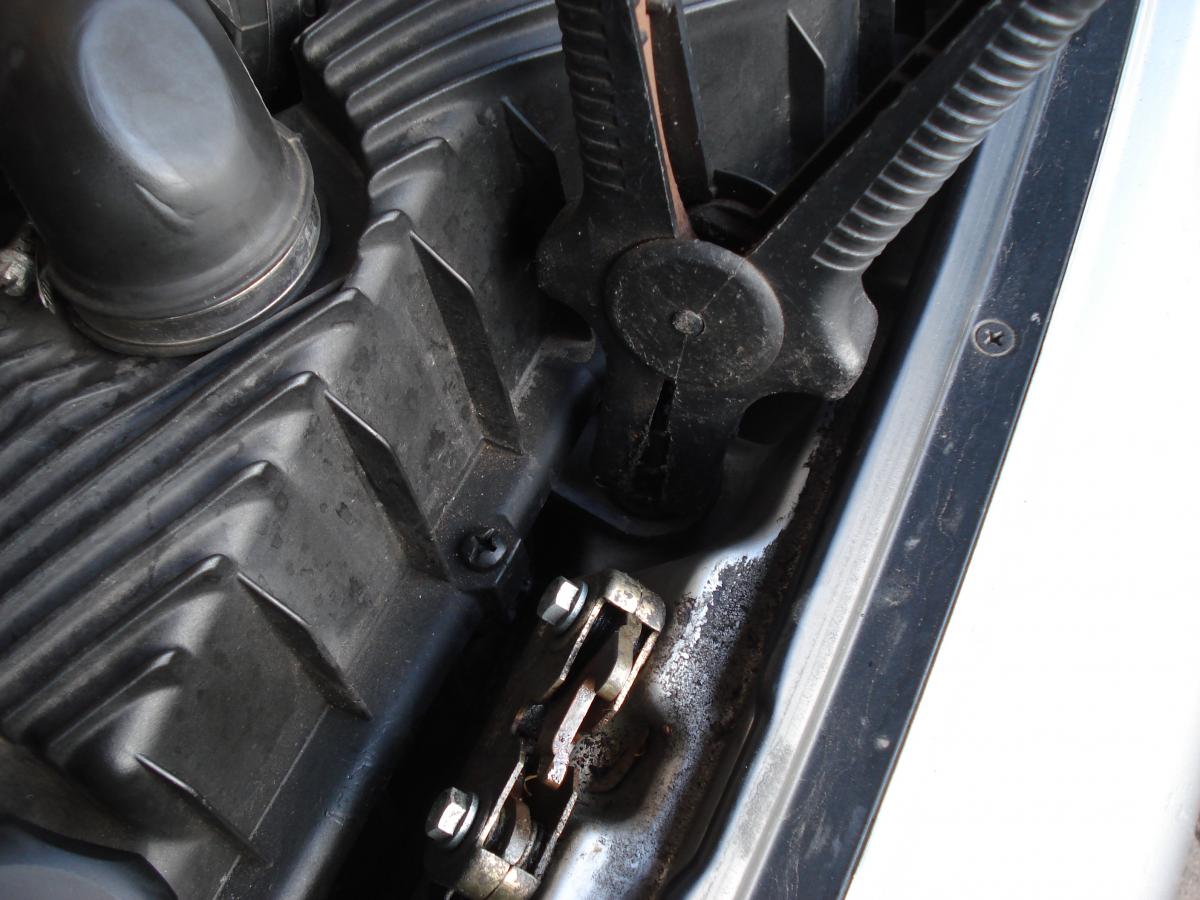
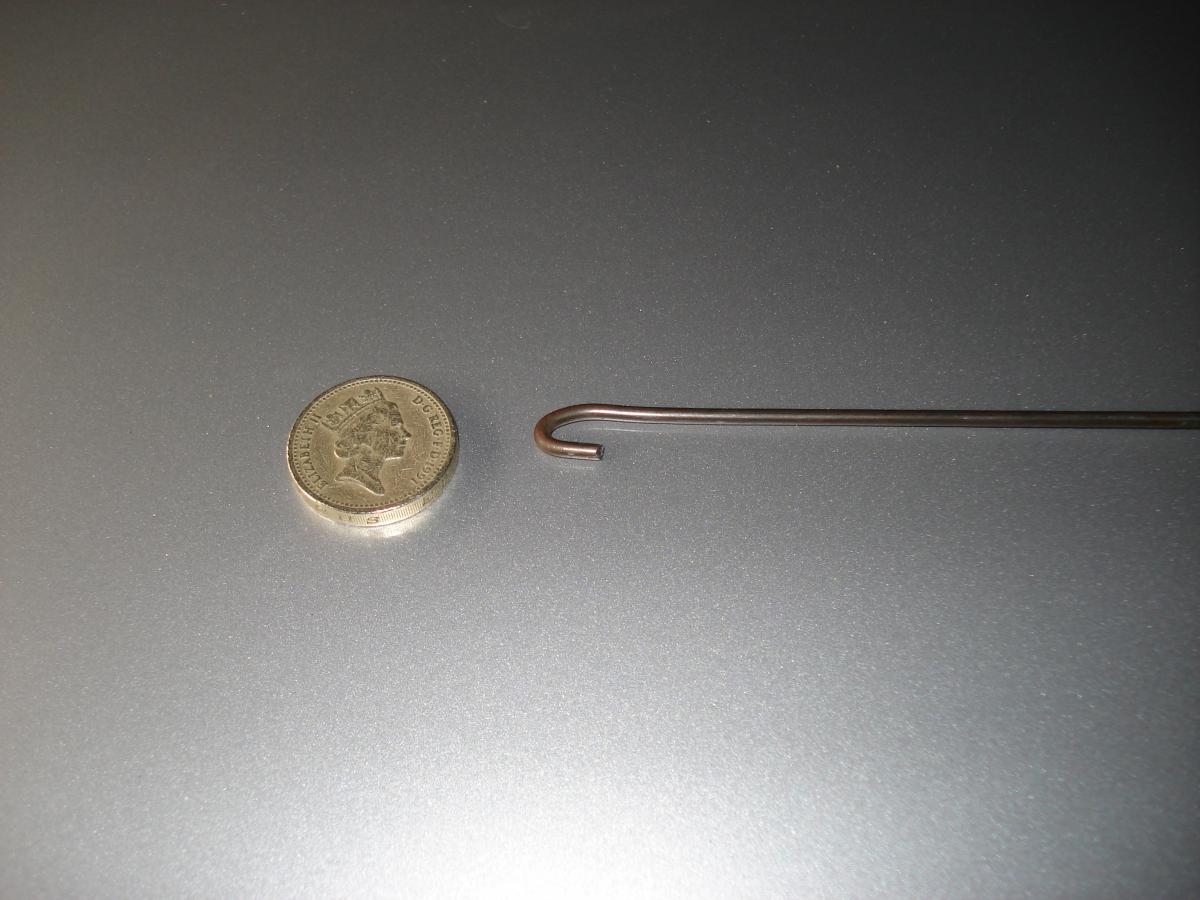
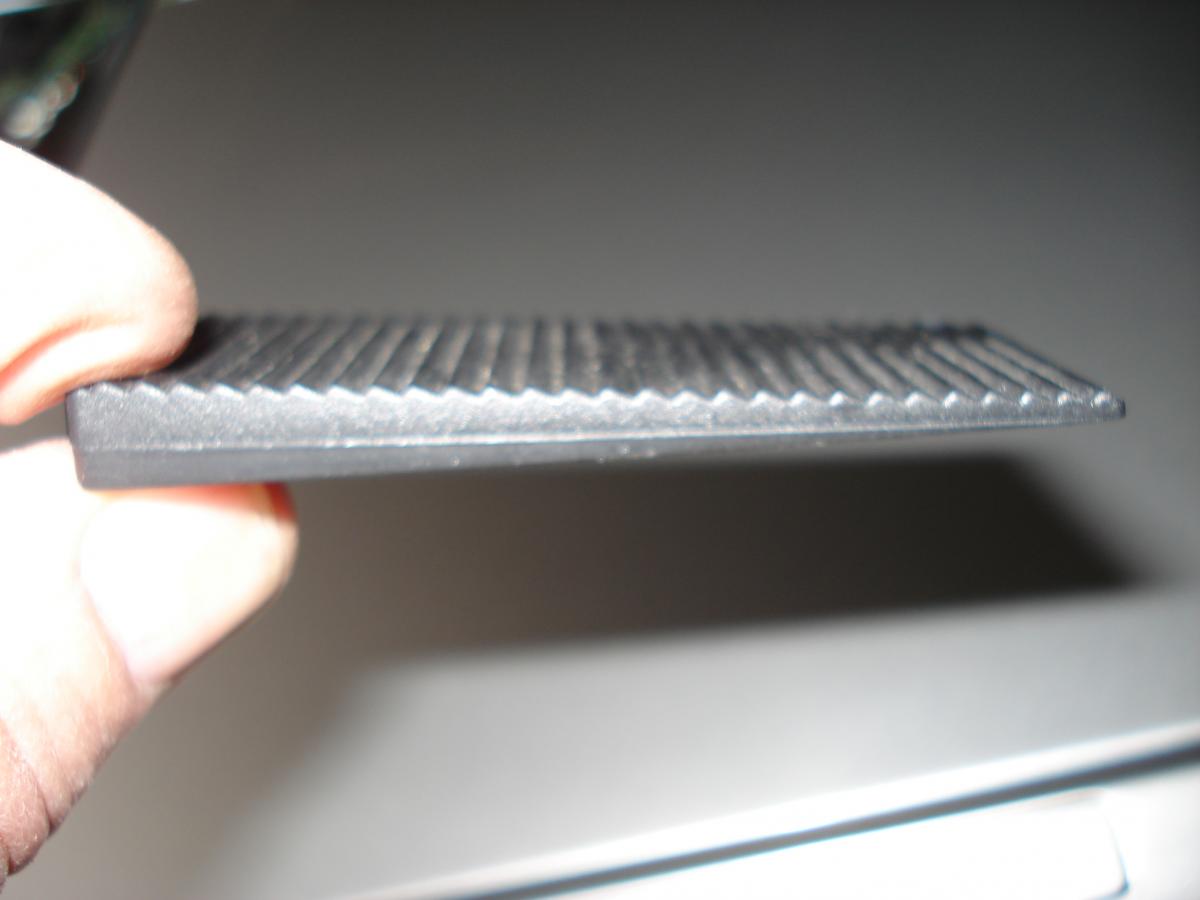
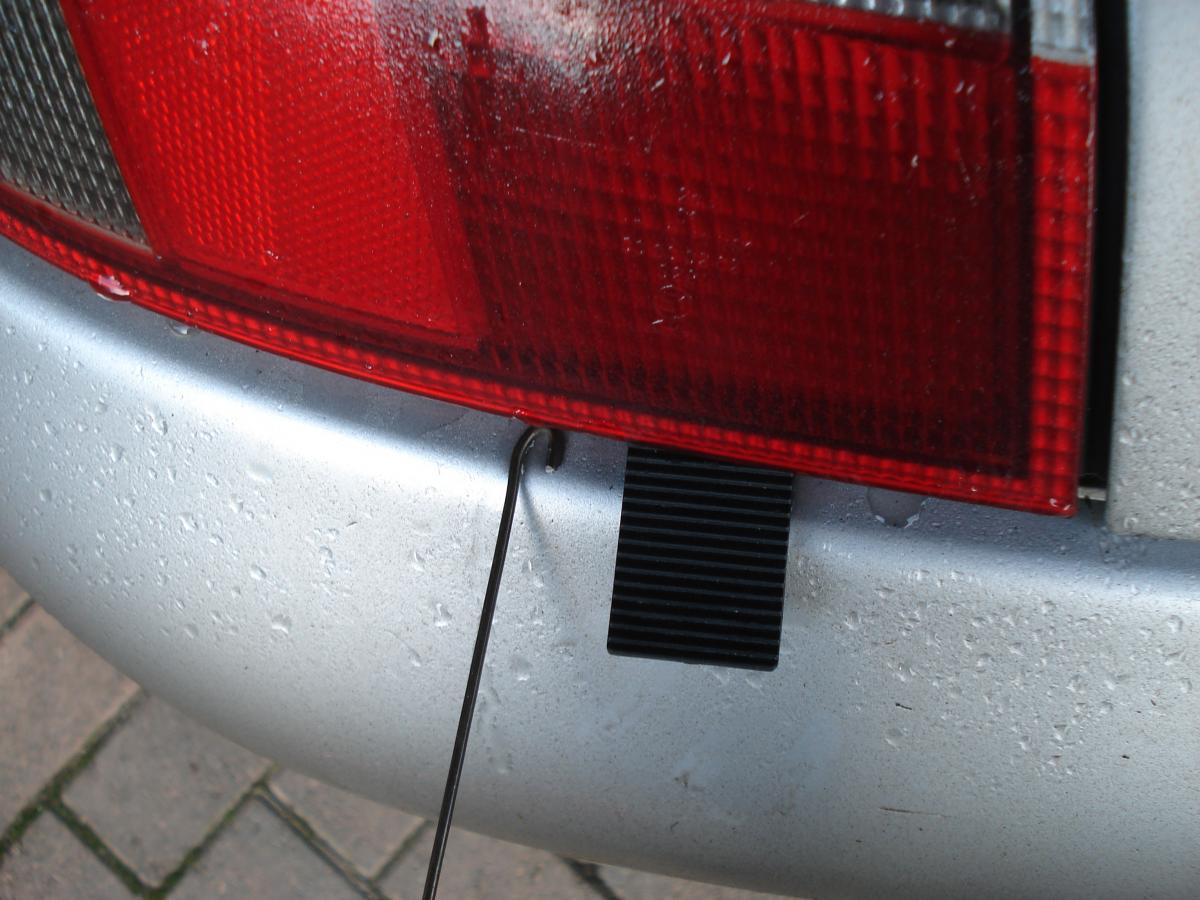
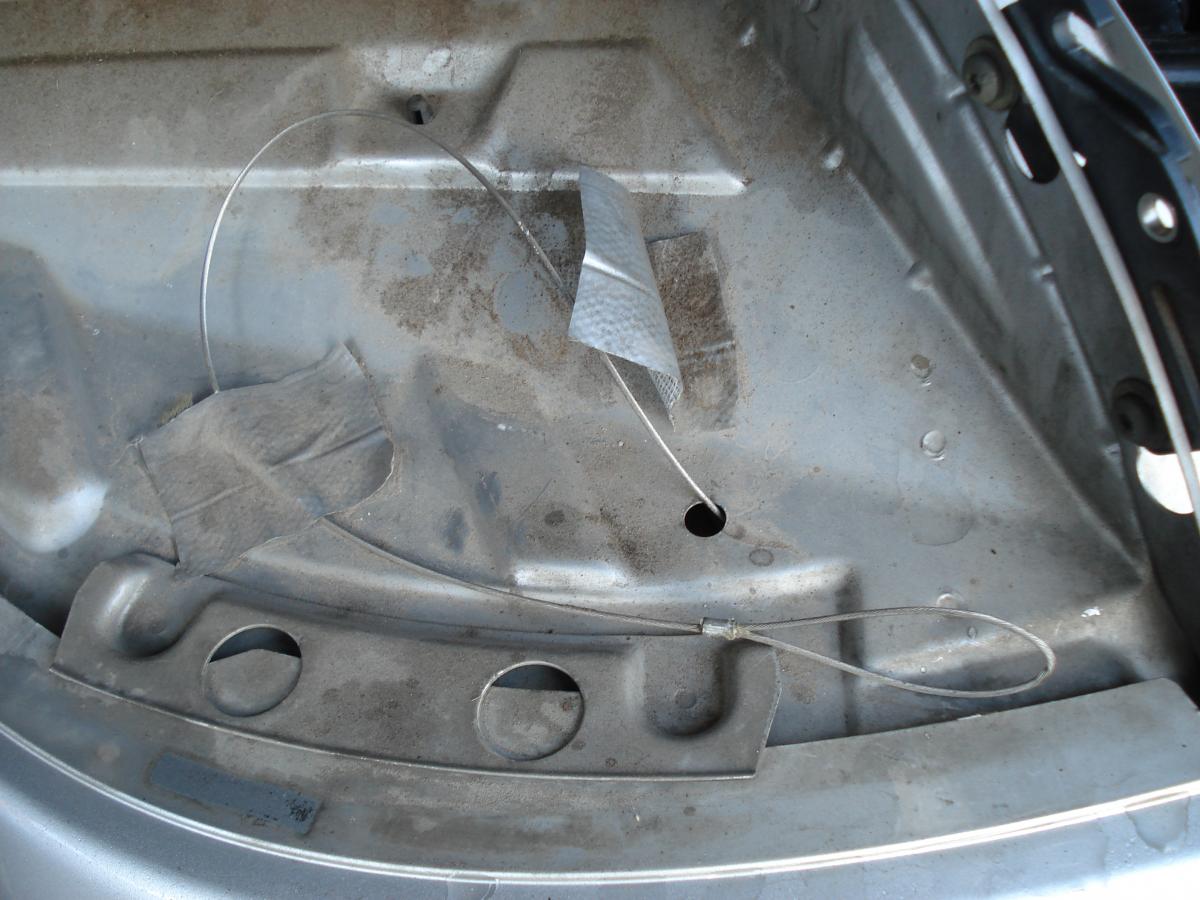
Getting into a 996 when the Battery is Flat. The conventional route seems to be opening the front trunk lid with the emergency wire and then applying jump start leads to the battery. This certainly works, but sometimes the wire is hard to find and with the wheel in place it is difficult to get behind the front wheel arch liner. In my view, it is a great deal easier to get in from the back, with the emergency release wire, and then to apply power to the jump start points in the engine compartment. Proceed as follows:- Tools: A short length of coat hanger wire with a small hook at one end and a narrow timber or plastic wedge. Method: There is an emergency engine cover release wire under the left back light cluster. You need to fish this wire out and when it is pulled the engine cover will be released. Insert the wedge between the underside of the light cluster and the top of the rear fender. Make the gap wide enough to insert the wire hook. Push the hook in about 4 to 6 inches. Turn the wire slightly and withdraw it pulling the caught emergency wire out. Pull the wire to release the engine cover lid. At this point the alarm will go off if there is sufficient current in the system. Locate the jump start points. The earth -ve (black jump wire) is near the engine cover catch and doubles as an air box fixing. The +ve (red jump wire) is just above the power steering pump within a plastic box. Attach both the jump wires, placing the red +ve wire first. The system is now energised and the central locking can be used and the alarm switched off. If you have never seen this wire, it is a good idea to locate it so you know where it is. It's easy to remove the rear light cluster. There is a single set screw with a 10mm hex head visible when the engine cover is raised. Options for the front emergency wire: Although the front trunk wire is more difficult to find it's worth looking for it before you need to do so in a hurry. I have extended my front release wire with a short length of nylon cord, bringing it out to a more accessible location. There are a number of options available for this, including running it to the side flasher unit. -
Having opened the lid jump leads can applied to the jump posts. These are shown in the following pics. The earth jump post (black lead) is near the catch. When the lid is opened the alarm will go off if there any life left in the alarm battery.

-
A few pics that might help The first pic shows the hooked end. The next shows the type of wedge - you could use cardboard or timber. There is a pic that shows the approx. insertion point. The final pic show the wire with the light cluster removed.
-
I agree it's easier with the wheel off, but he will need his socket for the locking wheel bolt which might be locked in the trunk.
-
One of the best ways to solve this is from the back of the car. Under the left rear light (looking from the back) there is a wire with a loop that when pulled will open the engine cover. You need a coat hanger wire about 12" long with a hook bent at one end. Widen the gap between the underside of the rear light and the fender with a plastic wedge and fish around under the light and pull the wire out. When it's out press down on the engine lid and pull the wire to release that catch. You now have access to the engine cover. You can now put jump leads onto the two jump start points in the engine compartment. The earth (-ve) is on the air filter housing near the engine catch. The positive (+ve) is with a cover just about the power steering pump. Energising the jump start points will energise the electrical system and should allow the central locking to work by inserting your key into the lock mechanism on the door. As the previous poster says you can use the wire under the front fender to open the luggage lid, but it is very fiddly to get at this. H
-
On my 2003 996 the fin rises at 74 mph and stays up until the car slows to below 30 mph. H
-
What is the open hose Right Rear near wheel?
Hilux2400 replied to Shred's topic in 986 Series (Boxster, Boxster S)
Coolant checks can be deceptive. Always check the coolant level when the car is cold and in the same location in your parking bay. Side to side or end to end can give different readings on heavily sloping ground. It is best to top up when the car is on level ground. -
What is the open hose Right Rear near wheel?
Hilux2400 replied to Shred's topic in 986 Series (Boxster, Boxster S)
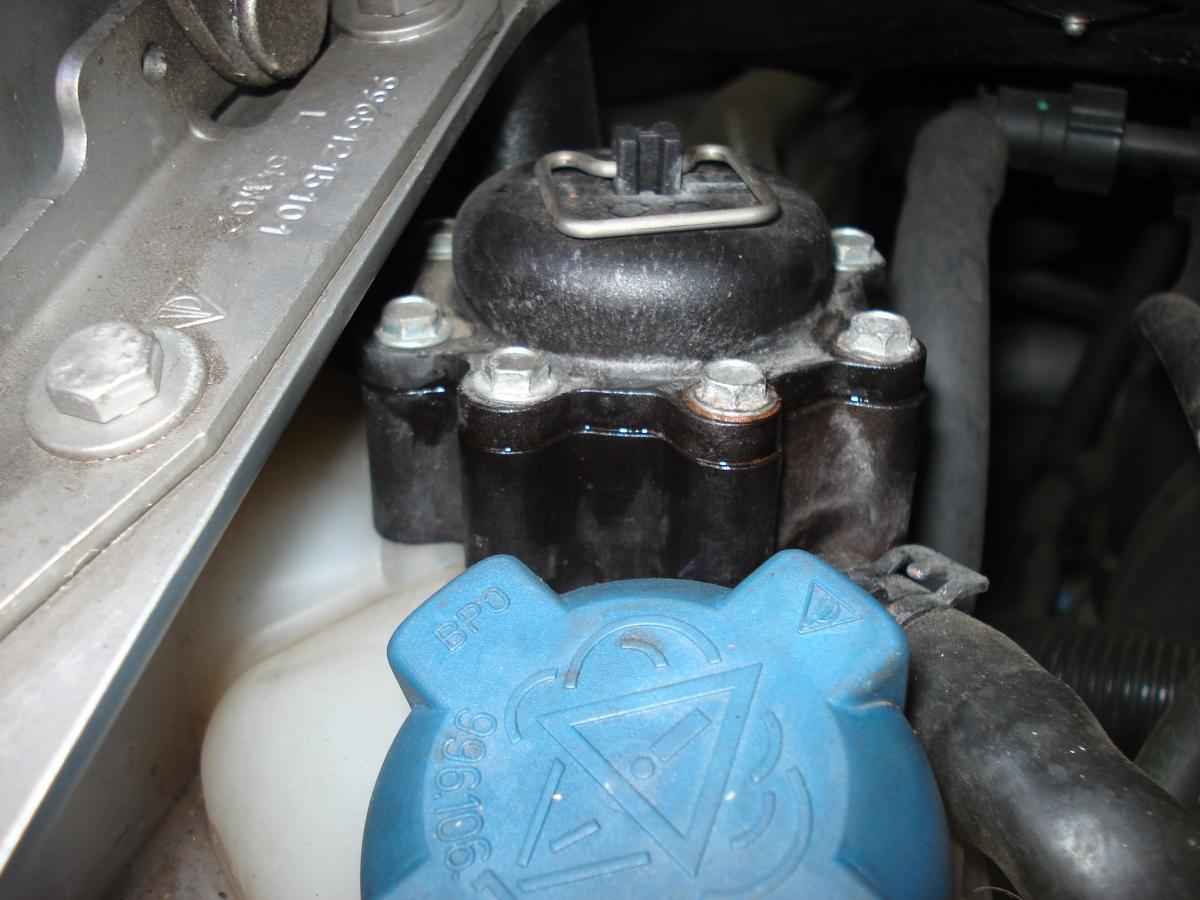
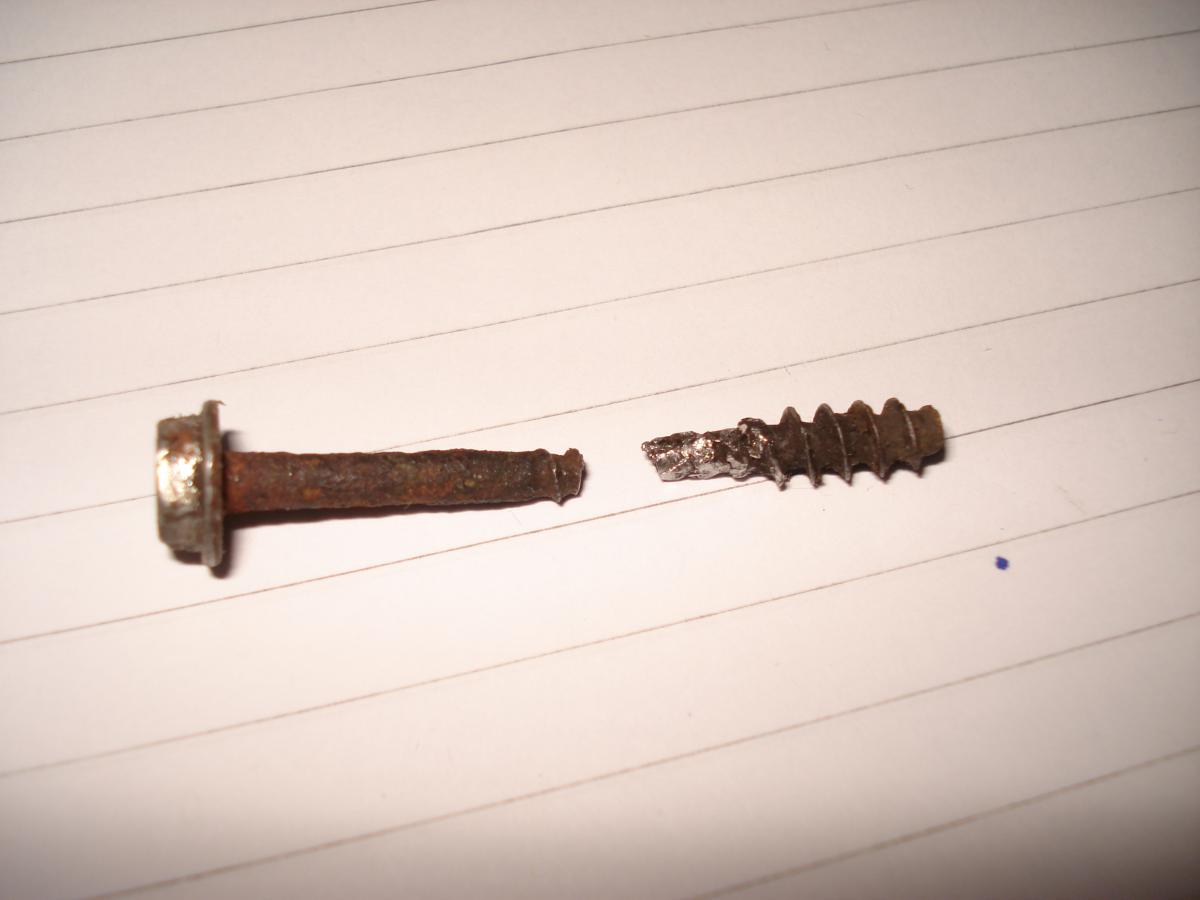
If the liquid has a red tint it is coolant and will be coming from the tray around the coolant filler cap. Look at this area and around the filler cap and determine the source of the coolant. Is it coming from overspill when topping up? Is it a faulty pressure cap (Cheap fix)? Or is coming from the bleed housing as these sometimes leak as a result of rusted holding down screws. You will see that the one in the picture is leaking. You can check for leaks with a handful of soapsuds.
-
I put in a set of after market HID's which gave great lighting on full beam, but showed fault codes. I had engine management lights come on when using the headlight flasher. I have since taken the HID's out. The sorts of problems I had were: oil level light, coolant level and parking brake light. The fault lights did not always come on, but when they did it always coincided with a main beam flash. On each occasion I stopped to make a check, but they were false warnings and there was nothing wrong. It's a great pity as the main beam lights on the 996 are dreadful. My only other option is to try higher rate bulbs, but already there is a 65w and a 55w burning away when on full beam and I don't want any higher heat sources in the unit in case it causes damage. H
-
Cleaning the MAF Sensor
Hilux2400 replied to Hilux2400's topic in 996 Series (Carrera, Carrera 4, Carrera 4S, Targa)
I used the CRC cleaner as mentioned by Loren in the above post. Cost about £7. It works just by spraying and the force of the jet is all you need. You need to spray the wire and the plates within the housing. Spray a few times using the full force of the jet. Shake off the surplus and allow to dry. The CRC fluid will cool the unit and if you do the job during high humidity water droplets will condense on the unit. These will need to be dried off in a warm room. I took the MAF sensor out. There are two torq screws holding it in, but you will need the security bit for the driver as the screws have a central pin. This job is best done with the air cleaner box off the car. Hope this helps. H -
I cleaned the MAF sensor recently on my Toyota Yaris, which has a diesel engine, with a noticeable improvement in fuel consumption. There was nothing wrong with the performance of the vehicle. It has done 42K miles over 8 years, but the MAF sensor had quite a bit of build up. With the first journey fuel consumption seemed to improve by about 5 -8%. I then used the same cleaner on the 996 (2003 C2 with 52k). Once again I could see an improvement in fuel consumption. I have never done this work as part of normal maintenance, but will in future. I used the proper spray cleaner for the job which does it without the need for hard contact. On looking at the shape of the MAF sensor it seems to be the same Bosch component that's fitted to the Opel Astra and Alfa Romeo 156. The one on the Astra is about 25% of the cost Porsche unit. Is it the same part? H
-
The lighter socket is a better option as there is little chance of driving off with the wire connected.
-
Excellent -I did not know that. H
-
I have a 10amp fused connector from the battery terminals. The female connector rests on the plastic shroud near the battery. When I connect it up to the charger I run the cable out near the wipers. This means I can close the trunk lid and lock the car. The reason I do it this way is that my 996 is parked in an open fronted car port and I like to keep it locked when not in use.
-
Turn signal indicator blinks rapidly
Hilux2400 replied to royp4's topic in 996 Series (Carrera, Carrera 4, Carrera 4S, Targa)
It's more than likely to be one of your left turn bulbs or the connection to one of the bulbs. Put the hazard flashers on and view the car from the outside to see which one is not working. If it's the side flasher it juts pulls out and it's easy. If it's the back that also easy. Lift the engine cover and unscrew the nut that holds the light assembly in place. Remove the light unit and locate the flasher bulb. It will be a 21w single filament bulb. The front one is a bit more tricky as you will have to remove the whole headlight unit. It's easy to do as it slides out, but a bit more difficult to put back. You might need help if you have not seen it done before. -
One of the easiest ways to repair this captive nut is with a product called SuGru. It is a rubber product that can be formed into any shape which then retains that shape when cured. I repaired this item with Sugru. I threaded a bolt from the top which I had lightly greased into a nut from the bottom. I then encased the bolt and nut with Sugru pressing it into the hole, forming a mushroom head on top above the metal and a blob below around the thread. I then allowed it to set overnight. The result was a 100% success as a replacement part. Sugru is great stuff. Look it up on the web. H
-
Time for a new battery?
Hilux2400 replied to Dario Campolattaro's topic in 996 Series (Carrera, Carrera 4, Carrera 4S, Targa)
Get the biggest one you can fit in. -
Coolant Issues
Hilux2400 replied to WhisperBlade's topic in 9PA, 9PA1 (Cayenne, Cayenne S, Cayenne Turbo, Cayenne Turbo S)
Top the coolant reservoir up to the right level when the car is cold. Make sure the car is parked in its normal parking place when you do this. Use the vehicle and bring it up to operating temperature and return the car to the same spot and allow to cool overnight. Check the coolant level in the morning when the car is cold. The coolant level should be the same on consecutive days. It is important to have the car parked in the same location as surface gradient can alter the level in the coolant reservoir. If you can find an absolutely level spot, then that's better. When I do this I park in the same spot in the car port and I put a chalk mark on the ground to mark the mid point of the tyre contact. H -
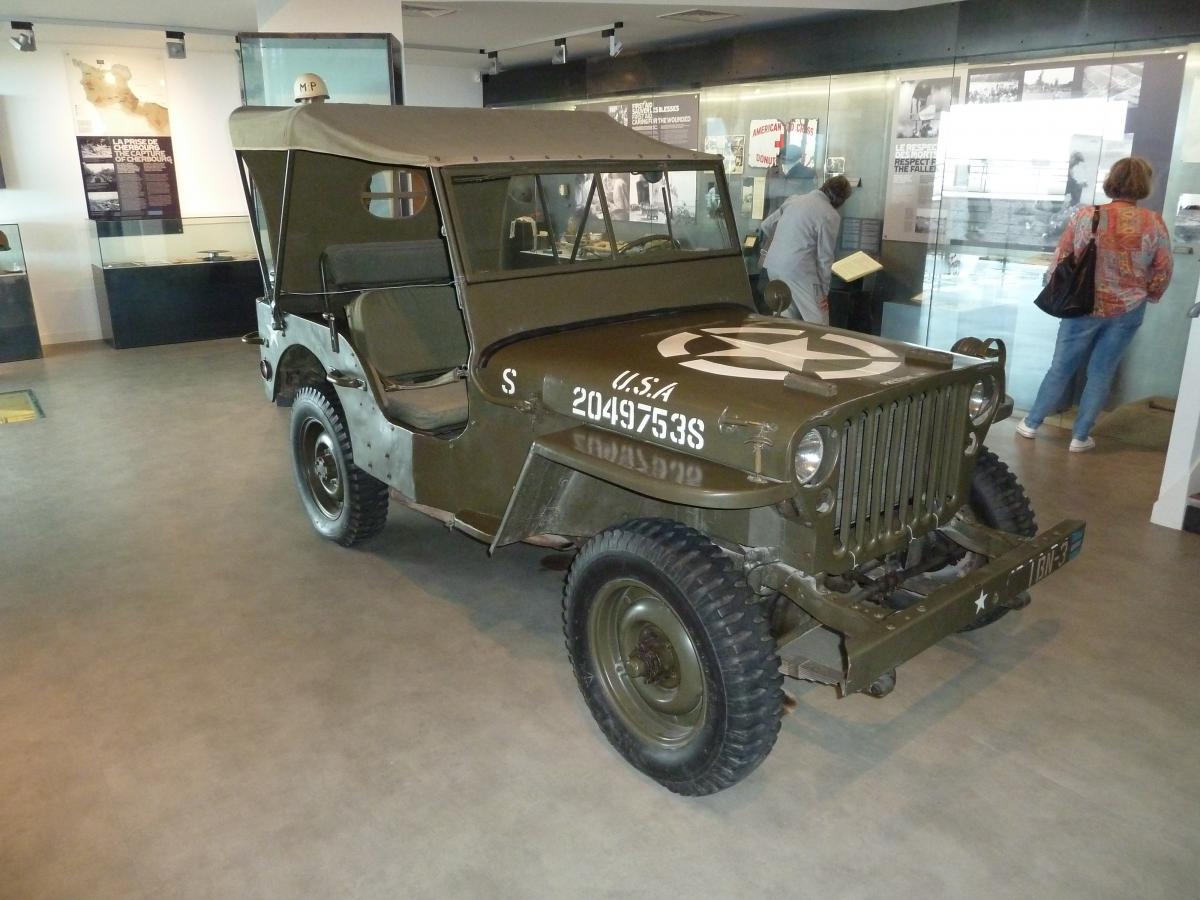
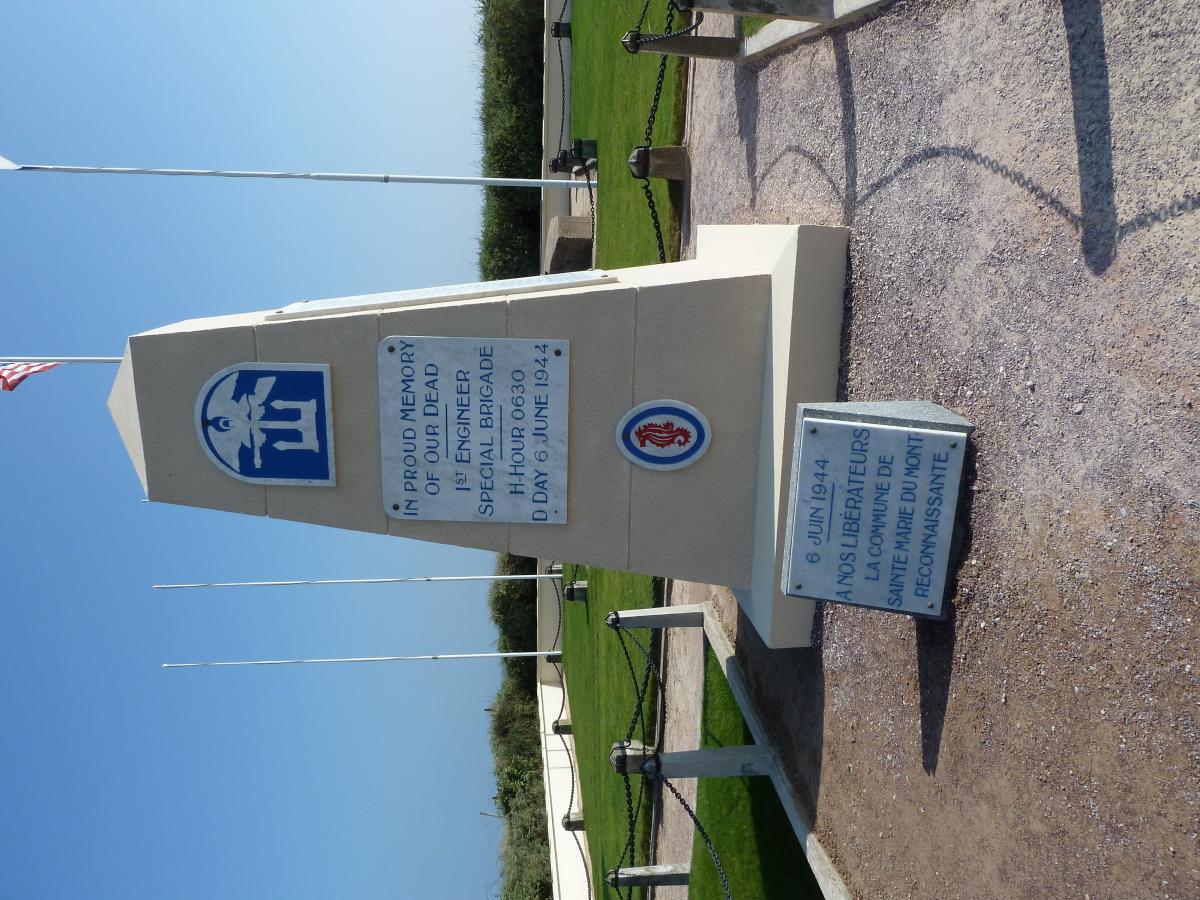
Hi All As it's Remembrance Week in the UK I though I would attach a few photographs taken at the American Museum at Omaha Beach in France. I visited the museum this year when touring in France. There were US people there when I visited. It's a very moving exhibition and important to remember how many young men lost their lives in this location in 1944. I stood on the beach at the very location where US landing craft would have been coming in and also at the location of machine gun posts on the beach. Both are chilling viewpoints. I am not sure if it's appropriate to place this post here, so I leave it to the administrators. Regards H
-
Something I noticed when mine was done was the air con pipes which go from the compressor to a fitting on the side wall. They can get stretched and if very tight can hold the engine up. The support bracket on the side wall disconnects easily and can give a bit more float to play with. We were also doing the AOS at the same time so had taken off a lot of other stuff on the coolant tank side, but as you say it's a tight fit. Don't forget to put in a new coolant warning sensor as it's a pig to do it afterwards. I also put on a new cap. H
-
That's a good price with the tyres as well - a bargain I'd say. H
-
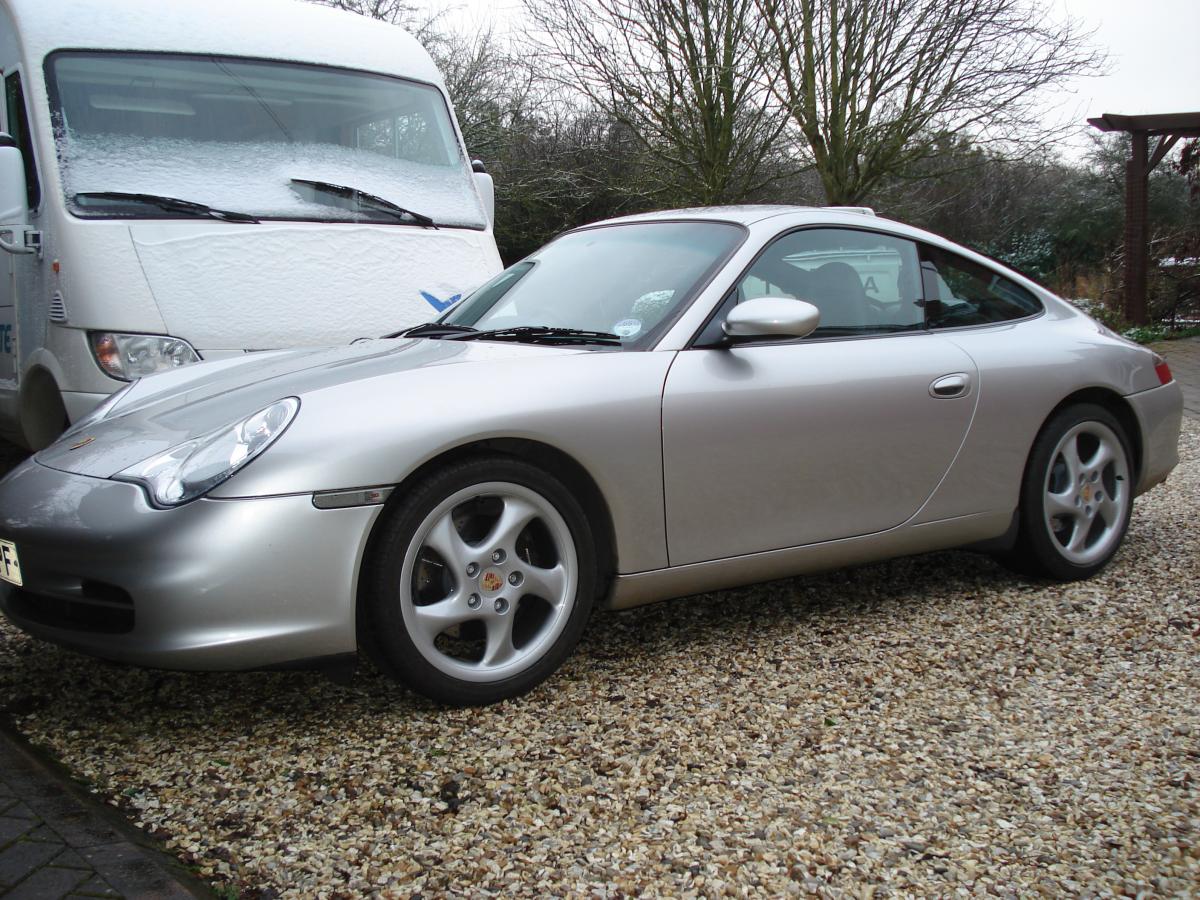
It's best to stick to the manufacturer's options size as otherwise it could be seen as a modification. It's not just the rim diameter it's also the offset that needs to be right. The wrong offset alters the track width and hence the road holding characteristics, not that it would be that significant at normal road speeds in the UK. The offset is also stated in the handbook. If you want some 7.5j fronts and 10j rears which are genuine Porsche Turbo type then email me as I have a set available in pretty good condition. They came off my 2003 C2 996 which had the wrong wheels when I bought it. I attach a picture of the car with these turbo wheels. I have since fitted the correct size 8/10 X18's wheels which should have been on the car at the time of manufacture. H