Welcome to RennTech.org Community, Guest
There are many great features available to you once you register at RennTech.org
You are free to view posts here, but you must log in to reply to existing posts, or to start your own new topic. Like most online communities, there are costs involved to maintain a site like this - so we encourage our members to donate. All donations go to the costs operating and maintaining this site. We prefer that guests take part in our community and we offer a lot in return to those willing to join our corner of the Porsche world. This site is 99 percent member supported (less than 1 percent comes from advertising) - so please consider an annual donation to keep this site running.
Here are some of the features available - once you register at RennTech.org
- View Classified Ads
- DIY Tutorials
- Porsche TSB Listings (limited)
- VIN Decoder
- Special Offers
-
OBD II P-Codes - Paint Codes
- Registry
- Videos System
- View Reviews
- and get rid of this welcome message
It takes just a few minutes to register, and it's FREE
Contributing Members also get these additional benefits:
(you become a Contributing Member by donating money to the operation of this site)
- No ads - advertisements are removed
- Access the Contributors Only Forum
- Contributing Members Only Downloads
- Send attachments with PMs
- All image/file storage limits are substantially increased for all Contributing Members
- Option Codes Lookup
- VIN Option Lookups (limited)


1schoir
-
Posts
2,739 -
Joined
-
Last visited
-
Days Won
9
Content Type
Profiles
Events
Forums
External Paint Colors
Downloads
Tutorials
Links Directory
Collections
Classifieds
Store
Everything posted by 1schoir
-
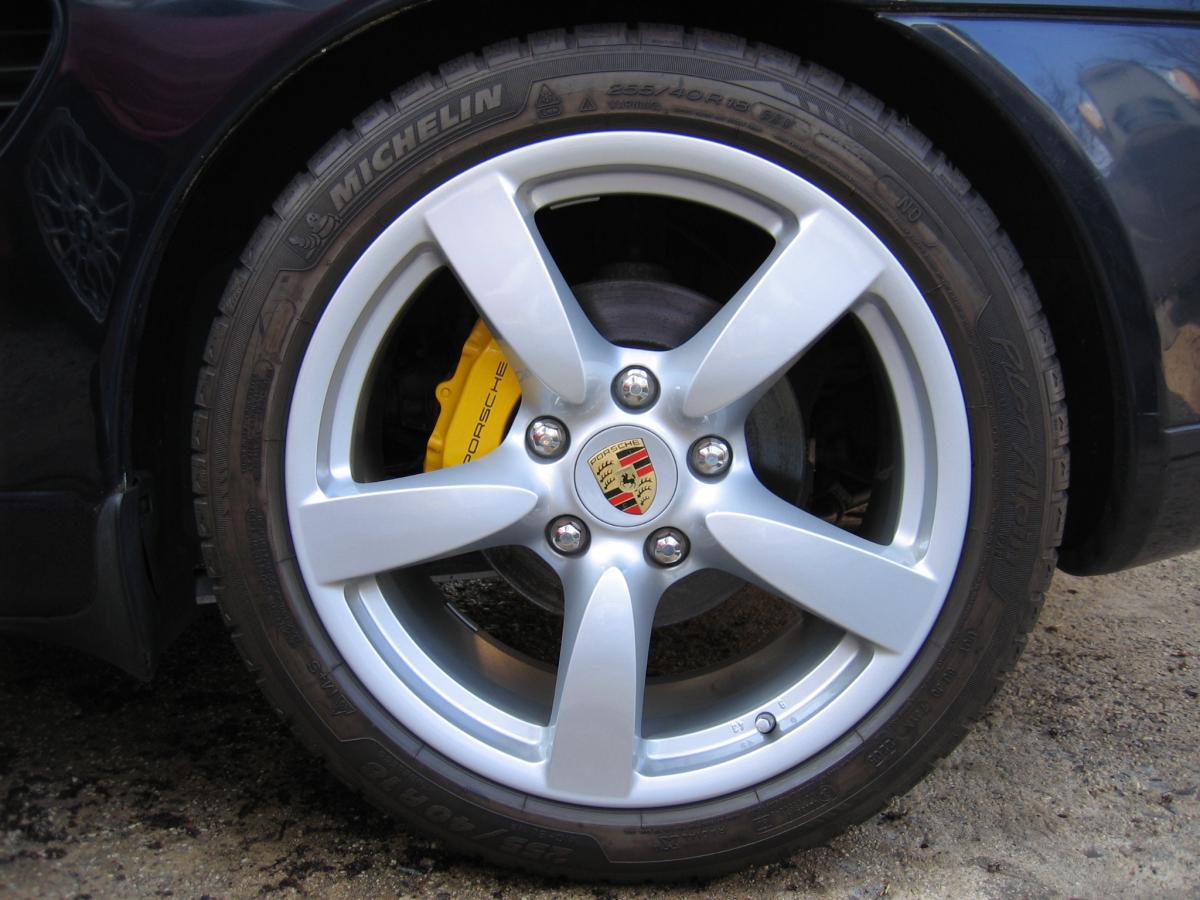
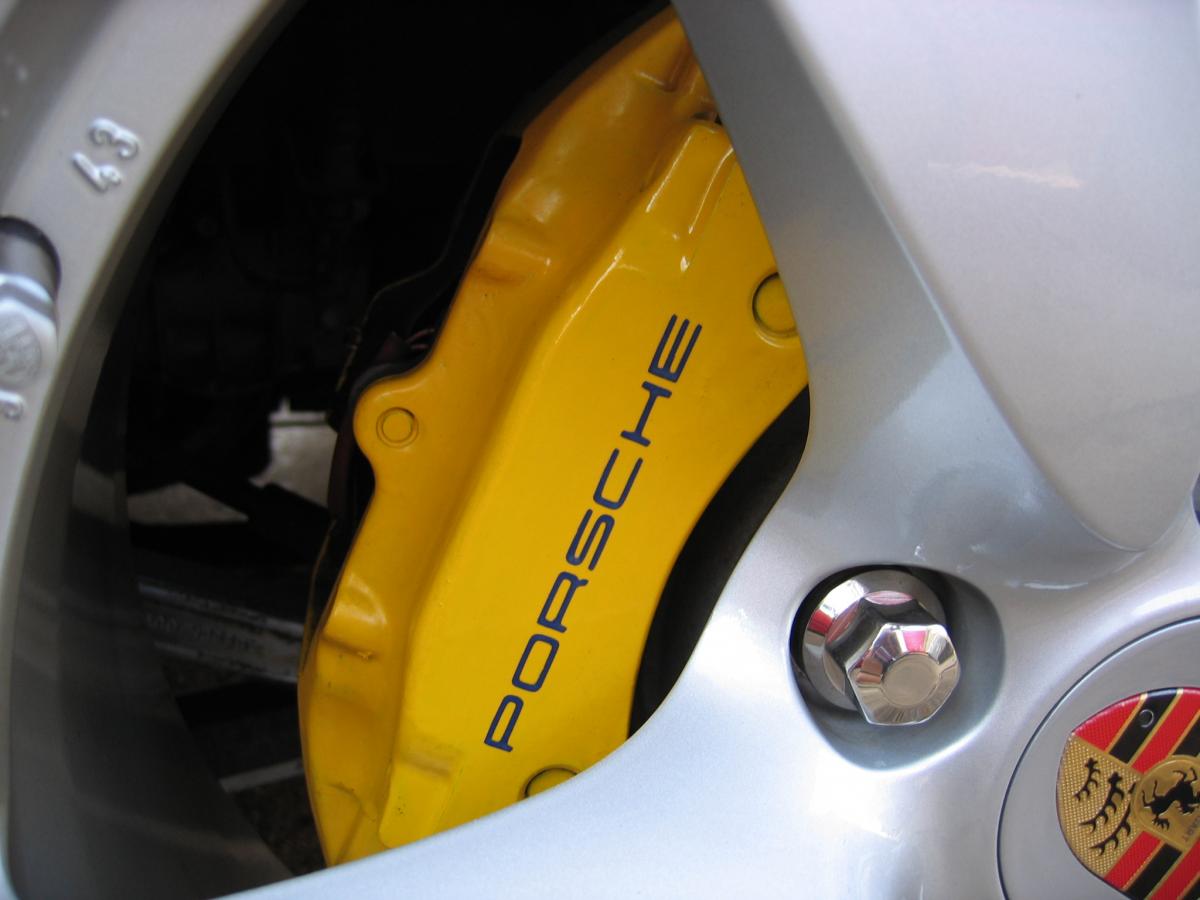
Your calipers look great and that G2 caliper paint holds up really well. If you want to keep the decals from getting prematurely damaged, shoot a couple of thin coats of high-temperature clear over them. That will help protect them, especially when you are cleaning the brake dust off the calipers on occasion. Here are what yellow one look like, done about two years ago: . Regards, Maurice.

-
Need another key.
1schoir replied to jshayes's topic in 996 Series (Carrera, Carrera 4, Carrera 4S, Targa)
A product called Novus, in three different grits, can usually bring back almost any vinyl window. Check out this link for a more detailed explanation: http://sites.google.com/site/mikefocke2/theplasticwindow Regards, Maurice. -
James: Thanks for sharing the solution and providing the details. :thumbup: Regards, Maurice.
-
Wheel Dynamics
1schoir replied to erey's topic in 997-1 Series (Carrera, Carrera 4, Carrera 2S, Carrera 4S)
ER: There was a very long thread on Rennlist.com about a year ago. You should do some reading before making a decision on where to put your hard-earned $$: http://www.6speedonl...must-see-5.html I have no personal experience with them, but I was taken aback when that particular incident happened. I do know that Wheel Dynamics is now banned from Rennlist, probably as a result of that incident. Anyway, do some more searching so that you can make your own decision. Regards, Maurice. -
New GAAH Top Some Issues
1schoir replied to Ronald Breeze's topic in 986 Boxster Convertible Top Issues and Solutions
:thumbup: Regards, Maurice. -
Where to top up Power Steering fluid?
1schoir replied to muzzy1's topic in 987-1 Series (Boxster, Boxster S)
The factory fluid is definitely a good idea. Pentosin, IIRC. Regards, Maurice. -
Where to top up Power Steering fluid?
1schoir replied to muzzy1's topic in 987-1 Series (Boxster, Boxster S)
That's easy enough. Take a look at your owner's manual. The 987 require a torx or other type of screwdriver to remove the engine cover. The 986's had "turnbuckle-type" fasteners that could be removed by hand. I guess Porsche wants us to pay more visits to their dealers for these complicated procedures! LOL! Regards, Maurice. -
Where to top up Power Steering fluid?
1schoir replied to muzzy1's topic in 987-1 Series (Boxster, Boxster S)
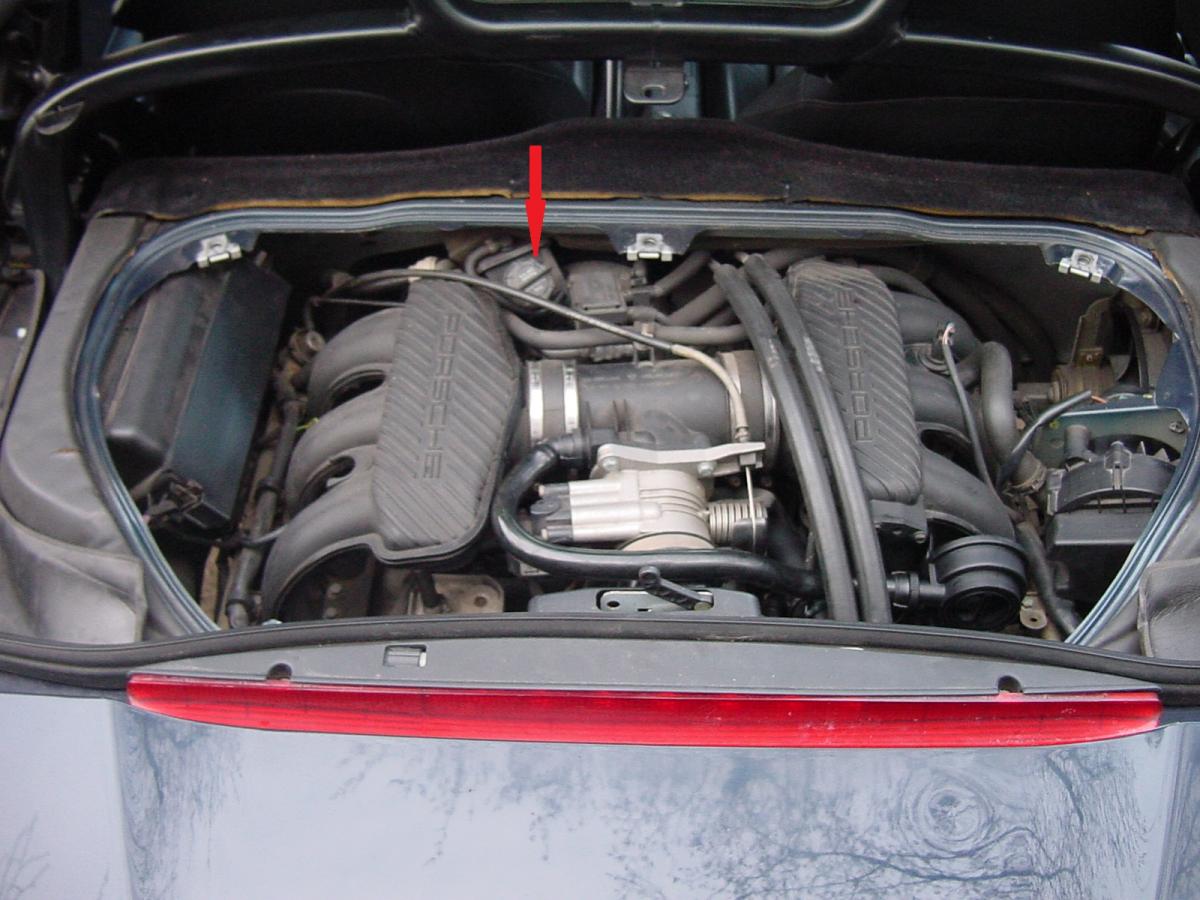
The power steering pump and reservoir is located at the very front of the engine compartment, on the driver's (left) side, just to the left of center. Here is a photo of the reservoir and the cap, at the red arrow (Note that this photo is from an early 986, but the location is the same): (click on the photo to enlarge) Regards, Maurice.
-
New GAAH Top Some Issues
1schoir replied to Ronald Breeze's topic in 986 Boxster Convertible Top Issues and Solutions
Just make sure to double and triple check that your foam drain trains have not gotten ripped or torn in case one of your front pushrods was dangling. Also make sure that the drain holes are clear of any leaves or debris. There are two sets of drain holes: one is in the foam drain tray directly below the V-levers, the other is at the very front inside corner of the metal channel into which the front pointed ends of the clamshell rest when the clamshell is down. If any one of those get clogged, you run the risk of getting water into the cabin and then frying the immobilizer under the driver's seat. Regards, Maurice. -
New GAAH Top Some Issues
1schoir replied to Ronald Breeze's topic in 986 Boxster Convertible Top Issues and Solutions
Ron: Your '99 originally came with the "A Version" transmissions, and although they usually function perfectly fine, they tend to be somewhat more troublesome than the "B Version" transmissions. The A Version transmissions have a half-moon gear inside, as opposed to a 360 degree gear inside the B Version transmissions. The electric motors are the same, even though the part number changed around 2004. The half-moon gear, if it goes past the 50th tooth can make a loud popping sound as the black "hydraulic" pushrods pull the V-levers back. That may have been the second popping noises you heard. Take a look at this link to get familiar with the various parts and their names, and to identify the different versions of the transmissions: http://sites.google.com/site/mikefocke2/installinga'03-'04glasstopandframeona'97 In particular, look at page 10 of the Part I PDF, and various pages of the Part II PDF. If your plastic ball cups are red, they tend to get more brittle with age and exposure to the elements. They were later replaced by white ones which hold up better. The ball cups either crack with age, a binding mechanism, or one that is not well lubricated. To make sure that your convertible top frame is operating smoothly, disconnect the two plastic ball cups and put the canvas top through a couple of cycles by moving it manually. You should be able to move it with just your pinky. Also check that the channels in which the clamshell support arms slide back and forth are well lubricated. You can use white lithium grease or Krytox as a lubricant. Porsche only sells the plastic ball cups as part of a complete front pushrod assembly, but there is a guy in the Netherlands who has had the ball cups manufactured. Regards, Maurice. -
New GAAH Top Some Issues
1schoir replied to Ronald Breeze's topic in 986 Boxster Convertible Top Issues and Solutions
The top has to have some time to stretch, preferably in the closed position baking in the sun. That should get better over time. The first popping you heard may be one of your plastic ball cups when it broke apart or popped off its steel ball under the base of the B Pillar. The top will still operate with one of the ball cups broken, although one side will lag slightly behind on the way up and lurch forward on the way down. If one of your ball cups is broken, be careful that you don't get the then-dangling front pushrod to dig into the foam drain tray as the top is going up and down. That will result in water in the cabin and a possible frying of your central alarm control unit (under the seat). Figuring out what caused the other popping noises depends on what year Boxster you have and whether you have the "A Version" or "B Version" transmissions. Regards, Maurice. -
:jump: Regards, Maurice.
-
From an installation standpoint, they are the same and they both use the later style brackets and hangers (for 986's). The tips are different. Regards, Maurice.
-
Are you saying "bilateral" as in two areas on one cylinder head, or the same area in both cylinder heads? Regards, Maurice.
-
Additives to stop an engine oil leak are a band-aid, at best, and they may give you a false sense of security. There is no way to definitively know whether it's the RMS or the IMS that is causing the leak, short of dropping the transmission to have a look. +1 on cleaning the area and monitoring it to see how severe the leak is. Since it's not dropping any oil onto the ground, it doesn't sound like a serious leak, assuming that it's coming from the RMS. Regards, Maurice.
-
Cold idle problem
1schoir replied to schienbeinj's topic in 996 Series (Carrera, Carrera 4, Carrera 4S, Targa)
Have you checked your air filter for clogging or your air filter box for leaves, debris, etc.? It could be as simple as that. Try starting the engine from cold with the air filter removed (and the air filter box clean). If it changes the idle behavior, replace the air filter. Regards, Maurice. -
For the fingertip test: Turning on the A/C to cause the low speed relays to click on and off will only happen when the coolant temperature is below 206 degrees Farenheit. If the coolant temperature is above 206 degrees, but below 215, the low speed fans will turn on (and the low speed relay will click) without pressing the A/C button on. Regards, Maurice.
-
Sport: Take a look at this recent thread: http://www.renntech....__fromsearch__1 Regards, Maurice.
-
Car needed a jump
1schoir replied to BrianMarks's topic in 996 Series (Carrera, Carrera 4, Carrera 4S, Targa)
Jimmy: The batteries are all the same, but the Bosch battery comes with a 3 year full replacement warranty and a further 3 year pro-rated warranty. If you go to Pep Boys, you can pick up a small device that plugs into your cigarette lighter that can avoid having to reset anything. You won't have to have your radio code re-entered, and will also avoid possibly having to re-set the windows. Your car won't have to re-learn the fuel trims, etc... Regards, Maurice. -
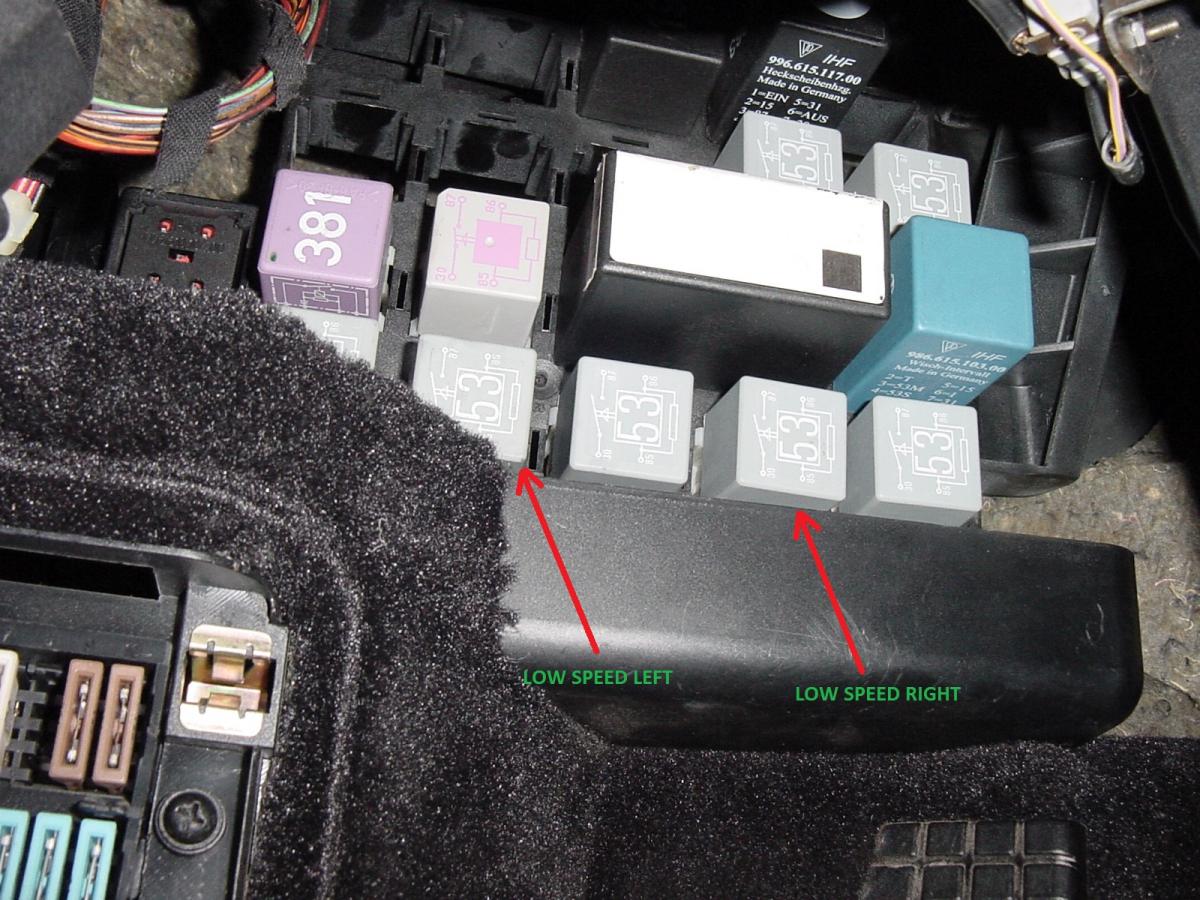
The car can just be in park....if the water temp gets high enough, the fans (both left and right) should kick on to run at the low speed at the same time. The ballast resistors are what causes the fans to run at the low speed, unless the resistors are fried, in which case they will not run at all when the low speed is called for. The fans are supposed to run at the low speed when the coolant temp is higher than 206°F or the A/C is on. The fans switch to high speed when the coolant temperature is higher than 215°F or the A/C freon pressure is higher than 16 bar. You can also get a clue about whether the resistor is bad by "feeling" the relay with your finger. With the car cold, you can start the engine (leave it in "park") and put your index finger directly on the first of the two low-speed relays shown in the photograph above (IIRC, it's relay in position #19). With your finger on the relay, press the "snowflake" button on the dash (to turn on the A/C). When you do that, you should feel (and possibly hear) the relay click. If it clicks and the fan does not turn on, the resistor is bad. Repeat with your finger on relay #21. If you stick your hand below the front bumper, immediately ahead of each front tire, you should feel each one blowing air. They definitely don't sound as loud at the low speed as they do at the high speed. The part number for the ballast resistors is 996.616.101.00. Same part for either left side or right side. The last time I checked, they listed for about $90 each and could be had for about $65 at sunsetimports.com. Regards, Maurice.
-
Boxster Front Trunk Light
1schoir replied to Pierre's Porsche's topic in 986 Series (Boxster, Boxster S)
:thumbup: Regards, Maurice. -
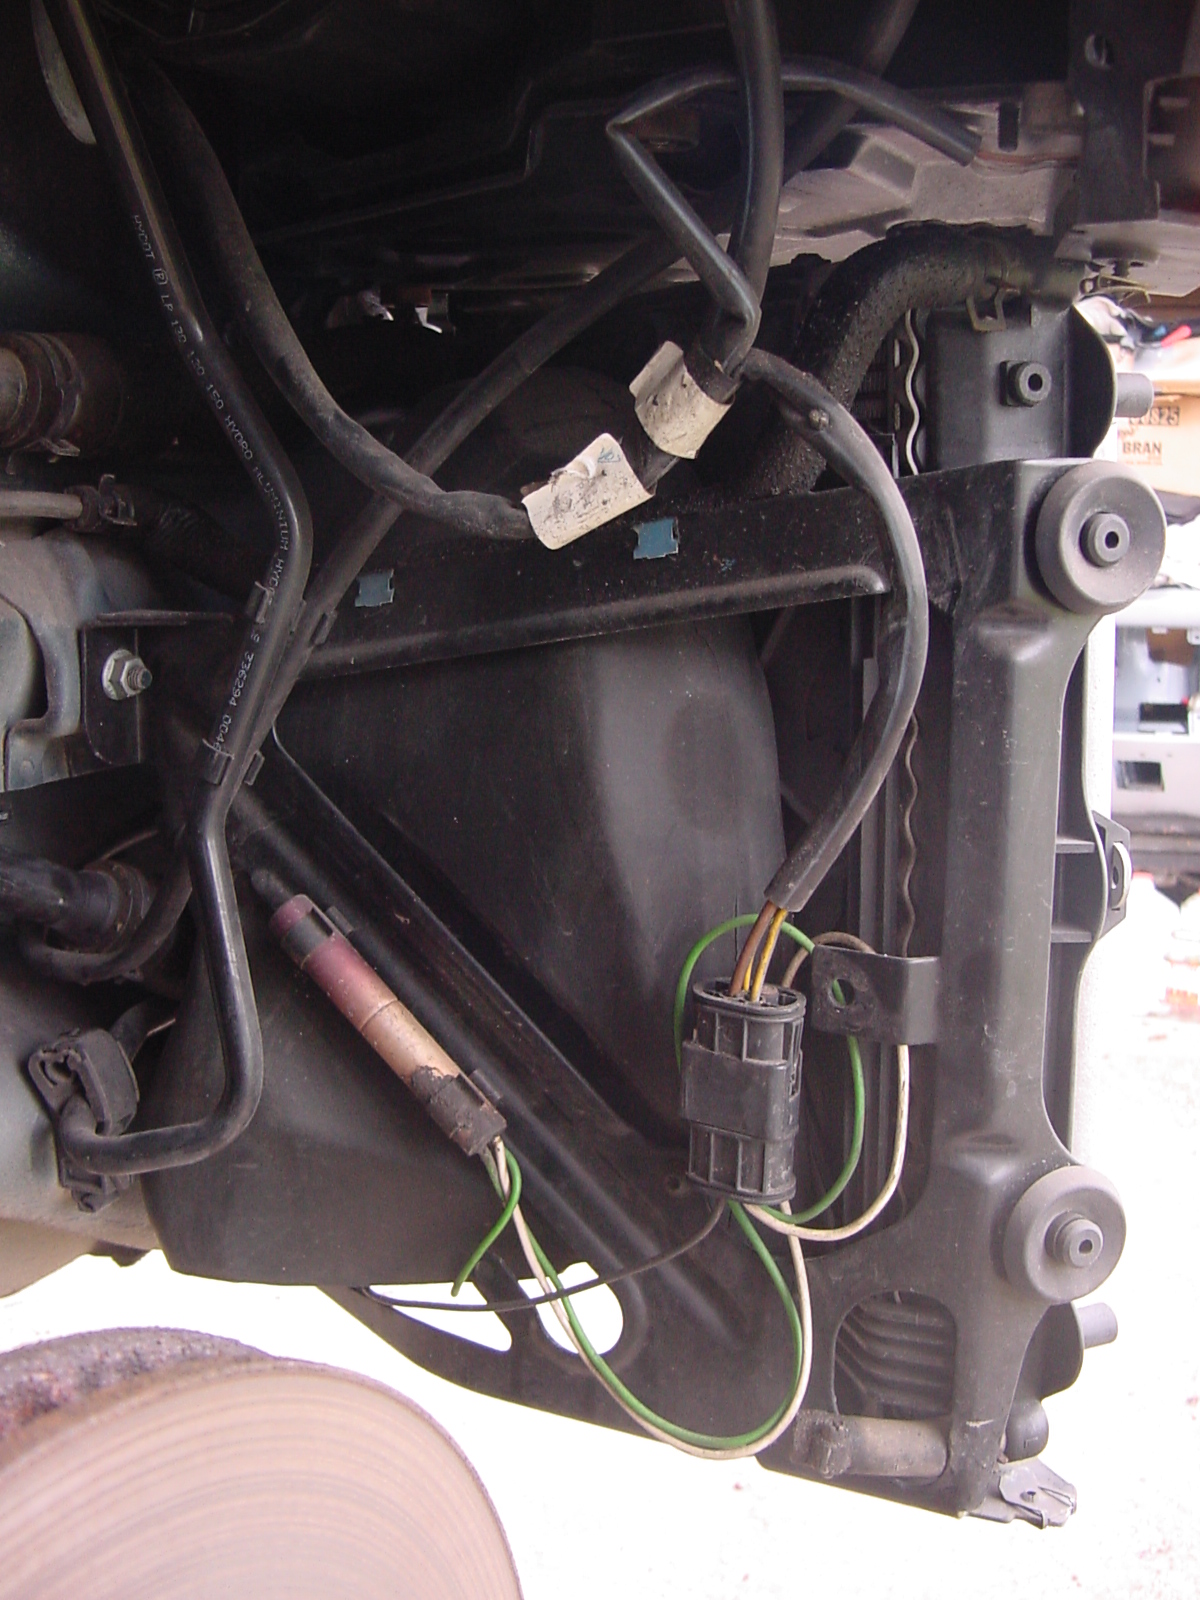
If you think that your low speed fans may not be coming on when needed, you have to diagnose the cause: 1. the low-speed fan relay (located in the bottom row of the relay tray in the kick panel); 2. the ballast resistor (located aft of the fan housing, clipped on to the lower rail of the housing); 3. the fan motor itself. Since you are certain that the fans work when you turn on the A/C, it's not #3. To eliminate the relay, you can swap each of the two high-speed relays (left and right) with the two low-speed relays. If both fans kick on after you turn on the A/C (after swapping the relays), then it's not #1. If you have determined that it is the ballast resistor (cause #2), you have to replace it. These fail often because of their location. They heat up and then can get splashed with cold water if you go through a puddle, etc, which causes them to crack and fail. You will have to remove the front wheel well liners to access them. Here is a photo of the low-speed relays and their location in the relay tray by the kick-panel: Here is a photo of the right side ballast resistor (it's the bullet-shaped part): Regards, Maurice.
-
Boxster Front Trunk Light
1schoir replied to Pierre's Porsche's topic in 986 Series (Boxster, Boxster S)
IMO, it's easier to simply remove the small lightbulb. Very easy to access and remove and replace. Just make sure you clean the bulb before reinstalling it to remove any oil that may have been deposited there from handling the bulb. That will make the bulb last longer. Regards, Maurice. -
Kiwi: On a 2000 to 2002 Boxster, a 2003 complete top and frame is a relatively straightforward swap that should take you about 2 or 3 hours. The noise level is a little better but not much difference there. You do get the advantage of having glass, and a defroster in the rear window, all pre-installed and pre-wired in the Boxster. Here is a complete DIY: http://sites.google.com/site/mikefocke2/installinga'03-'04glasstopandframeona'97 Regards, Maurice.
-
Convertible top problem
1schoir replied to eisenbud's topic in 986 Boxster Convertible Top Issues and Solutions
Bryan: Here is a rough DIY on lubricating the convertible top mechanism that I wrote up a couple of years ago: You can lubricate the various friction points of the convertible top mechanism. You can easily tell if your top mechanism needs lubrication by disconnecting the joints at the V-levers and operating the top and the clamshell manually. If it's properly aligned and lubricated, both should be almost effortless to move back and forth (open and closed). Note that you must first remove the cosmetic black plastic covers that are attached to each of the clamshell arms. They can just be pulled off and later snapped back on. Starting with the clamshell, there are four points to lubricate: 1. The joint where the black hydraulic pushrod attaches to the clamshell arm at its rearmost point. Note that there is a small plastic sleeve bushing (part #999 924 126 00) that sometimes wears out here and which is located in the hole in the clamshell arm, and through which the pushrod's metal pin gets inserted and is fastened with the speednut-type clip. 2. The cup end on the black hydraulic pushrod where it snaps on to the metal ball on the V-lever. 3. The metal guide rail (channel) where the black square plastic slider to which the forward part of the clamshell arm is attached and slides back and forth. 4. The metal ball on the end of the forward part of the clamshell arm and the cup in the middle of the square plastic slider where it is pressed in. For the convertible top side, there is one lubrication point which is easily accessible, and another part that must be checked: 1. The plastic cup on the front adjustable mechanical pushrod (this pushrod is connected to the opposite side of the V-lever) where it presses onto the metal ball under the B-Pillar of the convertible top frame. This one is easier to access if you open the top about 12 to 16 inches. 2. Verify that the rubber bush (part # 986 561 881 00) which is located where the mechanical pushrod is attached to the V-lever is intact. If it isn't in one piece, or is missing, it will allow that mechanical pushrod to move around and cause play and noise in operation. This is a very common wear part that does not hold up with time. For the above lubrication points, you can use spray (or paste) white lithium grease after you have thoroughly cleaned the areas to be lubricated. Use it sparingly, it's not necessary to gob it up. Another good lubricant for these points is Dupont Krytox. It is more expensive than white lithium grease but it is less messy and will not attract dirt. Finally, unclip the transmission cables where they attach to each side of the electric motor and drip in some cable lube (liquid graphite lock fluid is also okay) while holding that end of the cable elevated. There are a few more points that could use lubrication, but they are not as easily accessible as the above. For example, if you are ambitious, you can remove the transmissions and lubricate the worm gear on the other end of the cable, and the half-moon (or round gear on later models) gear after you remove the black plastic covers from the underside of the transmissions. Thanks for the holiday wishes. Hope you and your family had the same. Regards, Maurice.