Welcome to RennTech.org Community, Guest
There are many great features available to you once you register at RennTech.org
You are free to view posts here, but you must log in to reply to existing posts, or to start your own new topic. Like most online communities, there are costs involved to maintain a site like this - so we encourage our members to donate. All donations go to the costs operating and maintaining this site. We prefer that guests take part in our community and we offer a lot in return to those willing to join our corner of the Porsche world. This site is 99 percent member supported (less than 1 percent comes from advertising) - so please consider an annual donation to keep this site running.
Here are some of the features available - once you register at RennTech.org
- View Classified Ads
- DIY Tutorials
- Porsche TSB Listings (limited)
- VIN Decoder
- Special Offers
-
OBD II P-Codes - Paint Codes
- Registry
- Videos System
- View Reviews
- and get rid of this welcome message
It takes just a few minutes to register, and it's FREE
Contributing Members also get these additional benefits:
(you become a Contributing Member by donating money to the operation of this site)
- No ads - advertisements are removed
- Access the Contributors Only Forum
- Contributing Members Only Downloads
- Send attachments with PMs
- All image/file storage limits are substantially increased for all Contributing Members
- Option Codes Lookup
- VIN Option Lookups (limited)


ar38070
-
Posts
544 -
Joined
-
Last visited
Content Type
Profiles
Events
Forums
External Paint Colors
Downloads
Tutorials
Links Directory
Collections
Store
Everything posted by ar38070
-

Reman engine break in?
ar38070 replied to neil.schneider's topic in 996 Series (Carrera, Carrera 4, Carrera 4S, Targa)
If you don't do step 3, then you will not properly hone the cylinders round as you will not go through the entire heat range. This is the most important step other than warming up the engine. You must create as much pressure and heat in the cylynders during break in. <{POST_SNAPBACK}> That is contrary to porsche recommendation. I think it is more important to run the engine "gently" for the first 1000 miles, then start the higher level break in. To each there own. -
Boxster Rear Camber/Toe Adjustment Torques
ar38070 replied to Darth Coupe's topic in 986 Series (Boxster, Boxster S)
camber eccentric 81 ftlb track (toe) eccentric 81 ftlb -
Reman engine break in?
ar38070 replied to neil.schneider's topic in 996 Series (Carrera, Carrera 4, Carrera 4S, Targa)
While I do not have a problem with the above, I think that you should do this for more than 3 cycles. Minimally a 1000 miles, 2000 is better, frustrating as it may be. Also I would keep revs below 4200 and when you do start redlining the car do not sustain redline, redline the motor, then back off for a few minutes, repeat. Do the redline cycle for a couple of hundred miles. Step 5 is really important. Do not go for a 200 mile cruise on the interstate when the motor is new and put the cruise control on. Every five minutes or so shift to another gear. -
wheel centers question
ar38070 replied to macsak's topic in 986 Boxster Suspension, Brakes, and Wheels
Probably fell off. You can get a replacement from Performance Products. Sometimes you see singles on ebay. The center just pops out of the wheel. You can bend a coat hanger to fit the two holes or just take off the wheel and push it out from the back. -
I had this problem. I took a 1/4" by 1/2" piece of double sided foam tape, did not take off the backing on side and stuck it on the switch. No problems since.
-
Reman engine break in?
ar38070 replied to neil.schneider's topic in 996 Series (Carrera, Carrera 4, Carrera 4S, Targa)
Follow the break in procedure in the manual. Not only for warranty but for engine longevity. -
Spare tire question
ar38070 replied to jnx's topic in 997-1 Series (Carrera, Carrera 4, Carrera 2S, Carrera 4S)
It will mount on the car. The hole pattern is the same. -
Having used ramps in the past with other cars I would have to say that using a jack with jack stands or wood blocks is a lot simpler. The approach angle might be tough for a porsche. Also tire width would be a problem.
-
Nitrogen Tire Fills
ar38070 replied to Danyol's topic in 996 Series (Carrera, Carrera 4, Carrera 4S, Targa)
Deflate the tire, then fill with nitrogen, deflate and fill again. -
To Jump or Not To Jump !! (With Booster Cables)
ar38070 replied to Donie's topic in 986 Series (Boxster, Boxster S)
The trickle chargers work fine. Or just disconnect the negative battery cable (remember do not fully close the hood). -
996 turbo front strut removal
ar38070 replied to Eric02996's topic in 996 Series (Carrera, Carrera 4, Carrera 4S, Targa)
Yes, unbolt the driveshaft from the transmission.. -
If I remember correctly you pop out the two covers covering the IR sensors for the alarm. Underneath there are t2o torx screws to remove the courtesy light housing.
-
Clamshell
ar38070 replied to the_lonely_guy's topic in 986 Boxster Convertible Top Issues and Solutions
I had this problem once regardless of whether the top was up or down. I ended up putting a little more grease in the metal track that the clamshell slides in. Maybe that will fix your problem. -
In general you add pressure to increase grip. Of course this only works to a certain point. Starting with stock pressures you would increase pressure in the front and decrease pressure in the rear. Do not go overboard with this, 2-3 lbs change is about the limit. Generally you still want to run more air in the rear than the front.
-
stripped lug
ar38070 replied to C4S Surgeon's topic in 996 Series (Carrera, Carrera 4, Carrera 4S, Targa)
Try cleaning the threads with a wire brush and try it again without the wheel on. If it goes in straight do not worry about it. You can use a little anti-seize to help lubricate it. -
What is this part?
ar38070 replied to Alienz's topic in 986 Boxster Convertible Top Issues and Solutions
When you say it does not stop at the right time what do you mean? When you close/open the top the motor will run for about 2 seconds longer than you think it should. -
Help - 996 Caliper Seals
ar38070 replied to danjen's topic in 996 Series (Carrera, Carrera 4, Carrera 4S, Targa)
Unfortunately the only way that I know of to get the inner seals is to buy a new caliper. If you find out otherwise let us know. -
My C2 becomes a tire eater
ar38070 replied to tt2001's topic in 996 Series (Carrera, Carrera 4, Carrera 4S, Targa)
What are the alignment numbers? In particular toe. Who did the alignment? What equipment did they use? -
245-35 18 Anyone ever put these on the fronts?
ar38070 replied to Cold Warrior's topic in 986 Series (Boxster, Boxster S)
Also tire brand will influence your clearance. A 245 from one manufacturer will be different than a 245 from another in terms of actual width. You may have a tire that fits fine and then decide to try a different brand or even a different model from the same manufacturer and find out that it rubs. -
245-35 18 Anyone ever put these on the fronts?
ar38070 replied to Cold Warrior's topic in 986 Series (Boxster, Boxster S)
Due to the smaller overall diameter (compared to a 225/40) you may actually gain some clearance at full steering lock. The other potential rubbing points are the plastic air deflectors for the brakes and the clutch tubing in the driver's side wheel well. Clearance increase/decrease due to camber is difficult to determine statically as the tire deforms under turning loads. You have to test to see what happens. If it rubs under no load -> bad, If it does not rub but is close you will need to test under load to see if there is a problem. -
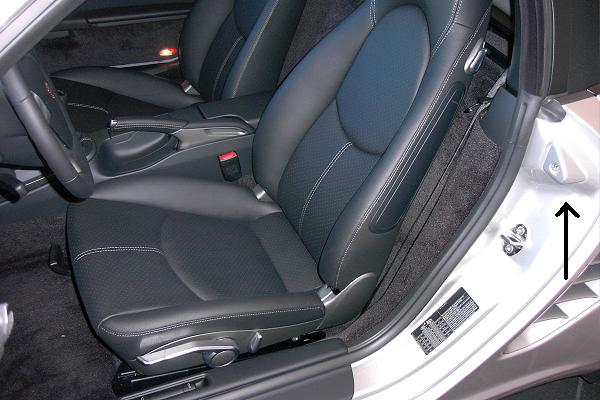
Another thing I noticed yesterday was that there is an added on protuberance where the upper part of the inside of the rear of the door meets the body. It is a triangular shaped piece (see picture) that matches up with a notch inside the door. I do not know if it has something to do with enhancing rigidity or has to do with side impact protection (helps keep the door in place during impact). Maybe something else. Ideas anyone?

-
2 questions about Wheels and Brakes
ar38070 replied to christeon's topic in 986 Series (Boxster, Boxster S)
The 18's will fit. 225 up front and 265/285 in the rear. While there is a chance of body cracks in a 97 you should be okay. Don't hit a lot of pot holes. You can put S or 996 brakes up front with no problems. The rears require either machining or wheel carrier replacement. -
I believe you can get the poly-rib belt from the dealer (or at least suncoast) for $30.
-
So just got back from the dealer. 1) the car looks pretty good in the flesh 2) One car I looked at had bridgestone RE050 tires on it. It will be interesting to see peoples feedback on this tire as it is new (at least to me). It is listed as a max performance summer tire on tirerack and it only has a treadwear rating of 140. 3) The rear panel in front of the rear wheel now has clear plastic film on it. 4) The stock 17" wheels have gotten tiny, 6.5 and 8 with 205/235 tires 5) The rear rotor has increased in size. It is actually larger than the front rotor (298 front, 299 rear). Seems bizarre to me 6) There are no handholds on the doors anymore. Just little pull slots to close the door with. 7) The ignition key hole is at a weird angle, angles in towards the steering column 8) The window switches are on the doors 9) The new cupholders are pretty gimmicky. I think that if you bust one the whole dash may have to come apart. 10) There is a 12volt outlet in the passenger foot well 11) The rear bumperettes are body colored 12) The adjustment levers on the seats are painted 13) All kinds of plastic covers in the front trunk 14) The console between the seats just has the ashtray, cigarette lighter and now the top opening switch (at least I think that is what it was). I have pics if anyone wants to see anything in particular.
-
Location/Orientation of Negative/Ground Strap
ar38070 replied to Moose's topic in 986 Series (Boxster, Boxster S)
If you are standing in front of the car and looking at the battery it is the right hand one (driver's side). You can always tell the negative lead by: 1) it usually goes straight to the body of the car 2) there is a negative (-) sign next to it on the battery 3) the positive side is usually covered with a plastic/rubber boot that has to be removed in order to get to the retaining screw.