Welcome to RennTech.org Community, Guest
There are many great features available to you once you register at RennTech.org
You are free to view posts here, but you must log in to reply to existing posts, or to start your own new topic. Like most online communities, there are costs involved to maintain a site like this - so we encourage our members to subscribe or donate. All subscriptions and donations go to the costs operating and maintaining this site. We prefer that guests take part in our community and we offer a lot in return to those willing to join our corner of the Porsche world. This site is 99 percent member supported (less than 1 percent comes from advertising) - so please consider an annual subscription or donation to keep this site running.
Here are some of the features available - once you subscribe RennTech.org
- View Classified Ads
- DIY Tutorials
- Porsche TSB Listings (limited)
- VIN Decoder
- Special Offers
- Paint Codes
- Registry
- Videos System
- View Reviews
- and get rid of this welcome message
It takes just a few minutes to register, and it's quality Porsche information at a low cost.
Contributing Members also get these additional benefits:
(you become a Contributing Member by subscribing or donating money to the operation of this site)
- No ads - advertisements are removed
- Access the Contributors Only Forum
- Contributing Members Only Downloads
- Send attachments with PMs
- All image/file storage limits are substantially increased for all Contributing Members
- Option Codes Lookup
- VIN Option Lookups (limited)


tanny02996
-
Posts
73 -
Joined
-
Last visited
Content Type
Profiles
Events
Forums
Exterior Paint Colors
Downloads
Tutorials
Links Directory
Collections
Classifieds
Store
Everything posted by tanny02996
-
Alternative IMS repair solution
tanny02996 replied to GTF's topic in 996 Series (Carrera, Carrera 4, Carrera 4S, Targa)
This looks like a complex solution for what would seem to be accomplished by simply removing the outer cover of the IMS bearing so that it can get lubrication from the oil bath that it's already sitting in. No? -
Oil change question from new member
tanny02996 replied to Gwndds's topic in 996 TT, 996 TT S, 996 GT2
These cars are jacked up from only the rear jack points. The front will raise when you do this. Many people also simply drive up on one or 2x10s to get enought room to access the drain plug and filter. If you are concerned about keeping the car level you can put a couple of 2x10s in the front as well. Hope this helps. -
i typically remove the wheel to get at the fender liner - it can be a tight fit - I'd be that you can do it though - once the liner is off you will have room to work
-
The last time I found myself with a dead battery I try to power up through the fuse block - i just manually opened the luggage compartment using the cable "hidden" in front of the passenger side front wheel/fender liner (the cable is behind the bumper). Once opened I changed the battery and was back in business. Hope that helps.
-
On my 996 I clean all of the areas that meet the glass and windshield frame with simple green and then lubricate with a silicone lubricant.
-
Spark Plug Change Instructions
tanny02996 replied to Loren's topic in DIY Articles - Carrera (996) - Maintenance
Appreciate the fast and clear advise...now I just need to find a small enough easy out... -
Spark Plug Change Instructions
tanny02996 replied to Loren's topic in DIY Articles - Carrera (996) - Maintenance
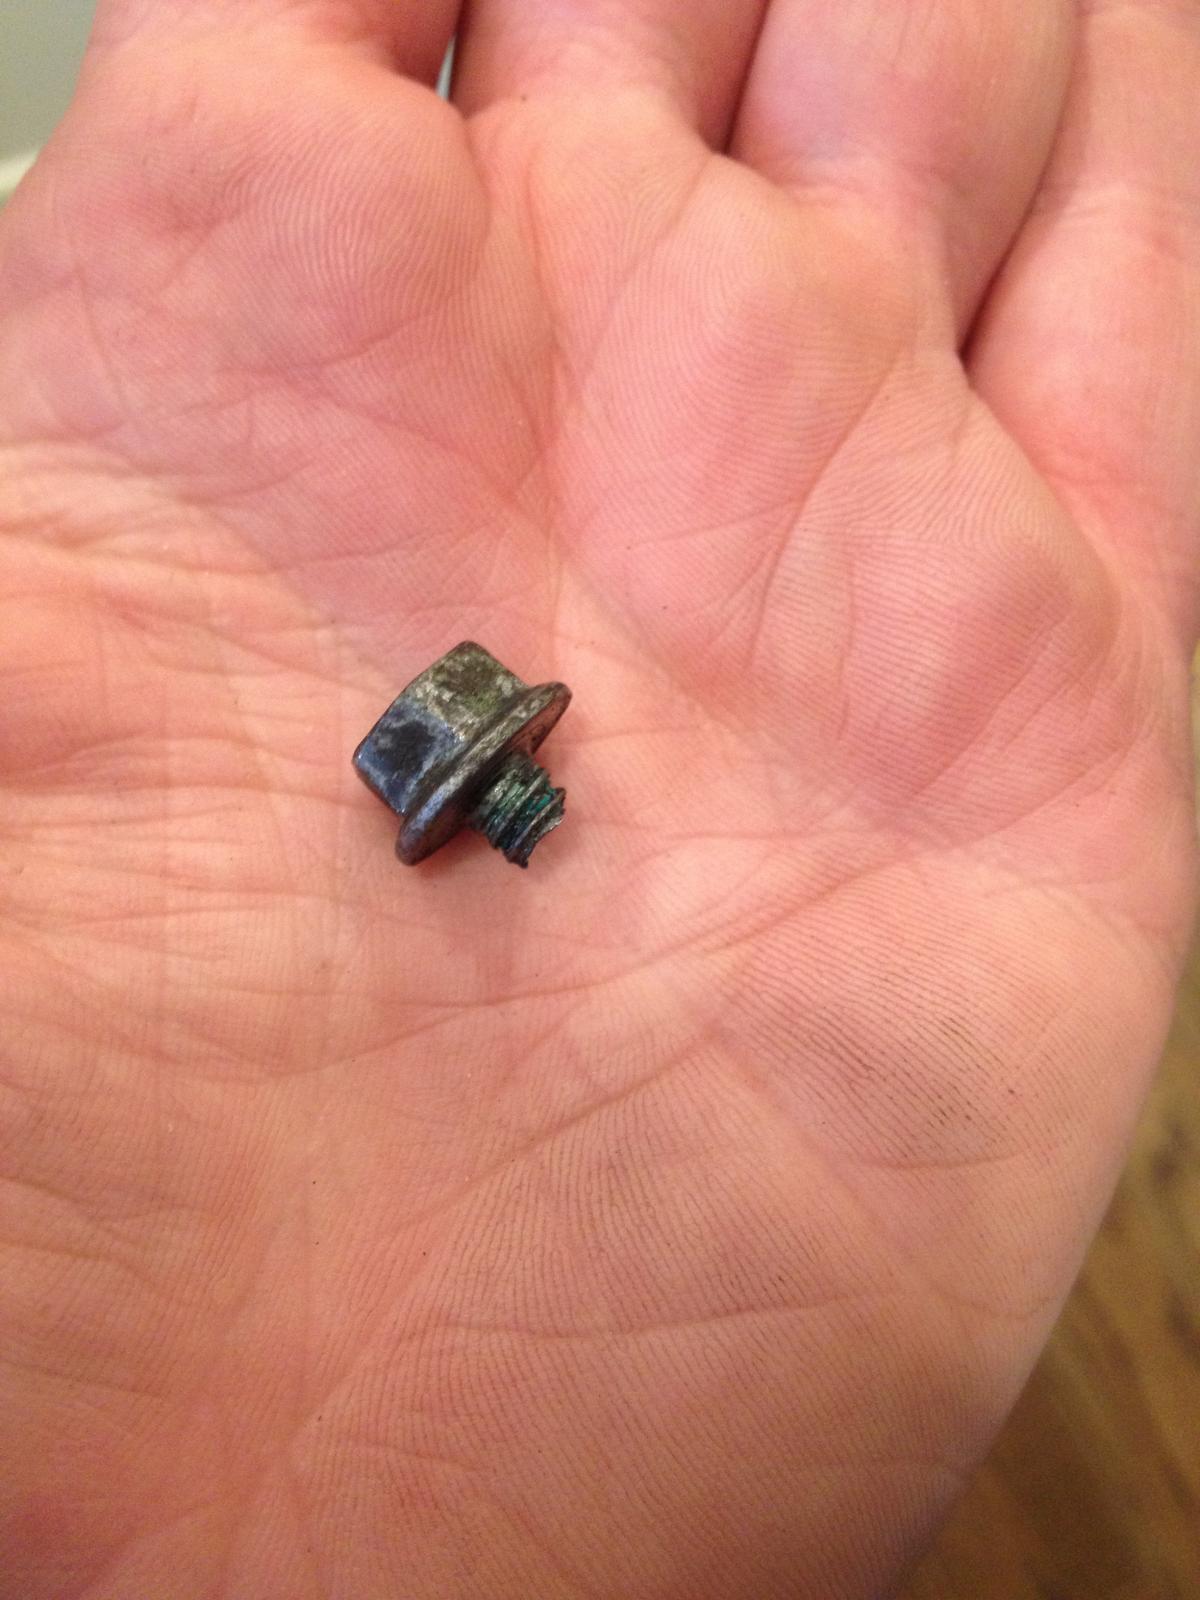
Thanks everyone for the tips and insights - i would never have had the confidence to try this project without Renntech! :thankyou: I tackled this project today. Went as expected except when I went to re-install the heat shield on the passenger side. My bolt sheared off (under pretty light pressure...grumble). Now I have part of the shaft in the receiver and the rest in my hand! Anyone ever face this situation? Thanks in advance for all your help. -tanny02
-
great insight - thank you so much for the response!
-
Hi all, I'm normally in the 996 forum, but have a friend with a beautiful new 991. When turning the car off he prefers to turn off any accessories and has noticed that at start-up, the A/C seems to come back on (even though it was turned off when he last shut down) - is this typical or an error that he should have checked by the dealer? Thanks as always, -tanny02
-
Interesting approach. 1. Key blade (the metal part) will be reused. 2. The new part will include the key head (black plastic), internal board, and the "pill" 3. If I recall correctly, I paid $125 for programming at a dealer. You will need a new key head if you do not have the 40 digit code that originally came with the key that you have, if you do have this code, there is a chance that the key can be reprogrammed.
-
2002 C4...Just changed my oil this past weekend - must be the third time with the LN drain plug - no issues at all.
-
of course, about 8k miles. Also, FWIW, the folks at LN Engineering are extremely friendly and helpful - you should really consider speaking to Charles over there, he is the expert. When I spoke to him he did explain that there is at least one shop in the UK that has successfully been using the seal removal technique for years and he did support this as a solution - frankly, I found it refreshing that he didn't recommend that I buy and install one of his bearings since I already removed the seal - he seems like a very forthright and honest person.
-
It was in good condition with no visible signs of degradation...also, it had sufficient grease, indicating that the glue holding on my seal had not yet begun to break down.
-
Oil can break down fairly quickly, especially in cars that don't have an opportunity to get hot and burn out the condensation that forms as the oil comes up to temperature. While I always try to drive long enough to get the oil up to temperature, it's not always possible so I change the oil frequently simply to avoid having any condensation remain in the engine for too long and cause issues (oxidation). Again, its really cheap insurance. I can change to oil twice a year on my own for less than the cost of one change at the local dealership and frankly, it saves time (who has the time to coordinate dropping off and picking up from the dealer...).
-
Yes, that is exactly what I had done when I did my clutch and RMS. No issues so far. In fact, I spoke to Charles Navarro at LN Engineering about this alternative and he indicated to me that this option does address what many believe to be the root cause of IMS failure (the glue that holds the seal on breaks down,allowing oil to get into the bearing and wash away the "lifetime grease," but there is not sufficient oil to keep the bearing lubricated; removing the seal keeps the bearing lubricated). In fact, he said that since I did this, there was really no need/benefit to retrofitting with his IMS bearing. On top of this, the consistent advice that I have received, and follow, is to change the oil every 6 mos or 5k miles - its really cheap insurance! One thing to keep in mind though, check out the cost differential between these two options, when I did this, the cost differential was about $1,500 factoring in parts and labor, that was meaningful to me especially since I had confidence that removing the seal was a good alternative. However, if the cost differential is not material to you, you might make a different decision. Hope this helps, -tanny02
-
Noise from cab top
tanny02996 replied to swynn97's topic in 996 Series (Carrera, Carrera 4, Carrera 4S, Targa)
I don't think the piece in the diagram is the metal piece you are seeing, sorry I can be of more help - I am a bit aggressive with lubrication when I hear a squeak and hit every joint/hinge and piece of rubber that i can find. Hope this helps. -
Noise from cab top
tanny02996 replied to swynn97's topic in 996 Series (Carrera, Carrera 4, Carrera 4S, Targa)
This is what I have used...still available at amazon.com and only $8... http://www.amazon.com/einszett-914806-Gummi-Pflege-Rubber/dp/B004B8GTQG -
Climate controls module
tanny02996 replied to Bwildstein's topic in 996 Series (Carrera, Carrera 4, Carrera 4S, Targa)
I had this exact issue and purchased a replacement screen from Module Master. It is well worth the effort to try to tackle this on your own. The part is about $50 and the process took me about 40 minutes. Module Master even sent detailed, Porsche specific instructions with pictures to guide me through the process. Also, I don't recall any soldering being required. Good luck! -
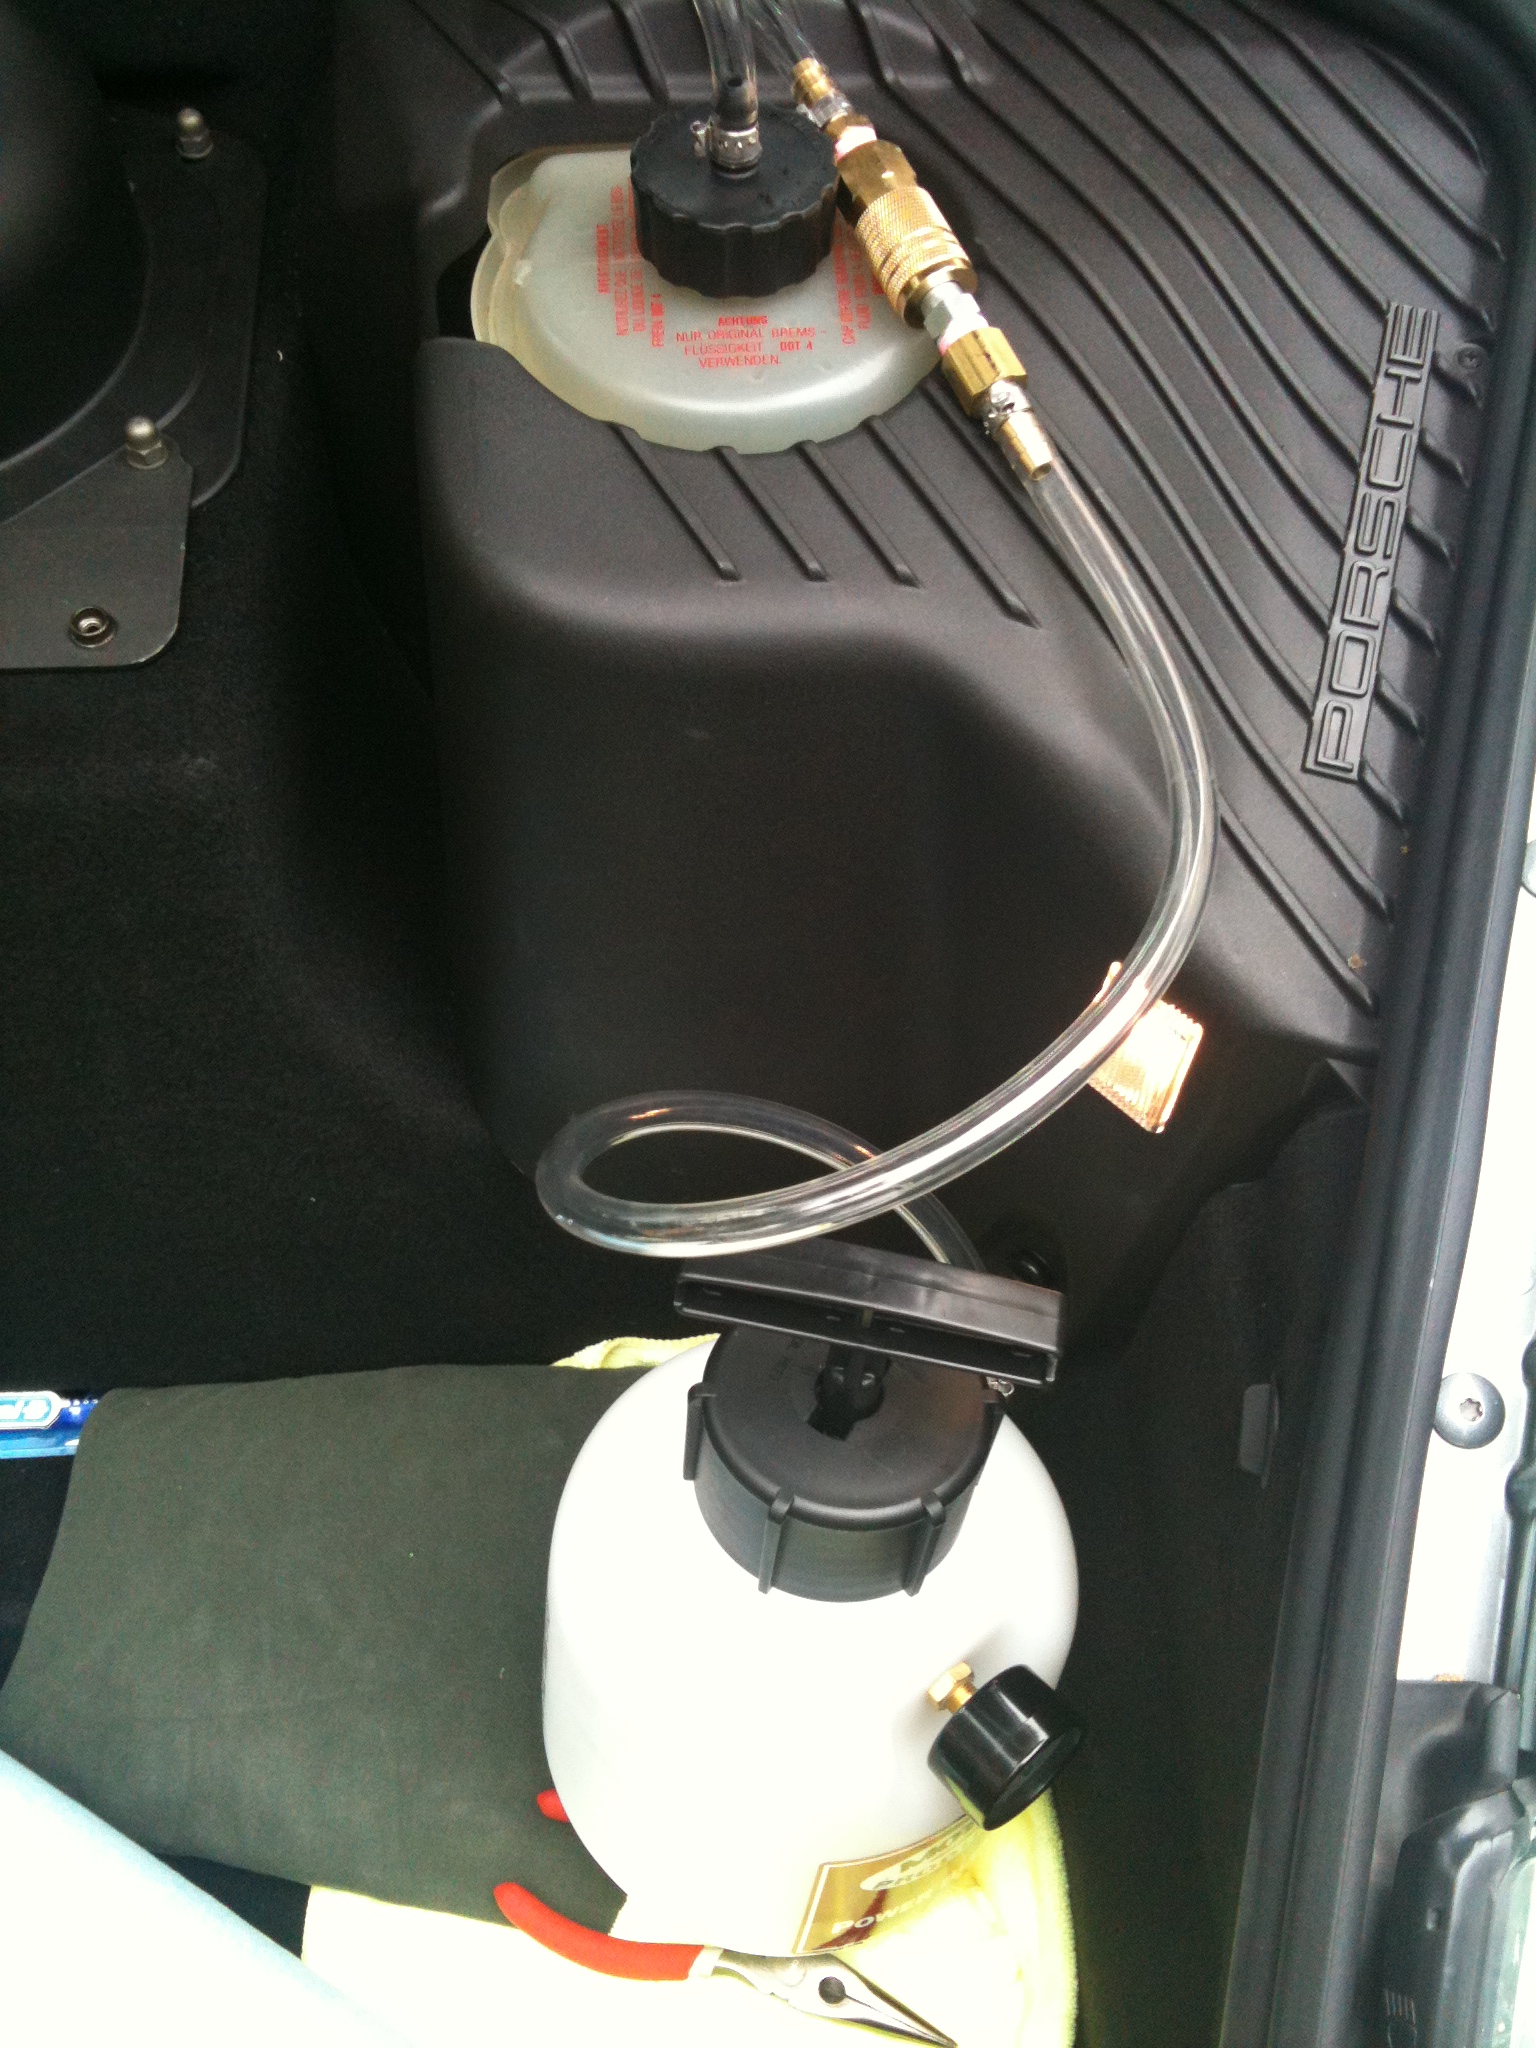
Thanks for the great DIY Loren. I made a couple of adjustments to the tools and process: I added a quick connect coupling to the Motive Power Bleeder (picture below) - this certainly made it easier to move things around to get everything in the best position for the job. I recommend this if you don't have the aluminum cap with swivel connection I couldn't find a small enough pump to fit into the reservoir so once I confirmed that they setup was holding pressure I just bled the fluid out through the rear passenger side brake and had a helper monitor the level in the reservoir to ensure I didn't go to low, once it reached the "min" line, I depressurized the power bleeder tank, filled the reservoir and put the rest of the fluid in the power bleeder (I did not add any more fluid to the bleeder during the process, but did need to top off the reservoir once during the process and then again at the end - made for relatively easy clean up). Overall, a very easy process. Thank you again Loren and good luck to others. -tanny02
-
Had the same issue on my 02 C4 Cab. I replaced the entire shaft as the rubber coupling is not sold separately by Porsche (~$600 for the shaft). I am not familiar with the replair approach using the BMW part though.
-
I replaced mine at 42k miles. There were no driving issues noted at the time, but the cracked bushing was noted when doing the RMS and clutch so I replaced it as a preventive measure.
-
Same experience as Roadsession...I replaced the entrire shaft when I replaced the clutch.
-
Replacing AC control panel
tanny02996 replied to porsche996tt_tpe's topic in 996 TT, 996 TT S, 996 GT2
Not certain of your specific issue, but have you looked at this: http://www.renntech.org/forums/index.php?/tutorials/article/28-cracked-or-bleeding-climate-control/ I have performed this repair recently and found it to be both easy and low cost (~$50); furthermore, it (1) does not require any reprogramming that may be required with a new control unit, and (2) replace an old part with new part (which I prefer relative to used parts that may fail in short order). Good luck, -tanny02 -
gas filler door emergency latch
tanny02996 replied to judgejon's topic in 996 Series (Carrera, Carrera 4, Carrera 4S, Targa)
Judge, the actuator is pretty cheap at about $50 (likely less from Sunset) and can fail (I just replaced mine). You will need to remove it to replace the release anyway, so you may want to consider replacing it at the same time. All in all, it's an easy job, but the working area is tight as described in Loren's DIY. -
Loud motor sound coming from Gas Door
tanny02996 replied to impersus's topic in 986 Series (Boxster, Boxster S)
Sounds like a fuel door actuator going bad to me. Mine did the same recently. There is a DIY in the 996 section detailing the procedure to replace it and I believe the process is the same for the 986. It was a simple fix, but the working area is tight under the front fender. Took about 45 min total, the part cost about $50. http://www.renntech....-door-actuator/ Good luck, -Tanny02