Welcome to RennTech.org Community, Guest
There are many great features available to you once you register at RennTech.org
You are free to view posts here, but you must log in to reply to existing posts, or to start your own new topic. Like most online communities, there are costs involved to maintain a site like this - so we encourage our members to donate. All donations go to the costs operating and maintaining this site. We prefer that guests take part in our community and we offer a lot in return to those willing to join our corner of the Porsche world. This site is 99 percent member supported (less than 1 percent comes from advertising) - so please consider an annual donation to keep this site running.
Here are some of the features available - once you register at RennTech.org
- View Classified Ads
- DIY Tutorials
- Porsche TSB Listings (limited)
- VIN Decoder
- Special Offers
-
OBD II P-Codes - Paint Codes
- Registry
- Videos System
- View Reviews
- and get rid of this welcome message
It takes just a few minutes to register, and it's FREE
Contributing Members also get these additional benefits:
(you become a Contributing Member by donating money to the operation of this site)
- No ads - advertisements are removed
- Access the Contributors Only Forum
- Contributing Members Only Downloads
- Send attachments with PMs
- All image/file storage limits are substantially increased for all Contributing Members
- Option Codes Lookup
- VIN Option Lookups (limited)


jagman1
-
Posts
94 -
Joined
-
Last visited
Content Type
Profiles
Events
Forums
External Paint Colors
Downloads
Tutorials
Links Directory
Collections
Classifieds
Store
Everything posted by jagman1
-
If I had to guess, the wiring harness that runs on both the front passenger and drivers side has some corrosion damage at some of the crimp connections. If you search "wet footwells," you'll learn more about the issue. In the end you'll find that there are several exposed crimp connections in those wire bundles. I expect they're corroded or wet. I'd recommend you pull of the lower sill trim, and lower a-pillar trim on both sides. Look beneath the carpeting and foam padding and find the harnesses. They run from the lower a-pillar region (near where the front door lower hinges are), to the front seats. Each wire bundle is wrapped in electrical tape and plastic. Unwrap them, and you'll see most wires are continuous and will be safe from water damage, but there will be 4 or 5 that have a small amount of electrical tape to protect a splice. If corroded, cut out the corrosion, and re splice the wires then see what you get. You may have fried a module or two, though I doubt you've fried as many as you've listed. I learned of this when I had issues with the Terminal 15 relay failing. It's under the drivers seat and gets its signal from the wire bundles I described. Bottom line, is the relays in this vicinity power the CANBUS and if they are suspect you'll get all sorts of crazy errors; namely every module will say that it has failed.
-
The picture in post #5 shows two different seals. The one that is wet is NOT the seal I am talking about. Looking at that picture from post #5, you are interested in cleaning the junk out of the lower of the two seals. The black part beneath the silver in your image, it is quite literally the lowest point on the door. You are getting water higher up the door because the drains at the lowest point are clogged. Contrary to what most people think the window seals are not meant to be completely water tight. They leak a little. So it is very normal for the inside of the door to get wet. The trick is for it to have a way to drain out.
-
Unplug the drains in the doors. You'll see at the bottom of the doors there is a black piece of weather strip gasket. That gasket is split down its center and is probably full of crud. Once that is clear you'll be able to see a few drain points along that track. Stick something made of wood or plastic up there and unclog the drains.
-
Where was the crack? I've been hunting a brake boost leak for years and have checked all the typical locations and found nothing. Each new report of someone finding a crack I use to narrow in on my leak.
-
Vacumn lines
jagman1 replied to mbagge01's topic in 9PA, 9PA1 (Cayenne, Cayenne S, Cayenne Turbo, Cayenne Turbo S)
I'd like to begin a systematic replacement of all the vacuum hoses in mine as well. -
Without seeing a picture of how bad the corrosion is on your sway bar, my advice would be this: Sway bars are usually very thick and robust metal. As such I'd sand it down and repaint it. It is unlikely that it has been structurally compromised by the corrosion.
-
ATF and also gear oil have a very strong and pungent smell to them as you know. I wouldn't be surprised if it's just residual on the outside of the car that's wafting into the air intake. That or you had some on your hands and it made its way into the passenger compartment. Either way, if all is dry underneath, then I think you're good to go and the smell should subside with time.
-
Just saw that these exist. Might work.

-
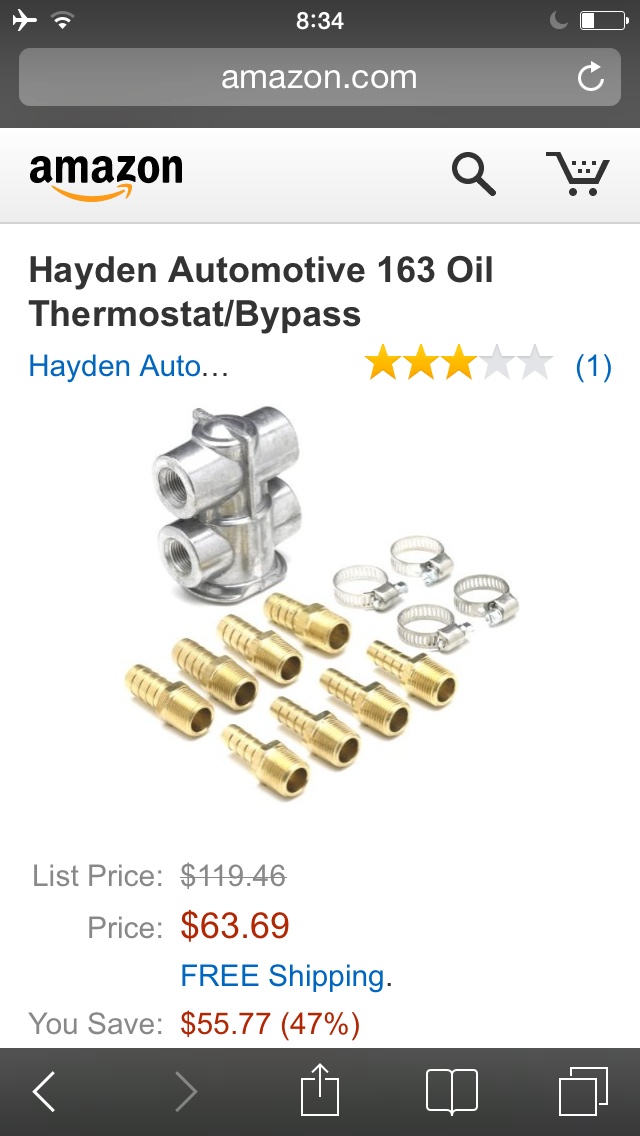
I tend to be very fanatical when it comes to using OE parts for maintenance and repairs. That said, after reading your post if I understand correctly the trans cooler mounted to the radiator has developed a leak. My advice in the absence of an original replacement part is to either have it repaired at a radiator shop or to use a generic trans cooler assembly. A few hose clamps and you'd be good. The only challenge is figuring out the thermostat.
-
I just replaced the two MOSFETs and 6 resisters following this thread. All is working once again. System failed on Thursday. Back to full operation by Sunday afternoon, thanks to fast shipping and lots of info on the subject between Touareg forums and here. I wasn't able to test any of the individual components because I lack the tools and knowledge required. So I just replaced the items in phases. I started with the two MOSFETs (they looked easiest). After reinstalling I cleared the codes with Durametric and it still didn't work. I then replaced the 6 resistors, reinstalled, then cleared codes and it is working perfectly. Thanks for the info
-
I changed mine at about 85K. Did not change the tensioner. I would give every pulley that'll spin a twist and feel the bearings to make sure they're running smooth. I'm on water pump #3.
-
04 Cayenne Build
jagman1 replied to rabbit7's topic in 9PA, 9PA1 (Cayenne, Cayenne S, Cayenne Turbo, Cayenne Turbo S)
The factory fill for the transfer case is indeed ATF. The Porsche shop manual makes special mention that "when replacing the fluid in the transfer case the factory fill is blue in color." and that the replacement fluid will be red. That should explain why it looked as it did. I had the same experience when I changed mine. -
I too highly recommend LED lights. No more burns and no more broken bulbs every time I drop the light.
-
You bet! I'm glad it worked out. I spent 20 hours trying to figure that out. Hopefully it saved you some time.
-
After re-reading the procedure I now recall that my issue at not being able to fill it all the way up was due to turning off the engine between filling cycles. The filling has to happen with the engine running as described in the DIY's listed above. Cycle through the gears, then put it in park with the engine running and top off. Reinstall the plug. cycle through the gears, then put it in park and top it off again. Rinse and repeat. You'll find that it is a messy job.
-
I too had trouble getting the full volume of oil back into the transmission when I did mine. I think I could only get 7.5 liters in at first. Then I realized that the transmission had to be in D to take the full volume. Actually I can't remember which it was D or N. Regardless, see if that might have been the reason you couldn't get the full volume of oil back in. I'll try and see if I can find which gear the transmission should be selected in the meantime.
-
Cardan shaft failures?
jagman1 replied to spooltime's topic in 9PA, 9PA1 (Cayenne, Cayenne S, Cayenne Turbo, Cayenne Turbo S)
Your description of your mechanic skills made me laugh. I also double whatever time estimate is put forth on the internet. I think others are simply not as fastidious as I am. On another note, I installed the Vertex support a few months ago. No issues with it whatsoever. I did notice one thing. I was uncertain when I first installed it as to whether I got the alignment correct. So I went back under the car a few days and a few hundred miles later and re-aligned it. There was a significant change in the alignment when I did this. I either completely screwed up the alignment when I did it the first time (which I don't think was the case) or the driveshaft settled a bit and the second alignment was more accurate as a result. My advice: Put everything back together, snug up the bolts on the bearing carrier, then drive up and down your driveway once and then do the final alignment. I replaced the guibo too, take note of which bolts go where. There are 2 different sizes used. -
Headliner Questions..
jagman1 replied to Jcayennes's topic in 9PA, 9PA1 (Cayenne, Cayenne S, Cayenne Turbo, Cayenne Turbo S)
Removing headliners is hard to do without damaging things including the plastic trim pieces that must be removed to get at the headliner. Putting a new one in is easy once you get the old one out. That said I'm not sure how pricey new ones are. -
Part number: 955 615 027 00 Tapping on my relay box would clear the errors temporarily. This relay powers the CAN network's switched power to the many ecu's in the car.
-
I had similar issues on startup and fixed them by replacing the terminal 15 relay that sits on top of the battery underneath the drivers seat. $18. It's a standard looking relay box and is the only one under there. Access either by unbolting the front seat as described in the owners manual as if replacing the battery. Or with a little less trouble by sliding the seat all the way forward and up. That should get you close enough to access the relay from the left rear seat footwell. I should add that I spent a lot of time going through both the front footwell floor areas looking for water damage. I found none.
-
I disagree about the gouge. The gouge is present on most rotors and is for balancing. I would be more concerned about the rotor that doesn't have it. As for Left/right, Porsche rotor only have and L or R painted onto the hat. The way the veins are oriented they do look directional.
-
foged up interior
jagman1 replied to gllever's topic in 9PA, 9PA1 (Cayenne, Cayenne S, Cayenne Turbo, Cayenne Turbo S)
Clogged a/c drain resulting in a wet pollen filter? -
I used a non-porsche pump made by Lasco, which is a german made OE pump. It lasted 10K miles. I now have a Porsche pump in there and hope it will last 90K like the original one did.
-
I concur. The start up noise sounds like the starter not disengaging cleanly. It happens more in the cold weather. You'll see several posts that describe it on here, most folks just accept it and don't do anything to fix it. Mine's been doing it for 4 years and doesn't seem to be getting any worse. As for your noises at idle, I'd look at your water pump before you do anything else. The water pump is the top pulley. I'm on water pump number three. Telltale symptoms are pulley noise at idle. Sort of like a marble rolling around the circumference of a coffee can. If it ends up being the water pump I recommend you replace the thermostat while you're in there, and use a Porsche water pump. The Lasco pump I used only lasted 10K miles and I replaced it after the bearings on it began making noises. Let me know if you need one. I have an extra (don't ask).
-
Tip oil capacity
jagman1 replied to Gary9425's topic in 9PA, 9PA1 (Cayenne, Cayenne S, Cayenne Turbo, Cayenne Turbo S)
If I were doing the job it'd take 9-10 liters. There's no chance I would replace a valve body and not do a full flush and fill. You didn't get ripped off in my opinion. That said, the fluid was pricey and was likely Porsche fluid.