Welcome to RennTech.org Community, Guest
There are many great features available to you once you register at RennTech.org
You are free to view posts here, but you must log in to reply to existing posts, or to start your own new topic. Like most online communities, there are costs involved to maintain a site like this - so we encourage our members to subscribe or donate. All subscriptions and donations go to the costs operating and maintaining this site. We prefer that guests take part in our community and we offer a lot in return to those willing to join our corner of the Porsche world. This site is 99 percent member supported (less than 1 percent comes from advertising) - so please consider an annual subscription or donation to keep this site running.
Here are some of the features available - once you subscribe RennTech.org
- View Classified Ads
- DIY Tutorials
- Porsche TSB Listings (limited)
- VIN Decoder
- Special Offers
- Paint Codes
- Registry
- Videos System
- View Reviews
- and get rid of this welcome message
It takes just a few minutes to register, and it's quality Porsche information at a low cost.
Contributing Members also get these additional benefits:
(you become a Contributing Member by subscribing or donating money to the operation of this site)
- No ads - advertisements are removed
- Access the Contributors Only Forum
- Contributing Members Only Downloads
- Send attachments with PMs
- All image/file storage limits are substantially increased for all Contributing Members
- Option Codes Lookup
- VIN Option Lookups (limited)


1schoir
-
Posts
2,739 -
Joined
-
Last visited
-
Days Won
9
Content Type
Profiles
Events
Forums
External Paint Colors
Downloads
Tutorials
Links Directory
Collections
Classifieds
Store
Everything posted by 1schoir
-
No response from top motor
1schoir replied to pkust's topic in 986 Boxster Convertible Top Issues and Solutions
:cheers: Excellent work! Thanks for posting the results. It will definitely help someone else with similar symptoms. Now that Spring is here, that probably won't be too long. :eek: Regards, Maurice. -
No response from top motor
1schoir replied to pkust's topic in 986 Boxster Convertible Top Issues and Solutions
Excellent! Also, judging from your description of the symptoms and the results of your tests so far, I'd say there is a good chance that the problem may be in one of the two microswitches that are found INSIDE the latch assembly. There are two microswitches in the latch receptacle assembly. There is one on the left side of the assembly (has a large plunger that juts out when the latch is open). That one controls the 4" window drop that occurs immediately when you pull down the latch to open the top. There is another one on the right side of the assembly, and that is the one that activates the convertible top double relay. My guess is that the latter switch is faulty, even though it may appear to be intact when you visually inspect it, and sometimes even when you test it with a multimeter. Specifically, take a close look at the solder joints where the leads attach to the plug. This can be hard to detect, so check it with a magnifying glass for hairline cracks in the solder joint and for corrosion. If necessary, heat up the connections with a soldering iron and flow a tiny bit of solder onto the suspect joint(s). Believe it or not, the temperature (sun light, A/C blowing on it, etc...) can affect it to the point where the connection is broken and then re-established. To gain access to the microswitch you have to remove the latch plate at the center of the windshield frame. Pop out the two little black plastic "eyes" by carefully prying them off with a very small flat blade screwdriver or borrow one of those "orange sticks" that women use on their fingernails to pry them out. Remove the small torx bolt that you will find under each one of the two eyes. Remove them and then pull down the latch plate carefully until you can see and access the wires for the switch and for the light. Unplug the wires and the latch plate will come off. You will find two fragile retaining clips that attach the switch to the underside of the latch plate. These are easy to break, so use a pair of small needle nose pliers to pull them off, very gently. You can reuse these if you are careful by squeezing the cross sections that are located at the center of the clips until they are flattened. Also double check the two fuses again (even if you have already visually checked them) by using a multimeter there as well, as one of them also provides power to the double relay. If none of the above yield a culprit, test the electric motor again to make sure that there are no "dead spots" in the motor by spinning it around a few degrees at a time and the applying the 12V each time you have turned the shaft/armature a few degrees. Regards, Maurice. -
No response from top motor
1schoir replied to pkust's topic in 986 Boxster Convertible Top Issues and Solutions
Here's one: Boxster Conv Top Microswitch Troubleshooting.pdf Let me know if you are able to download it. Regards, Maurice. -
Heated Seats will not work
1schoir replied to vwrado's topic in 996 Series (Carrera, Carrera 4, Carrera 4S, Targa)
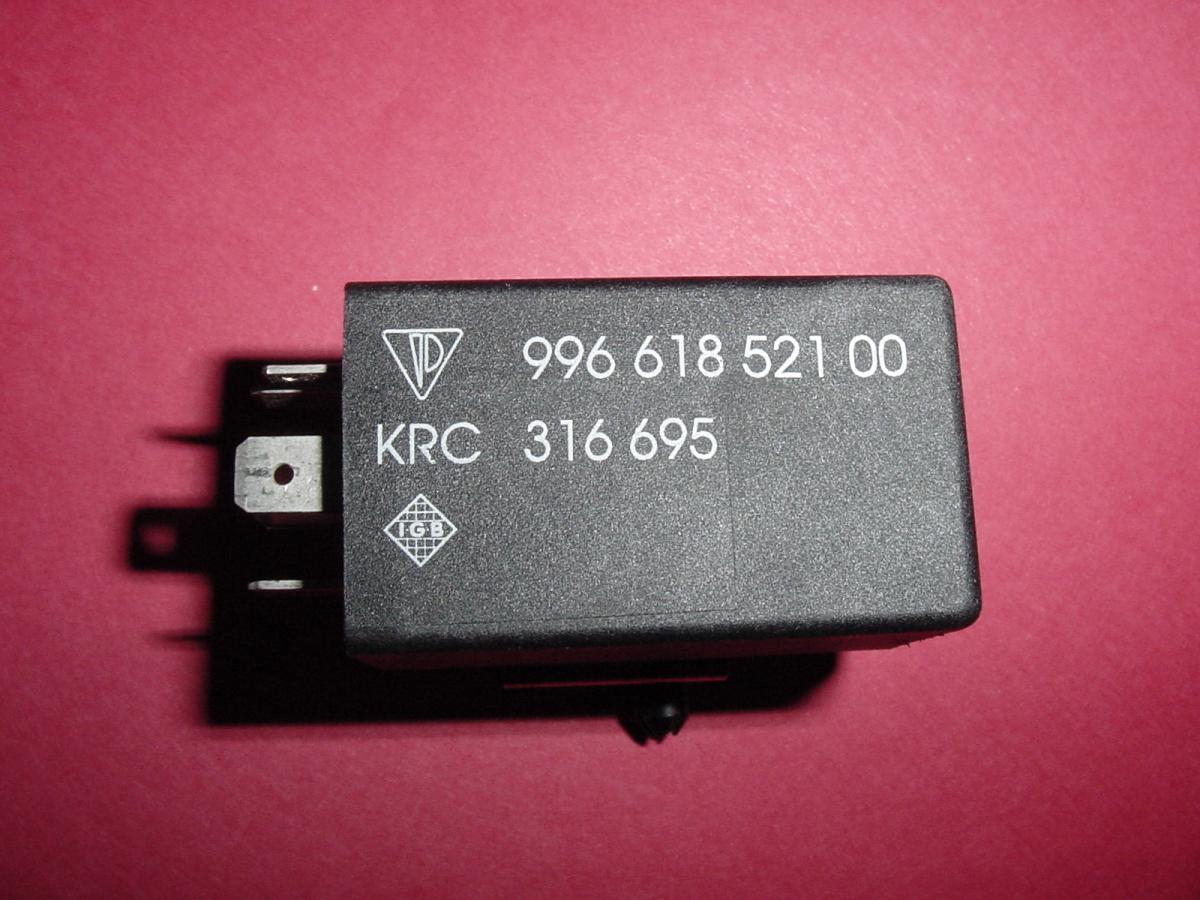
The part number is the same for the right or left side, but the bracket which holds it down is a mounted as a mirror image to itself, depending on the side. It's part number 996 618 521 00 and it lists for about $182. You can take out the relay without removing the seat. You can remove the four star bolts holding the seat down and just tilt the seat back. That will give you enough access if you prop up the seat bottom with a block of wood and put the backrest in the tilted forward position. Here is a good photo of what it looks like: Regards, Maurice.
-
Drilling the small hole may delay the further cracking of the plastic gear but it's almost sure to eventually fail, sooner than later. You may be able to prolong the inevitable by using a two-part epoxy putty product called "Marine-Tex" http://www.amazon.com/s/ref=nb_sb_noss_1?url=search-alias%3Dautomotive&field-keywords=Marine%20Tex) It can make patches that are stronger than metal and that have excellent adhesion to the part being repaired. The only difficulty there would be molding the Marine Tex so that the resulting patch does not interfere with the rest of the mechanical gears or the housing. The Marine Tex cures super hard and super strong so you may even be able to repair the gear in your right side transmission because you can mold it and shape it to the desired contour. The gears suffer a lot of wear and tear with the operation of the mechanism and the reinforcement with the epoxy putty may help you in this instance. Regards, Maurice.
-
IMO, you can never be too anal about rust because, as some of us know too well....rust never sleeps. Forget the Rustoleum because it's relatively worthless. If you want to stop rust in its tracks, you can't go wrong with a product/paint called POR-15. Over the past four decades of dealing with rust on early (pre-galvanized) cars, it's the only product that I have found will actually stop rust completely. The original, gloss black formulation is the best. If the surface is going to remain exposed to the sun/ozone, you have to topcoat it (with any paint). If you don't topcoat it and it's exposed, it will still be effective against the rust but its finish will dull. IIRC, POR-15 cures by absorbing moisture, not by means of evaporation of solvent. Don't get it on your hands (or any other part of your body) because once it cures it can't be removed by solvents, only by mechanical means (sandpaper or grinding wheel). Regards, Maurice.
-
Some Porsche OEM coolant actually looks "pinkish-red". If there is a drop of it on the floor, touch a tiny speck of it to your tongue and see it if is "sweet". If it is, it's coolant. Be sure to spit it out and flush your mouth with water afterwards! :eek: Regards, Maurice.
-
Boxster top issue
1schoir replied to bigmac's topic in 986 Boxster Convertible Top Issues and Solutions
The microswitch for the clamshell, as well as the microswitch for the canvas top, are located INSIDE the driver's side transmission. Here is a link to lots of information and photos about the convertible top: https://sites.google.com/site/mikefocke2/thetop-itsmaintaince%26replacement Regards, Maurice. -
Nice Work! Regards, Maurice.
-
2002 boxter top "dragging"
1schoir replied to bobroberts72's topic in 986 Boxster Convertible Top Issues and Solutions
"...greased or oiled all tracks..." Does that include the channels where the black plastic sliders ride (at the bottom of the body-colored clamshell arms) ride back and forth? If you haven't, you should lubricate those channels with white lithium grease (or Dupont Krytox if you want to spend the extra $$). Did you inspect the black plastic sliders themselves to make sure they are intact and are not binding in the tracks because of abnormal wear? If you have done the above, you can narrow down the cause of the problem (which may turn out to be one or both cables or the small plastic gear where the cables go into the rear of the transmissions) by disconnecting both sets of pushrods and trying to operate the convertible top through its full open and shut cycle manually. You should be able to operate the top manually by pulling or pushing on the leading edge with your pinky (i.e., there should be almost no resistance). If the top operates smoothly in the manual mode with almost no resistance, your trouble will lie in the cables or that gear in the transmissions. Regards, Maurice. -
IIRC, the heater blower for a 986 is a Valeo unit that is the same as the one found in a 1997 VW Jetta Wagon. Regards, Maurice.
-
1. This is caused by too much resistance in the convertible top frame mechanism. If it binds or rubs on something, the increased resistance will break the plastic gear. Your original video demonstrating the operation clearly had the periodic ticking sound, which indicated a skipping gear. 2. Porsche does not sell the parts inside the transmissions individually. 3. A used transmission is just as good, as long as there are no broken parts inside. Make sure that you get one of the "B Version" transmissions, which were installed by the factory in most 2000's, and all 2001 to 2004's. The "A Version" transmissions also look different externally from the B Version. See post #4 in this thread for a photo of the A Version transmission (it's showing the inside of the transmission but you can get an idea of the different shape of the outside from the photo). The used one in your link shows the correct years but there is no photo of the transmission to confirm. Also, although the text of the ad states that it is a right side transmission, the photo only shows the V-lever and associated parts. Make sure that you correct the binding in the operation before you install the replacement transmission. As I said, with all of the pushrods disconnected you should be able to move the convertible top through its open and close cycle with your pinky. Regards, Maurice.
-
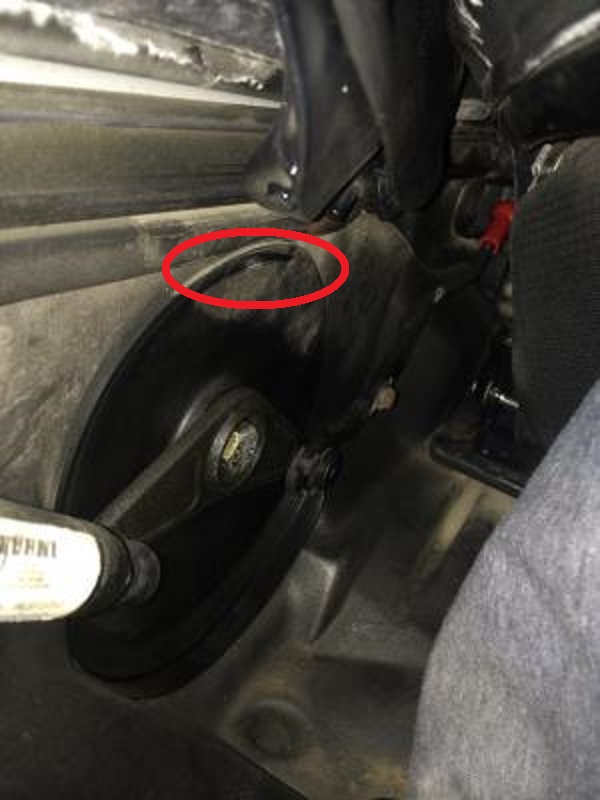
Yaron: You definitely have the "B Version" transmissions and set up, as evidenced by the small black square on your double relay. The intermittent operation may be caused by some corrosion on the double relay male and female spades. Use some fine emery cloth to clean the male spades on the double relay and then you can insert a thin, small screwdriver wrapped in a small piece of emery cloth to insert it into the female spades on the relay tray to clean everything up in there. Also, rap the double relay a couple of times on a hard surface to help "unstick" any of the contacts inside. The third photo also shows that there is no lubricant in the driver's side guide channel, so make sure that you lube that as well. The second photo also shows that there is some rubbing on the black vinyl protective cover under the V-lever at the area inside the red oval, here: Definitely observe that passenger side V-lever through its complete rotation to determine what is rubbing, both there and above that area, as pointed out in the earlier post. Regards, Maurice.
-
If the clamshell is closed down tight over the stowed convertible top and it won't move, your only option is to unbolt the V-levers by means of an offset 19mm box-end wrench. Once you remove the 19mm bolt on each side (in the center of the V-Lever), you will be able to access "the works". See post #4 for some photos and more details on the procedure. In the meantime, see if you can identify the type of convertible top double relay that is in your car as that will tell us whether you have an "A Version" transmission and set up or the later "B Version". The "A Version" will have a small black triangle on its top exposed surface and the "B Version" will have a small black square there. Regards, Maurice.
-
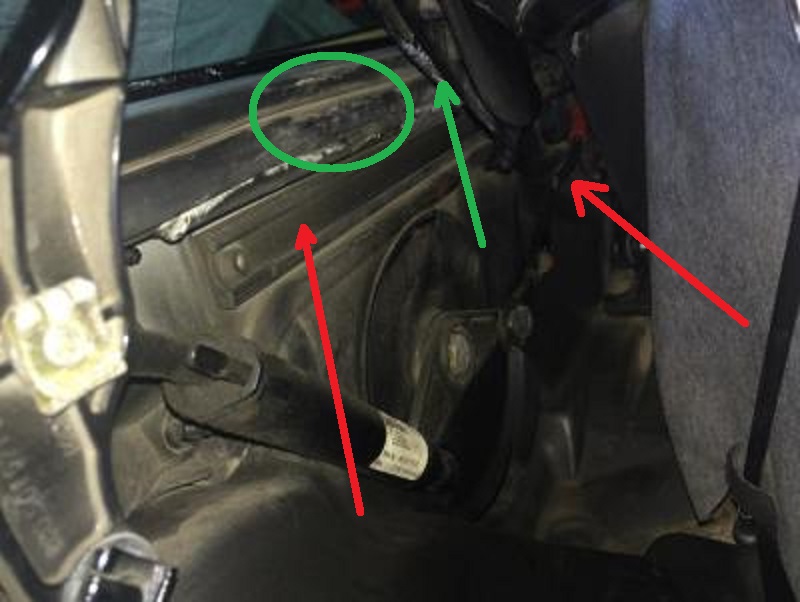
Boker Tov! :welcome: From the clicking noises and the straining of the electric motor on your video, it sounds like the gears inside at least one of the transmissions may be getting overloaded and thus skipping. That usually only happens when there is great resistance on the system's operation. Your third photo shows a number of possible causes: The red arrow on the left pointing to the channel shows that it is completely dry and with no lubrication. That will cause a lot of resistance and should be remedied. You can apply some white lithium grease in that channel and around the black plastic sliders that ride back and forth in that channel. The red arrow at the rear shows that the front pushrod (with the red ball cup) may be bent more than the original design. The photo is not that clear so you should compare that one with the one on the driver's side to make sure it is not bent out of shape. The green circle shows an area that looks like something is rubbing against it and the green arrow shows the edge of what may be rubbing against it. If that's the case, check to see if anything is rubbing and rectify that. It may be causing the lip of the sheet metal that normally sits over the V-lever's plastic protective cover to get caught and released repeatedly, thereby causing the resistance and the clicks that you hear when the electric motor is struggling. To take the possible problem with the transmission gear(s) out of the loop, I would disconnect the front and the rear pushrods on both sides and try to operate the convertible cop by pulling and pushing on the leading edge of the top through the open and close cycle. If it's working properly, you should be able to move the top with just your pinky. In other words, very smooth and with no resistance. That will reveal if the top is getting hung up on anything. Do this after you have lubricated the channels as pointed out above. Regards, Maurice.
-
tuneRS Direct Oil Feed
1schoir replied to HalM's topic in 996 Series (Carrera, Carrera 4, Carrera 4S, Targa)
Does the "brinelling" mentioned in the article also happen on ceramic bearings when placing a load on the inner race or does it only happen to steel bearings? Or, perhaps this is a testament to the efficacy of the DOF system. Pedro stated that after he re-installed the ceramic bearing, a few months later he also installed the DOF. Regards, Maurice. -
Great to hear that it worked! :cheers: Regards, Maurice.
-
There is some degree of adjustment possible, but the adjustment is not at the tips. You can loosen the exhaust clamps, then also loosen the support brackets (left and right) at the rear of the PSE as well as the bolts holding the large left to right support bar/bracket on top of the PSE. Once you have loosened everything, put a small jack under the left side of the muffler and jack it up very slowly until you get the proper alignment. Then tighten all of the bolts and clamps before you remove the jack. If you think that there is a problem that will cause the left side to appear lower, go slightly past horizontal before tightening everything up. If everything is lined up properly, the left and right tips will be exactly level on the horizontal plane. Regards, Maurice.
-
Soft Top Fully Opening Issue
1schoir replied to jimmyg1972's topic in 987-1 Boxster Convertible Top Issues and Solutions
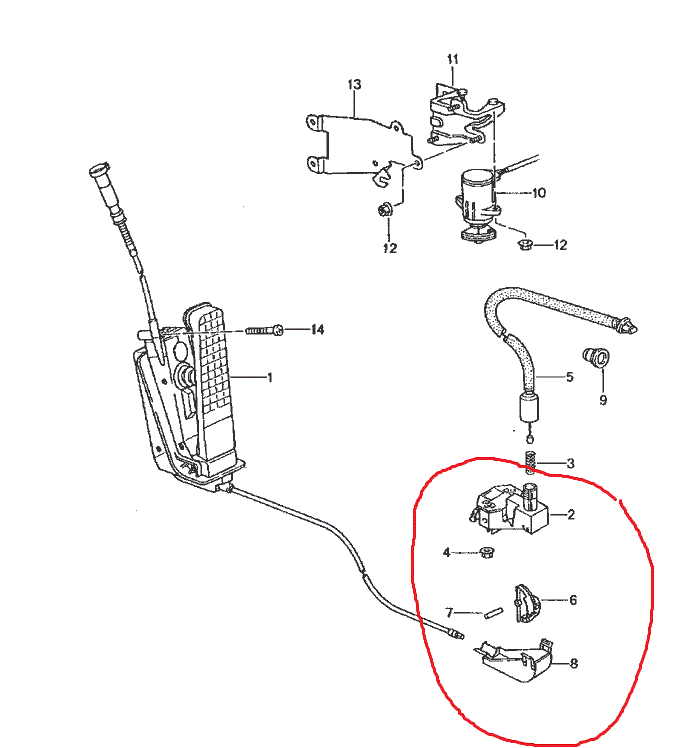
Sounds like you are still making progress, but not quite there yet. The V-levers are supposed to be absolutely flat, with no curve on either side. You may be able to straighten out the bent one but it is very well made and not easy to bend because of the built-in "ribs". You will have to start out with completely straight V-levers before you can isolate any problem noises or operation. The part numbers that you have listed are all correct, but it appears that for the 987 there is a cut-off with a serial number (according to build date) between the transmission part that ends in "00" and "02". The Porsche protocol with part numbers usually provides that the last two numbers in a part number are reserved for indicating an "updated" or "improved" part, and the bigger numbers are the latest part numbers. The three numbers previous to those two always indicate right and left side, with even numbers indicating right (or passenger side in U.S.) and odd numbers indicating left (or driver side in U.S.). So, for example, part number 987 561 180 02, has "180" indicating it's for the right side, and "02" indicating it's the latest or most up to date part. However, in this case, as I indicated above, there may be a difference depending on the build date of the car. You could check the part numbers for the convertible top double relay and for the electric motor for the 987 and, if there is only one part number for each of them, I believe that either one of the transmissions would work properly. Remember that there are two microswitches INSIDE the left transmission and that's the only place where there might be a difference. My best guess is that there is no difference between the "00" and the "02" parts for practical purposes and that either one will work, but I'm not 100% sure. Regards, Maurice. -
Check the bottom (carpeted) of the passenger door panel to see whether there is any moisture there. If you find that section wet, there's a good chance that the membrane between the door panel and the inside door is either damaged, incorrectly adhered, or missing. If the water is coming in from the window, you have to realign the window by using one of the three adjustment points so that the window seals well enough to keep out water and wind noise. The adjustments have been explained here before, so if that's the cause in your case, do a search or post again and I'll see if I can find some of my old posts on the topic. Regards, Maurice.
-
tuneRS Direct Oil Feed
1schoir replied to HalM's topic in 996 Series (Carrera, Carrera 4, Carrera 4S, Targa)
It can be installed on cars with the LN Engineering IMS ceramic bearing, the original OEM bearing, a replacement OEM bearing, the Pelican parts replacement bearing, etc... Regards, Maurice. -
Since yours is a mechanical linkage ('97 to '99's don't have "e-gas"), it would be a good idea to insert some drops of graphited lock fluid or speedometer cable lube into the vinyl/metal sheath in which the inner metal cable slides back and forth. You can start in the engine compartment where the cable is attached to the throttle body and then go under the car where there is a junction that guides the cable at a right angle towards the front of the car. The junction is in a small black plastic housing under the car, just forward of the front of the engine. You can undo the cable from the throttle body and also take the junction apart to get the most lube in there. While you are at it, inspect the cable at the junction to make sure it hasn't slipped off the "wheel" guide you will find there. Here is the area of the junction, to help you locate it: You would be amazed at the difference after lubricating the cable. Regards, Maurice.
-
Foam Pieces in Defrost Vent
1schoir replied to Wausau 911's topic in 996 Series (Carrera, Carrera 4, Carrera 4S, Targa)
The issue is that the foam rubber pieces that help seal the flaps over the inner vents have aged and deteriorated and will keep flying out piece by piece for a long time. At the same time, the vents won't have a complete seal and the air (whether heated or a/c'd) will not go completely where it's supposed to go, according to your settings. There is a comprehensive fix that involves accessing those flaps from the outside of the car, below the base of the windshield and there was a very good write-up by a guy named "rsfeller" on a site called carboncow.net. That fix is no longer on that site but I believe the poster moved it to another location. If I find the write-up, I'll post the link here. Regards, Maurice. -
Window drop passenger side
1schoir replied to av8sky's topic in 996 Series (Carrera, Carrera 4, Carrera 4S, Targa)
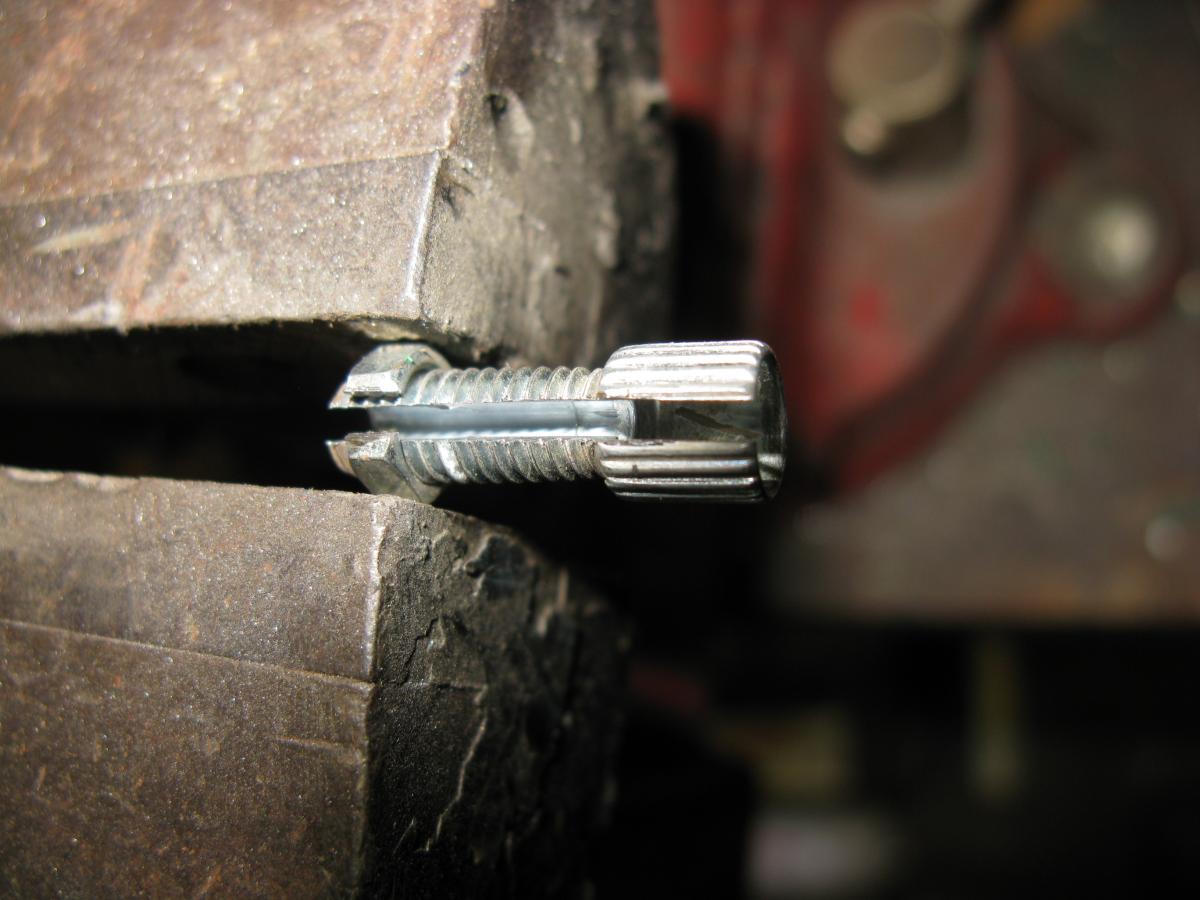
Not that dangerous with a dremel abrasive disc and this: :eek: Regards, Maurice.
-
Window drop passenger side
1schoir replied to av8sky's topic in 996 Series (Carrera, Carrera 4, Carrera 4S, Targa)
That would have doubled the cost of the repair! :lol: Regards, Maurice.