Welcome to RennTech.org Community, Guest
There are many great features available to you once you register at RennTech.org
You are free to view posts here, but you must log in to reply to existing posts, or to start your own new topic. Like most online communities, there are costs involved to maintain a site like this - so we encourage our members to donate. All donations go to the costs operating and maintaining this site. We prefer that guests take part in our community and we offer a lot in return to those willing to join our corner of the Porsche world. This site is 99 percent member supported (less than 1 percent comes from advertising) - so please consider an annual donation to keep this site running.
Here are some of the features available - once you register at RennTech.org
- View Classified Ads
- DIY Tutorials
- Porsche TSB Listings (limited)
- VIN Decoder
- Special Offers
-
OBD II P-Codes - Paint Codes
- Registry
- Videos System
- View Reviews
- and get rid of this welcome message
It takes just a few minutes to register, and it's FREE
Contributing Members also get these additional benefits:
(you become a Contributing Member by donating money to the operation of this site)
- No ads - advertisements are removed
- Access the Contributors Only Forum
- Contributing Members Only Downloads
- Send attachments with PMs
- All image/file storage limits are substantially increased for all Contributing Members
- Option Codes Lookup
- VIN Option Lookups (limited)


Schnell Gelb
-
Posts
308 -
Joined
-
Last visited
Content Type
Profiles
Events
Forums
External Paint Colors
Downloads
Tutorials
Links Directory
Collections
Store
Everything posted by Schnell Gelb
-
Dreaded Flashing Check Engine Light 100K
Schnell Gelb replied to zodman's topic in 986 Series (Boxster, Boxster S)
It would help us advise you if you mentioned the skill level(with M96) of whoever will do the work. I mention this because it seems probable that you will need a replacement engine. That is a task requiring some significant equipment, skill, time and money.Will you do all the work or your Indie? Ahsai's suggestion of removing the Bank1 scavenge pump seems the best initial course of action because the seemingly failed chain is easily exposed by removing just 4 bolts that retain the pump.You should see it on the Ex cam sprocket An alternative would be to remove (catch oil !!) the chain tensioner nearby -32mm size. Stick your finger in the hole to feel for the floppy/broken chain. The potential problem with a broken chain is the very hard debris of the broken chain pieces & of the thrashing chain on related plastic and aluminum parts. Finding all of that abrasive/clogging debris will be difficult even with a full dismantling of every part of the engine. If you have a full flow filter(LN?) that may help. Usually the cost of such work far exceeds the cost of a good used engine. For options, you could try L.A. Dismantlers for a used 3.2 , Woody (itsnotaNova on 986 Forum) or Fleabay ,maybe Craig's. Good Luck with your sad project .I am just recovering from a similar one. -
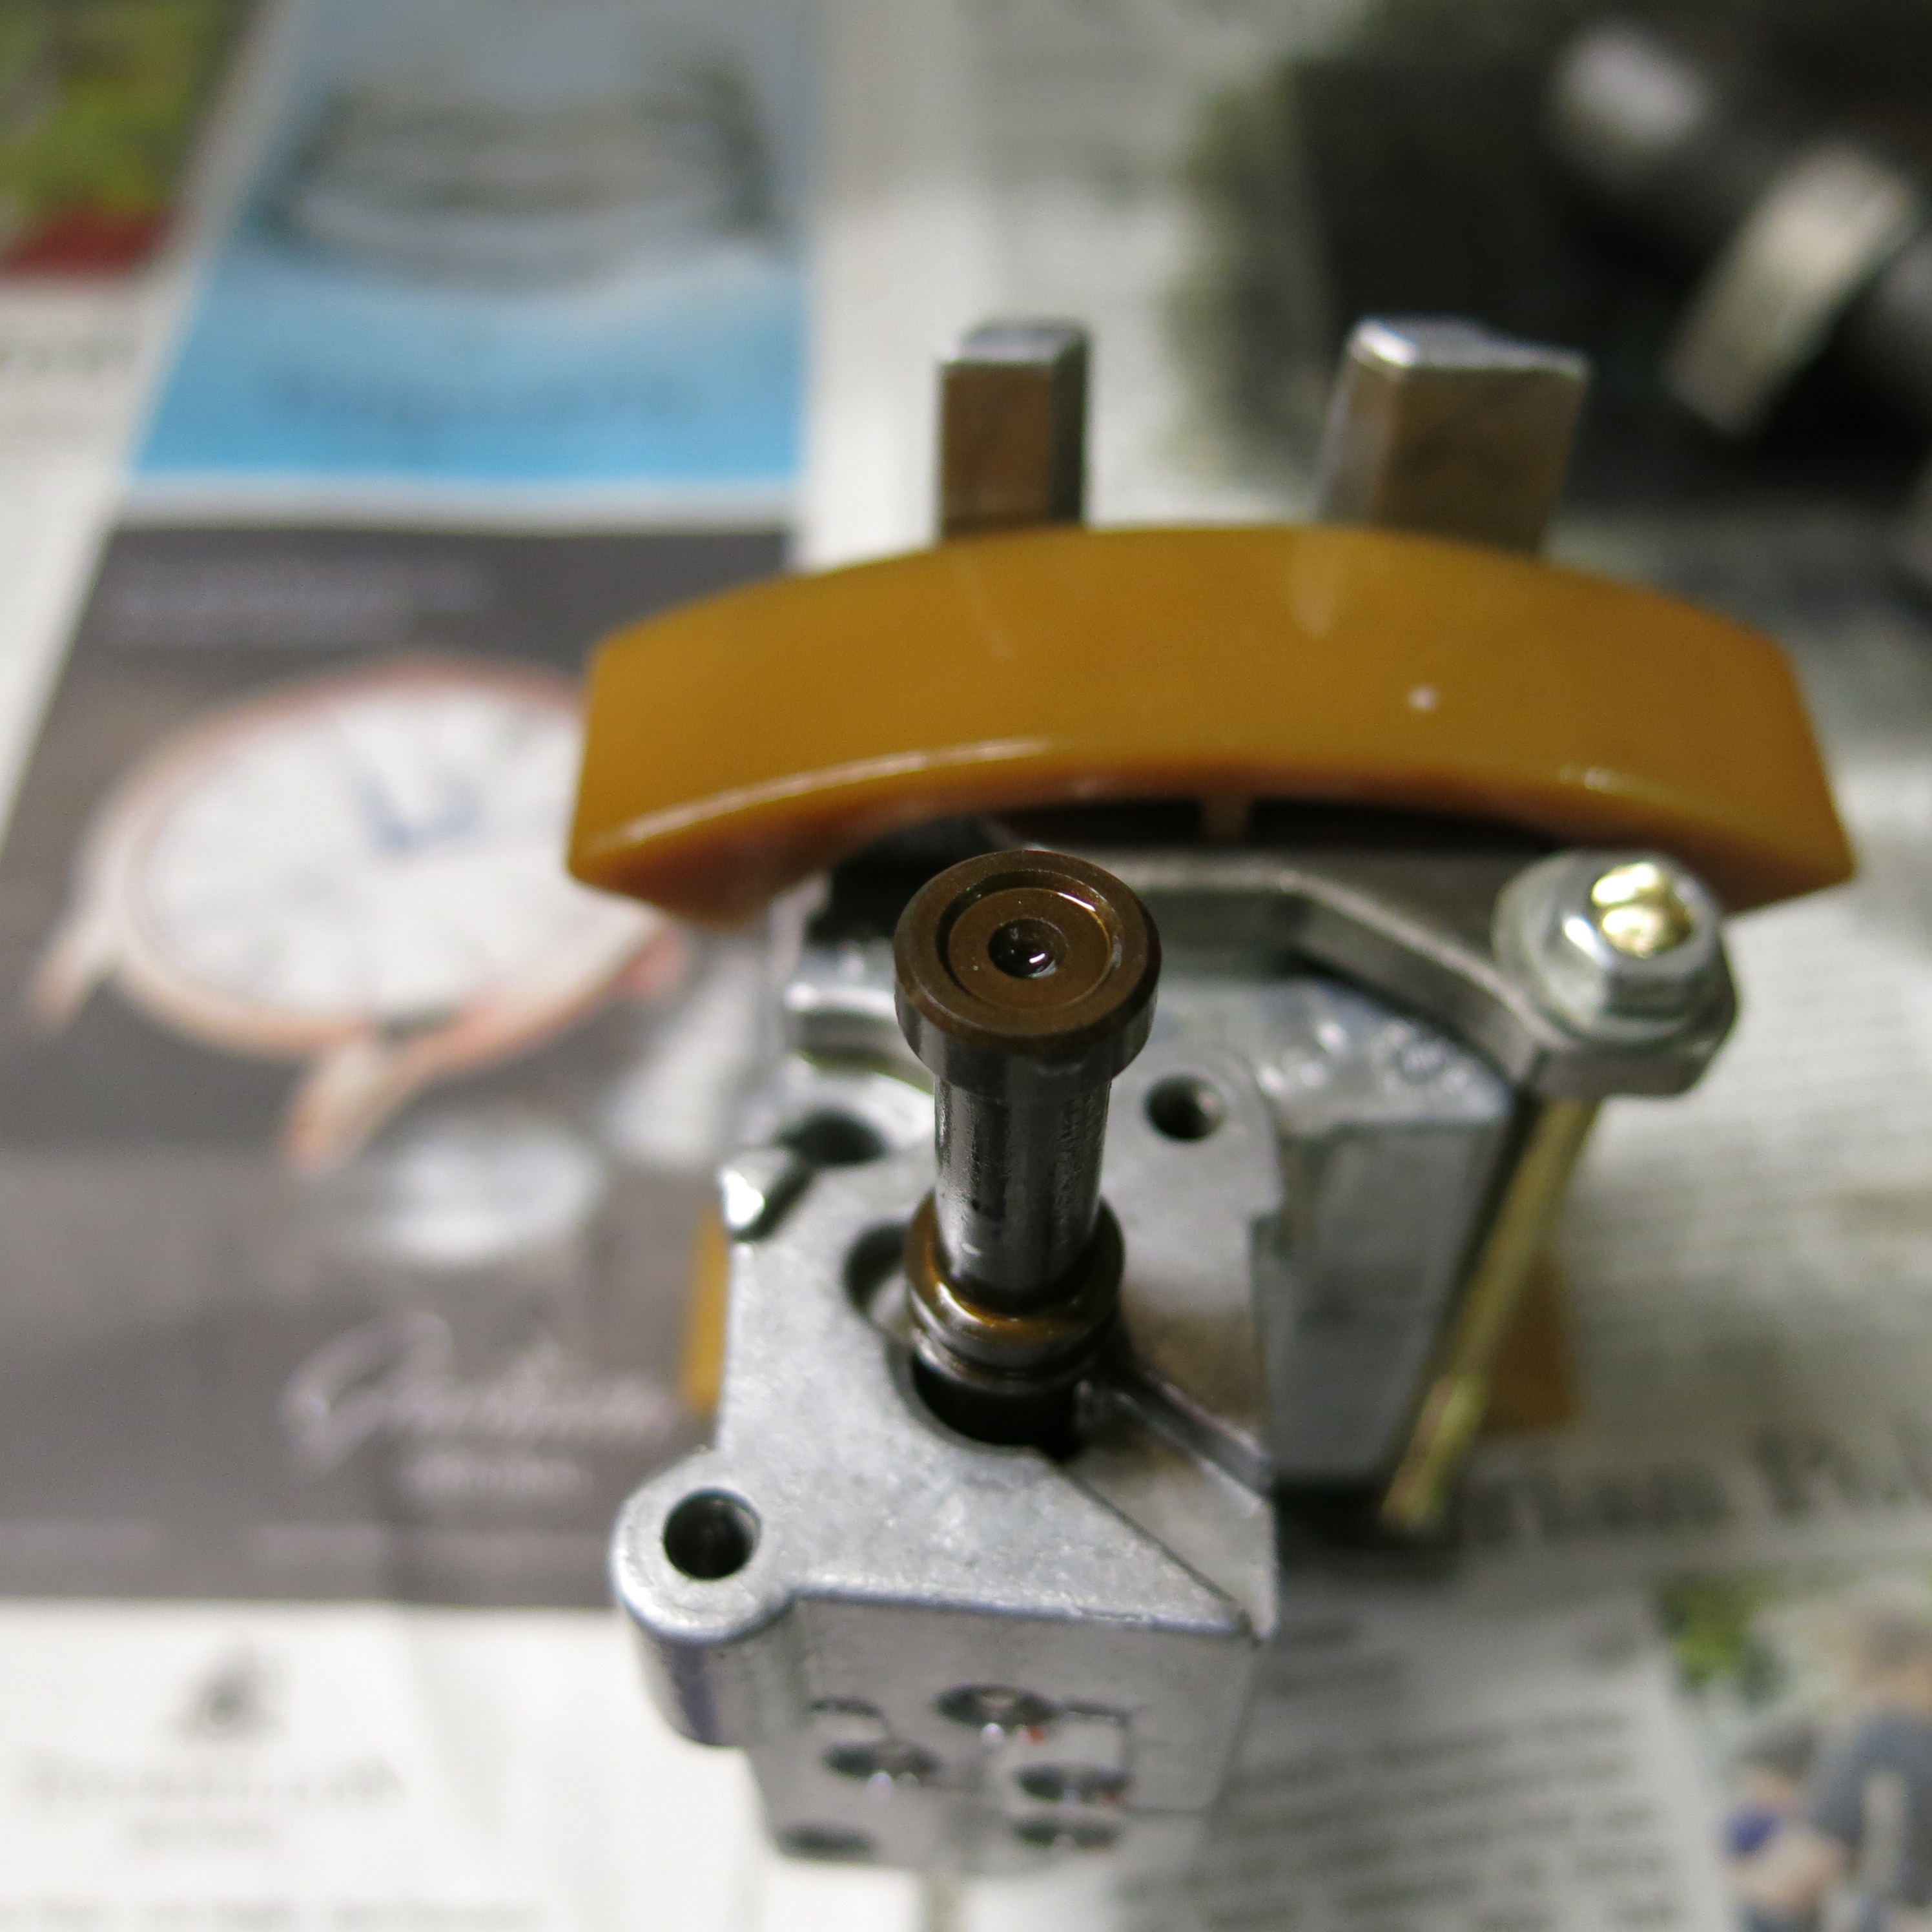
One ugly detail with this job is the orientation of the 2 pads on the Actuator. The pads are different as shown above. One pad has 2 oil ports in it and a green 'O' ring on the underside of it. The other pad has neither the oil ports ,nor the 'O' ring . Each pad will fit on the top or the bottom of the actuator ! So which pad goes where?? Very few Instructions mention this. AFAIK , the pad with the oil ports always(for Bank 1 or 2) should be fitted adjacent to the solenoid(INCORRECT ! see below) as pictured at the beginning of this thread. If this is incorrect Please mention it here !
-
Porschetech3 is wise to be leery of diy rebuilds. Particularly very recently rebuilt, no miles.I just did one. I made only 1 (so far) mistake. But it was potentially mortal.I lost one tiny spring.I did not realize it had dropped out. Why? Because there is nothing in the FSM that shows the bowels of a Variocam Actuator. Now Renntech has that photo and a detail write up on all the tests to identify that specific fault. In the FSM the same diagnosis tells you to buy a $1000 Actuator to fix it. And indeed ,that would fix the problem and you may never realize all you needed was a little spring. That alone is worth contributing to Renntech for ? Even better, when I get Porschetech3's spring ,I'll try to spec and source it so any Renntech Contributing Member can buy a replacement for pennies. Spare M96 engines - per the O.P. - some of us have a problem with collecting M96 engines and should confess ? I have a spare 6 speed gearbox and have been hunting for another rebuildable 3.2 S for several years. Some of us have several stashed in our basement as an investment.....you know who you are :-).
-
Welcome to RennTech an oasis of technical brilliance and courtesy .I 'll try to stay true to that here :-). Without Durametric readings to 'triangulate ' other factors in the 1341 code, we would be throwing out lots of futile suggestions. For example, what are the "Actual & Deviation angles", does the Variocam respond to a Durametric prompt ? To start with a logical diagnosis you could check the connections and do the 13 ohm and 9v click test mentioned above. Much depends on your skill level, equipment and FSM resources. Maybe better to find the best Indie in Las Vegas instead ? I am writing a full diy diagnosis for P1341 and related codes .It has many wiring harnesses for tests and runs to over 2000 words. I am not done yet. Probably more than the average diy enthusiast wants to get involved with ?
-
Battery Maintainer
Schnell Gelb replied to 356to966's topic in 996 Series (Carrera, Carrera 4, Carrera 4S, Targa)
The generic version(+upgraded) of the "Porsche" maintainer has been mentioned by JFP and others many times. It is the Cteck MUS 4.3. No 100% Porsche tax. Based on JFP's suggestions I bought the entire kit over a year ago - works perfectly on any car.There is a much cheaper version w/o all the extras also. https://www.amazon.com/LIMITED-CTEK-BATTERY-CHARGER-EXTENSION/dp/B00D8DTG6U -
Weird Fuel Problem
Schnell Gelb replied to dyerhaus's topic in 996 Series (Carrera, Carrera 4, Carrera 4S, Targa)
This may help: -
This seems odd that the pads are reversed between the 2 Banks.I am sure some rebuilders miss this.It is correct per the FSM Sec 15, page 23 & 24. You can also see it here for Bank 2 (TWO!) See the video at 1.30 .
-
996 water in oil?
Schnell Gelb replied to 1999911's topic in 996 Series (Carrera, Carrera 4, Carrera 4S, Targa)
The Hartech support ring is an interesting alternative . Surprised the OP in that case did not contact Hartech about the white smoke. Hartech seem very competent and a decent company who would be interested in a possible failure of one of their reman engines after so few miles. 3, M96 engines? Maybe I need more than just a spring from your basement ? :-). -
996 water in oil?
Schnell Gelb replied to 1999911's topic in 996 Series (Carrera, Carrera 4, Carrera 4S, Targa)
Have some fun with the list posted here.It would help others to read the entire Thread. It certainly got my attention ! Cracked cylinders ! -
White smoke!!!
Schnell Gelb replied to Paul Grainger's topic in 996 Series (Carrera, Carrera 4, Carrera 4S, Targa)
Someone should start a "White Smoke -possible Faults List" 1. AOS failure - manometer test 2. Cracked cylinder- Bore-scope test 3. Intermix - oily coolant/watery oil 4. Overfilled engine oil -new glasses 5. Years of oil residue in Intake - clean up 6. Wild driving style - buy a Buick 7. ...................? -
THe Crankshaft Position Sensor is an inexpensive $93 ,Bosch part that is relatively easy to replace. Time/heat cycles(?) causes them to deteriorate. why not just replace it ? Or test ohms when it malfunctions (easier said than done !) Try RND bur verify correct part # you did not mention your vehicle details http://store.rndeuroparts.com/catalog/SSF/catalog.aspx?SearchedText=0261210204 Unfortunately RND are no longer supporting their website for Porsche parts like this. Try Sunset ? Price is about 30+% higher when you include shipping.
-
Without a Smog Test, you won't get a new sticker -CHIP bait ! In desperation you might consider an ROW reflash if they promise the new Smog Machine won't detect the programming change.Lots about this in Search. For that price you could buy all the pesky valves and hoses in the entire SAI system. Fitting them is another matter ! Good luck and let us know what happens.
-
THANK YOU SO MUCH Porschetech3 !!
-
Agreed because the divot is 4mm deep - more than the travel of the plunger on the Solenoid .This was for photo purposes only. And a very useful link I had missed - thank you !
-
Ahsai's latest link is useful because it confirms my suspicion about the orientation of the piston.But compare the photo in that link with mine at the end of Page 2 of this Thread. They are very different ! Difference between earlier/later engines? No mention of springs
-
I'm thinking about that Treasure Trove in Porschetech3's basement.Must be a spring or 2 there ? :-).
-
There is NO SPRING ! My Kingdom for that 'missing' (?) spring ! Are you sure we are talking about the same part? See my photo on Page 2 of this Thread- way down toward the end of the Page.
-
Showing offset flanges in the piston. Note the plate at one end of the piston is thicker than at the opposite end.

-
Plain end of piston
-
Here is the piston showing the divot facing the Solenoid.I think this is the wrong way around?
-
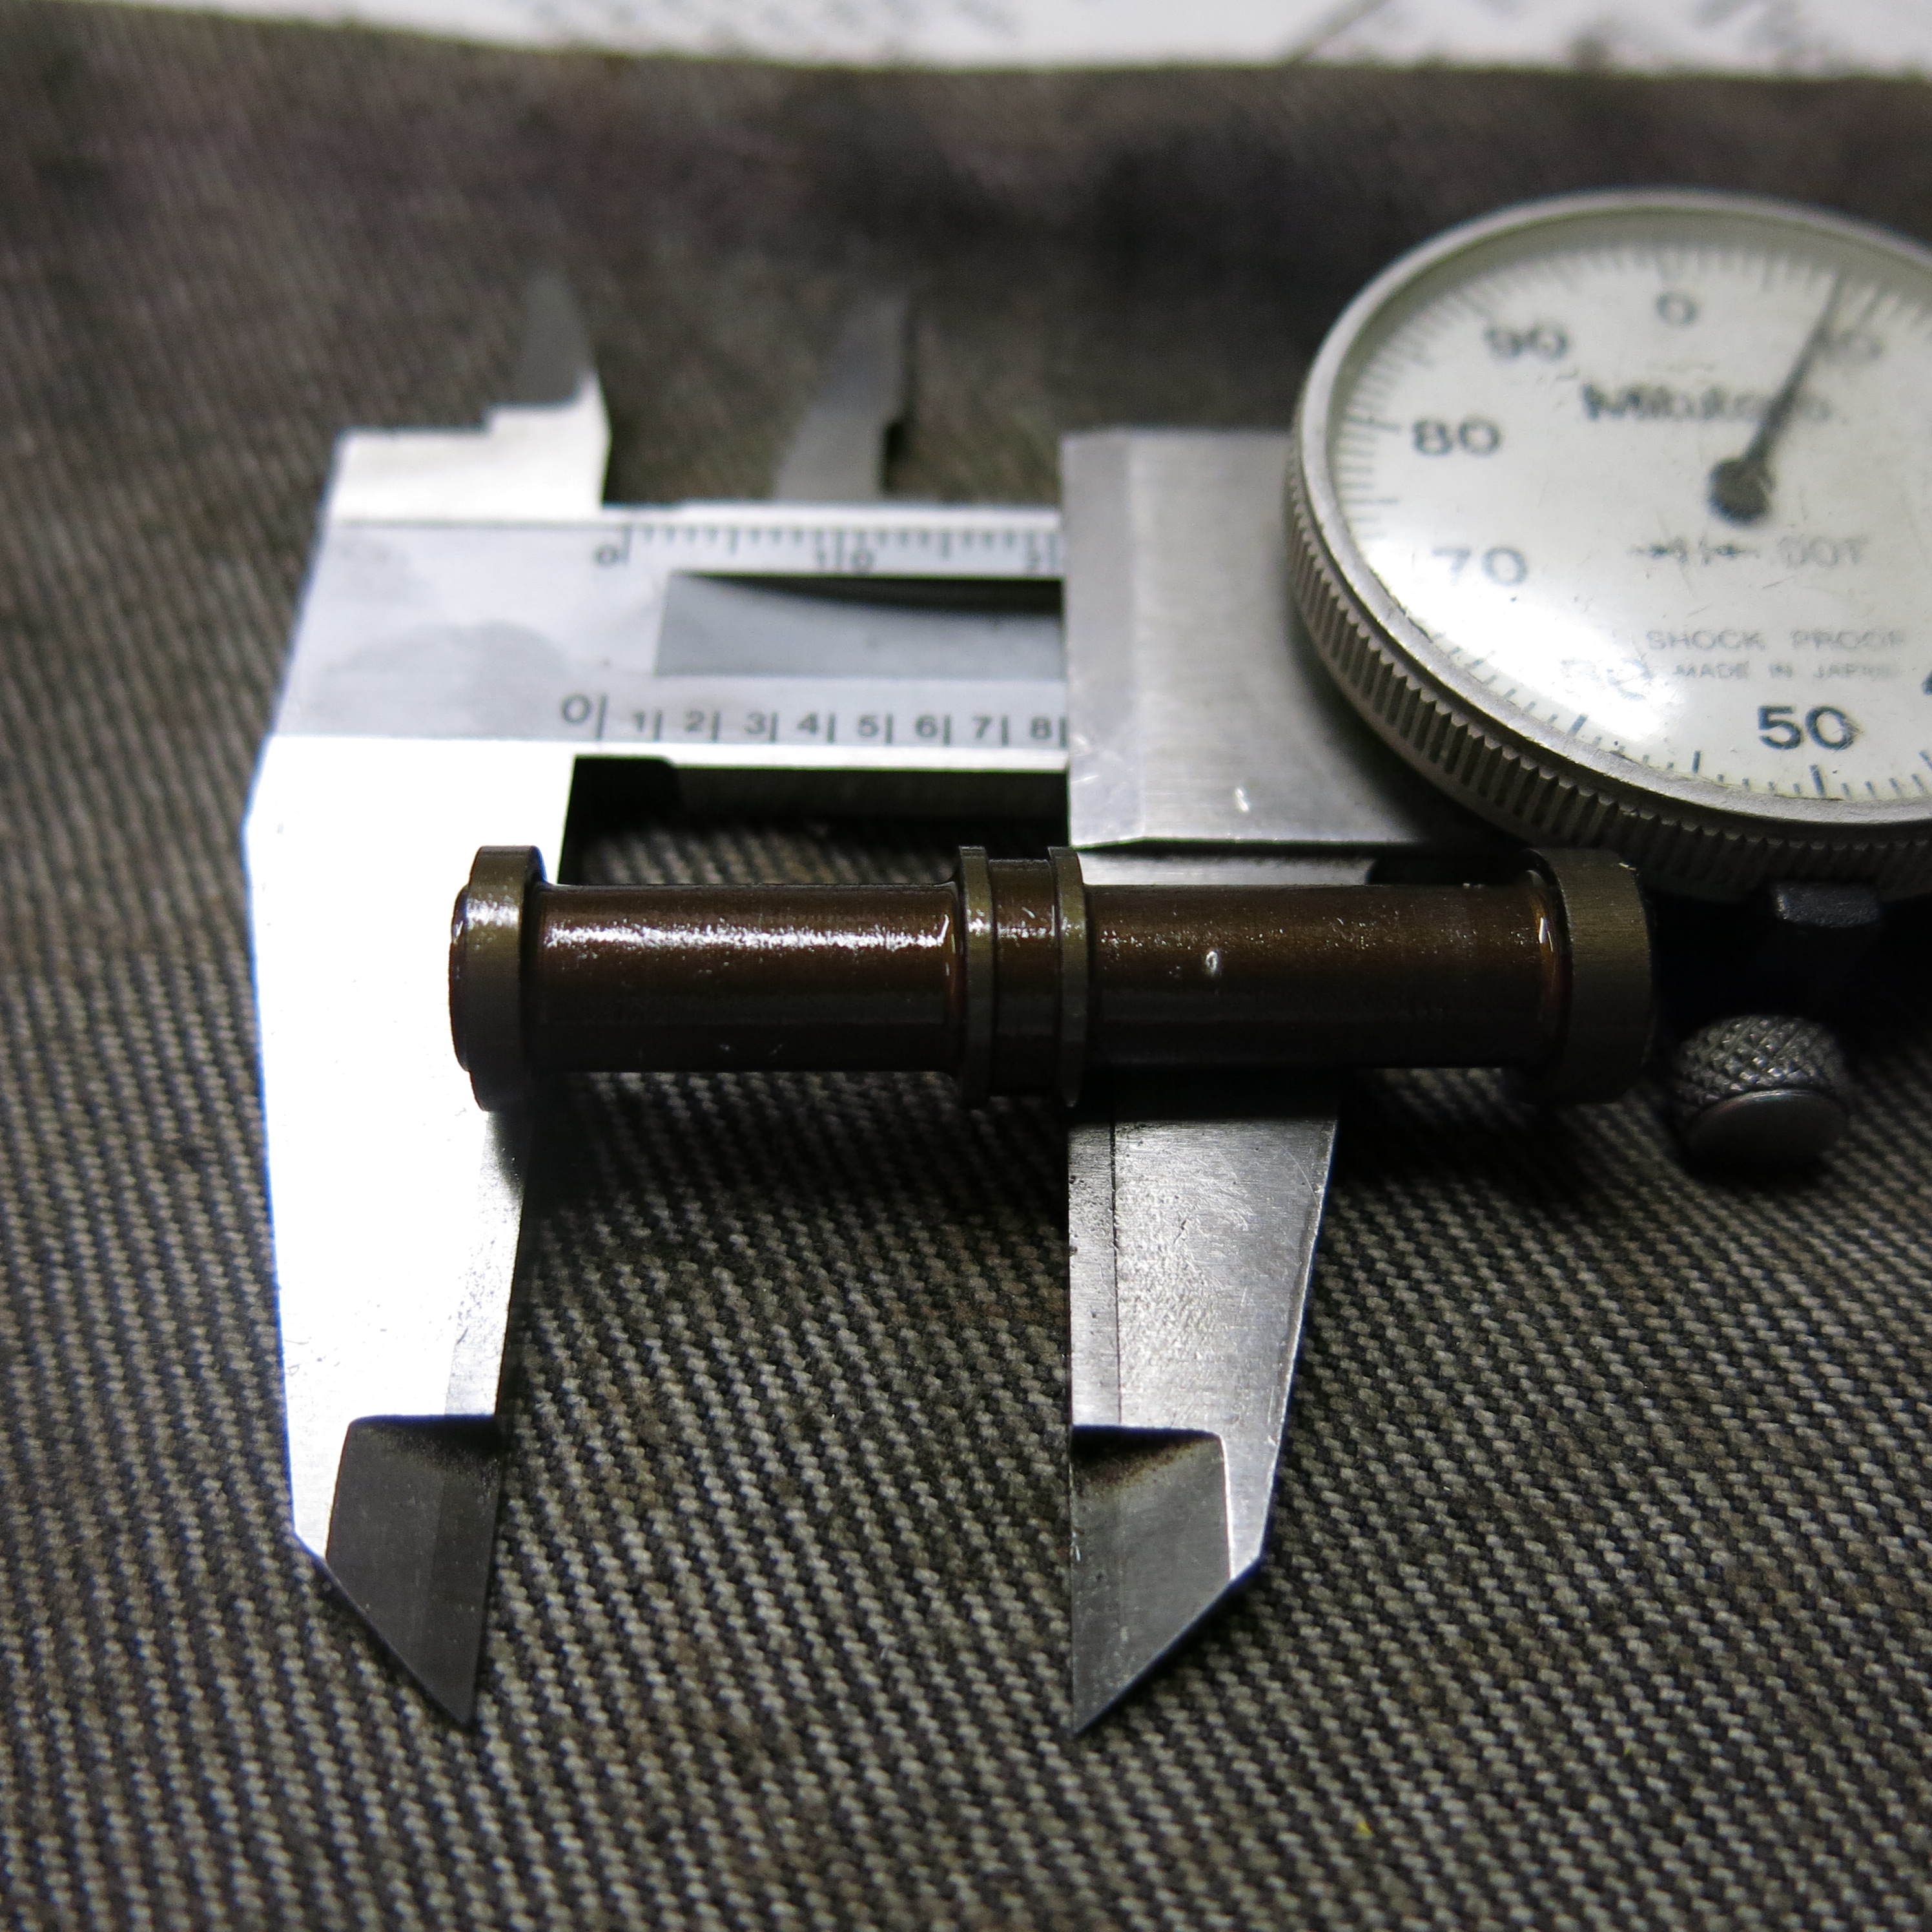
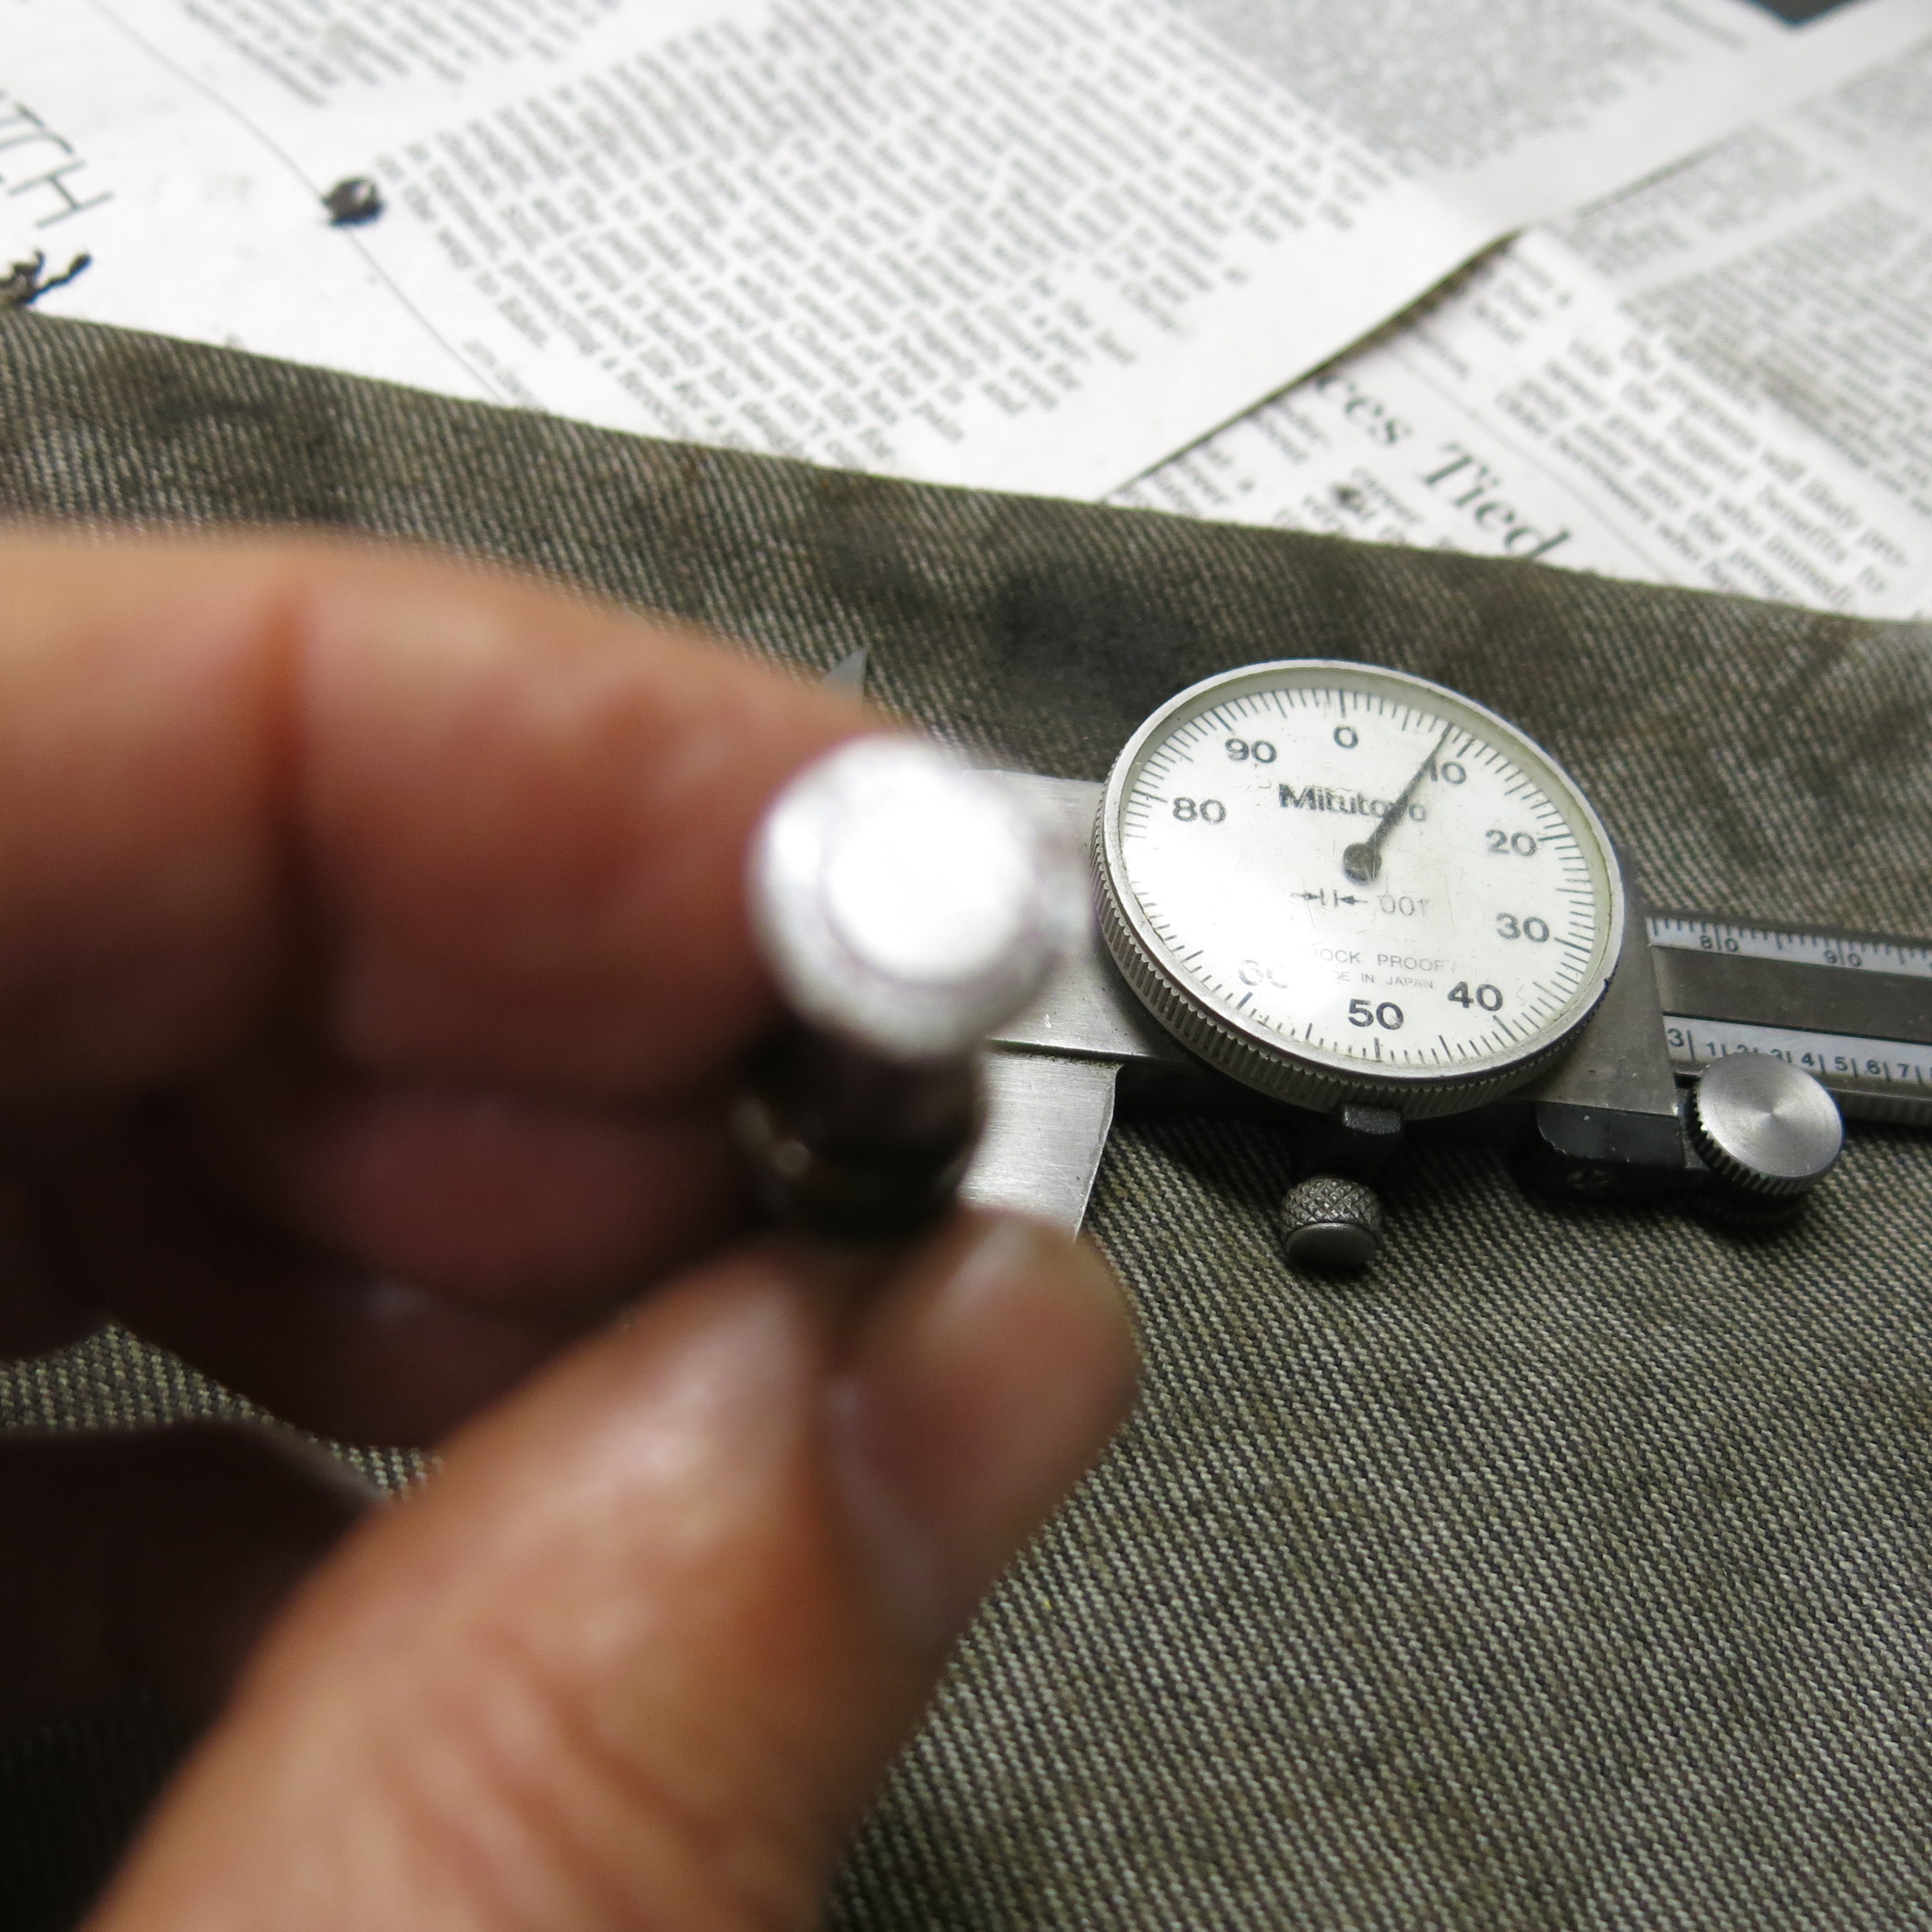
Confirm - yes ZYL 1-3 also marked with a partial part # 996 105 051. Confirm - pad with 2 holes is on the bottom of the Actuator. Confirm - 12v to the Solenoid via a MOM switch makes the plunger jump but no "click".Perhaps the Click on Bank 2(the good Bank) is just the chain noise? Nevertheless it seems a strong push. Solenoid shows 13 ohms - per spec. Now it may get interesting - remember I was hunting for stupid error opportunities - I found one. The Solenoid plunger acts on a piston in the Actuator .This piston is 44mm long and acts as a valve to direct oil pressure to pump the actuator in one direction or the other. Problem - the piston is reversible. Which way around should it be fitted? It fits both ways. Yes it matters because the piston is not symmetrical. The piston is shaped roughly like a barbell - a rod with a circular plate at each end. The ends are different in 2 respects. One end plate is much thicker and has a 4mm deep 'divot' dead center of the outer face. The other end is plain and slimmer. Which end should face the Solenoid ? Sorta looks like the divot is for the Solenoid plunger to engage in but the divot is so deep(4mm) it would take all the travel of the Solenoid plunger. . But it was installed the other way around.The plain end has a witness mark where the plunger was pushing. There is one other big difference. Roughly mid way along the rod there are 2 flanges but they are offset from the middle of the rod. They are further away from the end with the divot. Suppose this piston was installed the wrong way around ? The barbell-like piston acts like a shuttle valve and directs oil into the Actuator .It is controlled by the Solenoid. So if the Solenoid is perfect but this piston is the wrong way around, the Actuator will not operate correctly. Inside the bore of the Actuator there are 3 ports for oil flow . Anyone have an unmolested Actuator they can check? Just look for the 'divot' . I'll try to add some photos because I am sure this piston could be a problem for others. It easily falls out and has no markings to know which way it should go . I may just go to the Dealer and ask to inspect one.
-
No. I can clearly see my marking on the Actuator made when I dismantled the engine "1-3" on the side. So probably a bad Actuator ? The Actuator was in the correct position when I removed the cam cover. It was at full travel away from the crankshaft.I tested it by using a prybar to gently force it in the opposite direction.It moved smoothly. I removed the Solenoid,Plenty of clean oil.The plunger moves smoothly and the small piston in the base of the Actuator(that the Solenoid pushes on) also moves smoothly in it's bore. That piston looks like Porsche considered fitting an 'O' ring - there is an anular groove in the middle .I can not find any Parts Diagram that shows this little piston to check if it should have a seal.It should be with Item #10 on this diagram? http://www.autoatlanta.com/porsche-parts/hardparts.php?dir=986-97-04§ion=103-10 As yet I have no clue about the cause of the huge Deviation problem.I had speculated that maybe the plastic pads had fallen off or broken but all looks perfect. I'll take the cams off to get the old Actuator off the Ex to Inlet sprocket chain. Unfortunately there are no bench tests for the Actuator that are definitive. Maybe some obstruction of the oilway?
-
I can confirm that the Bank 1 Camshaft Cover on a 2001 Boxster S can be removed with the engine in place. No force required - just lower the front of the engine(&support it) as much as possible on the engine mount studs. Some carefully wiggling is required but it came out. Glad I used the correct seal because there are very few strong pry points on the cam cover.
-
Crank vs Cam degrees - Everything I have read says Crank degrees. So half that for Cam degrees. That is why even 14.9 degrees(crank) is hard see on the cam unless you are looking at it directly with the engine on a stand in good light with a straigtedge. The suggestion to use the adjustment tool 9612 is of no use if the engine is in the car - there is no space to use it or 9634! But there is space for LN Engineering 9686 aka 'Alignment Gauge' or the half length version that just checks alignment but does not hold down the Inlet can. For those removing the Cam Cover -refer to this helpful Thread for the bolt sequence: