Welcome to RennTech.org Community, Guest
There are many great features available to you once you register at RennTech.org
You are free to view posts here, but you must log in to reply to existing posts, or to start your own new topic. Like most online communities, there are costs involved to maintain a site like this - so we encourage our members to subscribe or donate. All subscriptions and donations go to the costs operating and maintaining this site. We prefer that guests take part in our community and we offer a lot in return to those willing to join our corner of the Porsche world. This site is 99 percent member supported (less than 1 percent comes from advertising) - so please consider an annual subscription or donation to keep this site running.
Here are some of the features available - once you subscribe RennTech.org
- View Classified Ads
- DIY Tutorials
- Porsche TSB Listings (limited)
- VIN Decoder
- Special Offers
- Paint Codes
- Registry
- Videos System
- View Reviews
- and get rid of this welcome message
It takes just a few minutes to register, and it's quality Porsche information at a low cost.
Contributing Members also get these additional benefits:
(you become a Contributing Member by subscribing or donating money to the operation of this site)
- No ads - advertisements are removed
- Access the Contributors Only Forum
- Contributing Members Only Downloads
- Send attachments with PMs
- All image/file storage limits are substantially increased for all Contributing Members
- Option Codes Lookup
- VIN Option Lookups (limited)

1dmurrray
-
Posts
82 -
Joined
-
Last visited
-
Days Won
4
Content Type
Profiles
Events
Forums
External Paint Colors
Downloads
Tutorials
Links Directory
Collections
Classifieds
Store
Everything posted by 1dmurrray
-
Buying a new 996 911!
1dmurrray replied to CellN12345's topic in 996 Series (Carrera, Carrera 4, Carrera 4S, Targa)
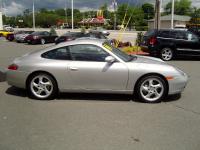
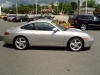
Drive it first to see if you like it. I would suggest driving a few before making a final decision. There are lots of 996s out there. If you like the way it drives, get a PPI as recommended by Logray. The PPI will pay for itself in negotiating the final price. If the seller won't agree to a PPI, walk away. Also, make sure the PPI includes overrev and cam displacement readings. At 86K, you may need engine mounts, clutch, brakes/rotors, water pump, fluid changes, struts, spark plugs (it adds up quick). Factor all of that into your purchase price. A good PPI should let you know what needs fixin. BTW, I have an '01 C4. Love it. Makes me smile every time I drive it. -
M030 kit part number
1dmurrray replied to crstfr's topic in 996 Series (Carrera, Carrera 4, Carrera 4S, Targa)
For MY 2001 6 Speed C4 Coupe, is the part number 000 044 500 08? Thanks. -
----- | | | | | Torx Key
-
Jack position
1dmurrray replied to Bob Brooks's topic in 997-1 Series (Carrera, Carrera 4, Carrera 2S, Carrera 4S)
It's probably similar to the 996: http://www.renntech.org/forums/tutorials/article/50-996-jackstand-placement. There is some controversy over using the engine case to jack the rear. After I jack each side from the rear jack point, I put stands in the front and tire ramps under the rear tires. This gives me plenty of clearance to reach the suspension cross member (Bentley manual recommended jack point) with the jack from the rear. Then, I can insert the rear jack stands under the rear jack points, and remove the ramps, if necessary. It doesn't take any longer with the ramps, which I got on sale for $40. -
996 replacement engine
1dmurrray replied to boxster-s-dk's topic in 996 Series (Carrera, Carrera 4, Carrera 4S, Targa)
Shenanogains perhaps? -
It shouldn't take 4 hours to do that job. I put a new shifter in my 996 in less than an hour. If it's a Porsche part, it shouldn't have any impact on the warranty. See what an indy would charge. I suspect a lot less.
-
What I love & hate about my Boxster
1dmurrray replied to wgerola's topic in 986 Series (Boxster, Boxster S)
Nothing's perfect; but for $6K, I don't see how you could go wrong with that one. Although it is heresy, I actually like the headlights from that era. A Honda S2000 impressed me the other day; kept up with my 996 until 3rd gear. -
I haven't seen any LED tail lights for the wide bodies. Check out http://www.6speedonline.com/forums/996/286020-996-wide-body-led-tail-lights.html.
-
This was the first mod I did on my 996 (needed to hook up an escort detector). On the 996, it was a bit tricky getting the existing socket out of the dash trim. There are DIYs out there. The replacement was plug and play.
-
997 Oem Shifter
1dmurrray replied to Rob001's topic in 996 Series (Carrera, Carrera 4, Carrera 4S, Targa)
jimmy3530: I don't have the part number handy, but I got mine at suncoast. Here's the link: http://www.suncoastparts.com/product/997SCU.html. I also used the B&M instructions as a guide. Easy upgrade. Big difference. -
997 Oem Shifter
1dmurrray replied to Rob001's topic in 996 Series (Carrera, Carrera 4, Carrera 4S, Targa)
I just installed the 997 stock shifter in my 2001 C4, and fine tuned the linkage adjustment. IMO, the 997 shifter is a huge improvement over 996 shifter. For about $200 and a leisurely couple of hours to install and tune, this mod is a no brainer. -
The new tail lights look great. As I understand it, there is only one rear fog light. In the US, it is on the driver's side. When I changed my tail lights, there was no bulb in the stock fog light socket on the passenger side.
-
Wiper chatter
1dmurrray replied to venturawildes's topic in 996 Series (Carrera, Carrera 4, Carrera 4S, Targa)
I also clean the blades from time to time with RainX and a microfiber cloth. -
Cheapest sound upgrades
1dmurrray replied to bosstucker's topic in 996 Series (Carrera, Carrera 4, Carrera 4S, Targa)
It looks like I have a new project. Thanks. -
Cheapest sound upgrades
1dmurrray replied to bosstucker's topic in 996 Series (Carrera, Carrera 4, Carrera 4S, Targa)
Valley996: Did you install the Fisters yourself? Any tips on getting the stock mufflers out? I've seen the diagrams, but the 3 bracket bolts appear to be difficult to reach. -
Cheapest sound upgrades
1dmurrray replied to bosstucker's topic in 996 Series (Carrera, Carrera 4, Carrera 4S, Targa)
I just put the Schnell kit on my '01 C4. I am using a stock paper air filter, and I like the throatier intake sound. I cleaned the throttle body at the same time. There is a DIY tutorial for this. Highly recommended. Engine purrs like a kitten now. Idle, acceleration and deceleration are much smoother. I would like to try the Fister modified mufflers for the 996. $265 with core exchange. http://fdmotorsports.net/fister-exhaust-996 -
DIY Throttle Body cleaning
1dmurrray replied to Orient Express's topic in DIY Articles - Carrera (996) - Maintenance
I just cleaned the throttle body on my '01 C4 with CRC throttle body cleaner. I sprayed the cleaner on a microfiber rag, and wiped out all the dirt. The engine now purrs like a kitten, and idle, acceleration and deceleration are much smother. Great DIY. Thanks. While I was at it, I put on a Schnell air intake kit. I prefer the throatier intake sound to the stock set up. -
I added arctic silver painted bumperettes from bumperplugs.com to complete the rear end remodel. Love the color on this car; it's filthy and still looks great.

-
Gentex Auto-Dimming Mirror with Homelink Install While looking for a good garage door opening solution for my MY01 996 C4, I came across some posts referring to the Gentex auto-dimming mirror with Homelink. Some posts suggested that there was a VW/Audi adapter that would allow this universal fit mirror to be installed on a 996 windshield. Other posts suggested that it was easy to tap into the existing dome light and sunroof switch wiring. So I decided to give it a go. It was a relatively easy install, and one of my best mods yet. Step 1: Author 1dmurrray Category Carrera (996) - Mods Submitted 12/16/2012 05:28 AM Updated 03/11/2017 06:20 AM
-
No replacement tips. I just replaced my passenger side nozzle. I paid $144 and change shipped from Sonnen Porsche. Replacement is fairly easy. You remove the headlight to access the nozzle, The hardest part was getting the original hose clamp off. Since I never use these washers, I seriously considered removing the nozzles, plugging the hoses, and replacing the headlight triangles with the ones that don't have holes. At http://www.suncoastparts.com/ the triangles will run you $52 a piece.
-
Gentex Auto-Dimming Mirror with Homelink Install
1dmurrray posted a tutorial in Carrera (996) - Mods
While looking for a good garage door opening solution for my MY01 996 C4, I came across some posts referring to the Gentex auto-dimming mirror with Homelink. Some posts suggested that there was a VW/Audi adapter that would allow this universal fit mirror to be installed on a 996 windshield. Other posts suggested that it was easy to tap into the existing dome light and sunroof switch wiring. So I decided to give it a go. It was a relatively easy install, and one of my best mods yet. Step 1: I purchased the Gentex GENK40A Auto-Dimming Mirror with Homelink on Amazon (American Security Company) for $249. My kit came with a VW/Audi adapter and a free wire cover. Here is the mirror, the piece of the wiring harness that I used (it came with a full, route to fuse box wiring), and the wedge adapter. Here is a close-up of the adapter. Here is the wire cover. Step 2: Remove the old school mirror by rotating the base 90 degrees counter-clockwise. I put masking tape around the base and used channel locks and a firm grip to rotate the base 45 degrees. I continued rotating the base by hand another 45 degrees until it released. Be careful as you don’t want to break the windshield -- been there, done that on a wiper blade DIY, oops! Step 3: Slide the adapter onto the windshield button cam and secure with hex key set screw. Note that my adapter did not fit out of the box. I used a small file to remove material around the inside of the adaptor until it fit snugly around the button cam. Since the adapter is aluminum, this was easy work for a steel file. I also primed and painted my adapter matte black to make it more inconspicuous. Step 4: Plug the wiring harness into the rear of the mirror, and remove the large red harness at the other end. The color coding for the wires is as follows: (1) Red = switched power; (2) Yellow = un-switched power; (3) Black = ground; and (4) the two Green wires are not used for this mirror (they are used for other Gentex mirrors with temperature displays). Step 5: Mark the outer wire casing so that you can split it for purposes of routing the wires through the mirror base. Don’t forget to leave some slack for mirror adjustment. Step 6: Slide the mirror base over the adaptor. Tighten the mirror base set screw with a T20 Torx driver. Step 7: Now it’s time to remove the dome light / sunroof switch housing. First, remove the two black alien eyes with a plastic trim tool. Next, remove the two screws underneath the alien eyes. Then, carefully pull the end closest to the sunroof away from the headliner until the rear tabs release. To fully release the housing push it towards the windshield so the front tabs release from the mounting edge. You’ll understand when you are in there. Step 8: Identify the existing wires that you need to tap into. After testing with a test light, I used the following wires: (1) the Red/Green wire with black spots going to the sunroof switch for switched power; (2) the Red/Black wire going to the dome light circuit board for un-switched power; and the Brown wire going to the dome light circuit board for ground. Step 9: Install the wire cover by clipping it into the top of the mirror base, and route the wires from the mirror through the cover and into the dome light housing. Note the wire cover that came with my kit was way too long, so I cut it down to size. I also made a channel out of mine to cover the wire on the inside. The inside cover was cut a little shorter than the outside piece to make it easy to route the wires. The dome housing will fit over the wire cover, so thankfully there is no need to cut a whole in the housing. To make the install look cleaner from the outside, I intend to go back and use a thin strip of black film on the inside of the windshield to better hide the wire cover from the outside. You might want to try this now. Step 10: Now it’s time to make the connections. I used 22-18 gauge splice tap connectors. The connections are as follows: (1) Red to Red/Green with black spots; (2) Yellow to Red/Black; and (3) Black to Brown. I wrapped up the unused green wires with electric tape. Step 11: Reinstall the dome light / sunroof switch housing by: (1) pulling the front tabs onto the mounting edge; (2) snapping the rear tabs back into the headliner (you may need to move the wires around a bit to get a good fit); (3) replacing the screws under the alien eyes; and (4) replacing the alien eyes. Step 12: Test the install. The Homelink buttons should work when the ignition is off. Press each and you should see a red light come on. With the ignition off, the anti-dimming feature should be off. If you press the 1 button, nothing should happen. With the ignition on, you should see a green light indicating that the anti-dimming feature is on. You may need to press the 1 button the first time. It should go on and off with the ignition after that. You can verify that it is working by covering the sensor on the back of the mirror and shining a light on the sensor on the front of the mirror. I found that the mirror works really well in real life conditions. Step 13: Program the Homelink buttons with the included instructions. Step 14: Congratulations, you are done. -
Pollen Filter Change Instructions
1dmurrray replied to Loren's topic in DIY Articles - Carrera (996) - Maintenance
I'm not saying it wasn't nasty, but the one on the left looks like a charcoal impregnated filter. -
Update: I found a red bulb online to use for the rear fog light.
-
door speakers
1dmurrray replied to pedefede's topic in 996 Series (Carrera, Carrera 4, Carrera 4S, Targa)
I used 4 ohm speakers in the doors, and they work just fine. See post #14. Factory amp sends only low frequencies to doors so you don't really want a 2-way speaker there. -
I just completed installation of the made in Taiwan smoke lenses on my MY01 C4. Details and more pictures are posted in the DIY 996 C2 Tail Light Tutorial Support Topic.


