Welcome to RennTech.org Community, Guest
There are many great features available to you once you register at RennTech.org
You are free to view posts here, but you must log in to reply to existing posts, or to start your own new topic. Like most online communities, there are costs involved to maintain a site like this - so we encourage our members to donate. All donations go to the costs operating and maintaining this site. We prefer that guests take part in our community and we offer a lot in return to those willing to join our corner of the Porsche world. This site is 99 percent member supported (less than 1 percent comes from advertising) - so please consider an annual donation to keep this site running.
Here are some of the features available - once you register at RennTech.org
- View Classified Ads
- DIY Tutorials
- Porsche TSB Listings (limited)
- VIN Decoder
- Special Offers
-
OBD II P-Codes - Paint Codes
- Registry
- Videos System
- View Reviews
- and get rid of this welcome message
It takes just a few minutes to register, and it's FREE
Contributing Members also get these additional benefits:
(you become a Contributing Member by donating money to the operation of this site)
- No ads - advertisements are removed
- Access the Contributors Only Forum
- Contributing Members Only Downloads
- Send attachments with PMs
- All image/file storage limits are substantially increased for all Contributing Members
- Option Codes Lookup
- VIN Option Lookups (limited)


fpb111
-
Posts
436 -
Joined
-
Last visited
Content Type
Profiles
Events
Forums
External Paint Colors
Downloads
Tutorials
Links Directory
Collections
Store
Everything posted by fpb111
-
You might be getting the oil to proper temp to boil out the water. Then it condenses on the long "cold" oil filler tube and mixes with the warm oil mist and "tapioca" happens. That might be part of the reason the AOS has hot water running to it. If you ever drove a VW bug thru cold winters you would be very familiar with this stuff. Sometimes my 1965 bug would clog the first two inches of the oil filler pipe solid with this gunk. I never suspected intermix there.
-
Noise from cab top
fpb111 replied to swynn97's topic in 996 Series (Carrera, Carrera 4, Carrera 4S, Targa)
Mine is definitely a black rubber block. It has signs of wear on it and was dry. The driver's side started to squeak loudly, at first when it was cold out ~40f, then most of the time. A little silicone grease stopped it. -
p1219, p1577, p1578
fpb111 replied to zone5996's topic in 996 Series (Carrera, Carrera 4, Carrera 4S, Targa)
find the Audi/Volkswagen equivalent and spend less. -
Checking the filter often is a good way to monitor things. Better for you might be IMSGuardian from Raby's Flat 6 Innovations http://www.flat6inno...ort_direction=0 http://www.flat6inno...&cat=289&page=1
-
Is the ign switch smooth in operation and does it release the key easily every time? Does it return all of the way to "Run" after "Start" position? Might be Switch related.
-
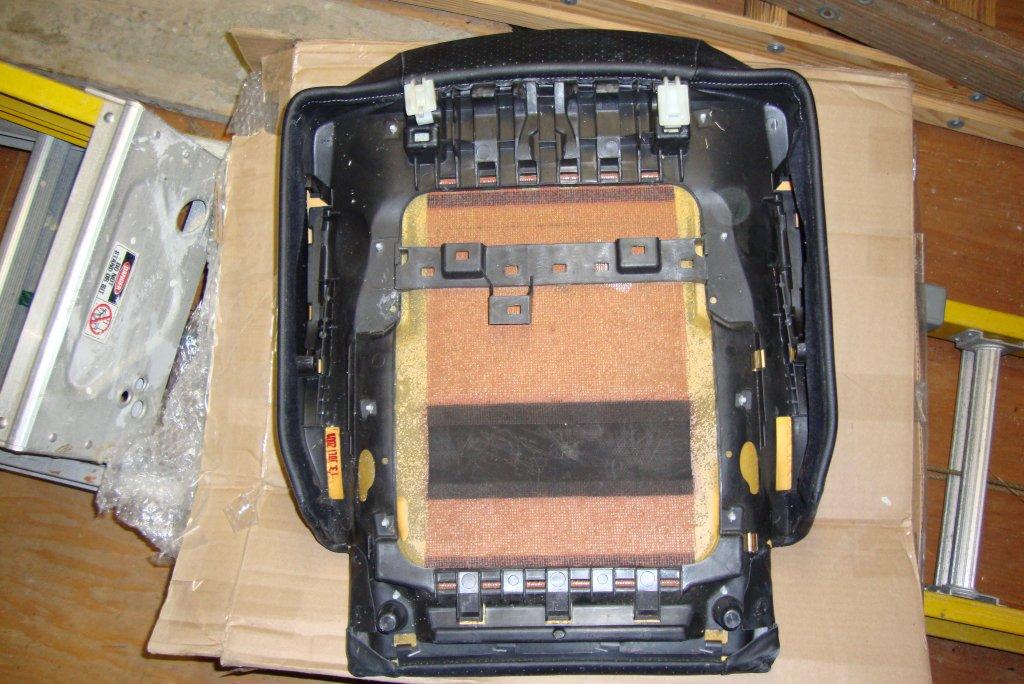
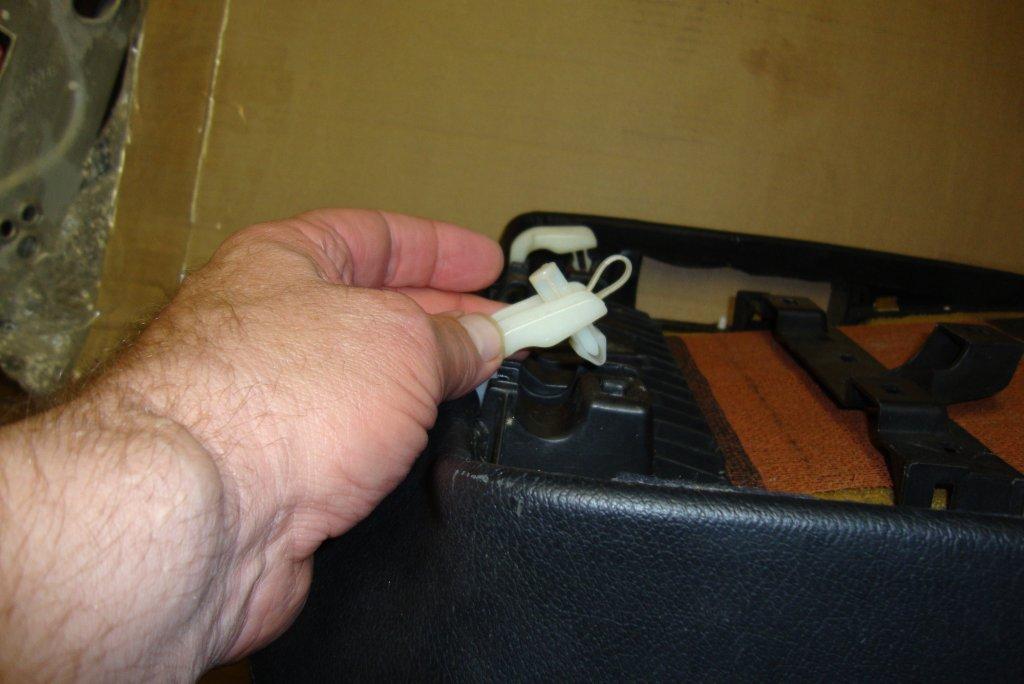
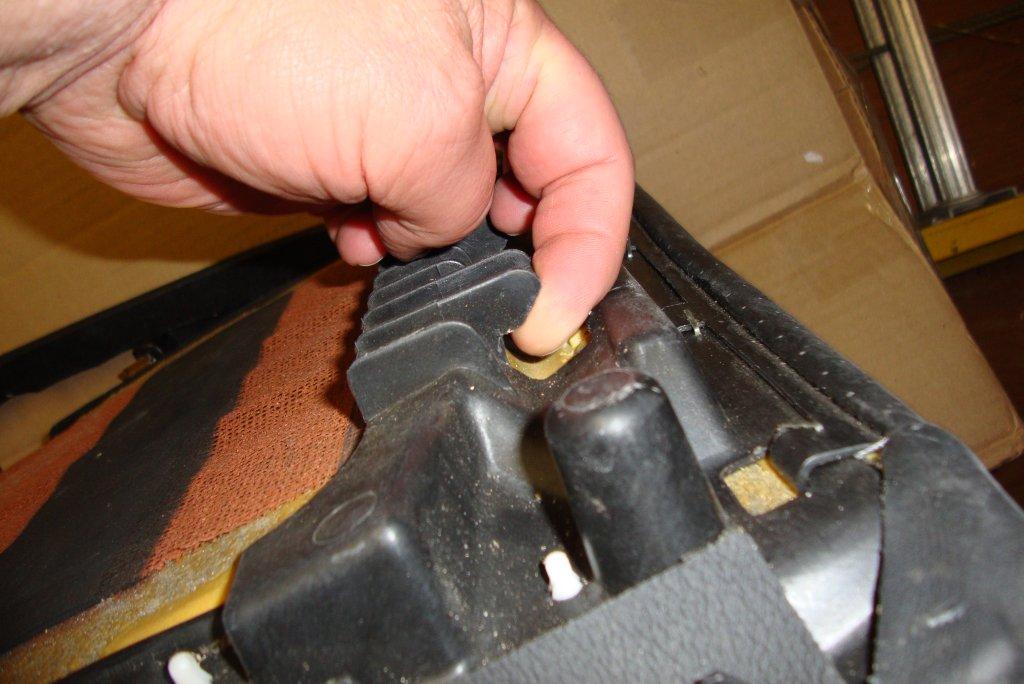
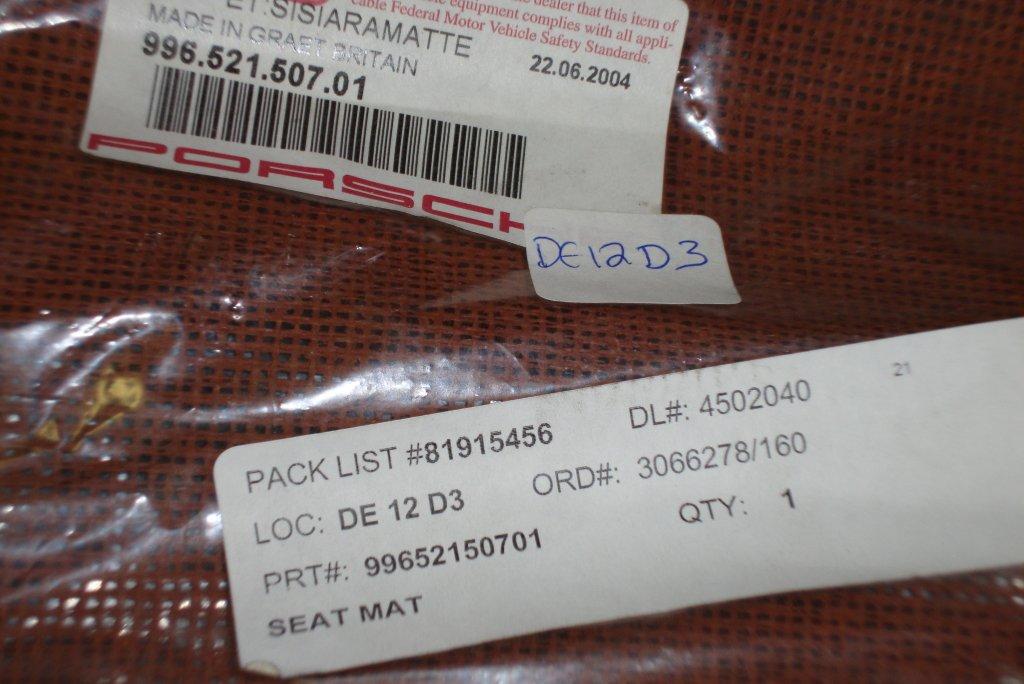
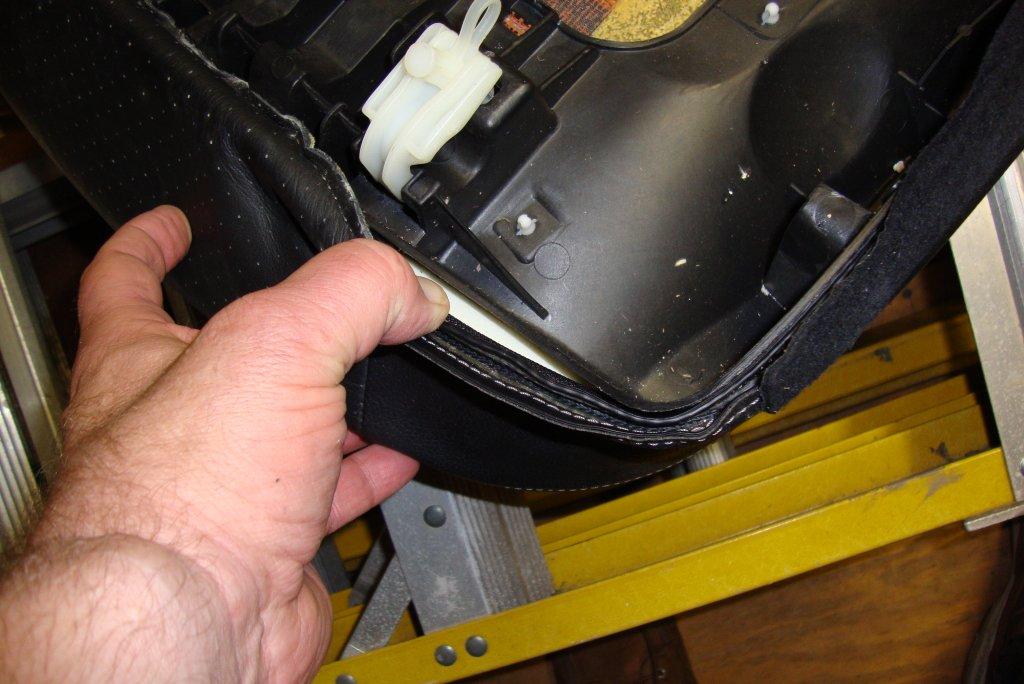
You don't specify which seat. Most 996 bottoms are very similar construction just different covering/padding. I would think the 986 would be close to the same. This is what the bottom of my 2003 sport seat looks like. see pic You can probably take your seat bottom out by releasing the two white nylon clamps. Then unscrewing the screws on the switch side panel to allow sliding it through the hole, unlatching the big connector from the cushion bottom base (1/2 turn should unlatch it) and taking the seat belt wire out of the guide clips on the base. Before you do this put the key in the house and don't bring it back out until the seat belt wire is hooked up again. If you don't do this you will inadvertently turn on the car and light the fault light = trip to the dealer to turn it off. When you have the bottom out you will see the netting that supports the seat cushion. Not very expensive or hard to replace. On this seat the upholstery slides off the edge to release the cover and the nylon pins push through to release the foam. Have fun and don't get dirty!

- 1 reply
-
- 1
-

-
need sport exhaust?
fpb111 replied to Chuckey996's topic in 996 Series (Carrera, Carrera 4, Carrera 4S, Targa)
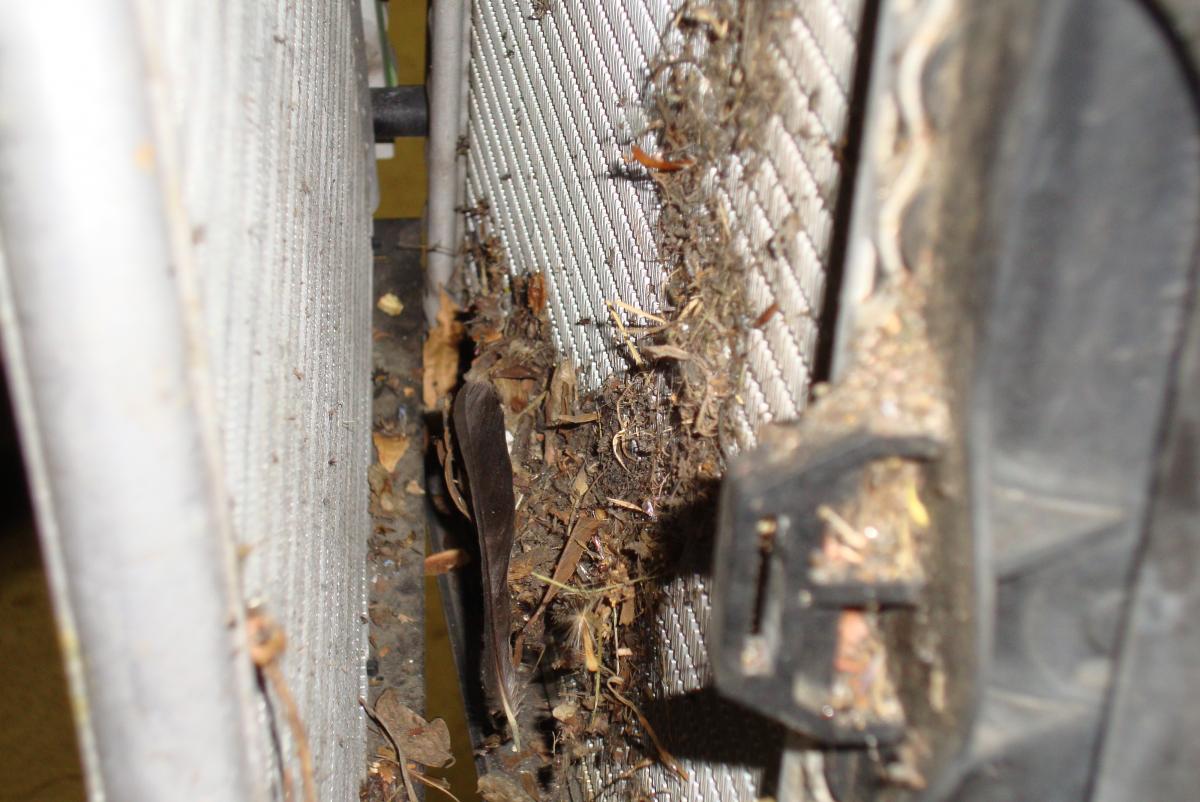
While you are waiting pull the front bumper cover and clean between the radiator and aircon rad. If no one has cleaned there you will be amazed at the buildup of junk in there. This is 3yrs or ~15k worth of summer driving'
-
The oil filter can be removed and replaced with new filter and "O"rings in under 10 minutes with loss of about 1/2 ltr of oil. If the shop plugs their Porsche computer into the OBD socket, by the drivers left knee in LHD cars, they can monitor and activate the vario-cam solenoids to check cam timing and many other engine parameters. Sounds like the shop doesn't want your business or just wants many lire/euro to give you poor service.
-
Did you try "opening" the latch? IE: Pull the lever as though you were opening the lid? Maybe the latch wasn't fully open and the hook caught the top of it and closed the latch before the hook slid into the slot.
-
If you are going to use Chevy rods use one of these "holders" http://www.renegadehybrids.com/
-
LN Engineering "Nickies" http://www.lnengineering.com/boxster.html
-
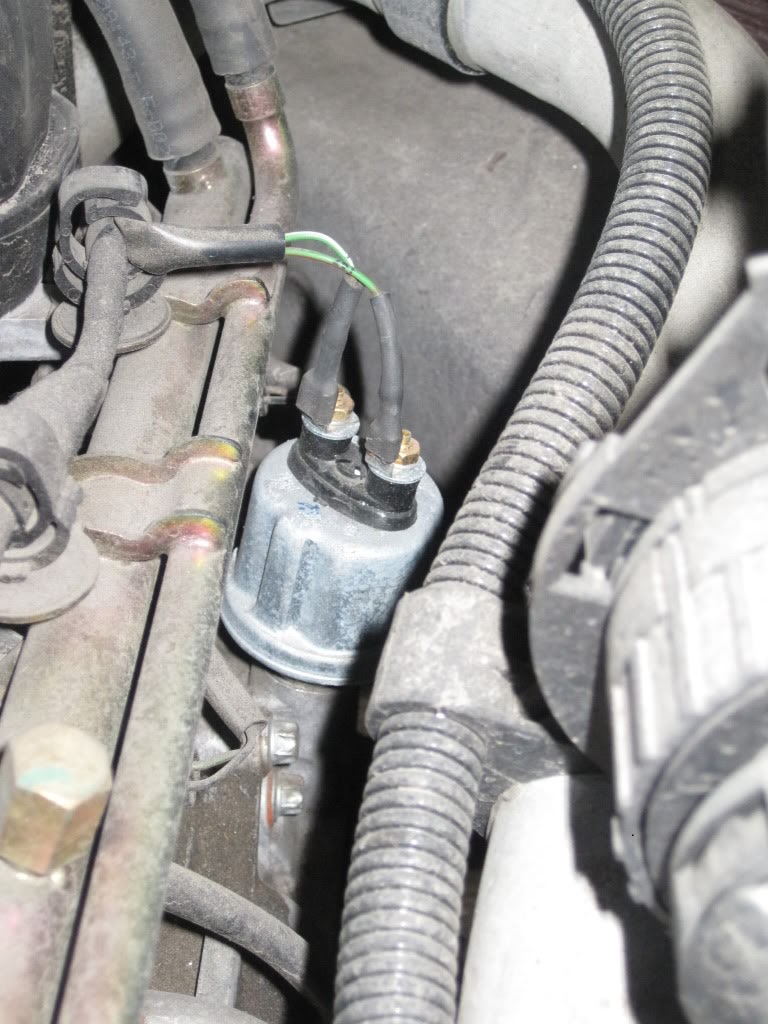
ultra high oil pressure gauge.
fpb111 replied to lunglord's topic in 996 Series (Carrera, Carrera 4, Carrera 4S, Targa)
Oil pressure sender failure is a relatively common problem Passengers side top toward firewall. Use a 19mm crows foot with a universal on a long extension up from the bottom.
-
Help 996 shut down while driving
fpb111 replied to 911mike99's topic in 996 Series (Carrera, Carrera 4, Carrera 4S, Targa)
Before you start ripping into the car fill the tank at least 1/2 full to rule out gauge or fuel pickup problems. If you have disconnected the battery, or had it go flat, when there was around ~1/4 tank of fuel your gauge may not be accurate. This is because Porsche used a saddle tank in the C4 that straddles the front dif to get enough fuel capacity. The amount of fuel in the isolated section is not directly measured. It is calculated by monitoring the fuel use/mpg from the first ~3/4 tank. -
need sport exhaust?
fpb111 replied to Chuckey996's topic in 996 Series (Carrera, Carrera 4, Carrera 4S, Targa)
Google Fisterd exhaust Absolute best bang for your dollars http://fdmotorsports.net/fister-exhaust-996 -
996 Ignition Replacement - HELP!
fpb111 replied to PorscheDre's topic in 996 Series (Carrera, Carrera 4, Carrera 4S, Targa)
It sounds like you may not have correctly aligned the electrical replacement with the key barrel. If that is the case the position of the key and switch will not be in sync. The barrel will press the center "activation" switch that the key hits and the car will always be awake when the battery is connected. -
You are probably going to have to loosen both to allow the engine to slide into position. 1. Unbolt the passenger's side until the nut is near end of bolt so that the engine can move and level out some. 2. Or unbolt the two mounting bolts on the new drivers side mount and jack the engine back until it is level enough to slide the mount stud through.
-
Pretty much the same. Blocking the small tube is what enhances the intake noise.
-
Another happy customer!!
-
Very Low Idle In Morning
fpb111 replied to Dominic123's topic in 996 Series (Carrera, Carrera 4, Carrera 4S, Targa)
Would help to know year. Early (cable throttle?) cars had idle control valve that may need cleaning. -
window noise?
fpb111 replied to jam996's topic in 996 Series (Carrera, Carrera 4, Carrera 4S, Targa)
clean and wax the window, then spray/wipe/apply some rubber lube to the seal. a little bit goes a long way. -
Try having someone pull the switch while you Rattle the hood with a little pressure above the latch. If your battery is not dead there is something else wrong.
-
Don't ground to the door handle. Use the chrome loop on the latch. The emergency release wire is in front of the right front wheel behind the fender liner. I think it would be easier to open the engine cover and use the connections there. The engine cover wire is between the bottom of the left taillight housing and the fender pocket the housing fits into. If you use something like a soft plastic scraper to gently wedge the taillight up so that you can see into the crack under it you should see the wire loop laying there. You can then hook it out with a thin piece of wire and open the lid.
-
Problem with 996 Cab Top
fpb111 replied to Jnguyen1976's topic in 996 Series (Carrera, Carrera 4, Carrera 4S, Targa)
There are a couple reasons for that to happen. There is/are elastic straps that go across the top, side to side, that help guide the top into the channel. (with both sides affected I would guess this is the problem) The cables that run along the top from rear to front can become disconnected at one end. More often the front ends pull out of the rivets. Put the top in the service position,1/2 way up, unsnap the ball end socket from the stud and tug on the cable ball end to make sure they are still connected at the front. visit your local Auto top shop. -
Excellent!!
-
High mile role call
fpb111 replied to violaGT3's topic in 996 Series (Carrera, Carrera 4, Carrera 4S, Targa)
Go to the top of the page and roll your pointer over "DIY Tools"