Welcome to RennTech.org Community, Guest
There are many great features available to you once you register at RennTech.org
You are free to view posts here, but you must log in to reply to existing posts, or to start your own new topic. Like most online communities, there are costs involved to maintain a site like this - so we encourage our members to donate. All donations go to the costs operating and maintaining this site. We prefer that guests take part in our community and we offer a lot in return to those willing to join our corner of the Porsche world. This site is 99 percent member supported (less than 1 percent comes from advertising) - so please consider an annual donation to keep this site running.
Here are some of the features available - once you register at RennTech.org
- View Classified Ads
- DIY Tutorials
- Porsche TSB Listings (limited)
- VIN Decoder
- Special Offers
-
OBD II P-Codes - Paint Codes
- Registry
- Videos System
- View Reviews
- and get rid of this welcome message
It takes just a few minutes to register, and it's FREE
Contributing Members also get these additional benefits:
(you become a Contributing Member by donating money to the operation of this site)
- No ads - advertisements are removed
- Access the Contributors Only Forum
- Contributing Members Only Downloads
- Send attachments with PMs
- All image/file storage limits are substantially increased for all Contributing Members
- Option Codes Lookup
- VIN Option Lookups (limited)

DBJoe996
-
Posts
704 -
Joined
-
Last visited
-
Days Won
21
Content Type
Profiles
Events
Forums
External Paint Colors
Downloads
Tutorials
Links Directory
Collections
Store
Everything posted by DBJoe996
-
 Ummm...hopefully after almost 8 years (auto-xr last post on December 20, 2010) he figured it out.
 -
Most of the connectors are "pinch and pull", although sometimes it takes more strength than you have in your hands to pinch the connector. You have to really pinch the release surround while also pulling to disconnect. Just from experience....
-
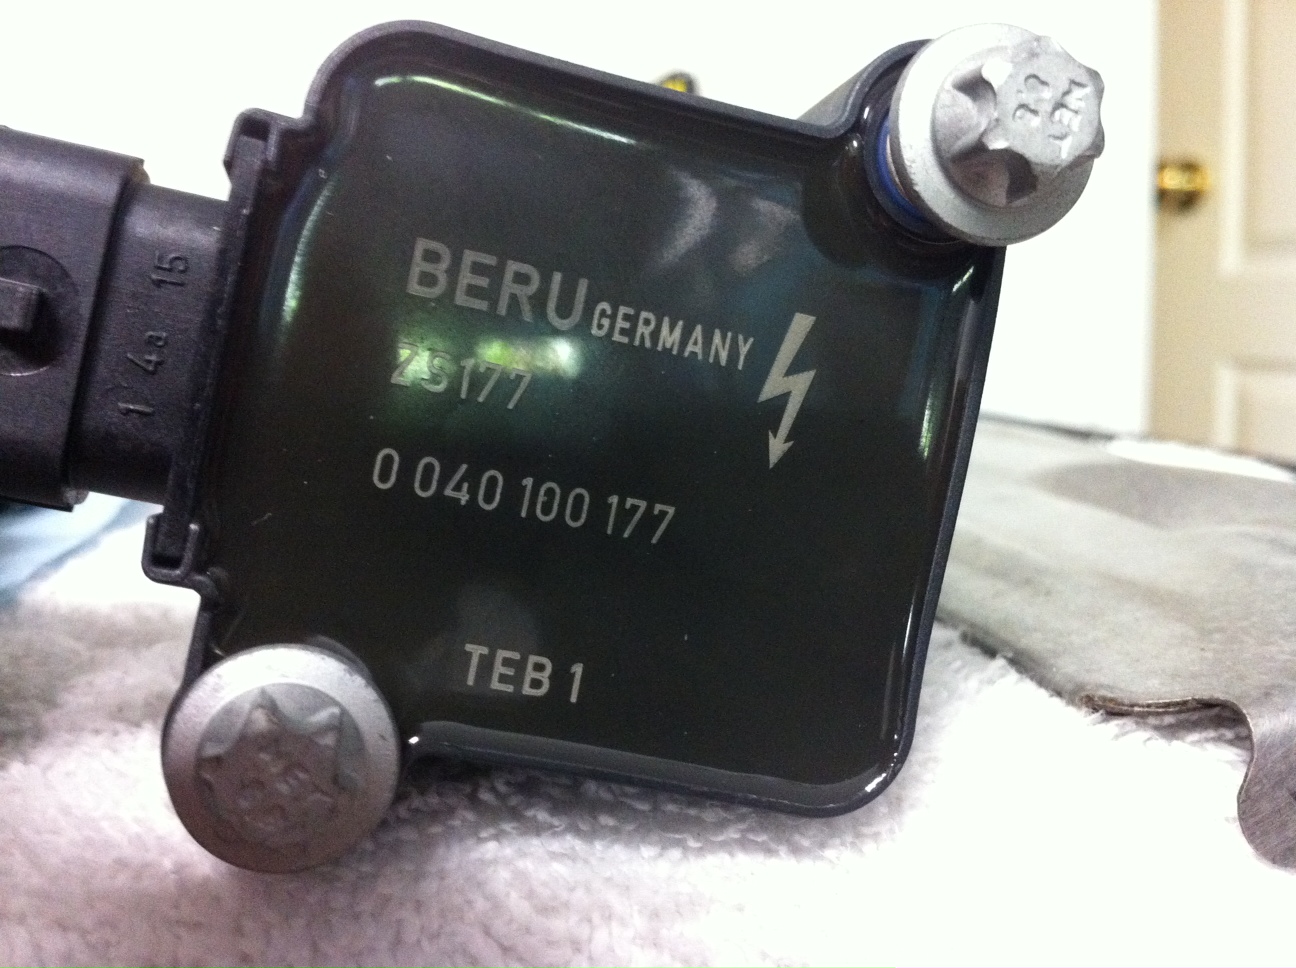
The issue isn't going to disappear just by clearing codes. The codes are telling you something is wrong. Spark plugs and coils are a maintenance item. How long has it been since either have been replaced? Cracked coils are common and will cause the problems you are having. Get some new upgraded coils packs.

-
Been there -
-
1999 996 Owners Manual
DBJoe996 replied to PauliesPorsche's topic in 996 Series (Carrera, Carrera 4, Carrera 4S, Targa)
Sunset has a very good reputation in my book. I've always received what I ordered and no problems. I would contact them directly because I'm sure they keep a record of orders/shipping and so on. Have you ever heard of "it got lost in the mail?" Or "it was shipped but never arrived?" -
https://translate.google.com/
-
Door Lock Latch Actuator Mechanism
DBJoe996 replied to valfam's topic in 996 Series (Carrera, Carrera 4, Carrera 4S, Targa)
Does it do the same thing both outside handle and inside handle? Here is a link to door latch mechanism http://www.autoatlanta.com/porsche-parts/hardparts.php?dir=996-99-05§ion=804-00 Pelican Parts https://www.pelicanparts.com/More_Info/8N1837015C.htm?pn=8N1-837-015-C-OEM Sunset Porsche (good price) https://www.sunsetporscheparts.com/auto-parts/1999/porsche/911/carrera-trim/3-4l-h6-gas-engine/body-cat/lock-and-hardware-scat Also found thishttps://www.getporscheparts.com/oem-parts/porsche-lock-8n1837015c?c=Zz1ib2R5JnM9bG9jay1hbmQtaGFyZHdhcmUmYT1wb3JzY2hlJm89OTExJnk9MTk5OSZ0PWNhcnJlcmEmZT0zLTRsLWg2LWdhcw%3D%3D -
I would start by checking the transmission fluid level, or maybe doing a drain and refill, particularly if it has never been done. If you are headed in the direction of a rebuild or transmission, these guys are good http://www.gboxweb.com/996reman.html
-
Door Lock Latch Actuator Mechanism
DBJoe996 replied to valfam's topic in 996 Series (Carrera, Carrera 4, Carrera 4S, Targa)
From memory, I have read that the VW part is not direct plug and play, and sometimes develops problems. I know that the OE units are expensive at around $300. But this is one case where I think going original is best. What if you install a door latch mechanism and it doesn't work? Worse case scenario you can't get back in the car or the microswitches in the latch mechanism don't function properly. What exactly are the problems? -
Check fuse C6 then check the flasher/turn signal relay. After that it might get ugly because you may have to remove the cowling around the steering wheel to access the turn signal switch to see if it is operating correctly.
-
Durametric will clear the code for the Airbag light. If you don't have it, maybe someone in your local PCA chapter has one. Or a local indy. Takes longer to hook it up than it takes to clear the code.
-
Camshaft tool for 2002 996 Targa
DBJoe996 replied to Trevar's topic in 996 Series (Carrera, Carrera 4, Carrera 4S, Targa)
i would go with what Ahsai says. No one I know has more experience on the internals of the 996 911 except for maybe Jake at Flat Six. -
Camshaft tool for 2002 996 Targa
DBJoe996 replied to Trevar's topic in 996 Series (Carrera, Carrera 4, Carrera 4S, Targa)
https://www.vertexauto.com/porsche-cam-timing-tool-kit-996986-p-10905.aspx -
Camshaft tool for 2002 996 Targa
DBJoe996 replied to Trevar's topic in 996 Series (Carrera, Carrera 4, Carrera 4S, Targa)
maybe try this one from LN Engineering...covers your year https://www.partsgeek.com/gbproducts/SC/83-08026465.html?utm_content=SC&utm_term=1999-2005+Porsche+911+Intermediate+Shaft+Bearing+Tool+Set+LN+Engineering+10+0125+001+99-05+Porsche+Intermediate+Shaft+Bearing+Tool+Set+2000+2003&fp=pp&gbm=a&utm_source=google&utm_medium=ff&utm_campaign=PartsGeek+Google+Base&gclid=EAIaIQobChMI-fLv2Oi32gIVlC-BCh1_2QzVEAQYAyABEgIqS_D_BwE&ad=47433965052 -
Camshaft tool for 2002 996 Targa
DBJoe996 replied to Trevar's topic in 996 Series (Carrera, Carrera 4, Carrera 4S, Targa)
https://www.pelicanparts.com/catalog/SuperCat/996J/POR_996J_ENGTOL_pg4.htm Several kits available Timing Tool Set - Camshaft Alignment Tool Set Part #: B9685KIT-M1229 For setting camshaft timing on Porsche Boxster 2003-2008, Cayman 2006-2008, 911 Carrera 2002-2008. (3-chain engines) -
engine compartment lid
DBJoe996 replied to hutch91656's topic in 996 Series (Carrera, Carrera 4, Carrera 4S, Targa)
Can't be absolutely sure, but the parts diagram shows only one part number for the C2 engine lid http://www.autoatlanta.com/porsche-parts/hardparts.php?dir=996-99-05§ion=803-05 -
On the side you think it is coming from, jack up that side so the tire is off the ground, put the car in gear (engine OFF), then turn the wheel by hand back and forth. If it is the CV joint, should be evident.
-
Take some string, maybe even some dental floss, and see if you can get it underneath, wrap a couple of times and pull on it while turning the screw. You only need a little bit of effort/force to pull out on it.
-
Loren is right...just apply a bit of lift and the screw will back out (been there done that). Do not try to drill it out, it will only spin. BTW, it is just a plastic screw in an expansion bit, like a drywall anchor. If really stuck and you are at the end of your tricks, put some vise grips on it and give it a good hard yank.
-
Door plugs
DBJoe996 replied to CHAPPIE's topic in 996 Series (Carrera, Carrera 4, Carrera 4S, Targa)
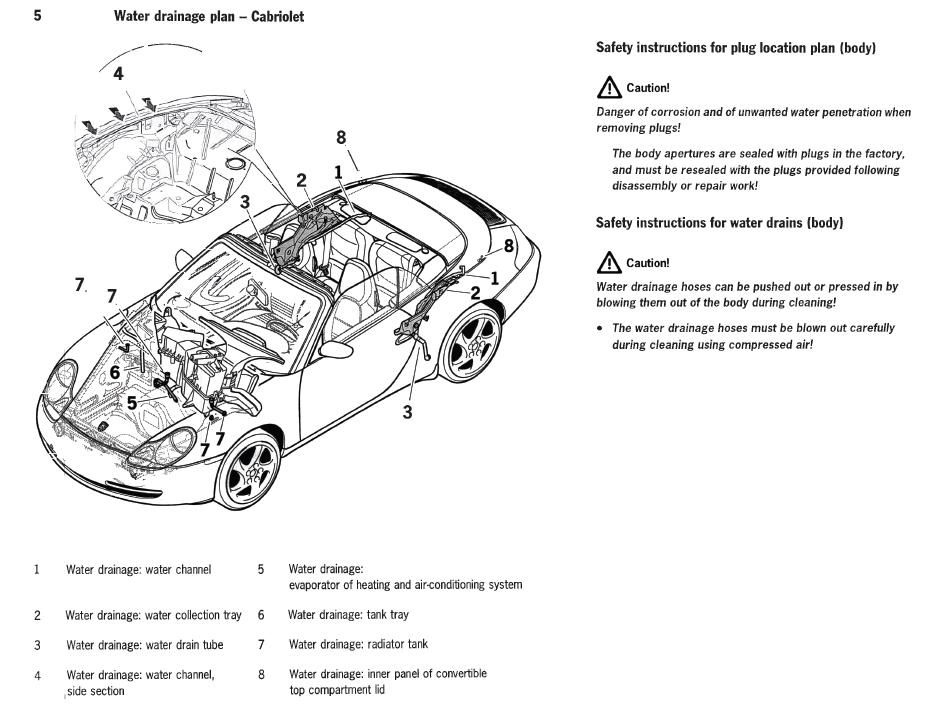
Well, you can do as you wish but it seems overkill to me. There are built in drainage holes in the door that drain out the water, but they can be plugged up with leaves and debris. Maybe check those for debris next time you wash the car. Also a good time to learn about all of the drainage holes, especially the ones in the frunk area and check them for debris.
-
1998 996 tip Engine ? problem
DBJoe996 replied to Harry Alan's topic in 996 Series (Carrera, Carrera 4, Carrera 4S, Targa)
Remove and clean the MAF sensor with MAF cleaner (since you will have the air filter box out anyway) Remove and clean the entire TB Remove the ICV (Idle Control Valve) from the TB and clean it out with alcohol and q-tips, cycle it with a 9V battery to ensure smooth operation of the valve, it should not stick and should cycle smoothly, it should be shiny clean inside, not black (the is the usual culprit for "hunting idle"), as stated be very careful with the paper gasket, it is very fragile Remove the TPS (throttle position sensor) and clean it up as necessary Suggest replacing the TB O-ring upon reassembly- 2 replies
-
- 1
-

-
- engine
- tiptronic gearbox
- (and 2 more)
-
Ignition Switch Sticky
DBJoe996 replied to Uwon's topic in 997-1 Series (Carrera, Carrera 4, Carrera 2S, Carrera 4S)
I would start by replacing the electrical part of the ignition switch. Two screws, unplug and it is out. -
Vibration when accelerating
DBJoe996 replied to USMC9953's topic in 996 Series (Carrera, Carrera 4, Carrera 4S, Targa)
Usually if it is plugs and/or coils it will start to throw misfire codes and the CEL will come on. This sounds more like a bad DMF (dual mass flywheel)...or if it occurs when running at speed, the rear CV joints. -
Water damage inside after rain
DBJoe996 replied to LexiBri's topic in 986 Boxster Convertible Top Issues and Solutions
Not Porsche design fault. Sorry to say but owner maintenance requirement. Also suggest you do this: http://www.ecudoctors.com/porsche-996-boxster-waterproof-immobilizer-case-enclosure.html
-
Spitting gas, ugh.
DBJoe996 replied to johnmh's topic in 996 Series (Carrera, Carrera 4, Carrera 4S, Targa)
I understand your frustration and empathize. Sometimes it helps to look at the parts diagram to see what you are dealing with. Here is one of the carbon canister and apparently the one nut that holds it in...I think, but I've never been in there http://www.autoatlanta.com/porsche-parts/hardparts.php?dir=996-99-05§ion=201-20